

One thing I am never without when we travel is my small bag of health essentials, and "in case of emergency" supplements. It is the WORST to be sick away from home, so I like to know I have some of my basic, go to remedies close at hand. The kit is
Read moreHow to Knock Out a Cold or Sinus Infection

A couple of weeks ago I started feeling that dreaded soreness in my throat, and noticed that I was a bit more tired than usual. And by a bit more tired, I mean
Read moreNatural Remedies for Tummy Trouble

Nothing turns me into a big baby faster than an upset stomach. Colds, sinus infections, and aches won't stop me from doing what I need to do, but
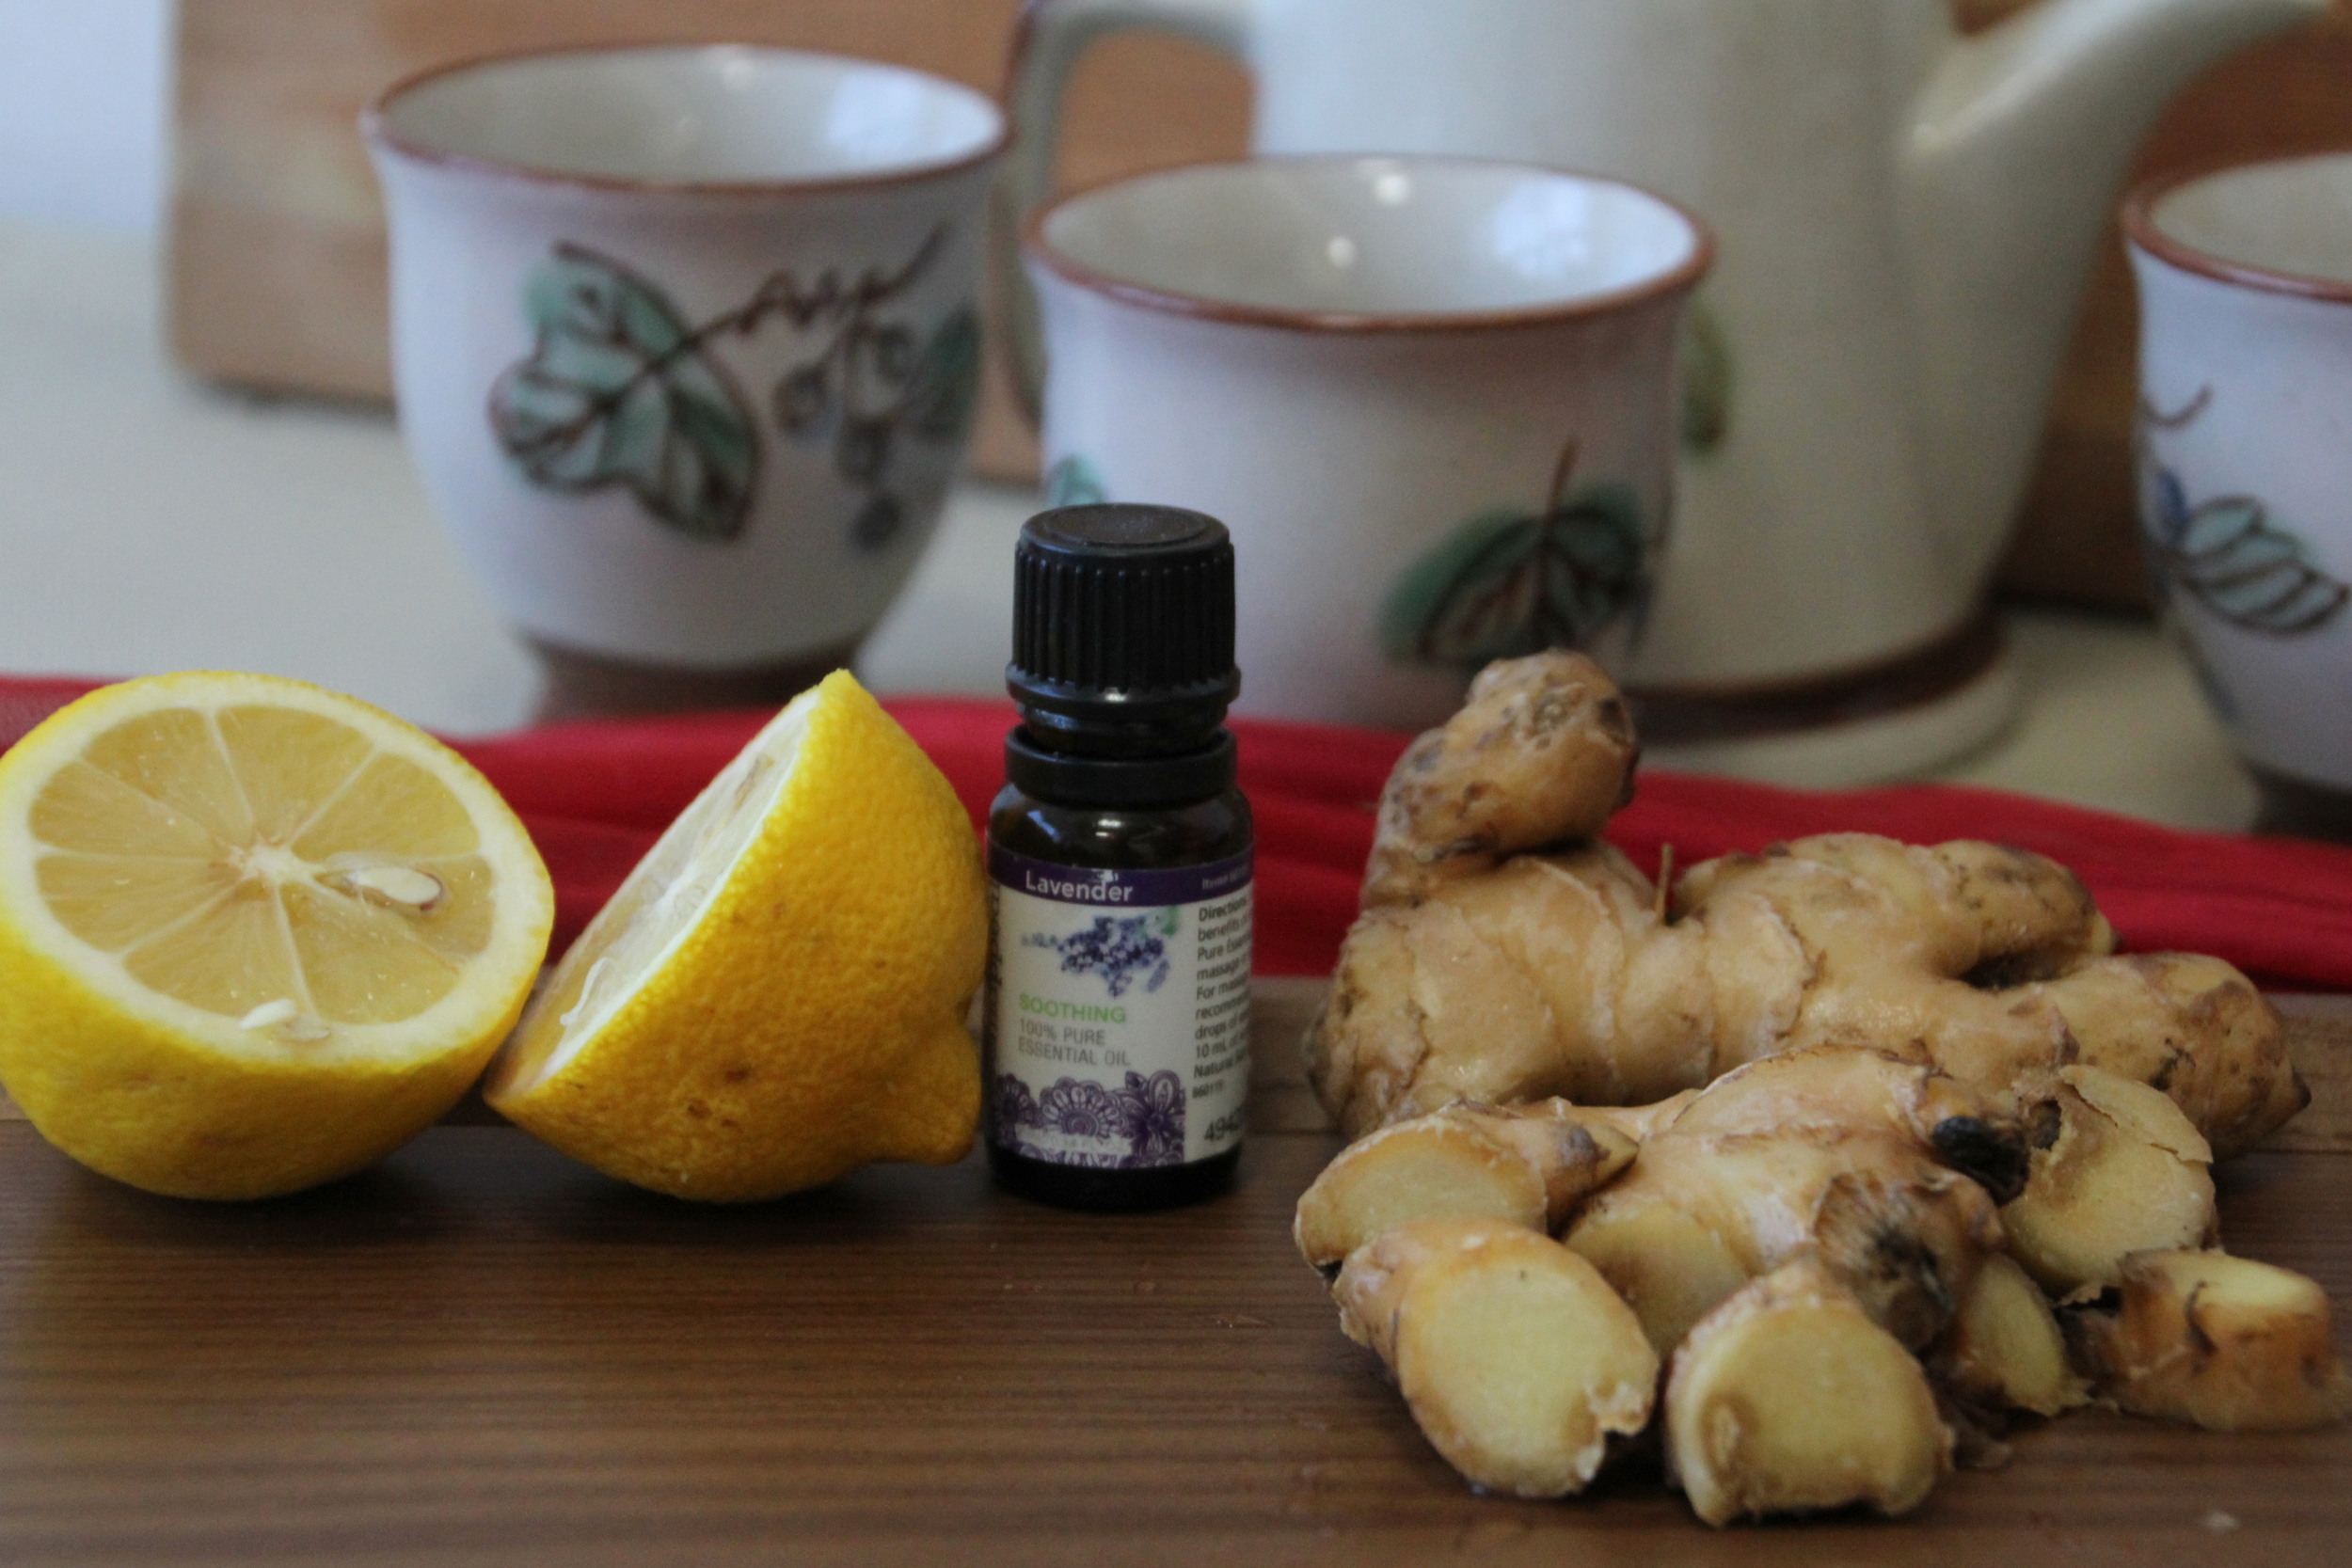
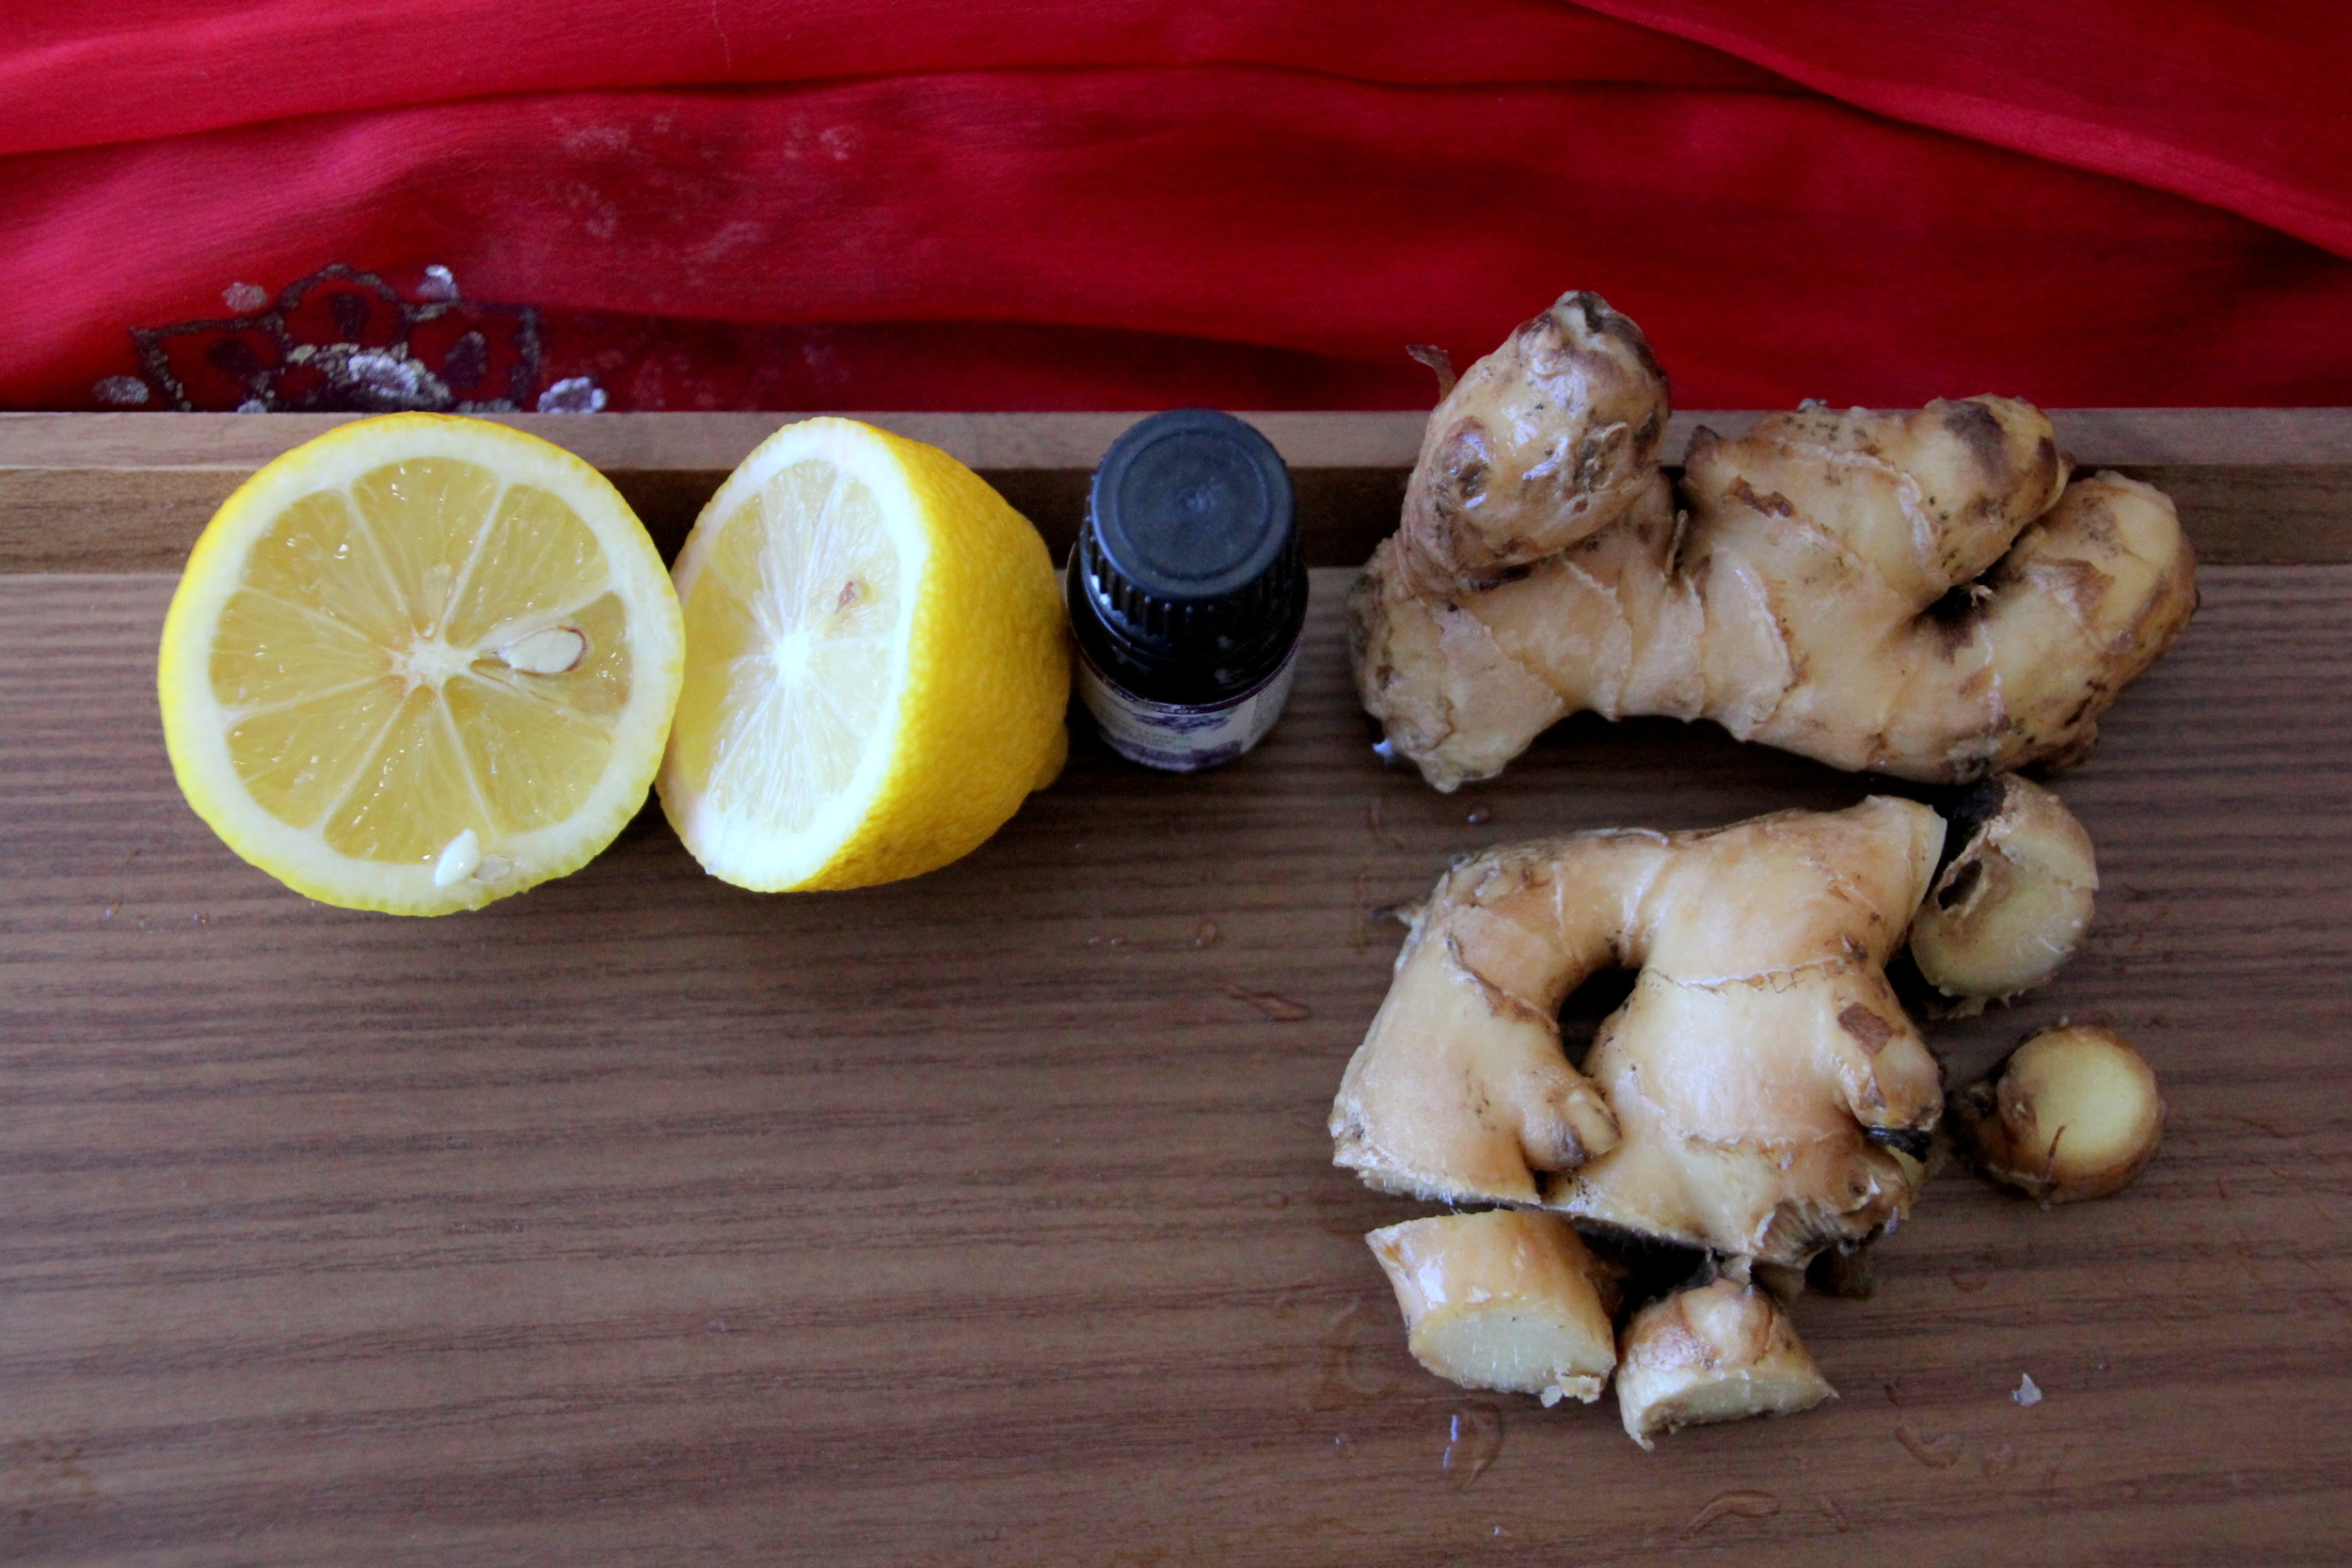
Read moreCleansing Detox Bath

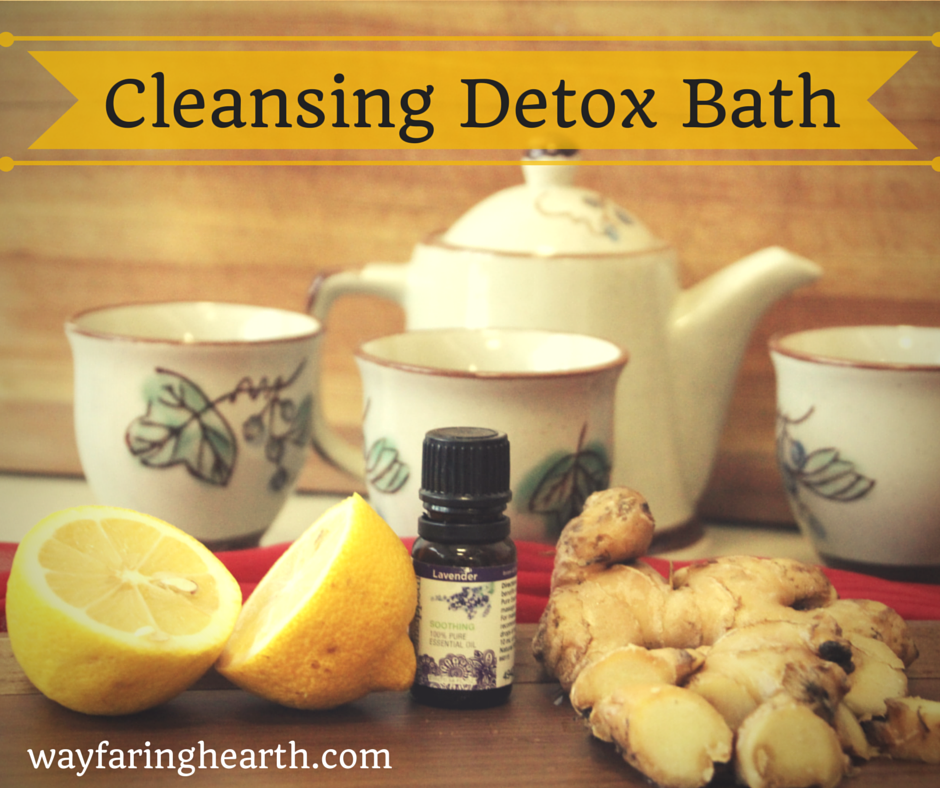 On Sunday I did a post about a purifying sea salt scrub, and I thought it only appropriate to follow that up with a post about how to do a detox bath. Hint: it's as simple as running the bath water and throwing a few things in the tub that you probably already have in your kitchen!
Detox baths are gaining popularity, and for good reason. Not only does it pull toxins from your body, but it can also increase circulation and give your body a great boost of magnesium, which has a long list of benefits that include easing muscle spasms (yes, that means menstrual cramps, too) and relieving stress. Magnesium is also a key player in absorbing other nutrients, reducing inflammation, and easing/preventing migraines. Are you hooked yet?
I usually leave myself an hour for the detox bath, but you can do 45 minutes if pressed for time. The first chunk of time is to pull the toxins from your body, and after that you will absorb the nutrients. It's never happened to me, but keep in mind that you may get lightheaded, so be cautious when getting out. You can use as many of the ingredients I list, or leave some out if you wish. Keep in mind that Epsom salts are the source of the magnesium, so I always include them in my baths.
If there's one thing you MUST do while taking these baths, it's to drink plenty of liquids. This will help flush out more toxins. I usually drink ginger-lemon tea or water. Also, if you include ginger in your bath, it will increase circulation, and may make you sweat.

Here's what I use for detox baths:
Tub filled with water as hot as you can stand it
1 Tablespoon ground ginger, or 1-inch chunk of fresh ginger
1 lemon, sliced
10 drops lavender oil
2 cups Epsom salts
1/2 cup baking soda
Lots of liquid to drink (water, tea, etc.)
Directions: Fill tub with water and pour in all ingredients. Gently swirl until the Epsom salt and baking soda have dissolved. Soak for at least 45 minutes, drinking a lot of liquids.
I always feel great after a detox bath. My mood is lifted, and I feel incredibly relaxed and rejuvenated. What do you put in your favorite detox bath?
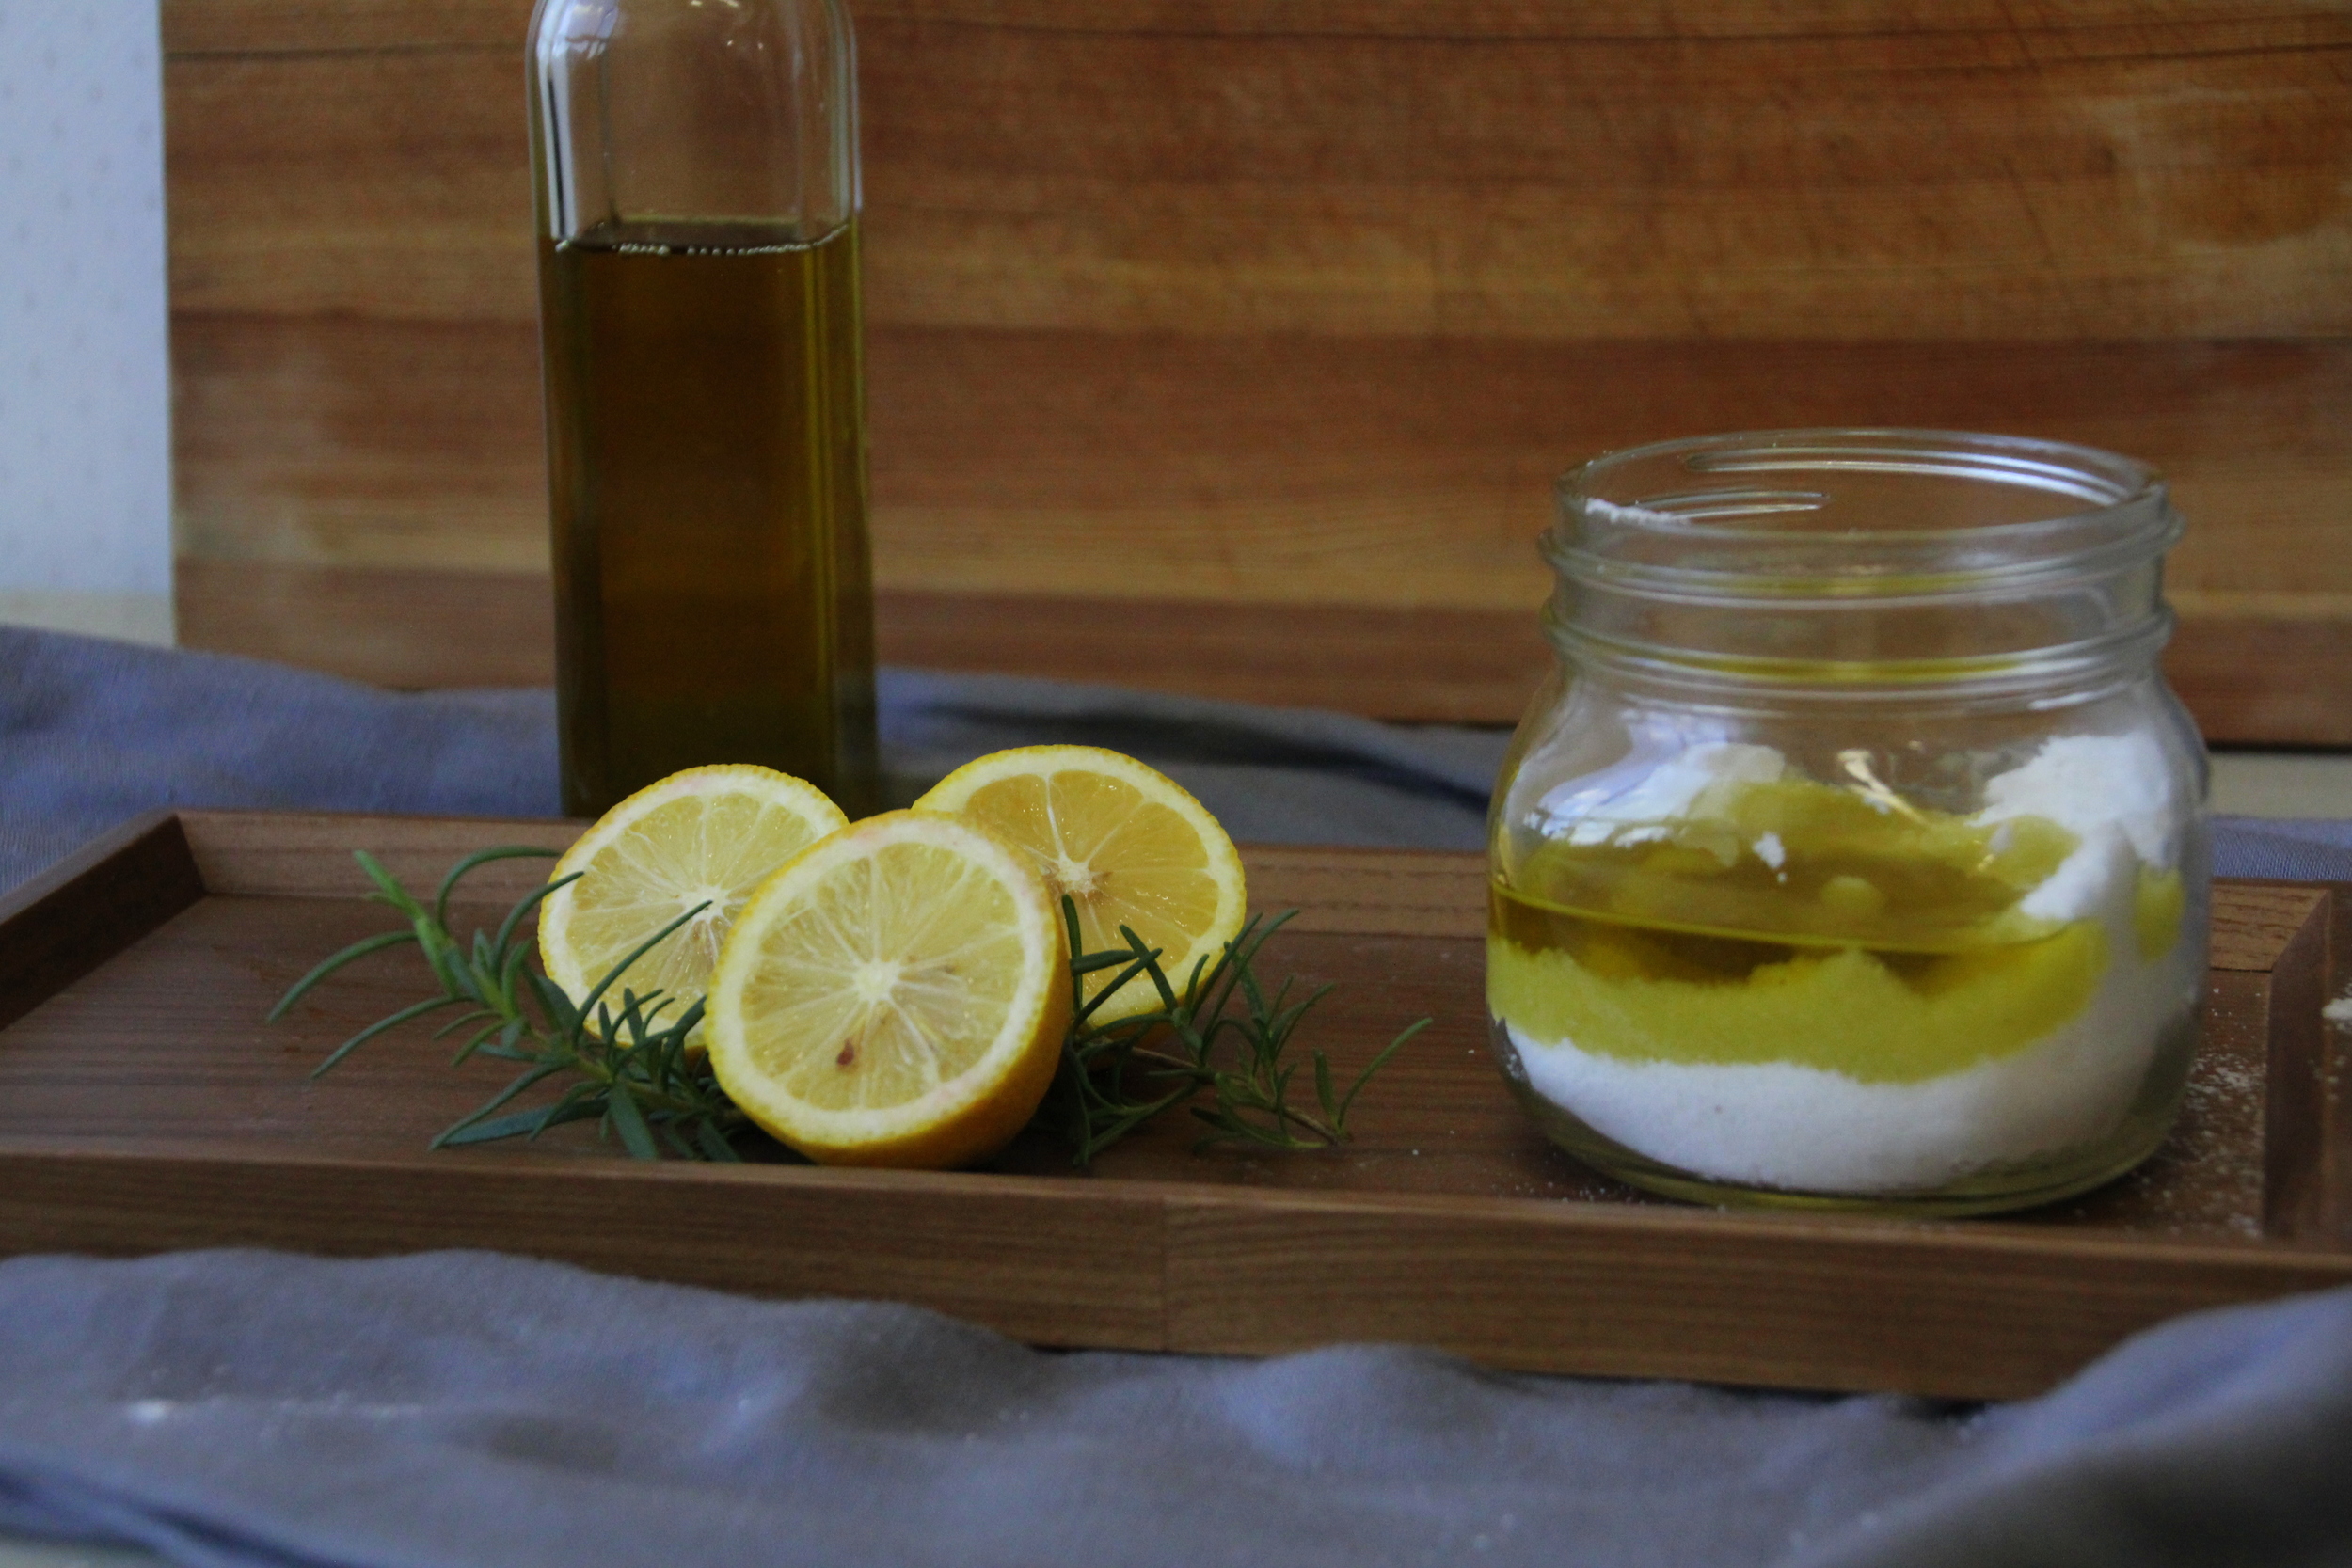
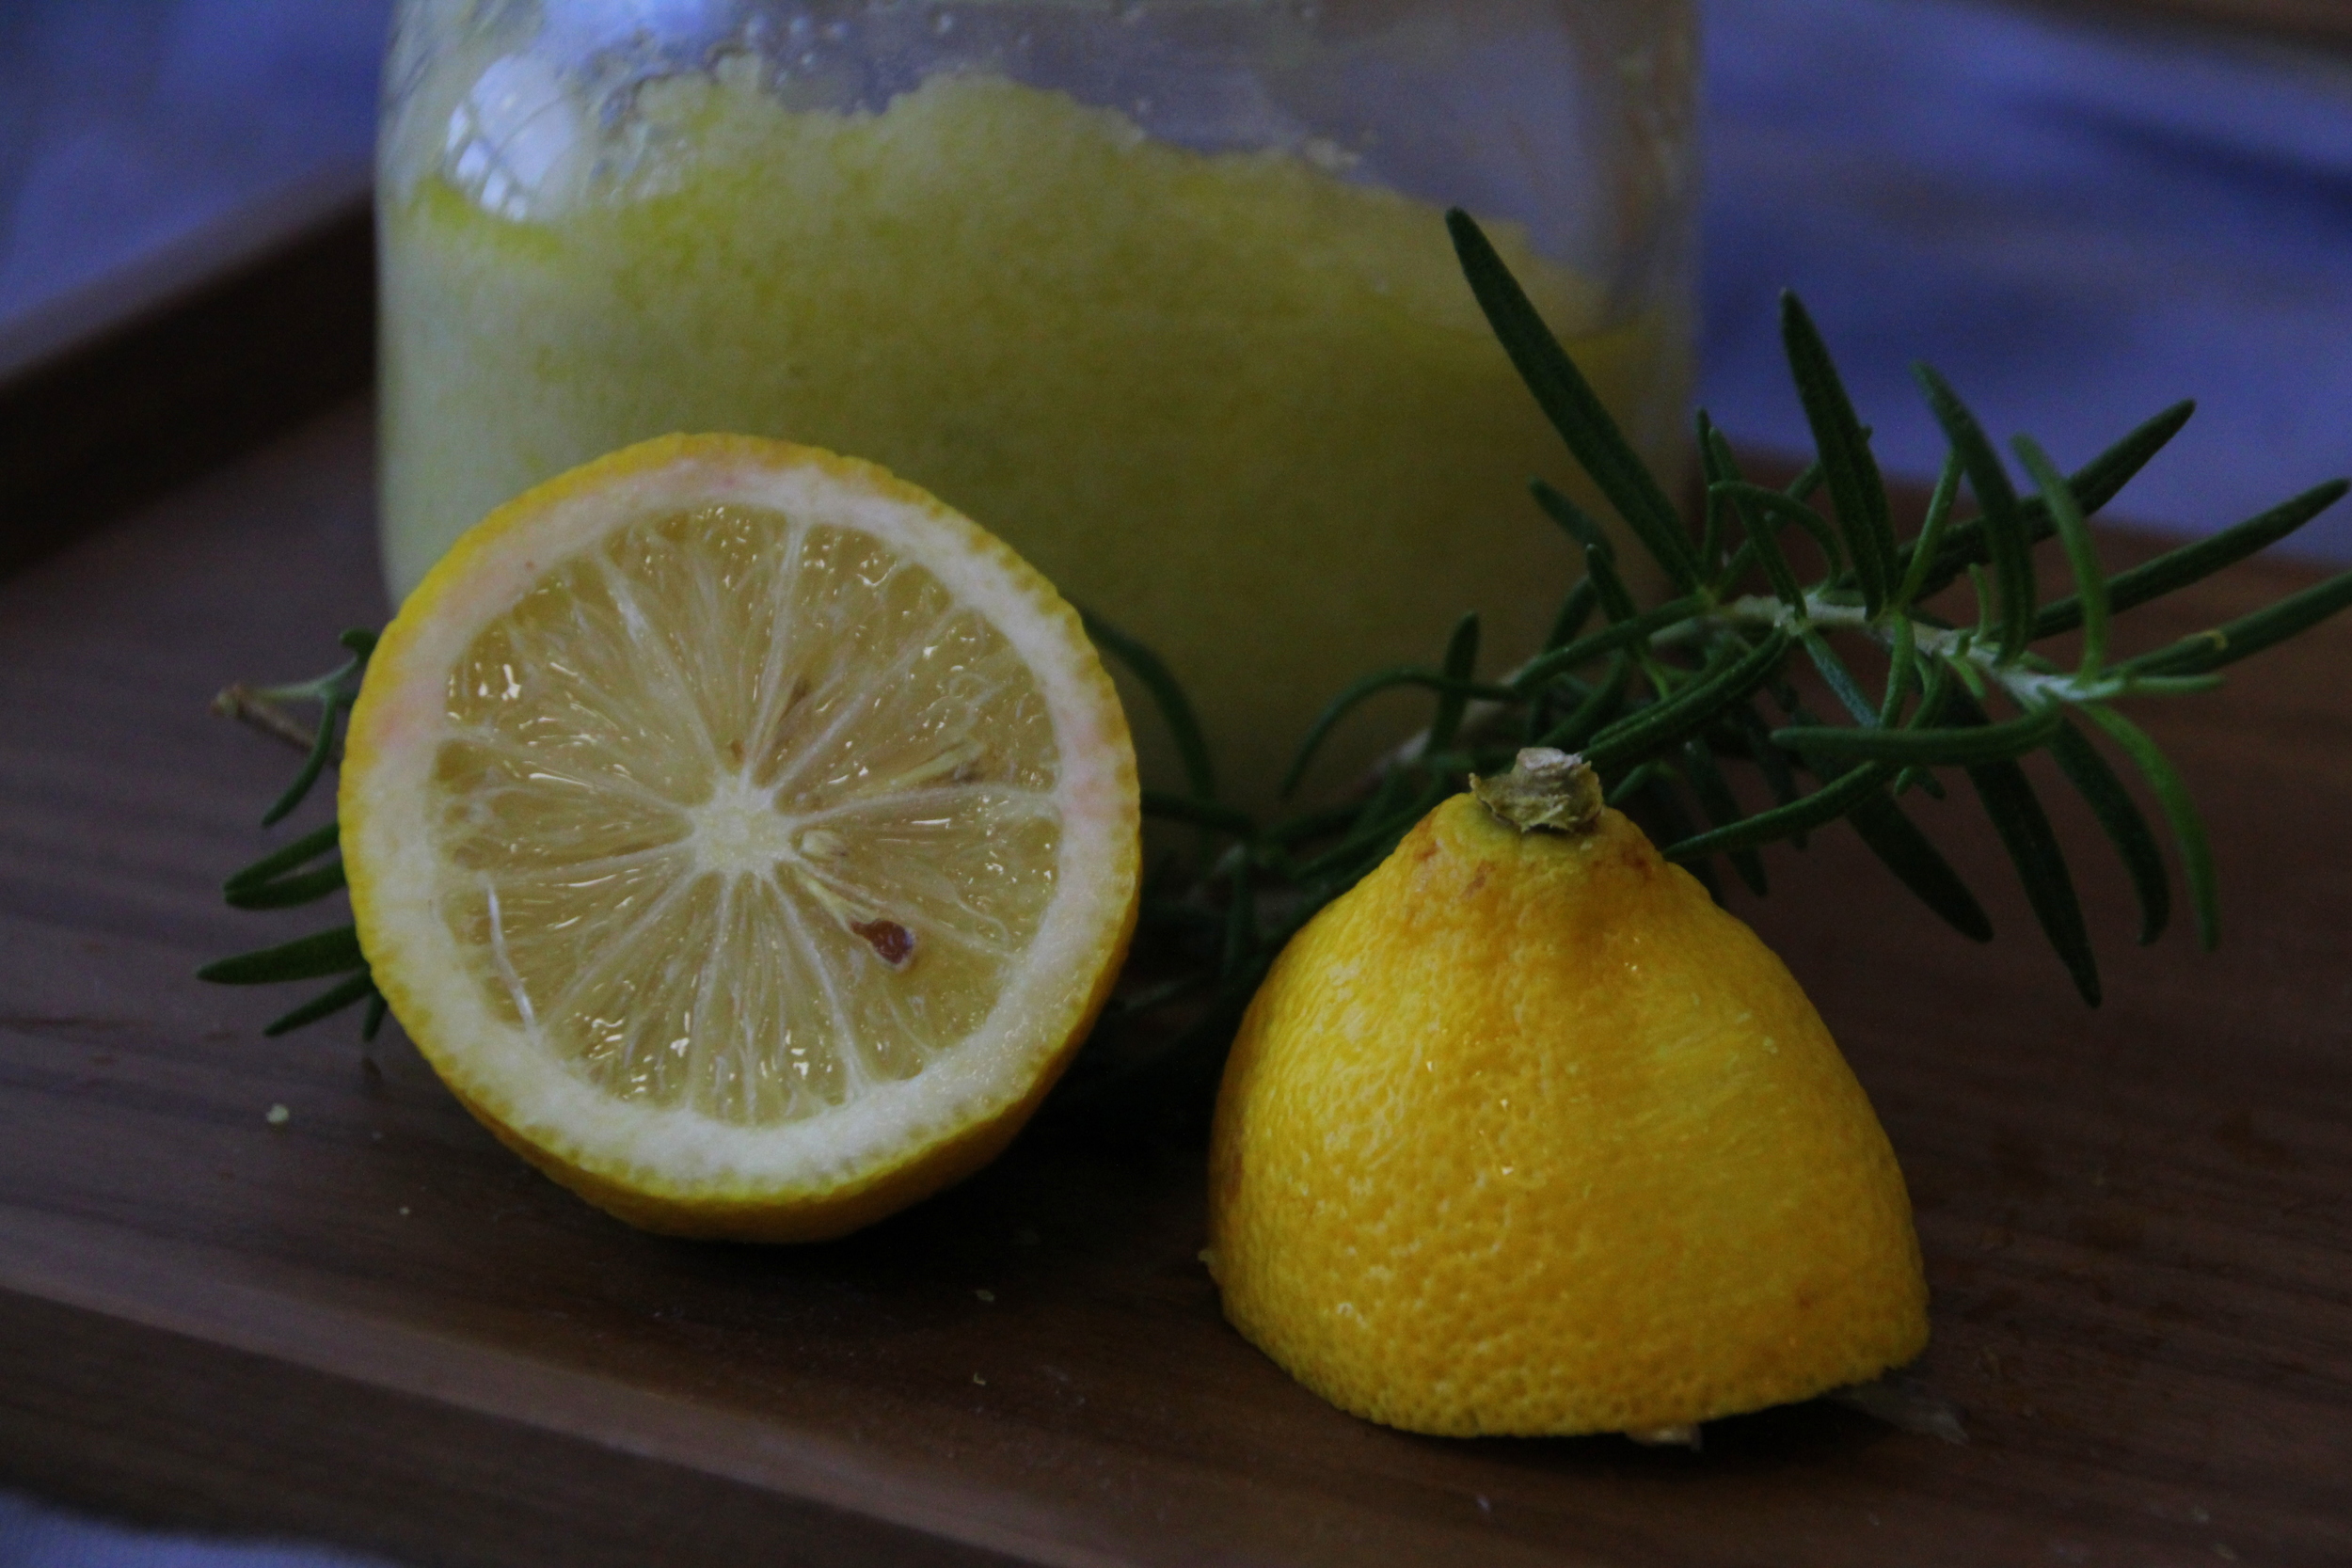
Purifying Rosemary-Lemon Scrub

Purifying Rosemary-Lemon Scrub
I miss my bathtub. On Saturdays, I would sometimes take a detox bath to relax and rid my body of toxins. Don't get me wrong, I'm thankful we have a shower with hot water. In college, I did a semester abroad in the Dominican, and had enough cold rain-water bucket baths to never underestimate the value of a hot shower again. Anyway, I decided to create a scrub with similar benefits as my beloved detox baths, and came up with this Rosemary-Lemon Sea Salt Scrub.
Rosemary's lists of benefits goes on and on, and it's one of my favorite herbs to grow and cook with (bonus: the plant is pretty hard to kill). The oil is made from the leaves of the plant, and contains antimicrobial and antioxidant properties, which makes it an excellent nemesis against skin disorders. It contains many anti-oxidants as well, and can fight free-radicals. While it has many of these purifying properties, rosemary oil does not dry out your skin. Instead, it nourishes it with many vital nutrients. Yay, rosemary!
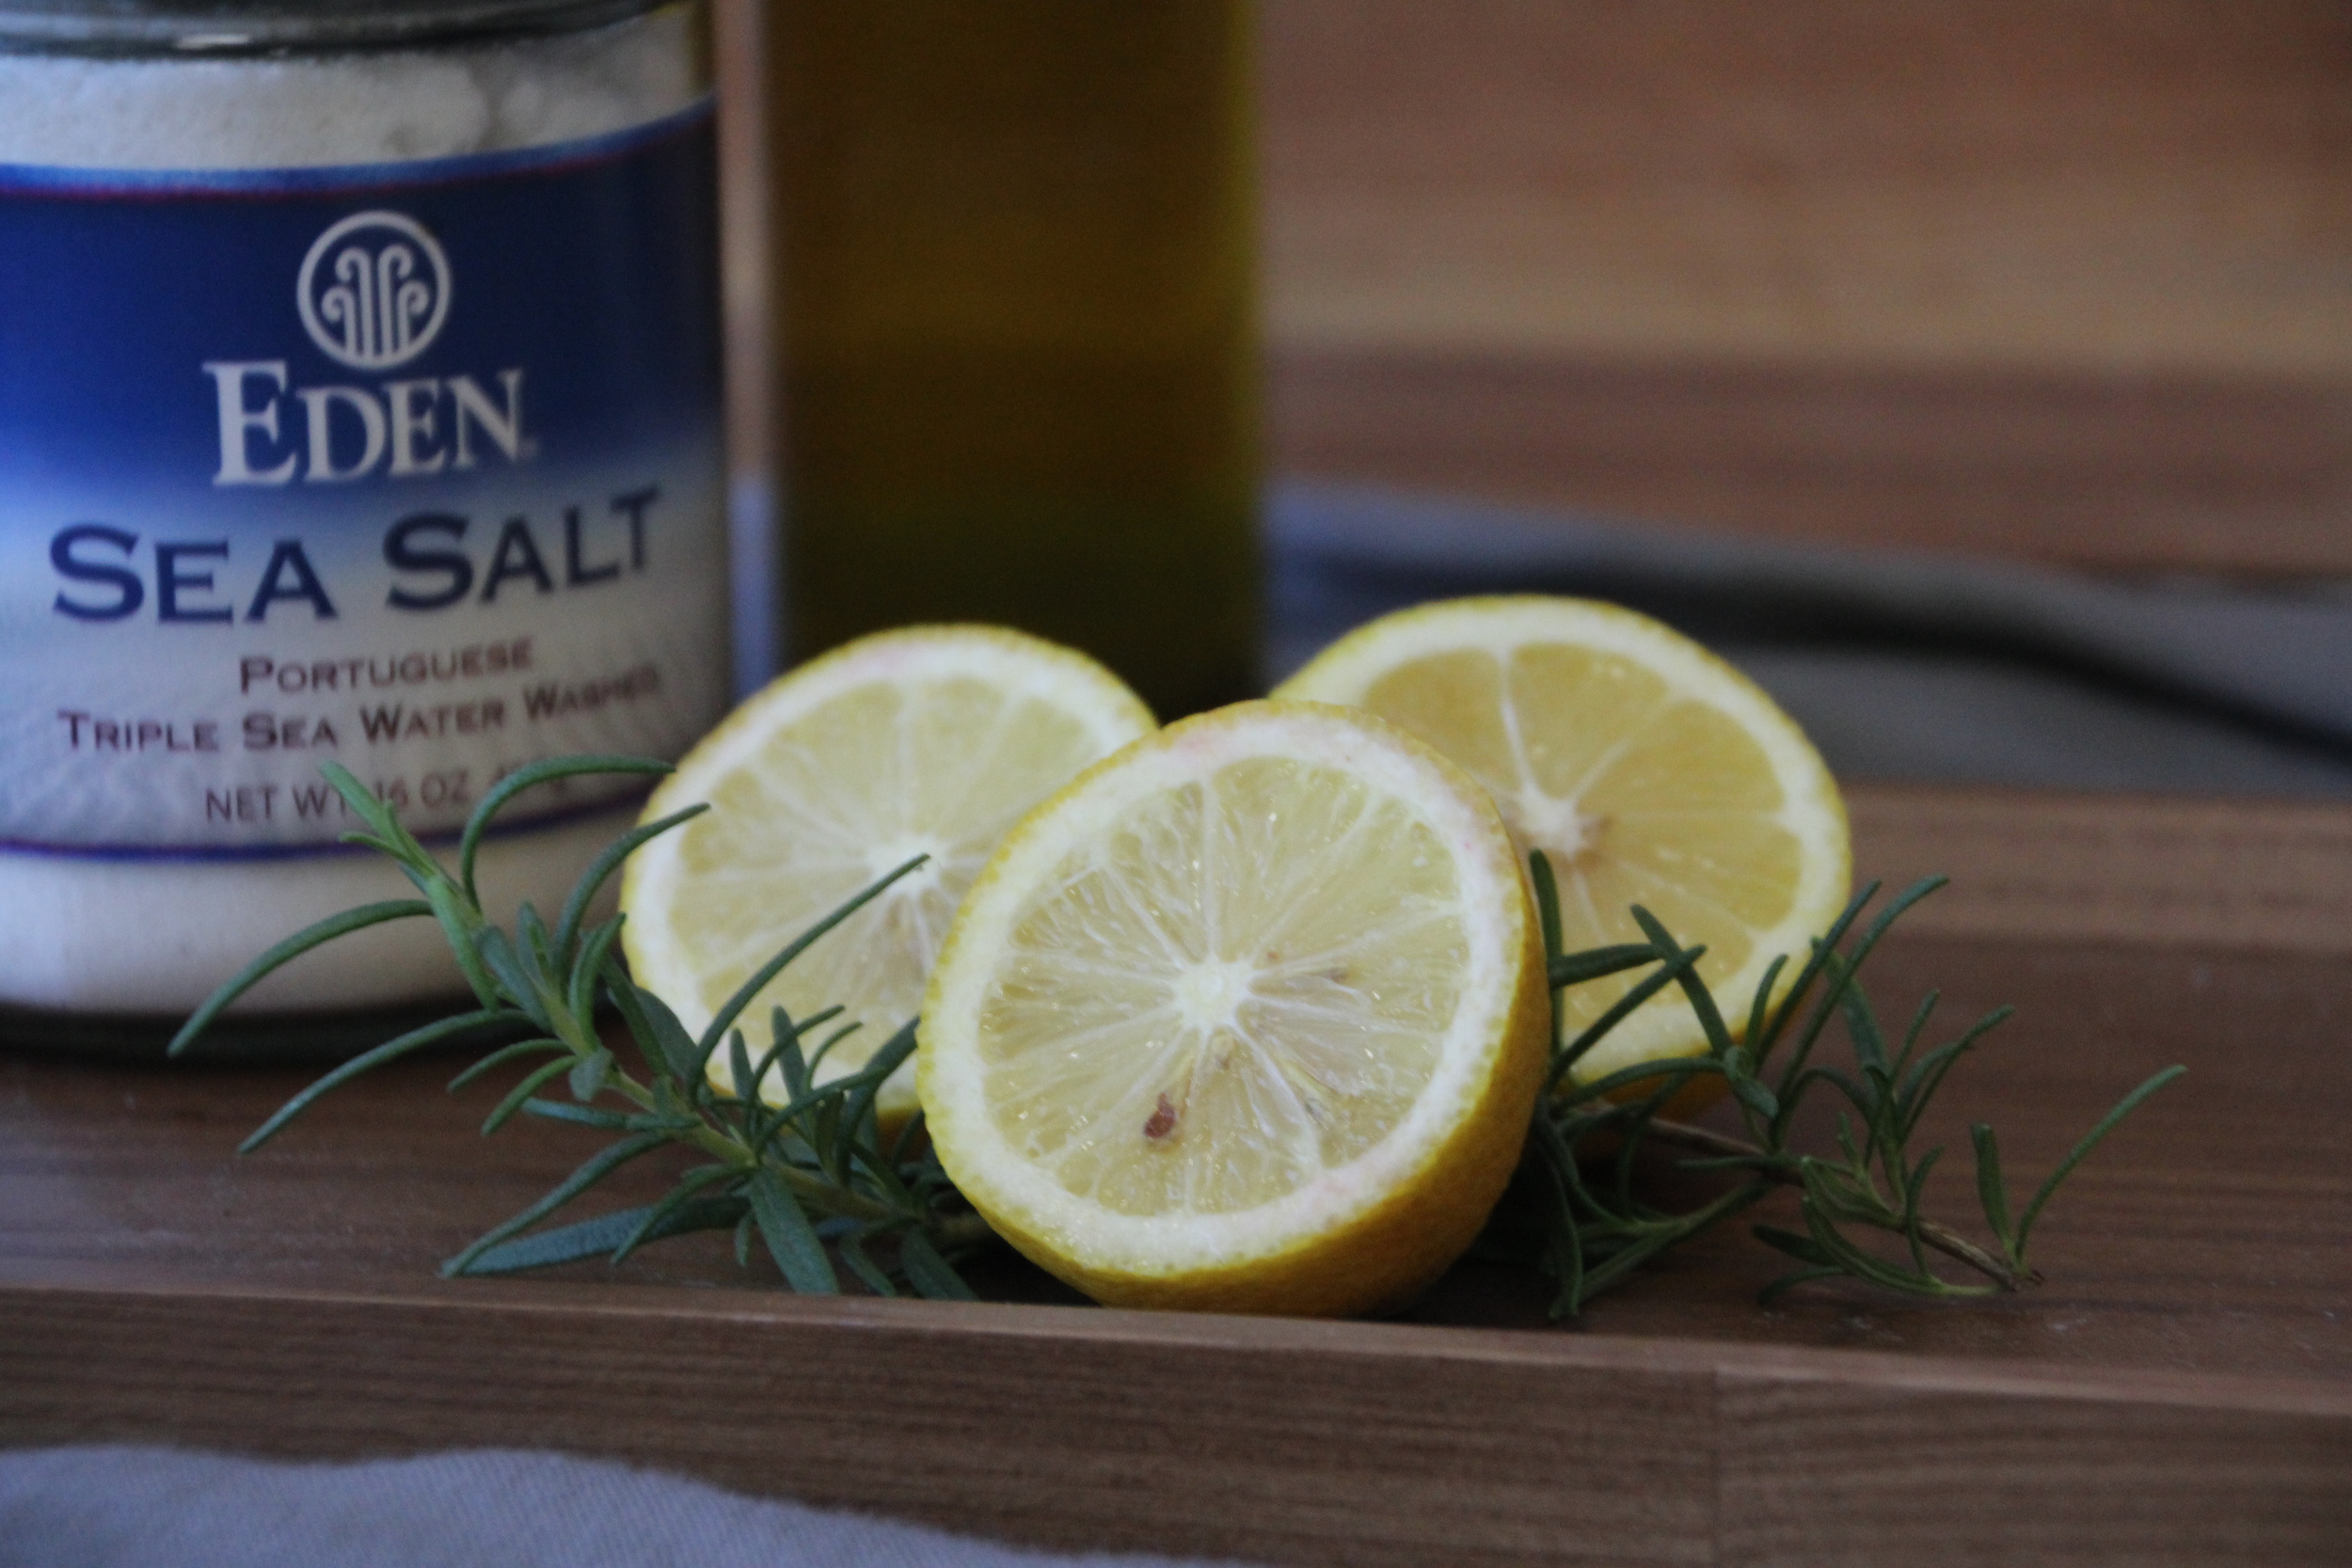
Purifying Rosemary-Lemon Scrub
You may already know of my love for lemon oil and its ability to fight heartburn, but it is also a key player in this scrub. I could go on and on about this oil, but specifically for external use, lemon oil detoxifies and rejuvenates the skin, making it the perfect partner for rosemary oil. It also increases circulation, clears the nasal passages, and gives your immune system an extra boost. BOTH rosemary and lemon are used in aromatherapy to lift the mood, so you can pamper yourself with a little aromatherapy treatment while you exfoliate!

Purifying Rosemary-Lemon Scrub
This takes about 5 minutes to whip up, and it oh so worth it! First, grab these things:
1 cup sea salt (I used fine grained sea salt since it's what I had on hand, but you can use coarser sea salt as well)
1/3 cup olive oil
1/2 Tablespoon vitamin E oil
1 lemon
Rosemary sprig (optional)
Rosemary Oil
Lemon Oil
Measure out your sea salt and pour it in a jar.

Purifying Rosemary-Lemon Scrub
Pour in your 1/3 cup of olive oil and 1/2 Tablespoon of vitamin E oil.
Purifying Rosemary-Lemon Scrub
Zest your lemon, and drop the zest in the jar. Cut the lemon in half and squeeze the juice into the jar as well. Add 5 drops of rosemary oil and 5 drops of lemon oil, along with a few chopped up rosemary leaves. The leaves are totally optional, but I love how they contrast with the sea salt mixture! Mix it all together, and enjoy!

Purifying Rosemary-Lemon Scrub
Purifying Rosemary-Lemon Scrub
Natural Food Poisoning Remedy: Activated Charcoal


Natural Food Poisoning Remedy: activated charcoal
So, this happened this week:

IMG_9938

IMG_9935
We're fostering these two little Jindo mix girls until they are ready to be adopted, which could be a month, or ten months. They were previously at a kill shelter here in Korea. Thankfully, we got in touch with an organization that finds foster families for the dogs that are there. We've already fallen in love with them! Fortunately, all three couples that work at Hans have dogs, so we've already talked of play dates and dog-sitting.

IMG_9907
Anyway, this week's "Health, Naturally" post has nothing to do with puppies. I just like showing pictures of them. We're actually going to talk about food poisoning, which is anything but cute and cuddly (how's that for a segue?).
Before we came to Korea, I researched remedies for food poisoning, parasites, and other things that always tend to happen when one travels overseas. I was finding that the best remedy for parasites is oregano oil capsules, however it was hard to find a solution for food poisoning that you could take on an empty stomach. Sorry, but I'm not going to eat a meal in the middle of expelling my previous one.
I finally found some information about activated charcoal, and after a few hours of obsessive research, I purchased some for the inevitable, dreaded food poisoning. We've used it three times, with great results. Folks, there's no quick solution, but activated charcoal can help your body get rid of the toxin much faster, which means less sick time for you.
One of the things I love about charcoal is that it doesn't stop you from getting rid of the toxin, it simply binds it up and passes through when you use the bathroom. I avoid taking things like Imodium, since it stops your body from getting rid of whatever is bothering it. Charcoal can bring relief, but does so by soaking up the toxins. It turns out that hospitals keep this stuff on hand for food poisoning as well
The first time we tried using charcoal was when my husband decided to try some pork ribs, which should be fine, but for some reason every other time he had pork ribs he would be up all night getting sick. We're not sure what exactly it is about BBQ ribs, since he can have bacon, and he can eat BBQ. Ribs never sit well with him. He decided to take a chance and have them again, and within a couple hours was feeling horrible. I promptly gave him two capsules of charcoal, and a full glass of water. After he took it, he felt relief within a half hour, and never got sick. Now we just stay away from barbecue ribs.
Now, I wouldn't say he had experienced food poisoning, but the situation at least showed me there was something to using charcoal. I decided to bring it with us to Korea, and a couple weeks ago I couldn't have been happier that I did.
For dinner we tried some new Korean food, which tasted great, but later that night I awoke and found that Nate had been getting sick for the past half hour, and my stomach was starting to feel terrible. It came suddenly, and was obvious that food was the culprit. I made some peppermint tea for both of us, and then we both took the activated charcoal.
Like I said, there is no instant fix for food poisoning, but the charcoal definitely lessened our symptoms. I had caught mine in time, and never got sick. After Nate took the charcoal, his vomiting stopped, and he was able to go back to sleep. Compared to being sick all night, it was much easier to deal with.
It's really important that you drink a lot of liquid with the charcoal, or else you won't pass it through as fast. Being hydrated helps it work through your system, and soak up the toxins in your stomach and intestines. Like I said, the charcoal will pass through your body (it will not absorb the charcoal), so don't be alarmed when there is, um, evidence, of charcoal in your stool.
Some people choose to mix the powder in some water or food, but I prefer the capsules so I don't have to taste it.

Here is the short and sweet of what to do you if you start to feel food poisoning coming on:
1) Sip a mix of organic apple cider vinegar and water if you are able
2)Take two capsules of activated charcoal, with a lot of peppermint tea, water, or other liquid of your choosing
Personally, I have a hard time drinking the apple cider vinegar if I am feeling ill, but if you can stomach it, the vinegar will really speed up the process. The day after we got the food poisoning, we stuck to just eating things like rice and homemade chicken broth .
Of course, don't avoid going to the hospital if things get serious or if you feel too dehydrated. However, taking the charcoal can turn a few days of misery into only a few hours of sickness. It definitely has a permanent spot in my medicine cabinet.
What do you do at the onset of food poisoning? What have you found to be most effective?

Peppermint to the Rescue!

Peppermint has been one of the best-kept secrets for nausea for thousands of years. I'm shocked that I went through most of my life not knowing about it, and equally shocked that there are plenty of others who have no idea about its ability to save you in those "Oh-no-I-think-I-may-be-sick-please-God-no" moments in life that we are all too familiar with. I still have trouble not getting slightly nauseous while cleaning the toilet, since the only other time my face is that close to the seat I'm usually miserably sick. Anyone else have this issue?

It wasn't until a conversation with my uncle that that I heard about the benefits of
for digestive discomfort (bonus: it's also great for headaches!). He talked about he rubbed it on his stomach when having indigestion, and soon he was feeling better. Of course, I couldn't help but try it myself, so I bought a bottle and used it during one of the many nights I woke up sick.Word to the wise: Do NOT use straight up peppermint on skin...it takes "cool burn" to a whole new level...At first I just mixed peppermint oil in a bit of water, and then rubbed that on my belly. Soon after rubbing it on, my stomach settles. I'm still amazed at how effective it is, and it has not failed me yet! Later, I made a peppermint oil rub with coconut oil that I take with me when we travel, and keep by our bed at night (recipe below).

On tough nausea, I rub the oil on my belly, and then drink some peppermint tea. So far,
Bigelow Tea is my favorite brand
for it's strength and quality. If you have a weak tea, you won't get many of the benefits. I'm telling you, folks, I would not have made it this past year without the dynamic duo of peppermint oil and tea.


Peppermint Belly Rub
1/2 cup
20 drops
Mix the coconut oil and peppermint oil together, making sure they are well combined and the peppermint is mixed evenly through the coconut oil. Put in a jar and use as needed! You do not need to refrigerate, but the oil will liquify if it gets too hot, so make sure the container is airtight. Enjoy the sweet relief, my friends.
Lemon Oil
I am a lover of all things bright and summery. To me, nothing says summer like fresh-squeezed lemonade, or a happy bowl full of lemons on our kitchen table.

I love the look of lemons so much that I was bent on getting a lemon tree, and thanks to my sisters-in-law, we received one as a wedding present. Since we live in Indiana (for a little while longer, anyway), the tree was brought indoors and coaxed through the winter. It was such a ray of sunshine to get a bowl full of home-grown lemons in early January!


Soon, I learned that lemons had many health benefits (besides boosting your spirits in the Snowcalypse of 2013). I had some therapeutic grade lemon oil on hand, so I decided to experiment. Here's a quick rundown of it's benefits:
-Can stop heartburn in it's tracks -Provides a boost of vitamin C -Is a powerhouse of antioxidants (therefore it can rid you of toxins) -Uplifting when used as aromatherapy
I was pretty skeptical about it stopping heartburn since citrus fruits are known to be acidic and heartburn is caused by, you know, acid. However, lemon oil alkalizes the excess stomach acid, therefore giving sweet relief from heartburn. Add 1-2 drops of lemon oil to a glass of water, drink, and an enjoy a heartburn-free evening!

I added lemon oil to my routine due to its benefits, plus, it's super refreshing! Every morning I take my vitamins with a big glass of water that I've infused with lemon oil, and I know that I'm helping my body get rid of toxins, giving my internal organs a head start, boosting my vitamin C, and balancing my stomach acid. Important note: If you are ingesting any kind of essential oil, make sure its "therapeutic grade" oil produced by a company that will tell you their oils are safe for internal use. Also, as a precaution, do your research before taking it if you are nursing or pregnant.Try it out and let me know how it works for you!
Homemade Chicken Broth and Whole Chicken


Nothing is quite as comforting as a bowl of chicken noodle soup when you've got the dreaded cold that has made its way around your home. While teaching Kindergarten last year, all sorts of fun sniffles and sneezes made their rounds. Fortunately, I was able to avoid the bug (most of the time), and I attribute that to the onslaught of home remedies I took at the first sign of illness, chicken broth being one of them.
So, as you can imagine, I had a hard time deciding whether to categorize this under "Health, Naturally" or here, under recipes. I finally decided that it's just too delicious to be categorized just as a health remedy! I make this in bulk and then freeze it in jars, which can be easily defrosted. If you decide to just keep it in the fridge, be prepared to use it within a week.
The best part about this recipe is that you get a few meals out of it as well with the whole chicken! A future blog post is coming about how to use that for several meals this week. Without further ado, I give you my chicken broth and whole chicken recipe:

Whole Chicken
1 5 to 8 pound chicken (don't throw away the gizzards! Put them in the fridge for later.) 2 cups water 2 lemons, quartered 1 onion, sliced 2 big leaves of kale (does not change the taste at all) 5 cloves garlic 2 stalks of celery 2 carrots Fresh or dried herbs: sage, parsley, basil, oregano, thyme, bay leaves, and rosemary (Season to taste, but don't be shy with these!)
In the crock pot put two cups of water to give the broth a head start. Put the chicken in and stuff with some of the veggies and herbs. Place the rest of the herbs, veggies, and lemons around the chicken. Cook on low for 8 hours. At the end of that 8 hours what you will get is a juicy, seasoned chicken that is literally falling off of the bone.
What I go for is a seasoned but not distinctly flavored chicken since I will use it in many different dishes throughout the week. When you take the chicken out of the crockpot, use a slotted spoon to pick up the little pieces that are still left in the crockpot. Carefully take the meat off the chicken and put in container. Set aside the bones, and a few scraps of meat and skin. Now you're ready for broth!
Chicken Broth
Bones from your chicken A few scraps of meat and skin Gizzards from chicken 1 lemon, quartered 1 onion, sliced 2 stalks of celery 2 carrots A couple cloves of garlic 2 big leaves of kale Fresh or dried herbs: sage, parsley, basil, oregano, thyme, bay leaves, and rosemary
Add these in your crockpot, and fill it 3/4 full with water. Stir, and cook on low for 8 hours. When it's done you have broth for next to nothing, and you know exactly what's in it! Let it cool for a bit so you don't burn yourself, and then pour it into a container while straining. Refrigerate it and let cool completely before you try to freeze it. If you want low-fat broth, skim the fat off the top after it cools in the fridge (the fat will rise to the top when cooled).
There you have it , folks! Golden, beautiful broth for next to nothing!
Aloe Vera- A Gutsy Godsend

 This past year has been filled with a lot of learning, trial and error, and finally some solutions with my stomach issues.
It all started with nausea every few nights, where I would wake up and feel that I was about to get sick. Soon that increased to every night that I would have to wait out this feeling, desperately drinking peppermint tea and rubbing oil on my belly. It also is important to give a shout out to my husband, who more often than not woke up with me and provided much-needed comfort during the never-ending nausea.
This past year has been filled with a lot of learning, trial and error, and finally some solutions with my stomach issues.
It all started with nausea every few nights, where I would wake up and feel that I was about to get sick. Soon that increased to every night that I would have to wait out this feeling, desperately drinking peppermint tea and rubbing oil on my belly. It also is important to give a shout out to my husband, who more often than not woke up with me and provided much-needed comfort during the never-ending nausea.
I finally went to my doctor, who is a lovely woman that likes to start with "small solutions" instead of jumping to scary conclusions. She prescribed me some antacids to take every morning to test and see if I have h. pylori or was overproducing acid. These were great for about one month, and then it returned with a vengeance. Not only did I have nightly nausea, but there was no such thing as an, ahem, "normal" bathroom trip (do you catch my drift?). After a few weeks of this, an intense burning and pain was felt in my gut at all times, and I do mean ALL THE TIME. Oh, you're hungry and want to eat something? PREPARE FOR THE INTERNAL BONFIRE OF A LIFETIME! That's about how mealtime went.
It came to a head one night when Nate and I thought my appendix was rupturing because of the pain, and after a costly trip to the ER we still had no answers. Multiple doctors appointments, tests, procedures left my gastrointestinal doctor baffled, and so I got the "diagnosis" of IBS. Now, I see so many "doctor-bashing" natural health bogs, and if you're here to listen to me describe the evils of doctors, you'll have to go elsewhere. I still believe that my doctors deeply cared, and they were incredibly kind to me. I still prefer natural solutions, but I have no complaints about how I was treated by my doctors, and they provided the testing I needed to rule out other illnesses.
Enter: Aloe Vera juice

I had tried multiple other natural solutions with marginal success, and then I stumbled upon some information about the benefits of aloe vera. Needless to say, I was beyond desperate for relief, so I ran out to the nearest natural foods stores (I checked everywhere else) and picked up a bottle.
Folks, I won't bore you with a play-by-play of the weeks that followed, but within a a few days, the burning had decreased and within a month I had so much more freedom in what I could eat (I had to cut out just about everything except chicken, rice, and bananas). I even returned to my beloved coffee addiction!
Now, there were some other integral players in my gut-healing process, but I believe that aloe vera juice was the missing piece. Basically what it does is break down the build-up in your intestinal lining, getting the nasty toxins out of your body. After it does that, it rebuilds and soothes the lining, and plays an integral part in helping you absorb nutrients, as well as adding a few essential vitamins and mine rals.
rals.
When I started out, I took one or two ounces before every meal (one ounce is roughly two tablespoons), and now, three months later, I just have an ounce before dinner. There are also days where I go completely without it (yay, freedom!).
From the research I've done, brand doesn't make a huge difference, but the ones that I've tried are "Lilly of the Valley" and the "Lakewood Organic" brand on the right. The Lakewood brand is a bit less abrasive to drink because they put a tiny bit of lemon juice in it. A bottle like this will last you about two weeks if you have it three times a day.
Well, friends, I'm off to continue the never ending packing and cleaning to prepare for our departure in three weeks. Happy health!
