

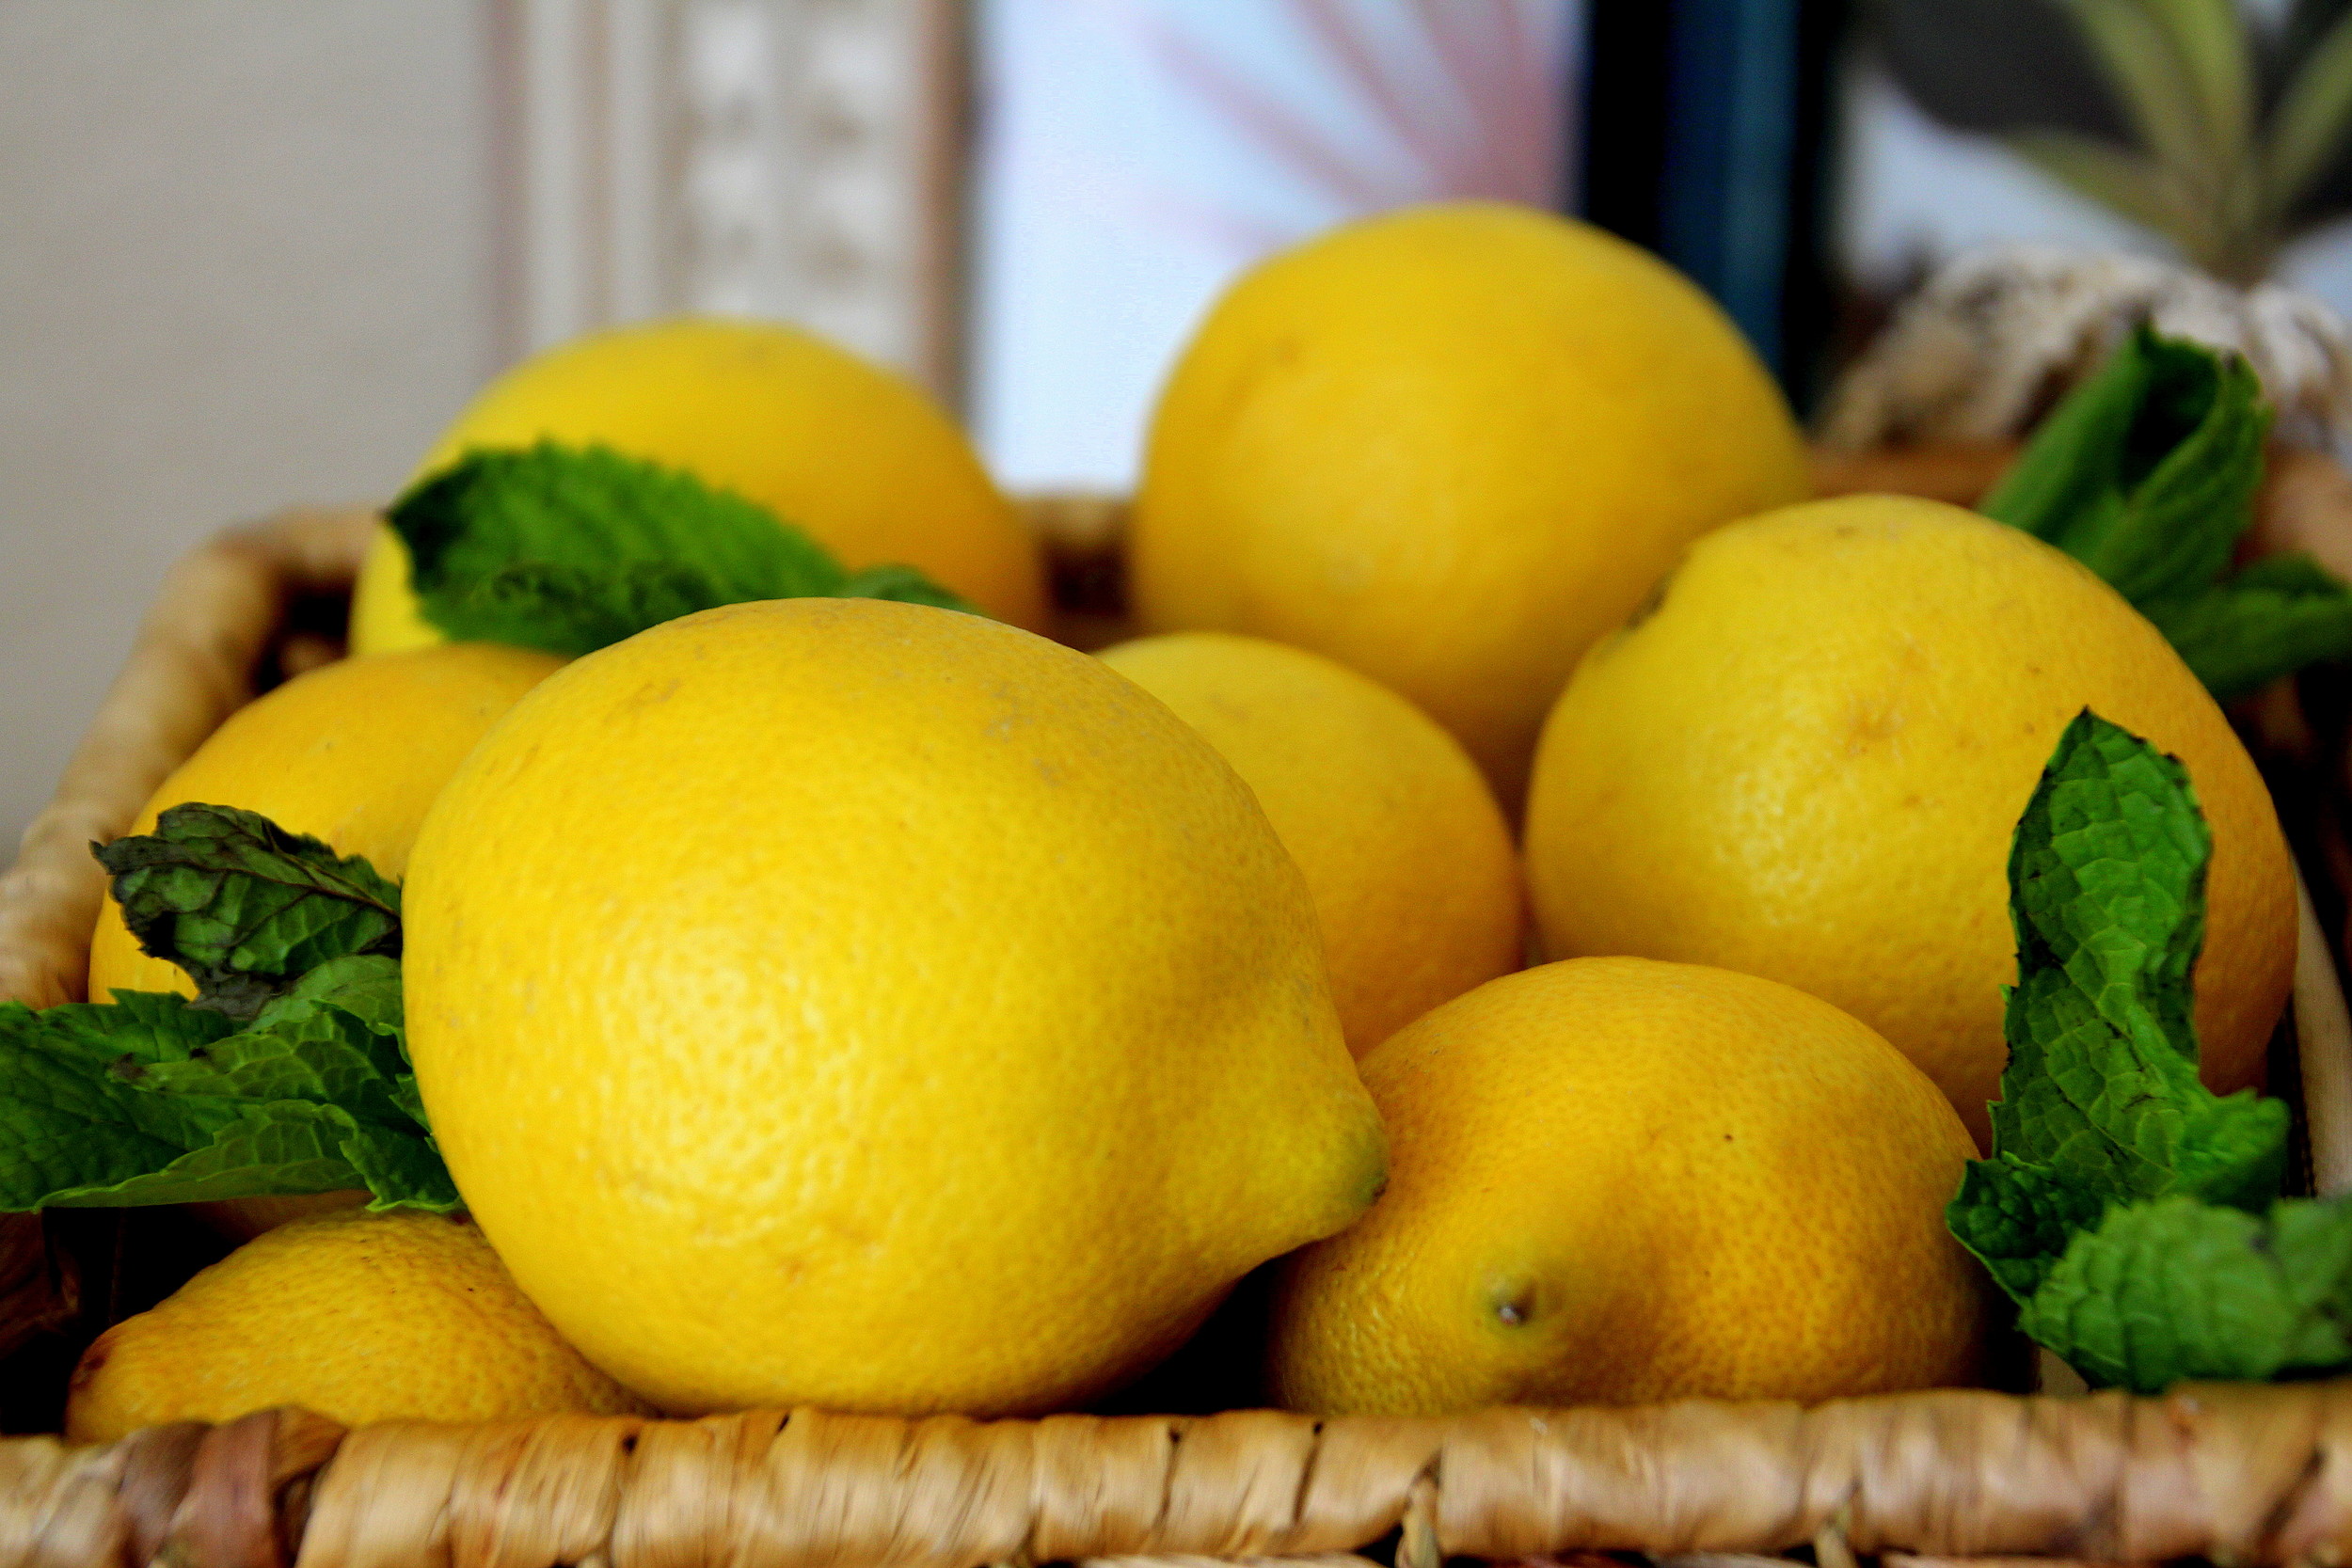
Korea has some great fresh veggies, however the only “familiar” herbs you will find in supermarkets is (sometimes) parsley (on a good day). It makes sense, because
Read moreHomemade Peppermint Mocha Creamer

One of my (many) vices is enjoying creamer in my coffee. I know, I know, sugar is bad for you, but I really can't resist when it comes to coffee, and it's especially hard to resist
Read moreFall Harvest Granola
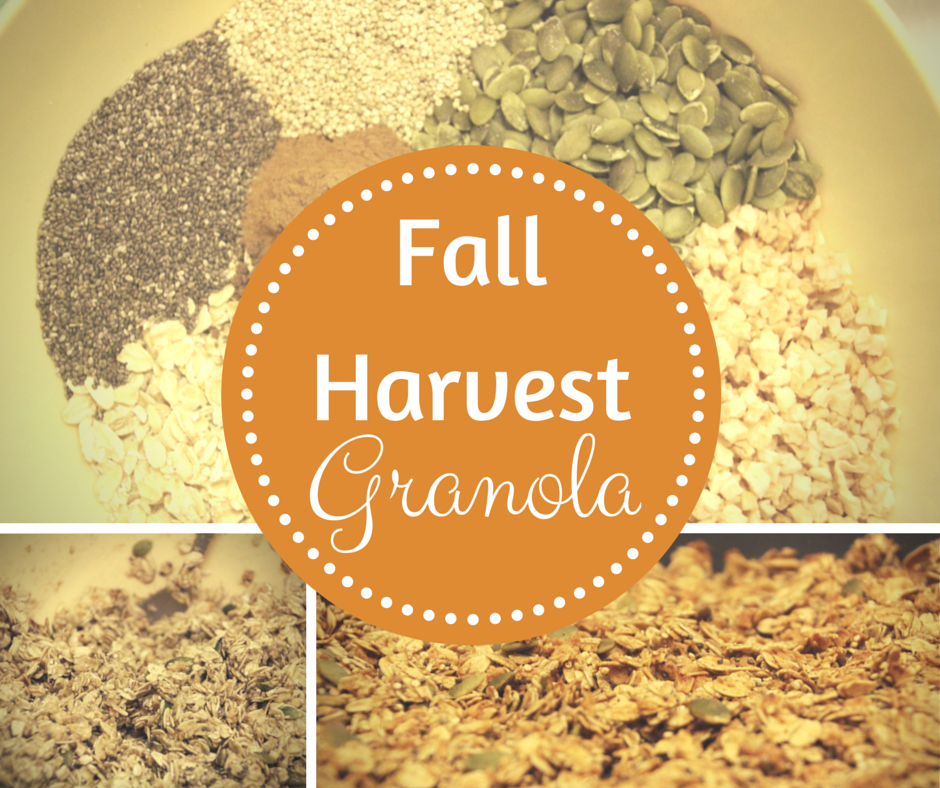
Fall Harvest Granola
You guys, I found my new favorite granola. This time, it's gluten free, packed with so many goodies, and tastes AWESOME. I was pretty proud of myself.
Fall Harvest Granola
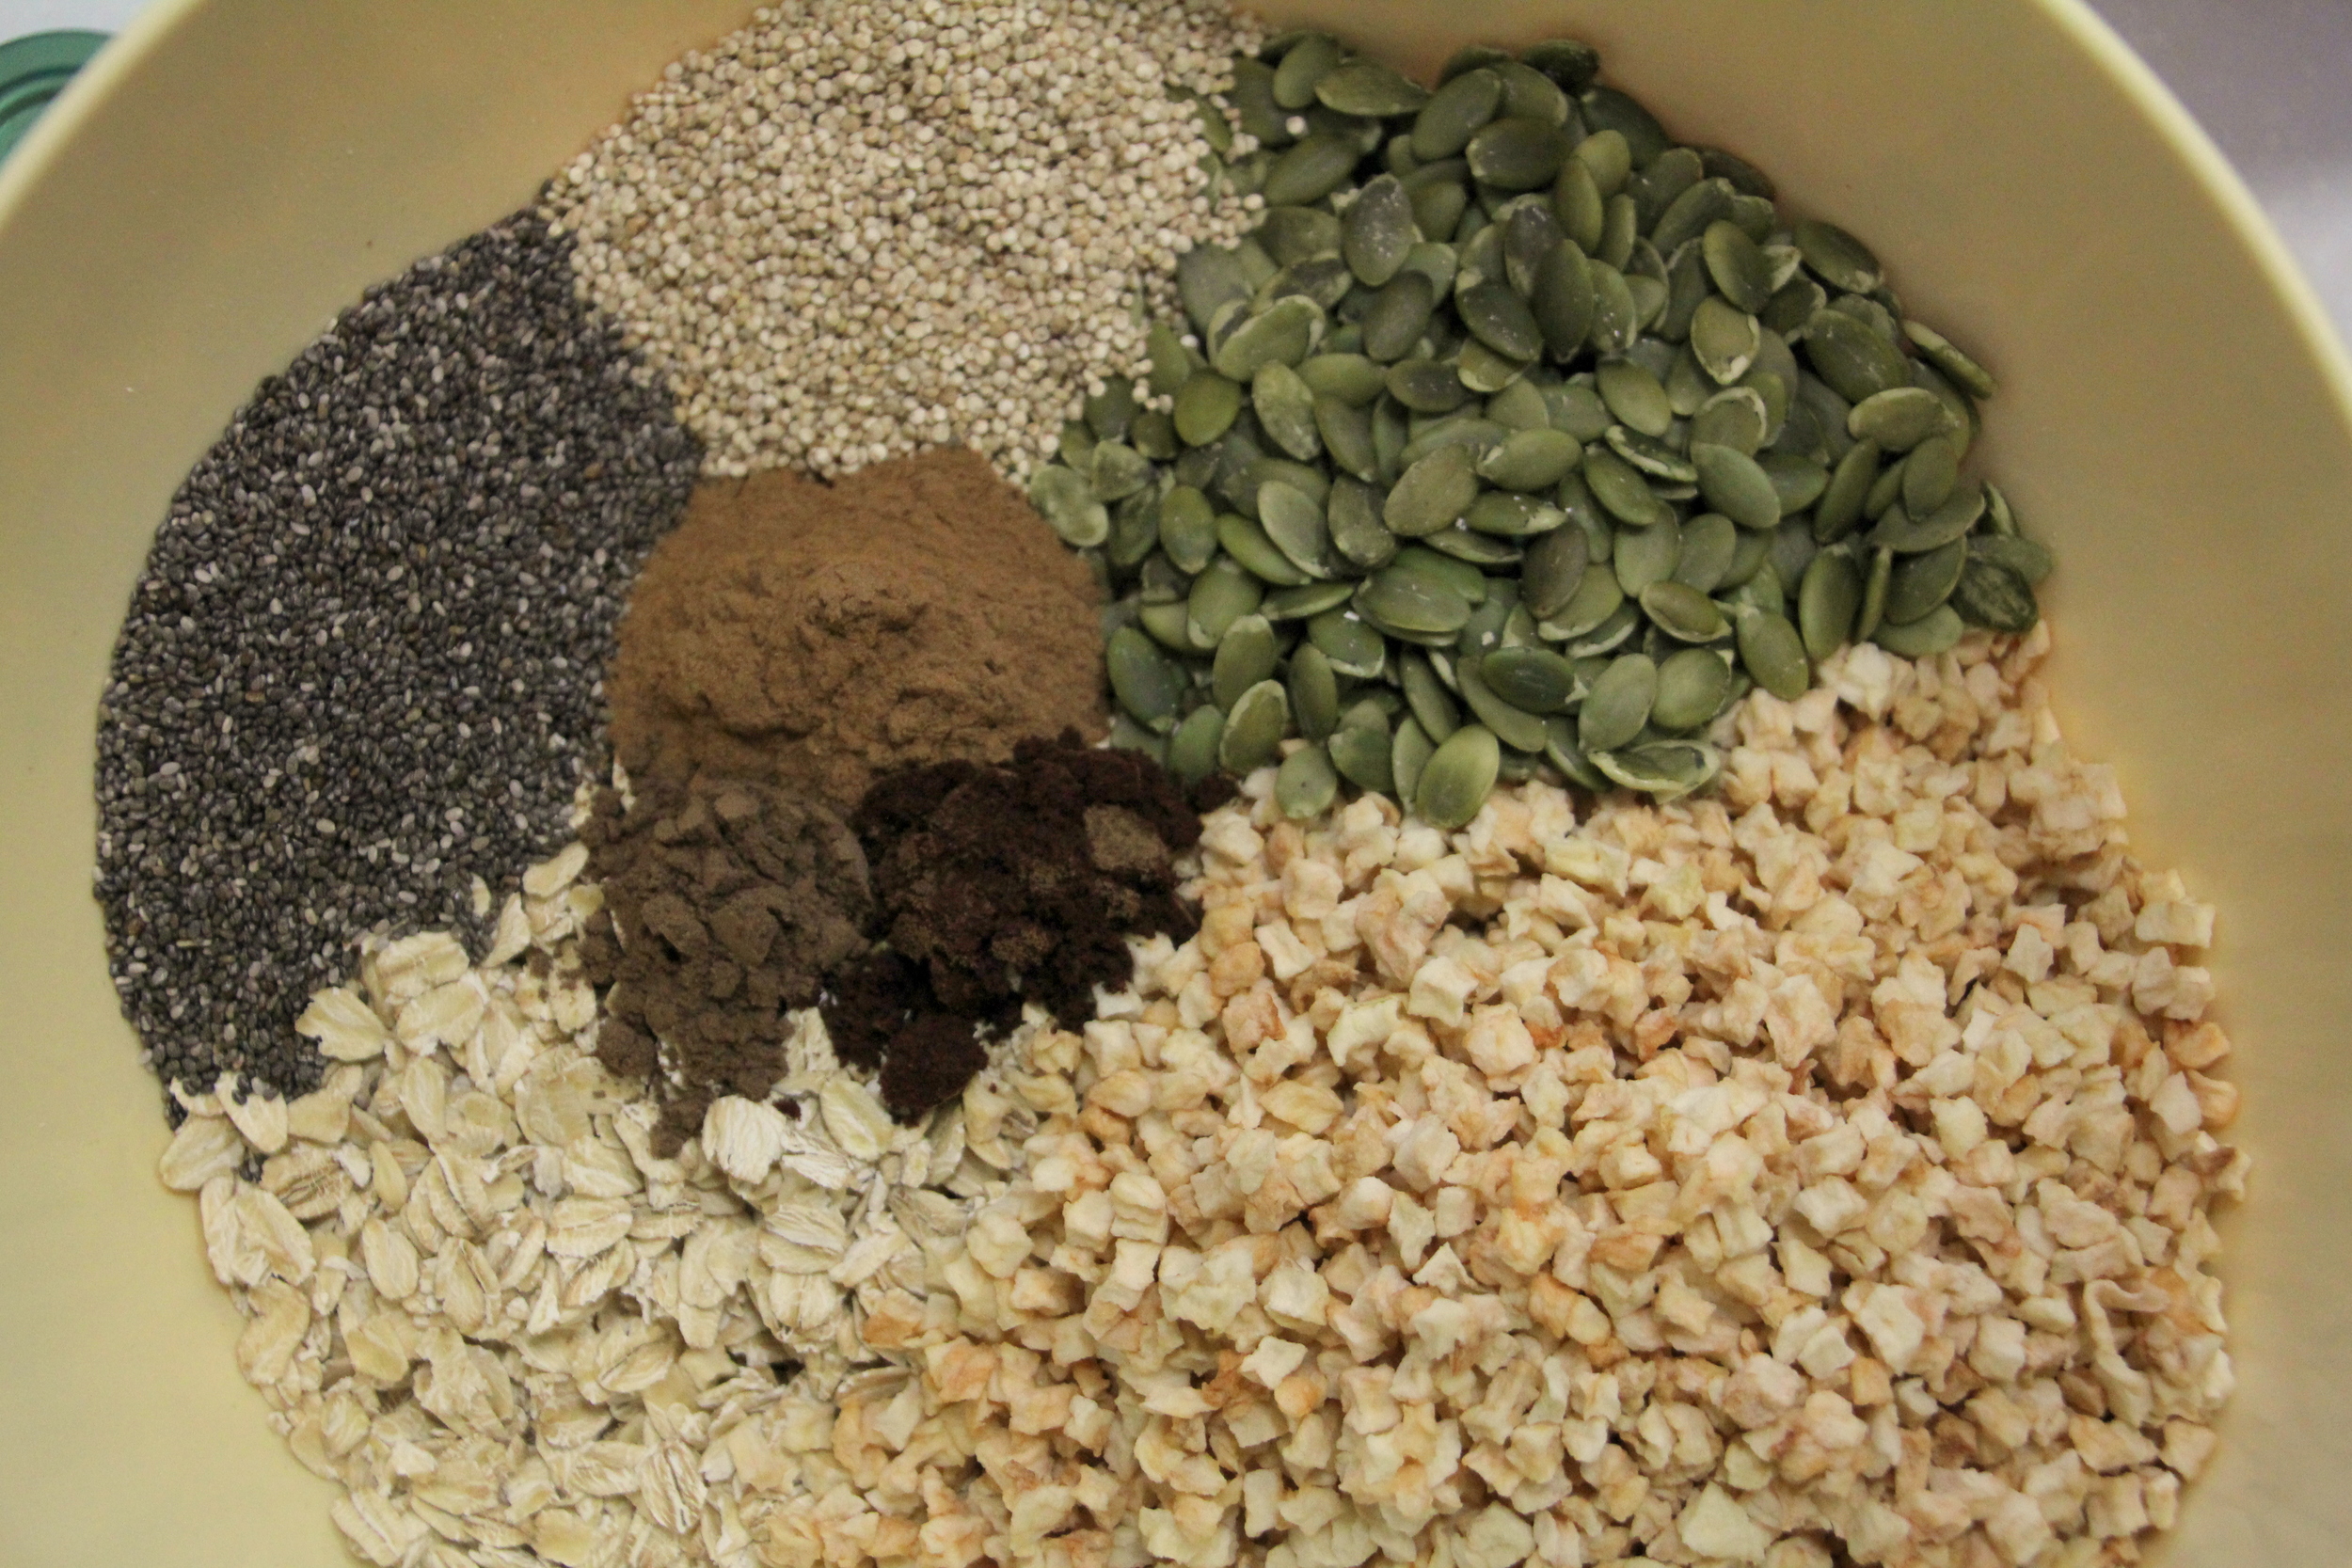
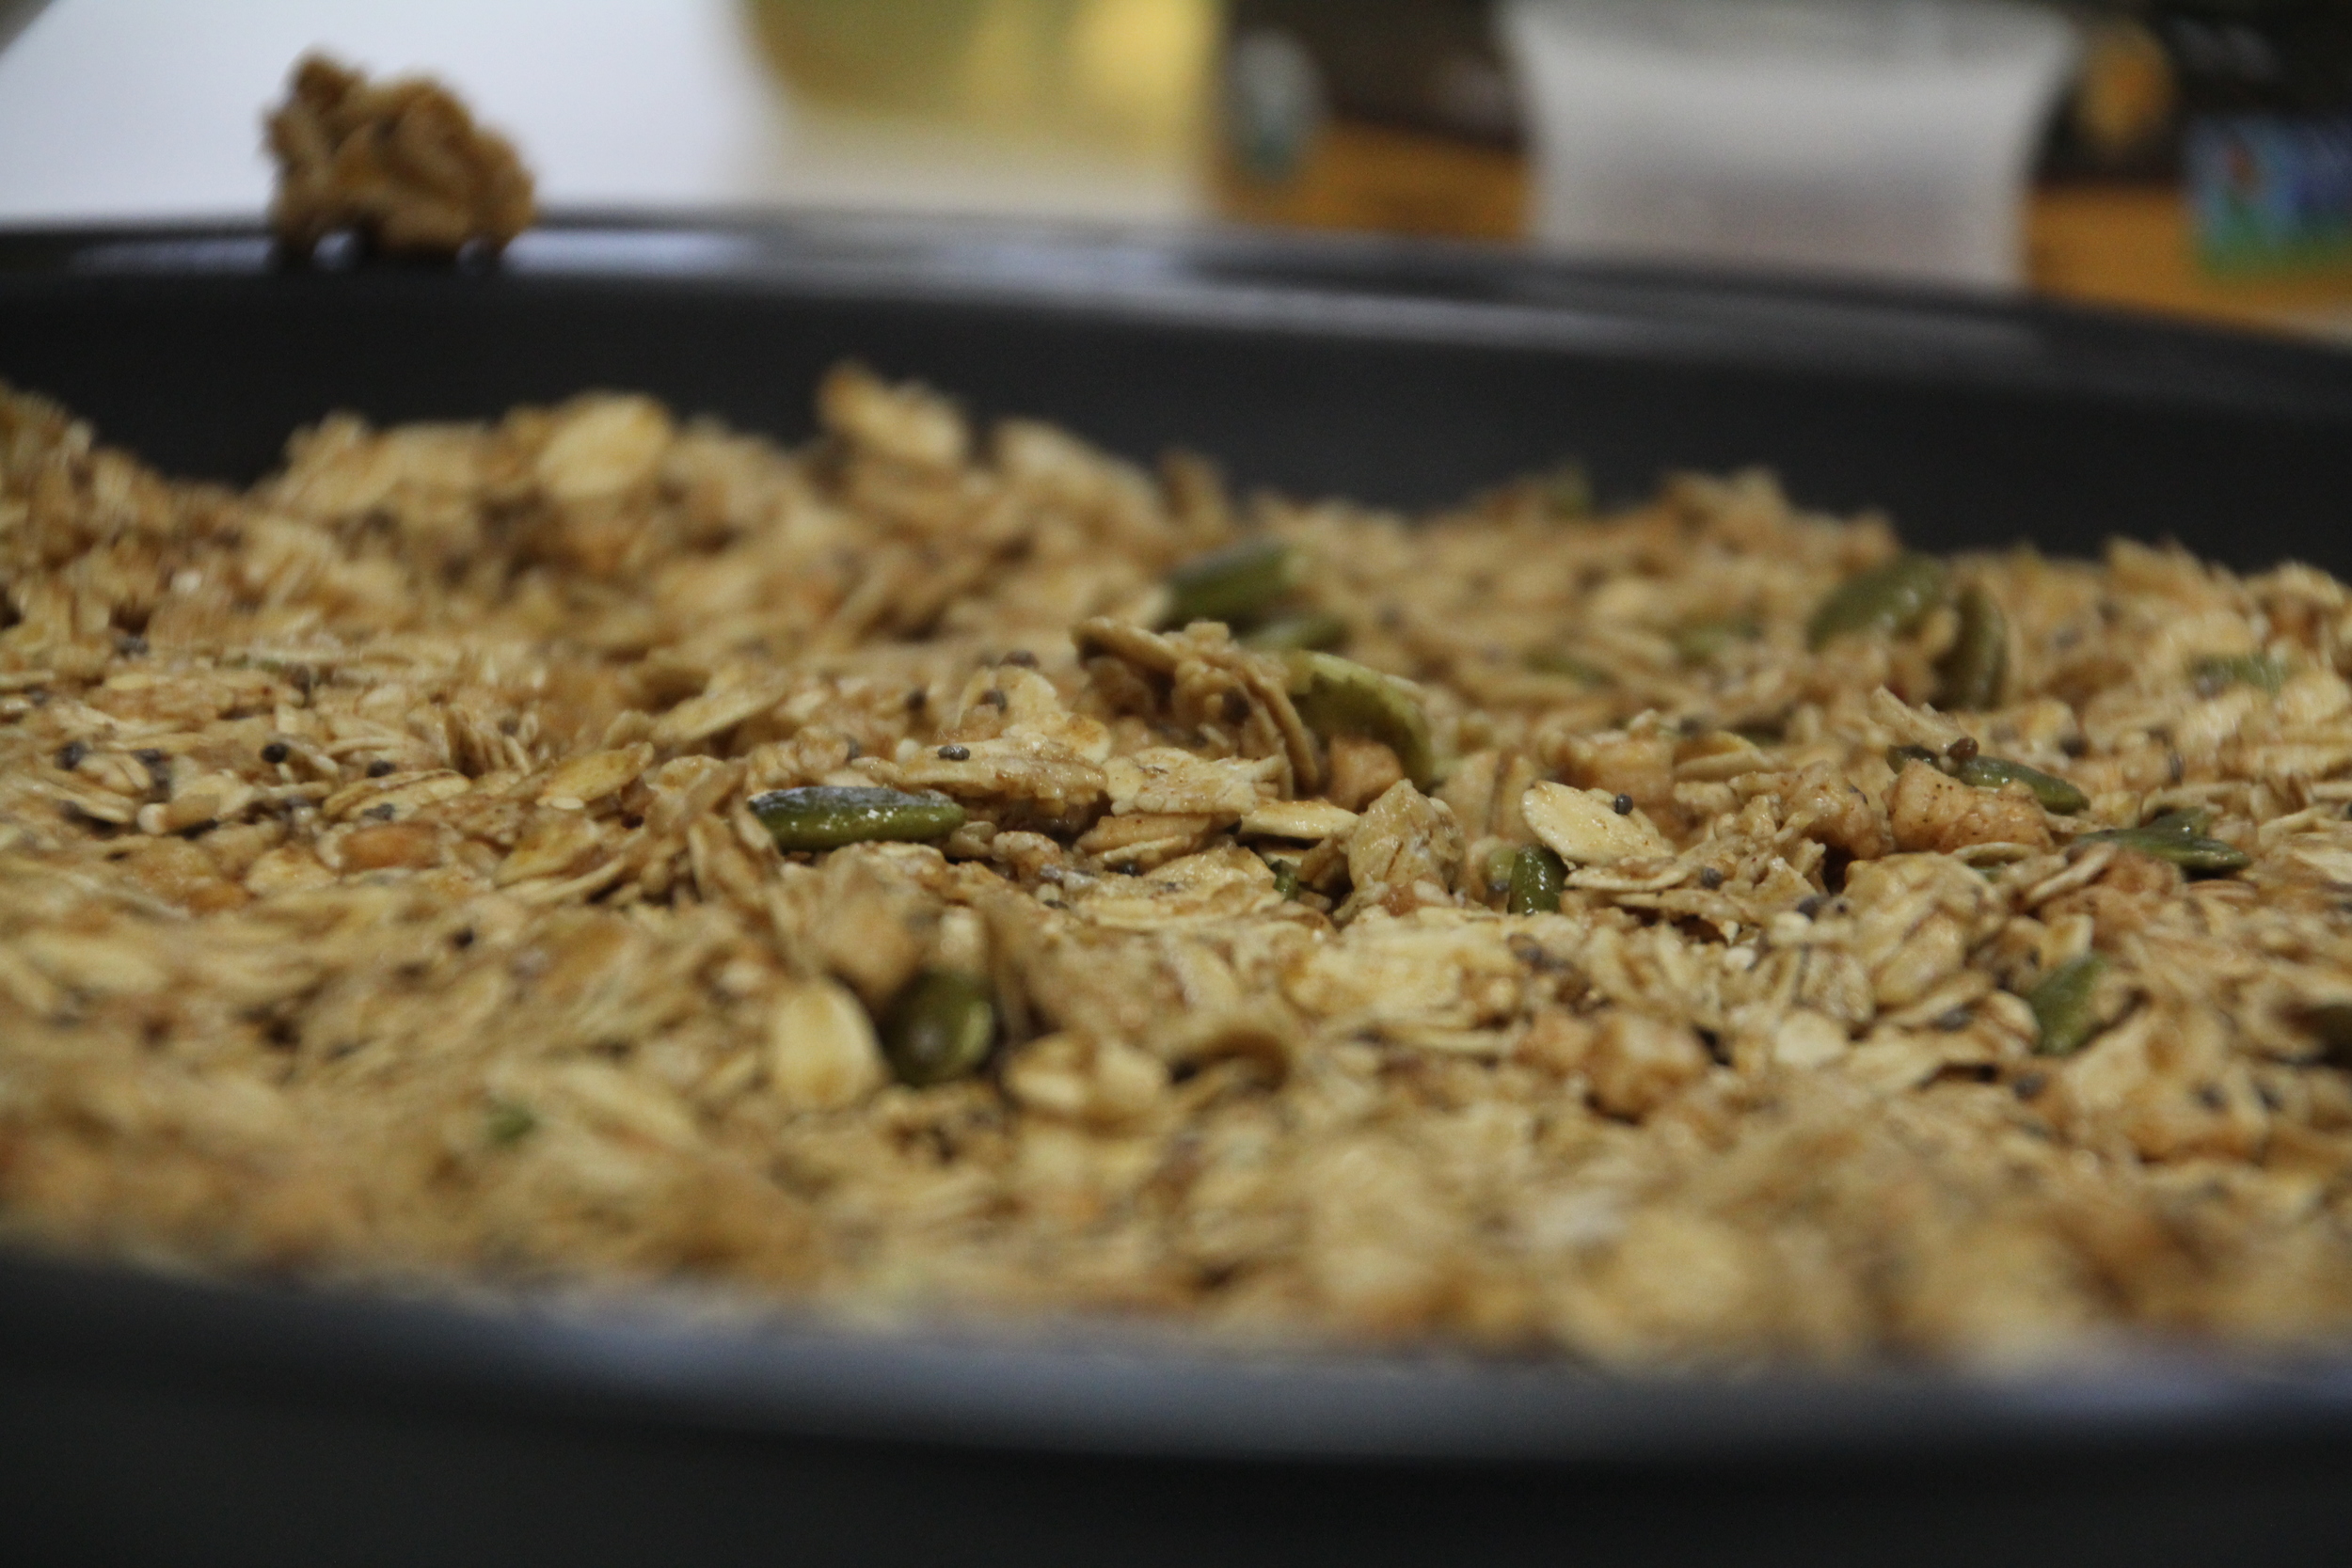
Okay, so I've definitely jumped on the chia and quinoa bandwagon, but I was hesitant to put it in a granola since I was unsure of how it would affect the taste and texture. However, I just went for it this time, and let me tell you, I'm never going back! It just added to the crunch, didn't compromise the texture or taste, and adds so many nutrients! I think I may even start adding them to my tried and true classic granola recipe.
Fall Harvest Granola

Fall Harvest Granola
After roasting some delicious pumpkin seeds, I decided to experiment more with this nutrient packed seed, and purchased some shelled pumpkin seeds at the market. Have I told you how much I love our market here? I simply adore having people I go to every week for my produce and eggs. I affectionately called them "my apple guy", "my egg lady" and "garlic woman". That last name might not sound so flattering, but she sells the most beautiful and inexpensive garlic! Here in Korea they even peel the garlic for you, so literally all I do is buy a huge bag of peeled garlic for $3.00 and I'm good to go for a couple weeks!
Anyway, back to this granola. It's super simple, takes about 10 minutes to whip up, and 20 minutes to bake.
Go ahead and grab these things, and you'll be good to go!
6 cups gluten free oats
2 cups dehydrated apples
1 cup sliced almonds
1/2 cup shelled pumpkin seeds
1/4 cup quinoa
1/4 cup chia seeds
2 1/2 teaspoons cinnamon (I really like cinnamon, so if this is too much for you decrease the amount)
1 1/2 teaspoon ground cloves
1/2 teaspoon allspice
1/2 teaspoon salt
1 teaspoon vanilla extract
1 cup applesauce
2/3 cup maple syrup
1/2 cup honey
Whew! I know that looks like a super long ingredient list, but that's what makes this granola so jam-packed full of goodness. You probably have most, if not all of this stuff in your pantry already, so throwing it together is a cinch!

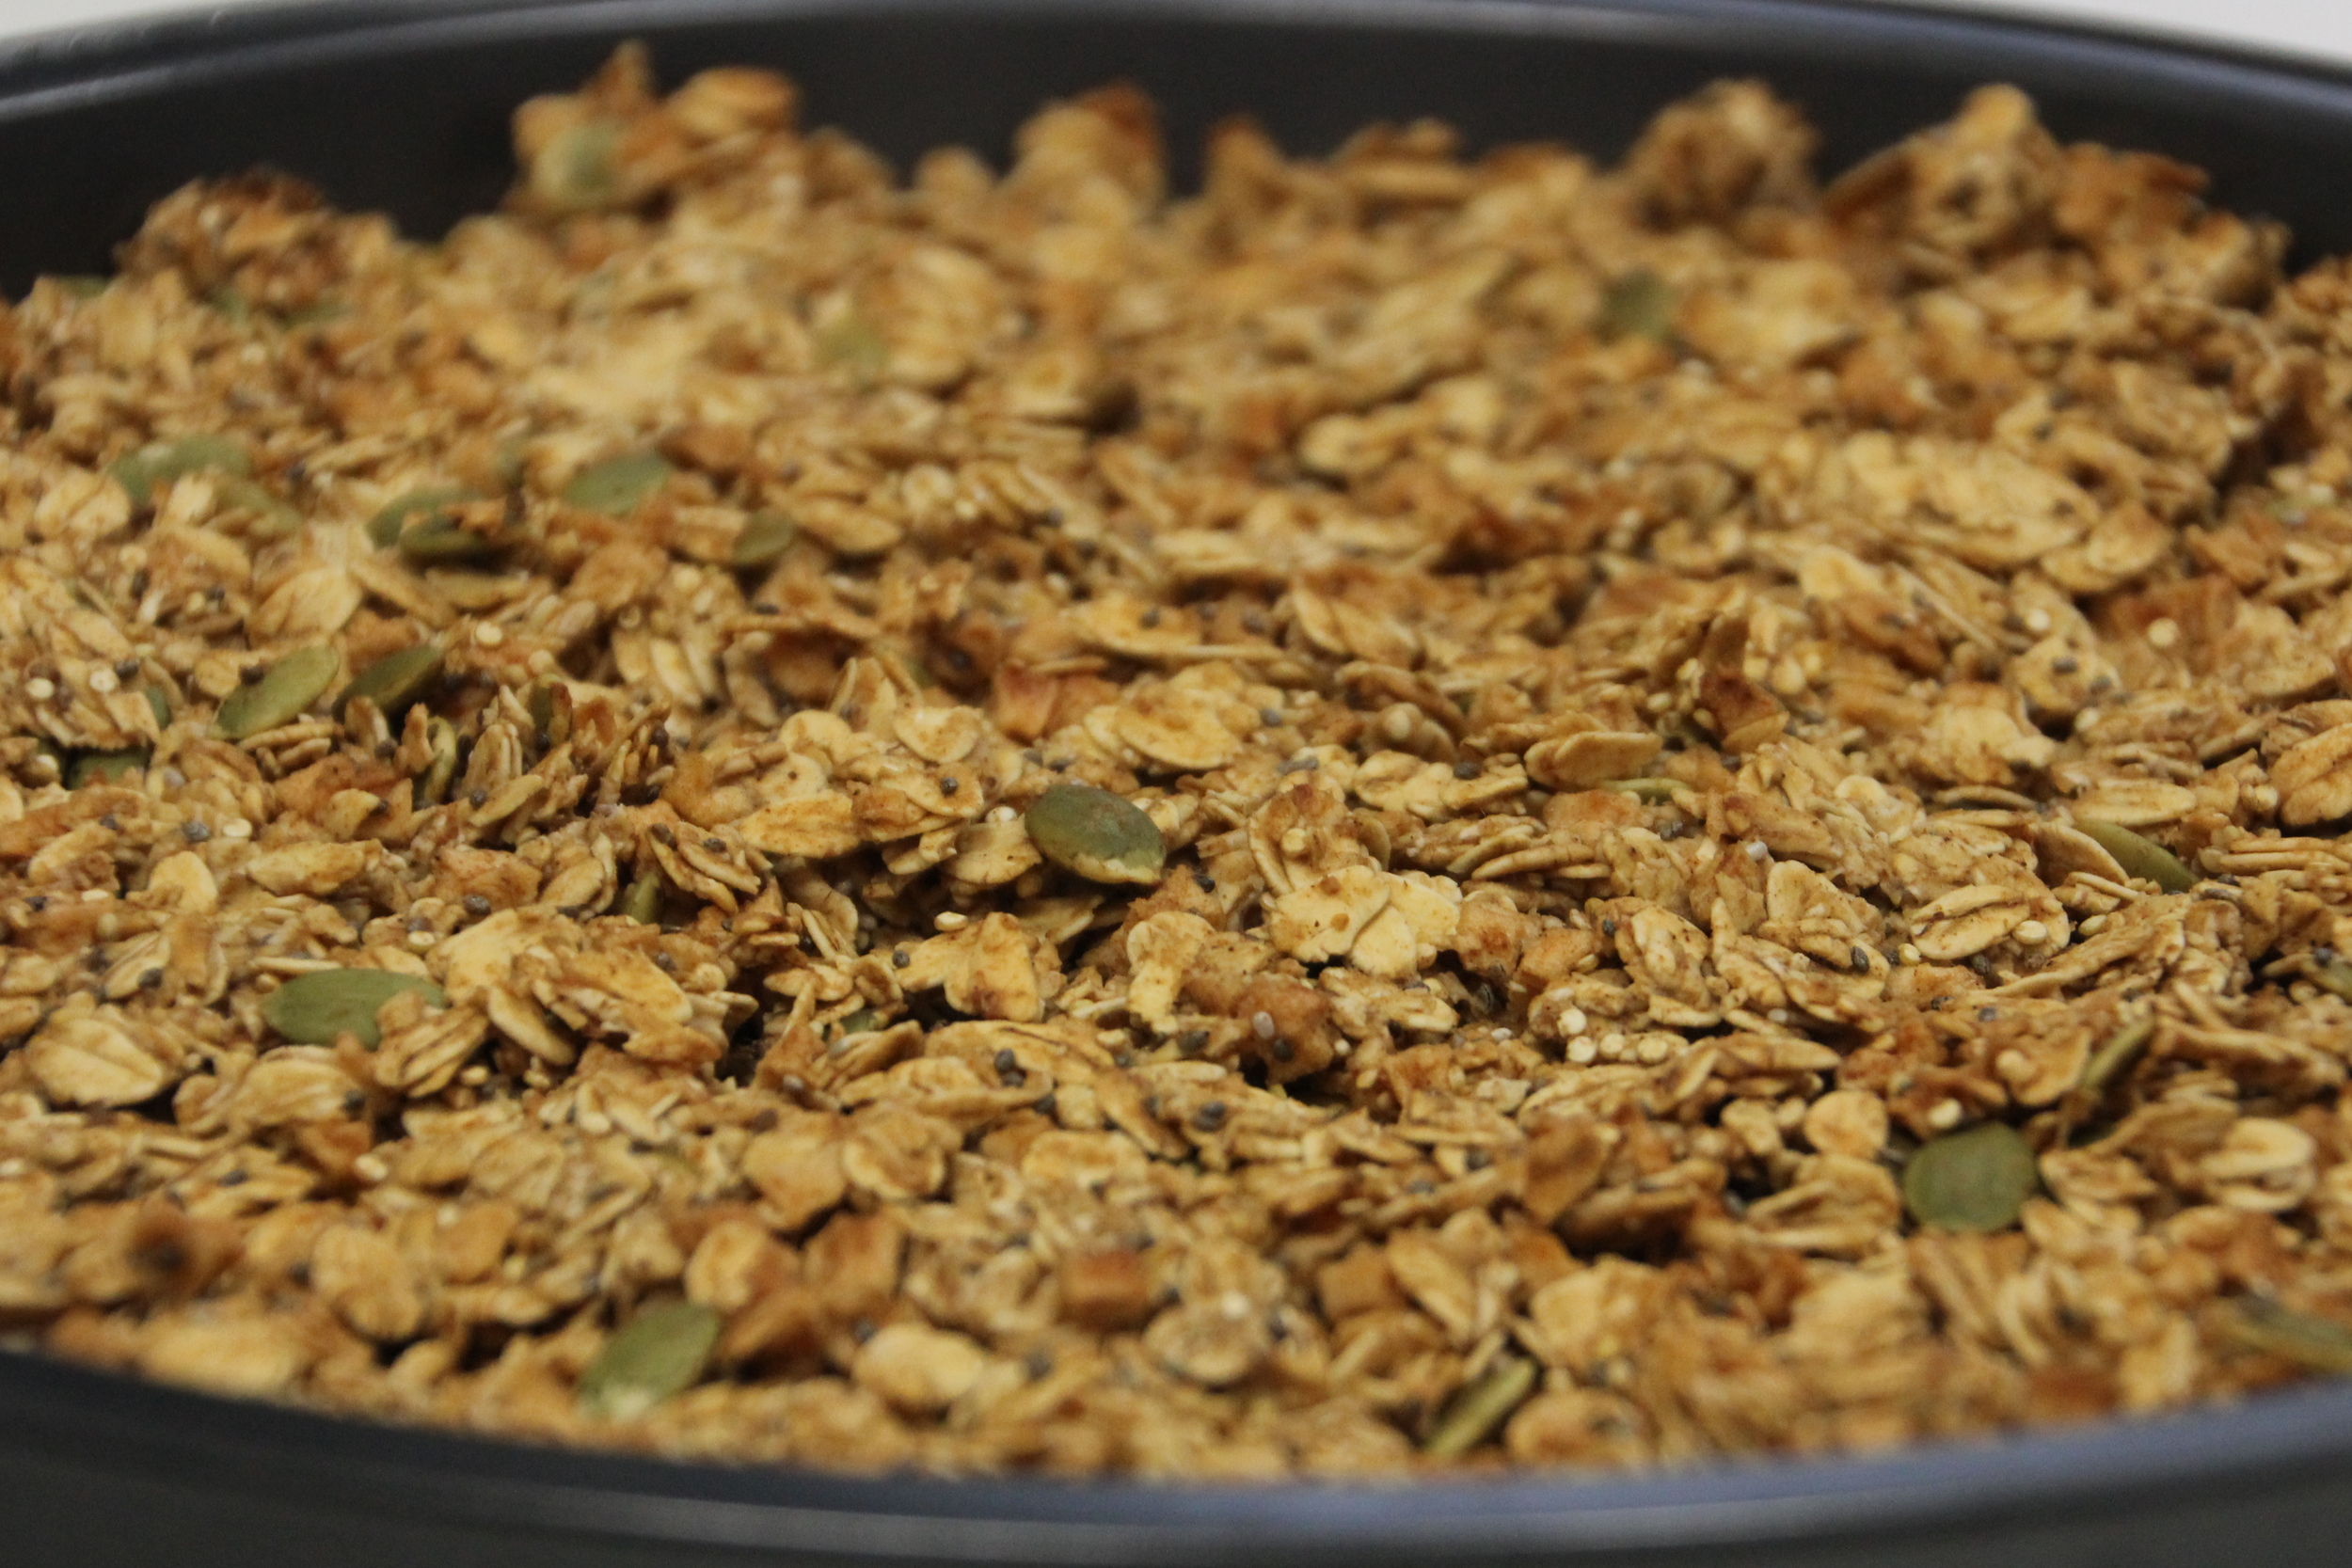
Fall Harvest Granola
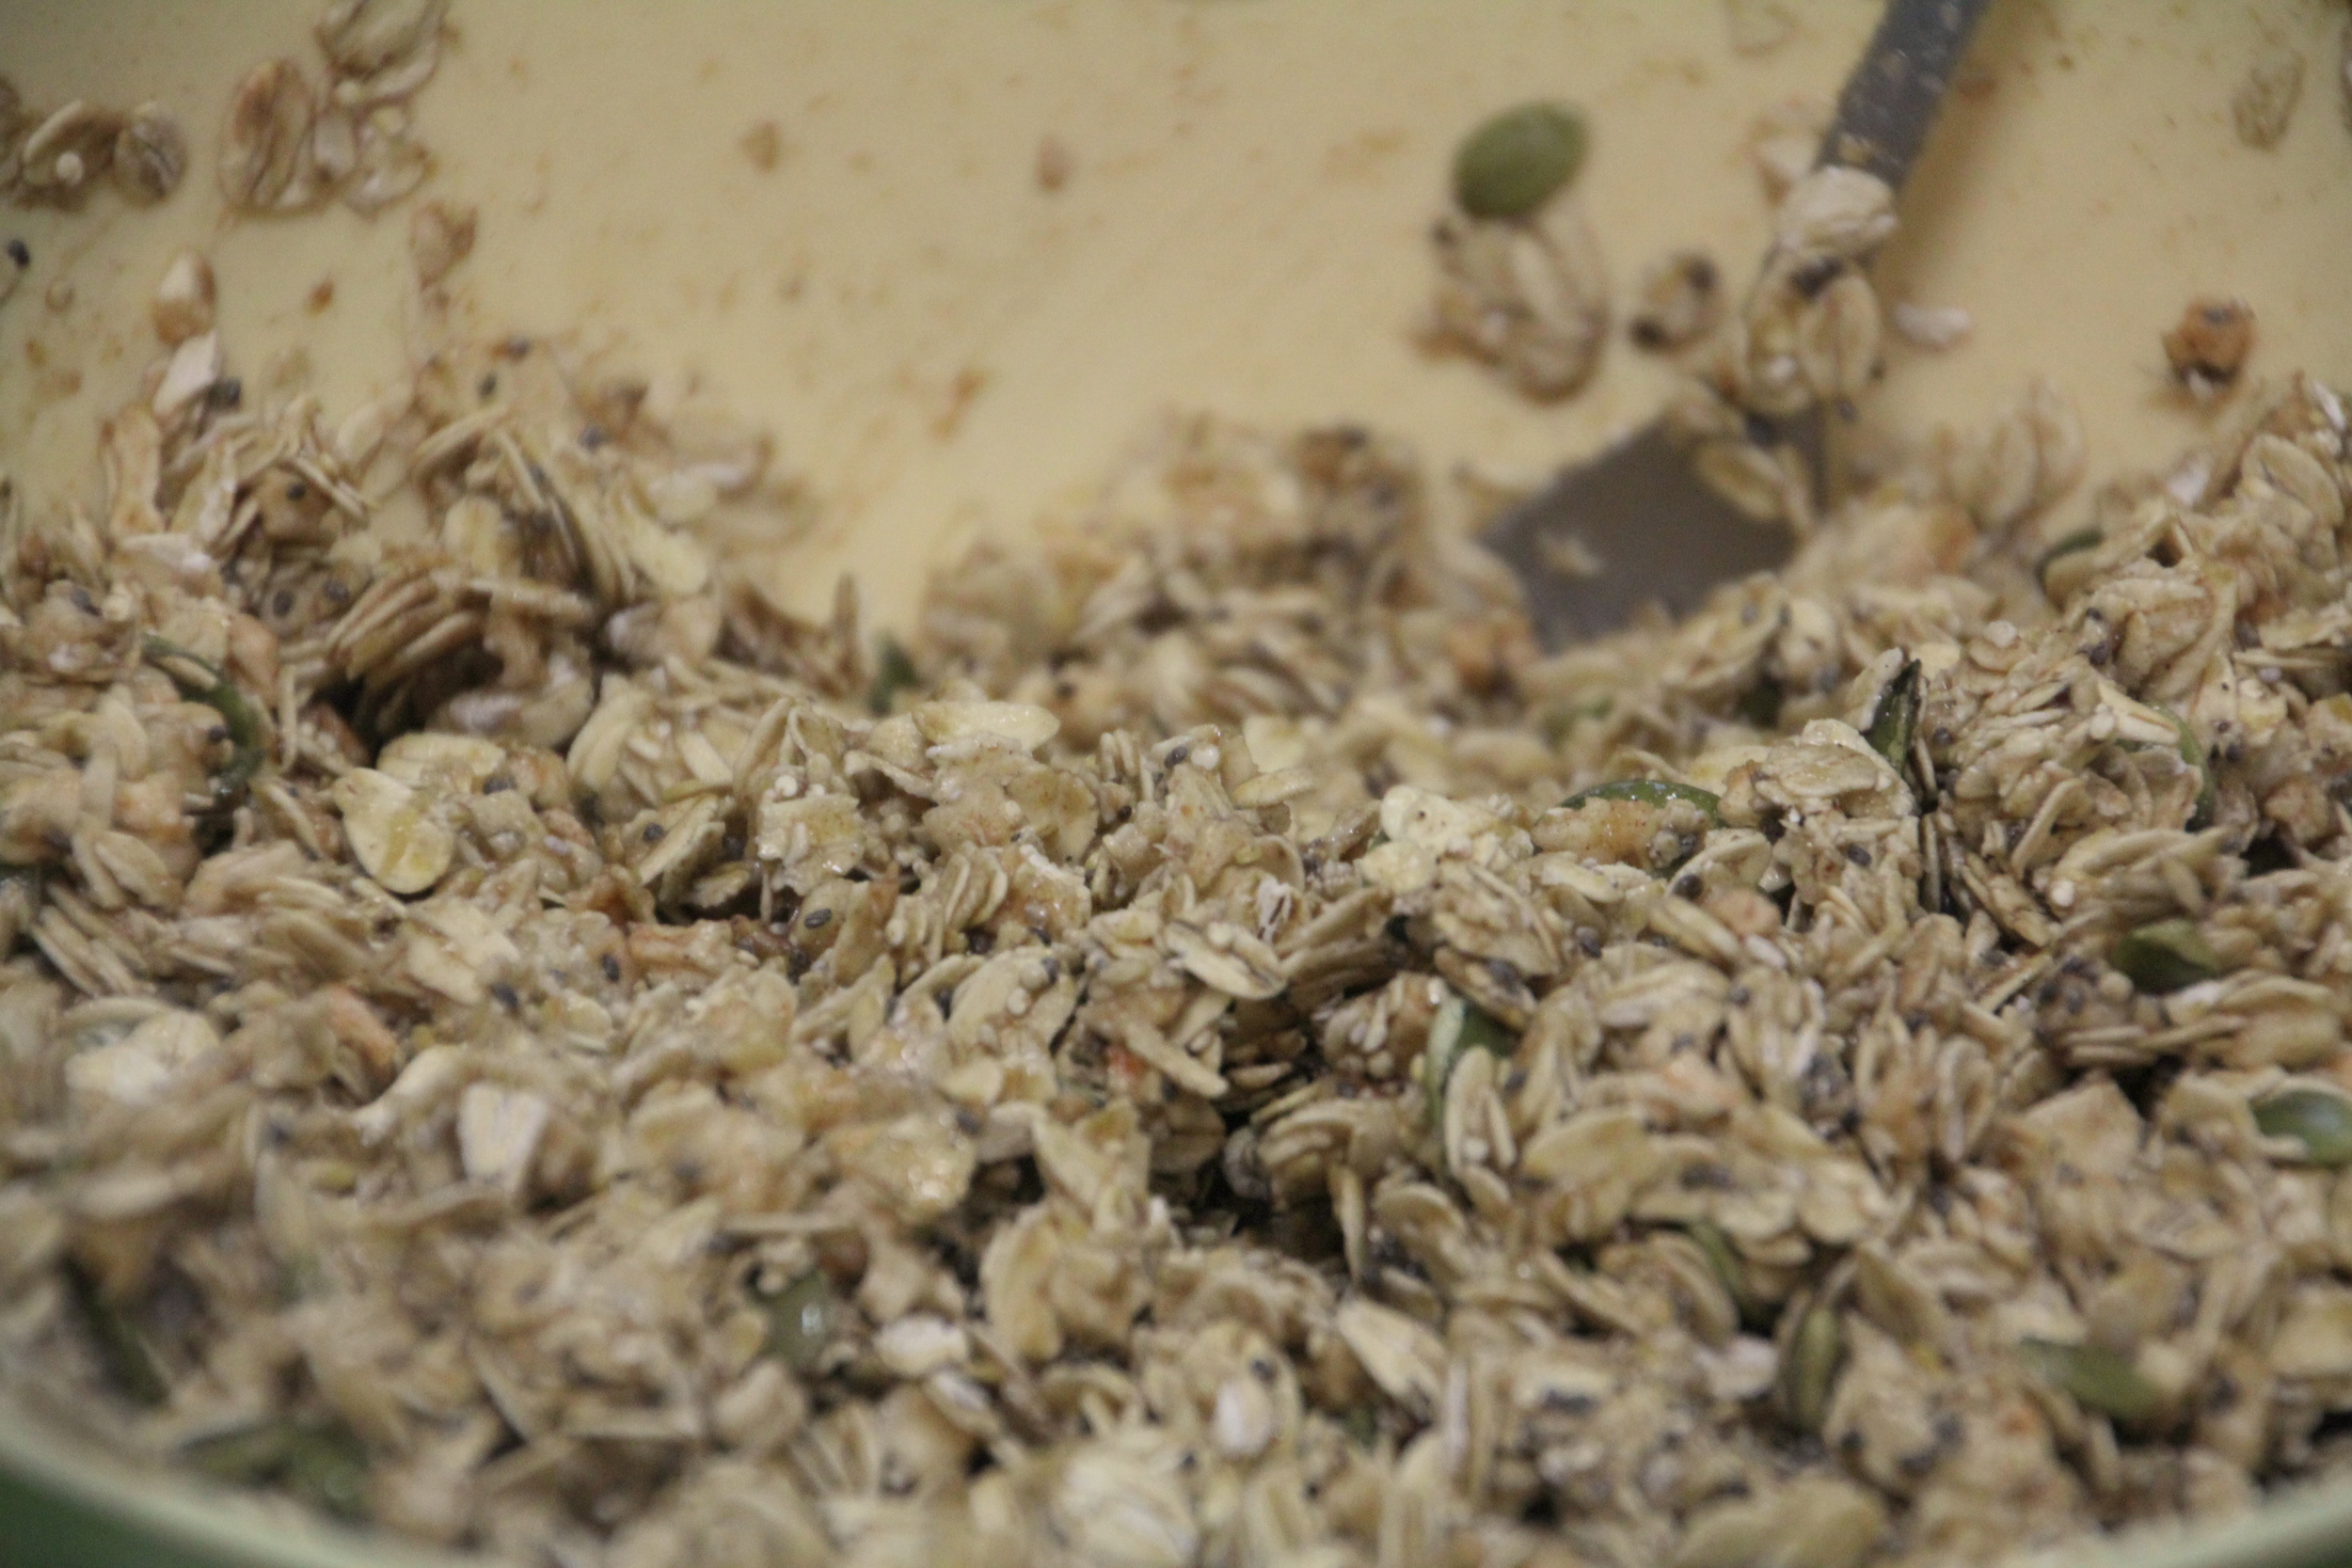
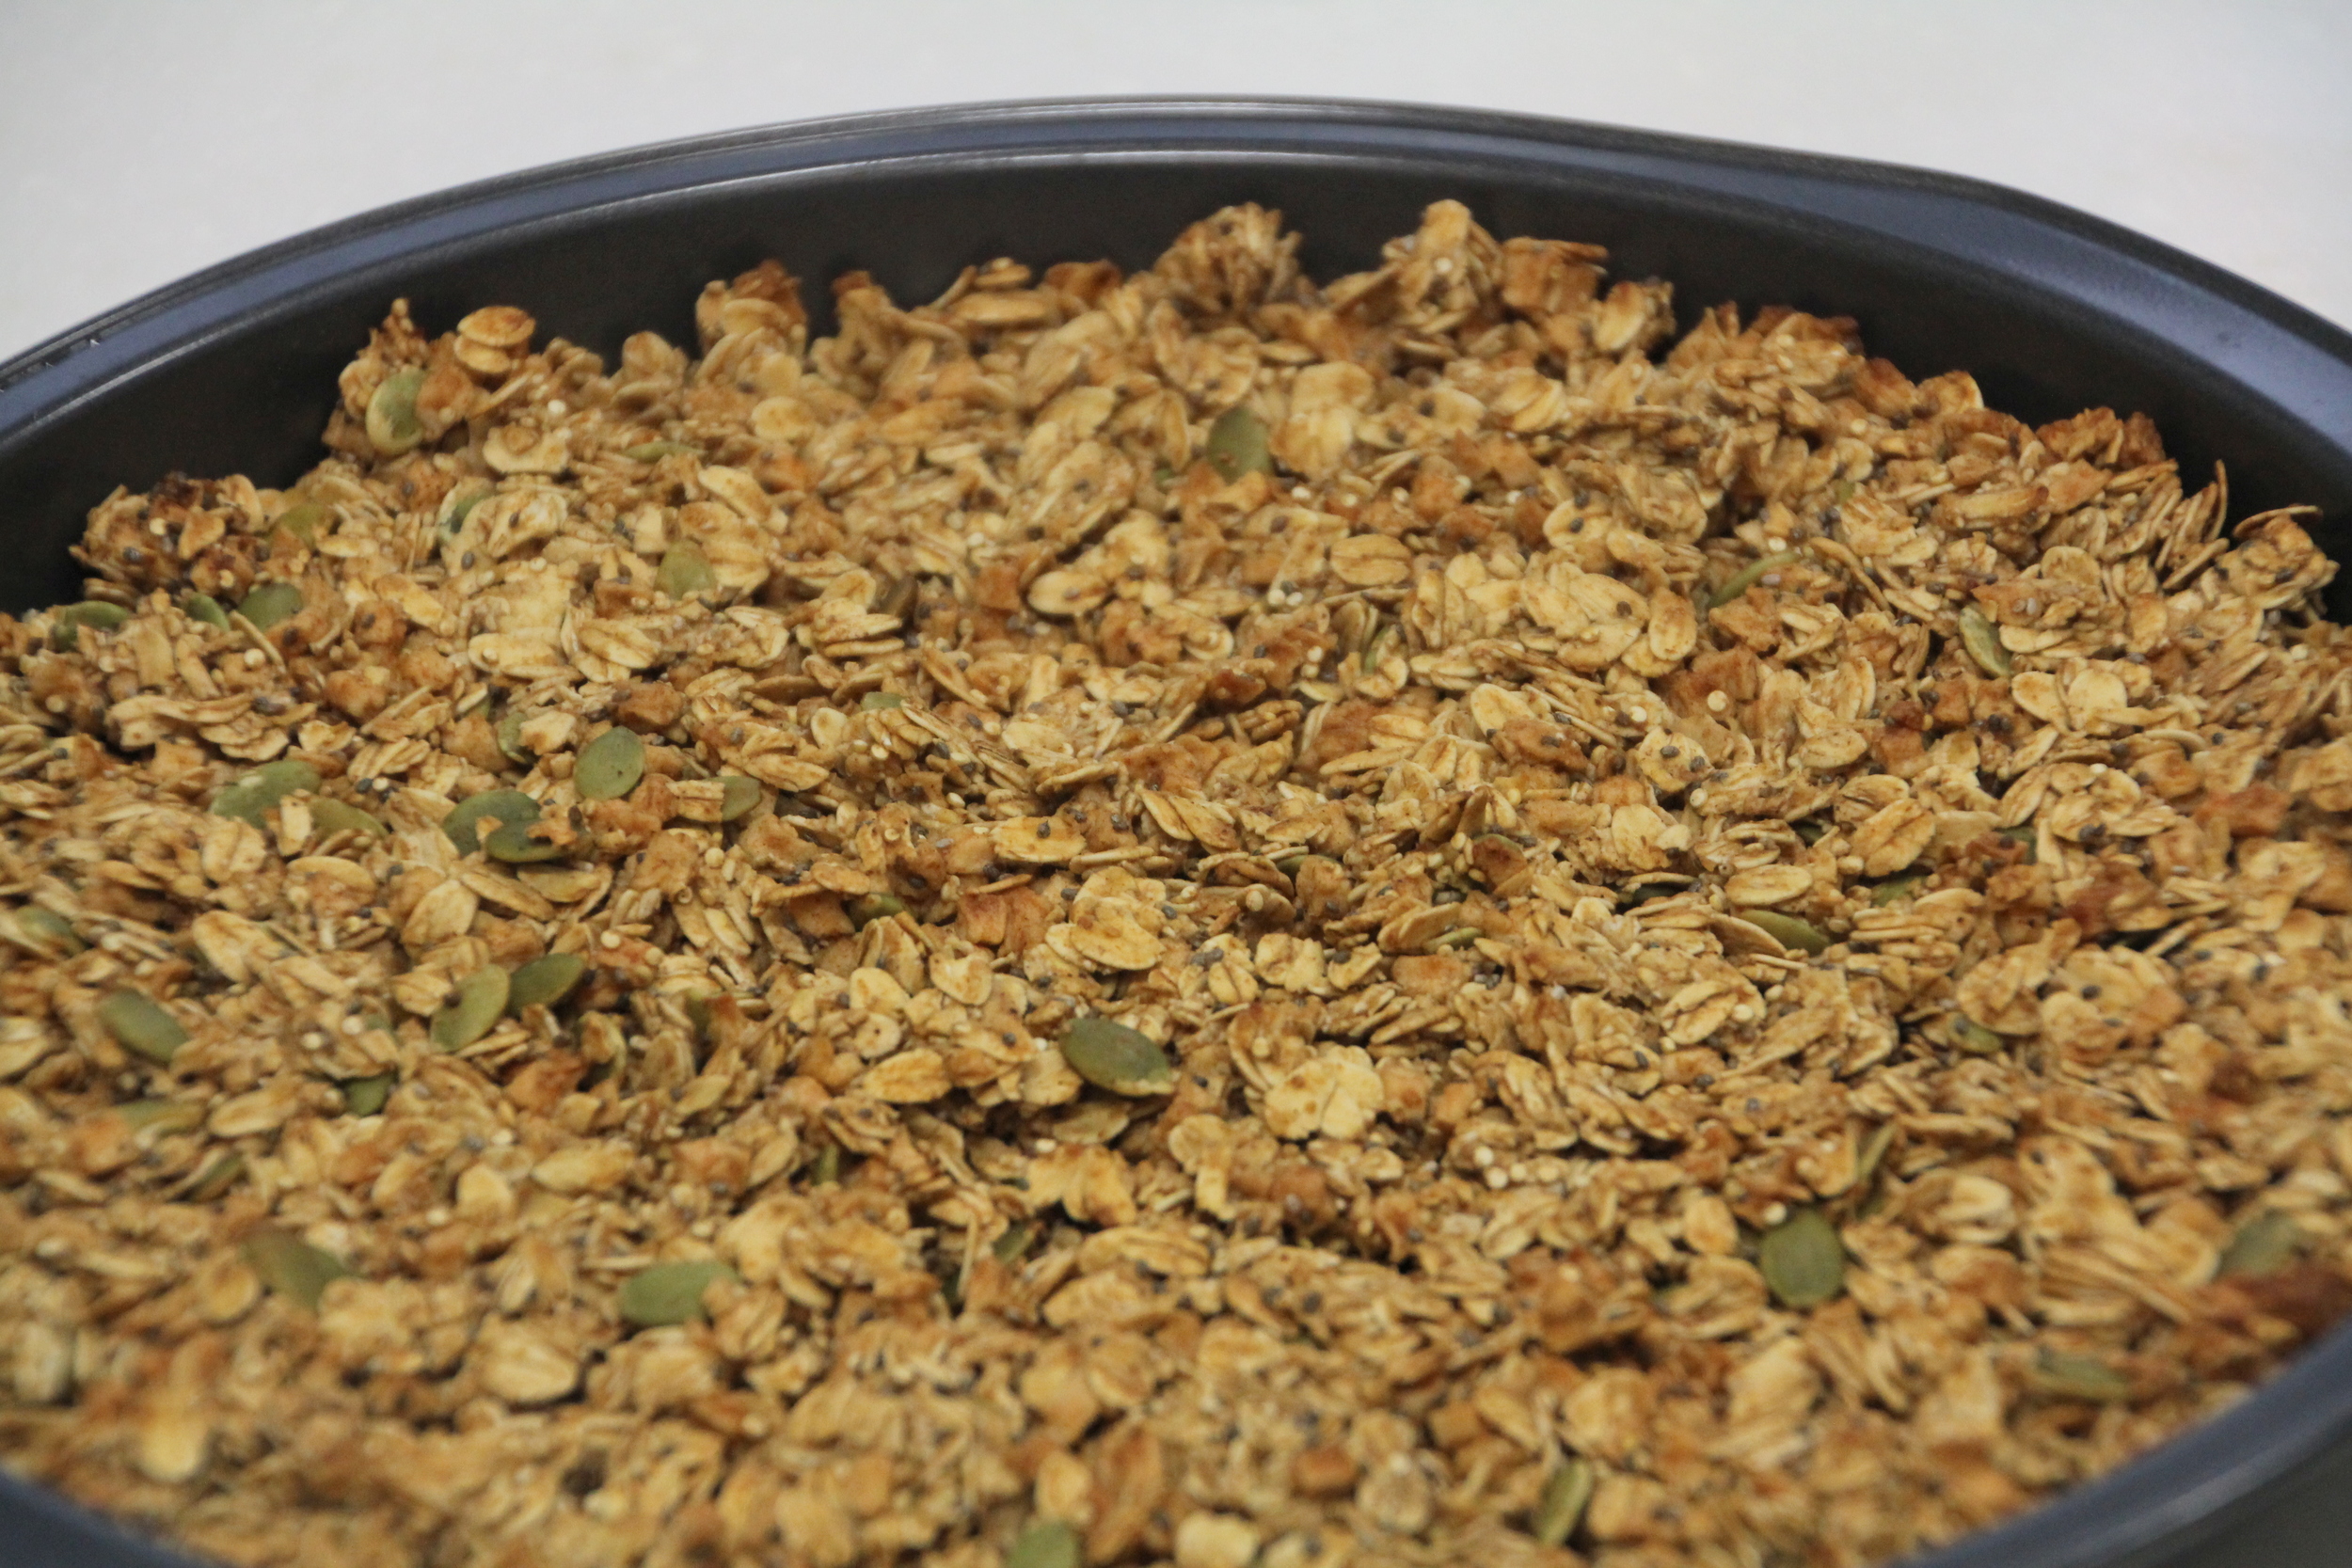
Preheat your oven to 325 degrees, and throw all your ingredients into a bowl. Mix it up really well so you don't have random clumps of cinnamon or chia seeds, and then spread your mixture thin on a cookie sheet or baking pan. Press firmly on the granola to flatten it, and stick it in the oven for 20 minutes (for more detailed instructions and pictures on how to cook granola, click here).
Fall Harvest Granola
Fall Harvest Granola
After 20 minutes the granola should be done. Look for a deep golden color, and then you'll know it's finished. Take it out of the oven and allow to cool completely before breaking it apart into whatever size chunks you desire. Throw it over some yogurt, ice cream, or pour milk over it and enjoy a great bowl of granola! I hope you enjoy it as much as I did. What are your favorite ingredients for granola?
Fall Harvest Granola
Fall Harvest Granola
6 cups gluten free oats
2 cups dehydrated apples
1 cup sliced almonds
1/2 cup shelled pumpkin seeds
1/4 cup quinoa
1/4 cup chia seeds
2 1/2 teaspoons cinnamon (I really like cinnamon, so if this is too much for you decrease the amount)
1 1/2 teaspoon ground cloves
1/2 teaspoon allspice
1/2 teaspoon salt
1 teaspoon vanilla extract
1 cup applesauce
2/3 cup maple syrup
1/2 cup honey
Preheat your oven to 325 degrees, and put all of your ingredients into a bowl. Mix it up REALLY well, and flatten a thin layer into a baking sheet. Cook for 20 minutes, or until it's a deep golden brown. Let cool completely, break into chunks, and enjoy!
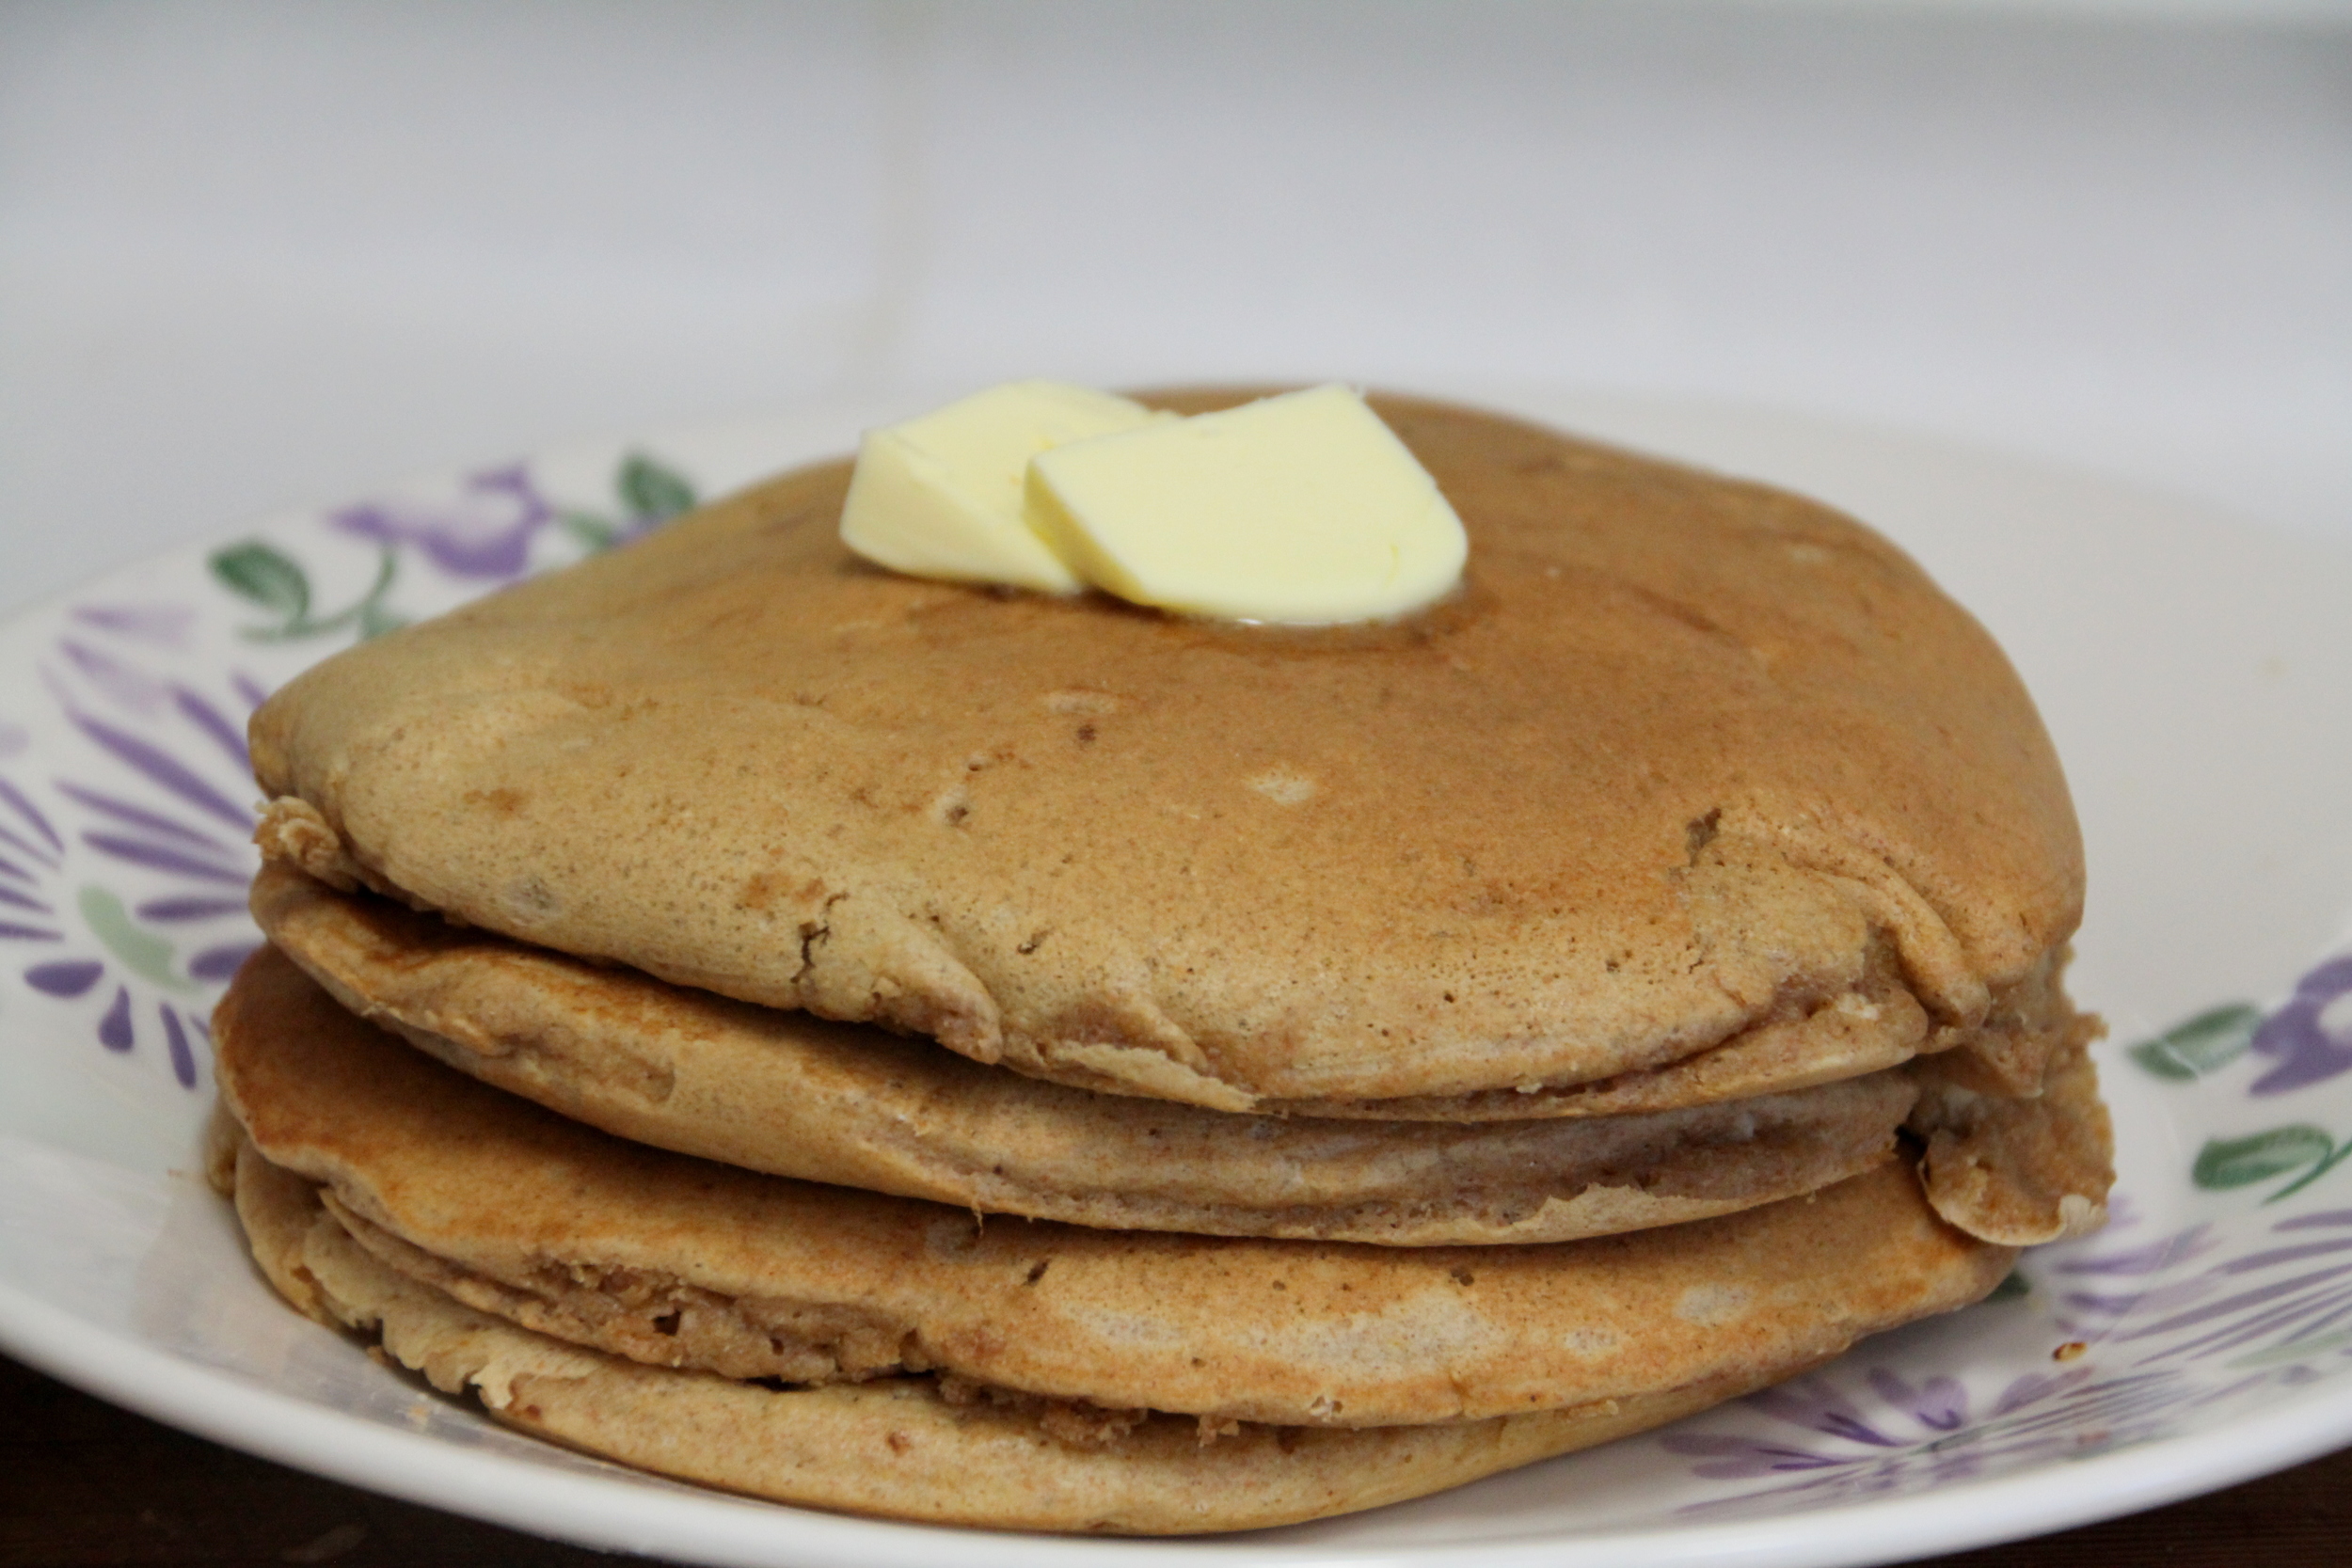
Whole Wheat Apple Pancakes with Vanilla Cinnamon Maple Syrup

Whole Wheat Cinnamon Apple Pancakes-1
I'm usually aching to start the Christmas season early in October, however here in Gwangju the Fall weather just set in last week, and the only hint of Christmas you'll find is at Starbucks (yes, they sell Christmas drinks here as well, much to my delight!). I'm still in "Fall recipe" mode, although I will admit I listened to some Christmas music while I was making these incredible pancakes. While these pancakes scream "Autumn" with the apples-cinnamon combination, they would truly be good any time of the year. Simple, healthy ingredients make this a hearty breakfast that will keep you full for a good while.

Apple cinnamon pancakes with vanilla cinnamon syrup
Combine these pancakes with the warm maple syrup infused with vanilla and cinnamon, and you've got a breakfast that will have your family running to the table! To whip these babies up, grab the following ingredients:
For the pancakes:
1 cup whole wheat or white whole wheat flour
1 cup milk
1 medium apple, chopped in small pieces
1 teaspoon cinnamon
1/2 teaspoon vanilla extract
1 egg
1 Tablespoon butter, melted
2 teaspoons baking powder
For the maple syrup:
1/2 cup pure maple syrup
1 teaspoon cinnamon
1 teaspoon vanilla extract

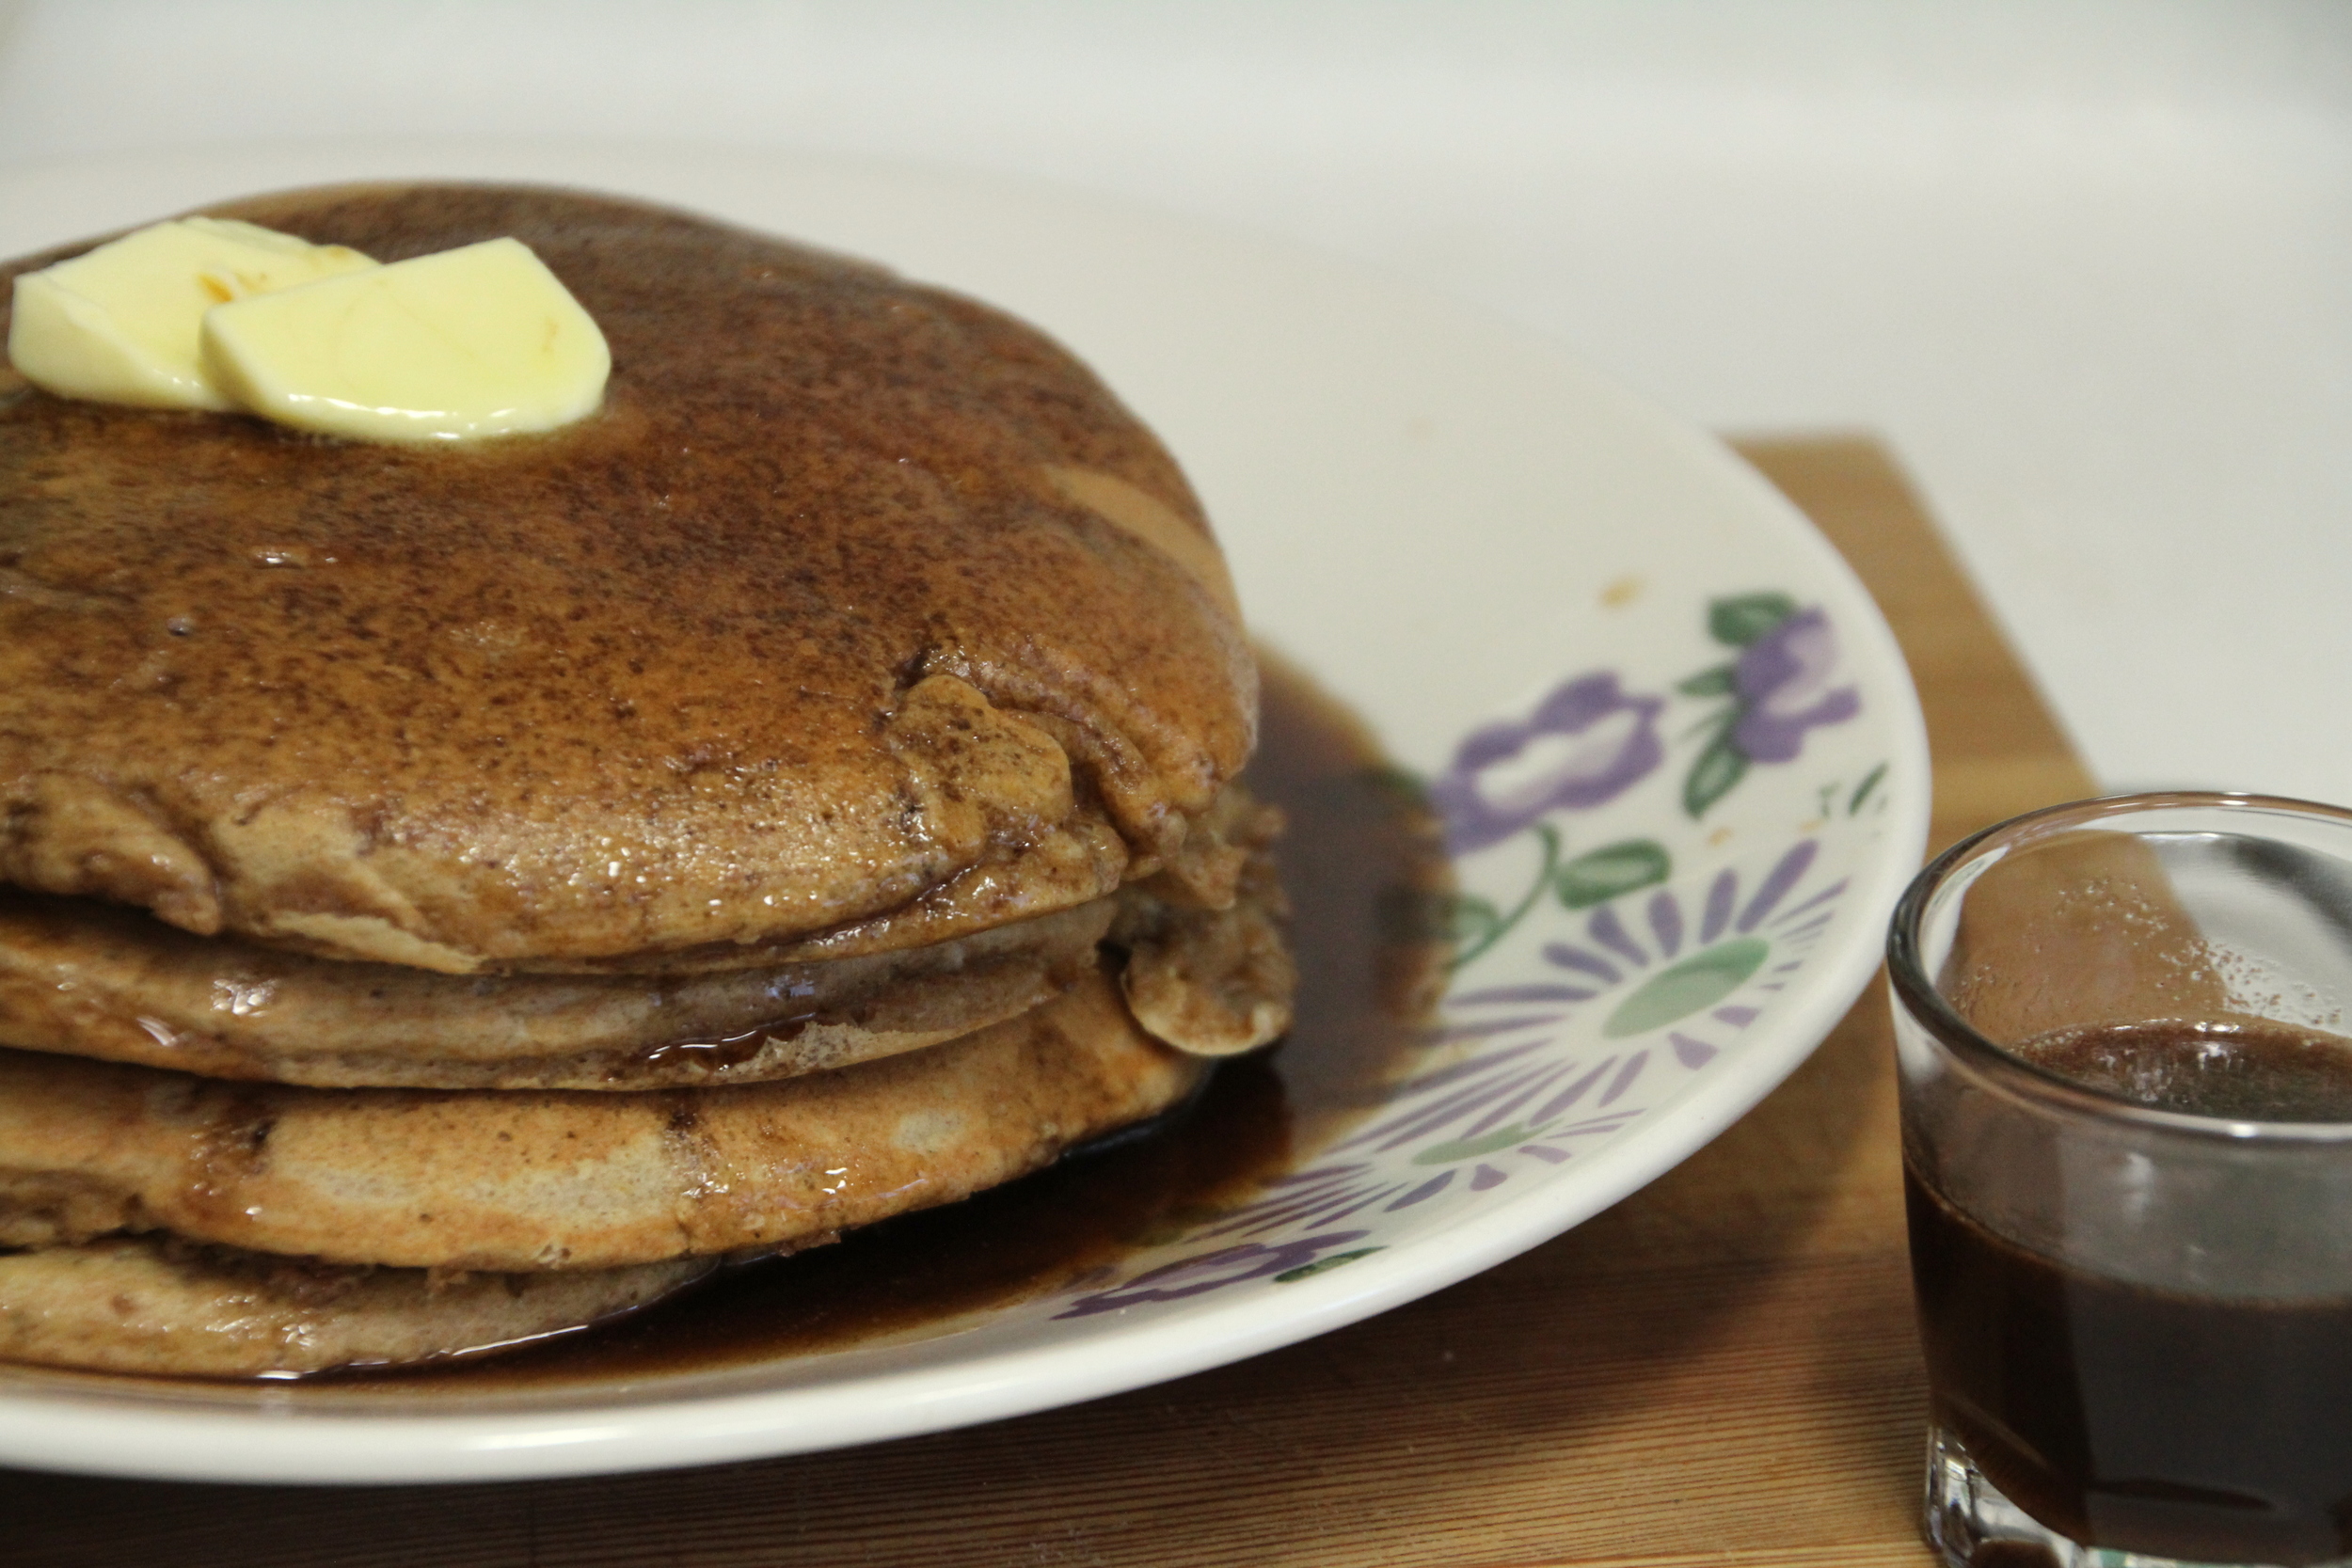
Apple cinnamon pancakes with vanilla cinnamon syrupIMG_0475
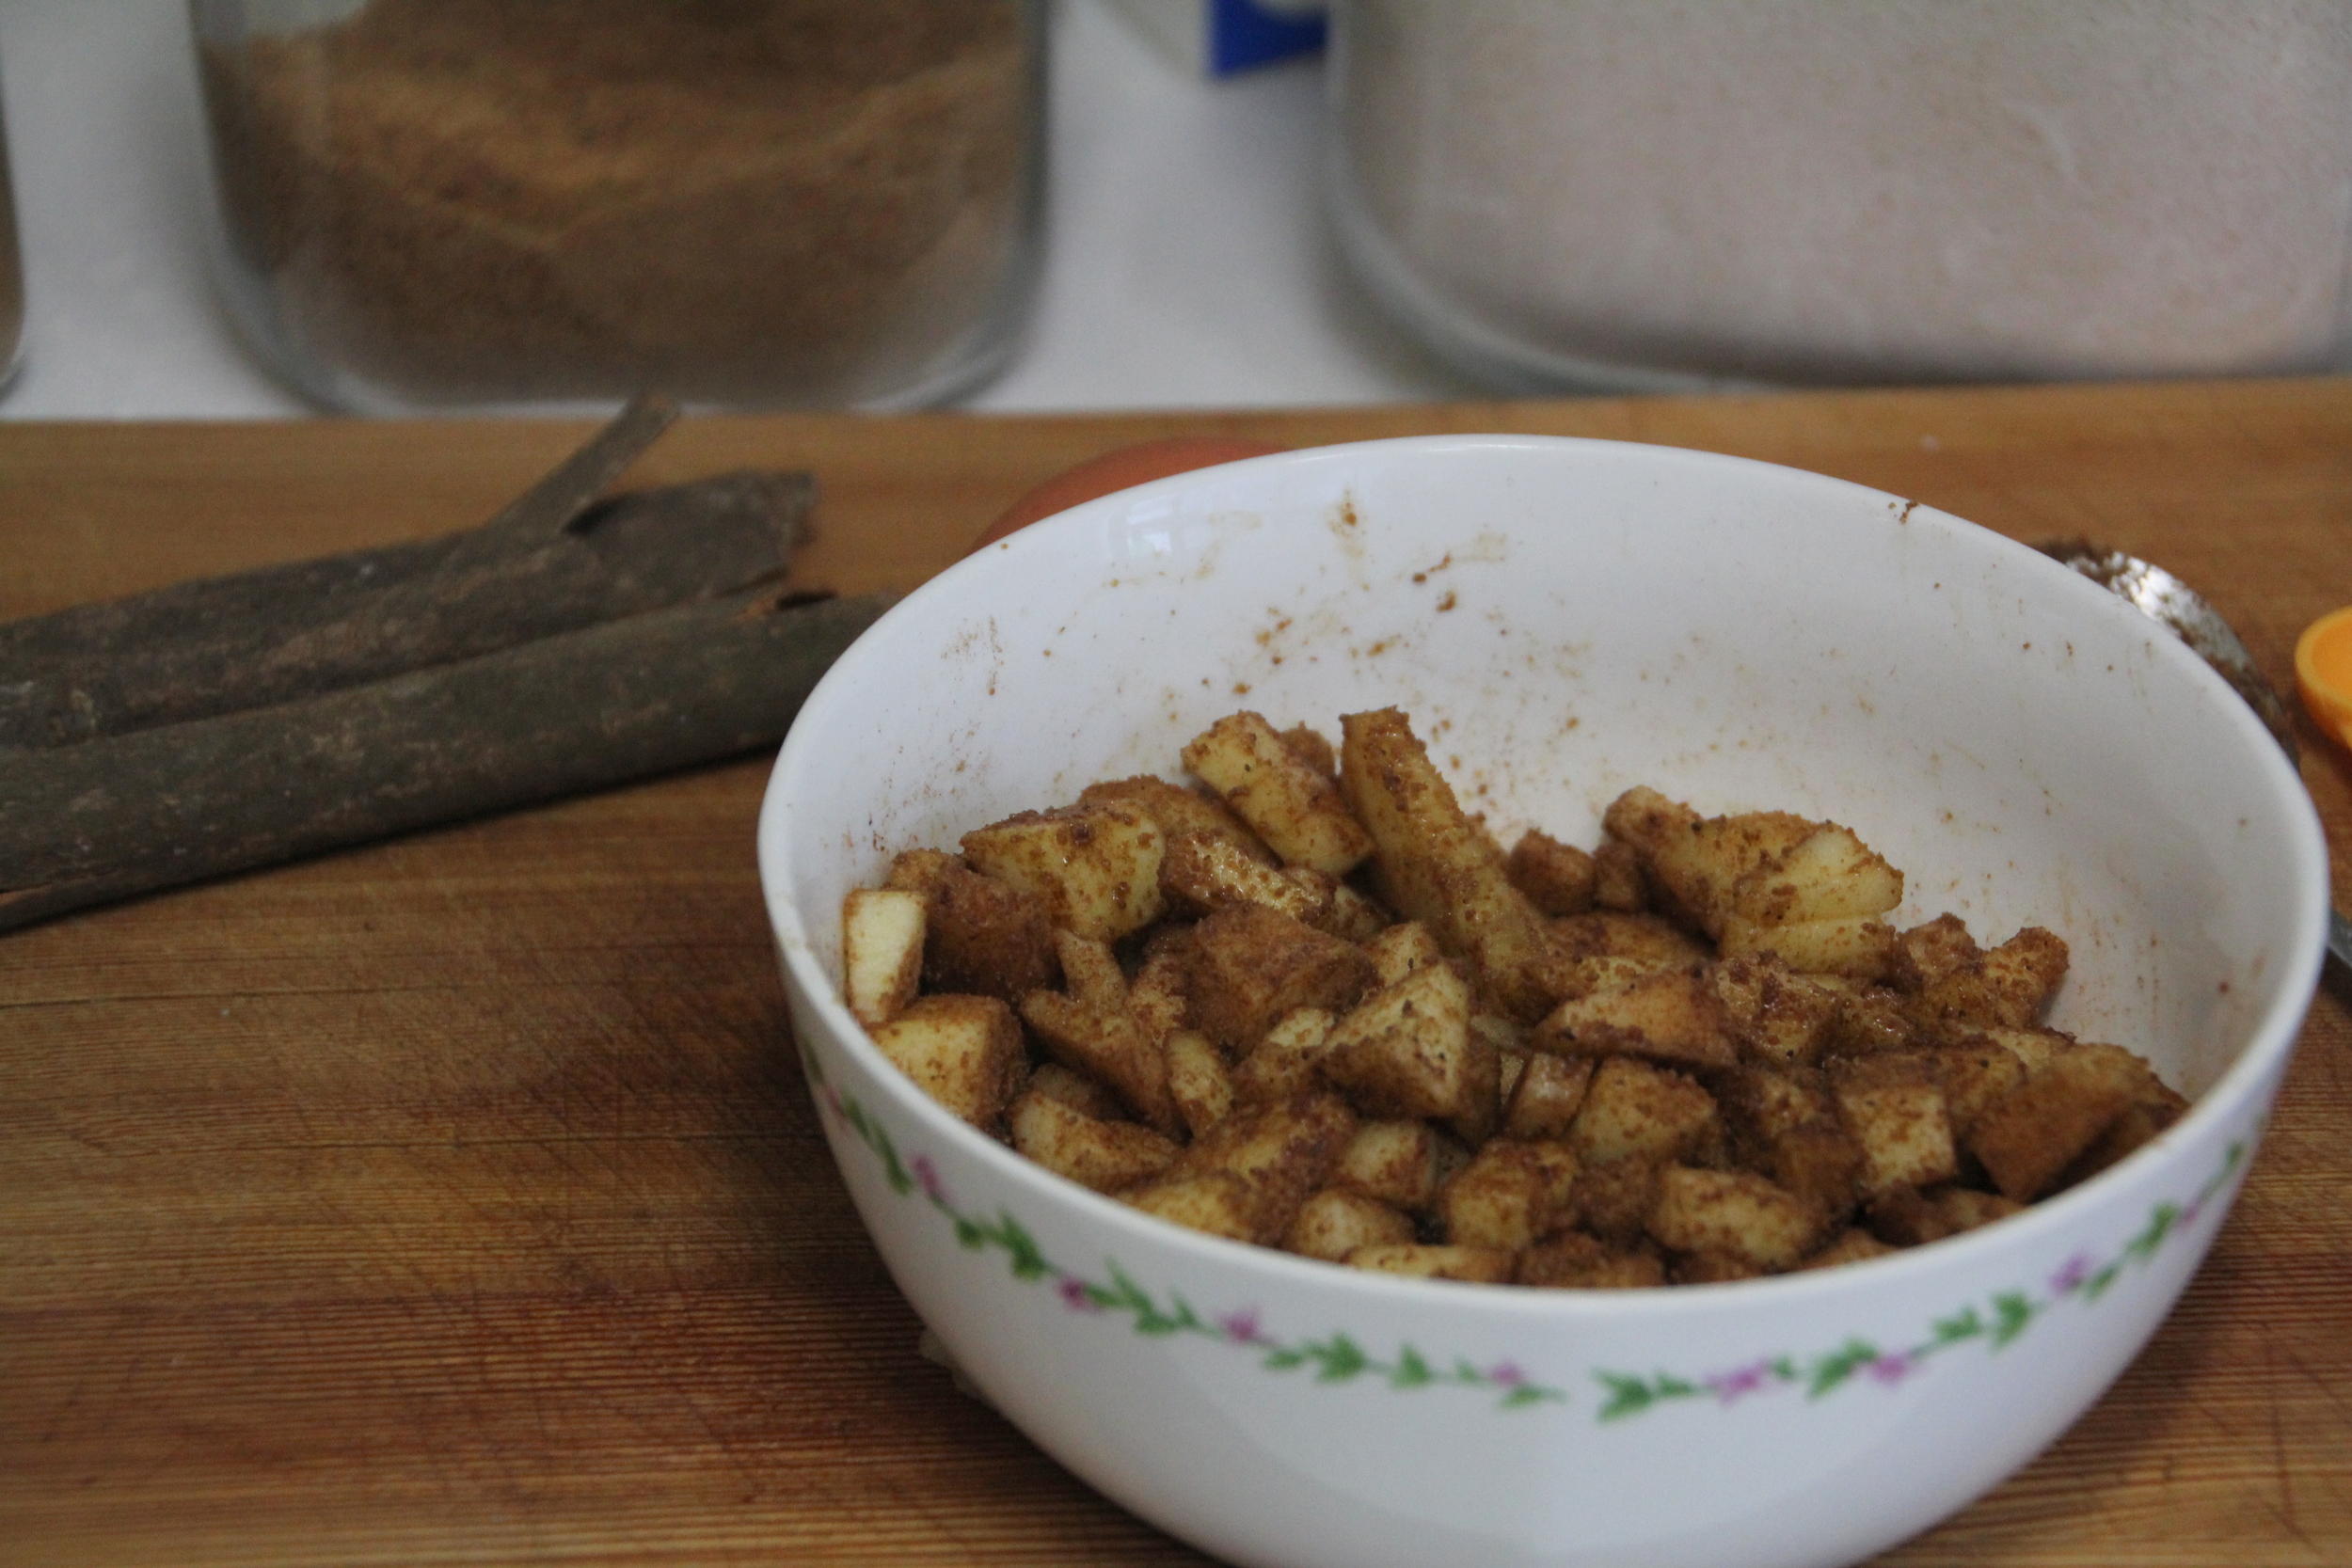
Chop up your apple into small pieces, and add in your vanilla extract and cinnamon. You can also throw in some cloves, nutmeg, or allspice if you wish! Mix up the apples until they are well coated, and set them aside.
Apple cinnamon pancakes with vanilla cinnamon syrup
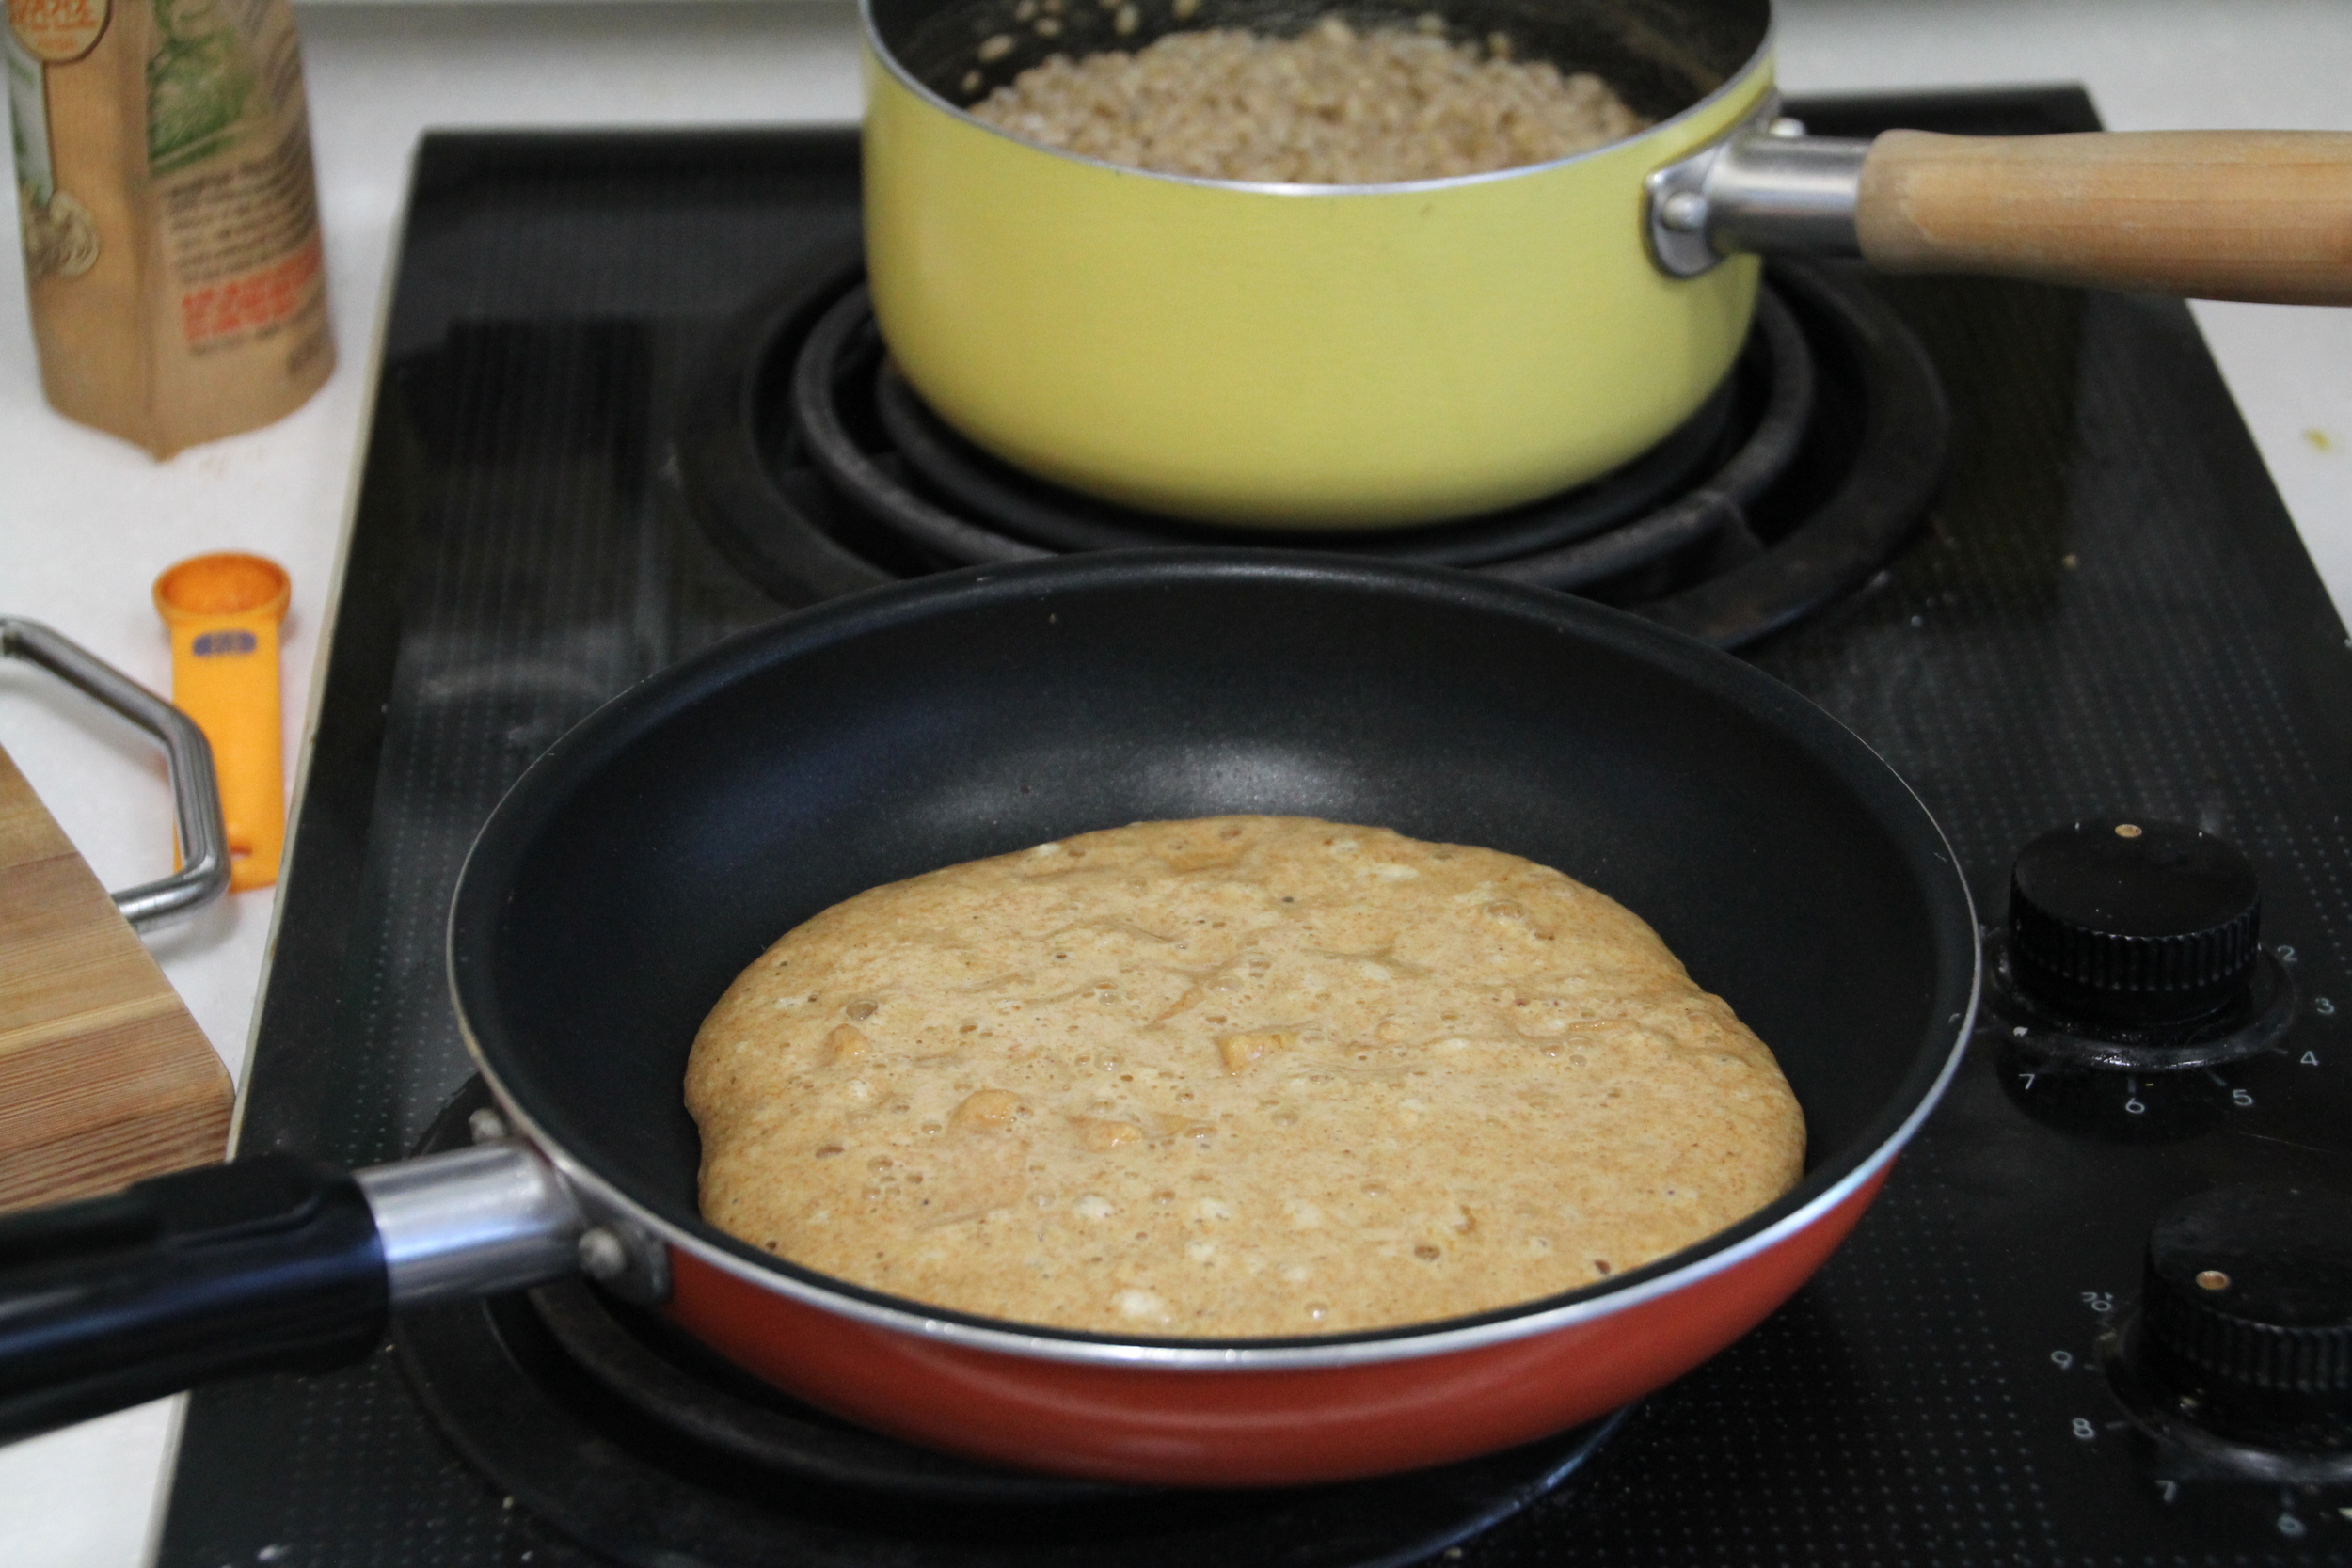
Put the other ingredients in a mixing bowl and stir until well-combined. Gently mix in the apples while you heat up a non-stick frying pan. I like to add a spot of butter in the pan, but it's not neccessary. One of my biggest mistakes is turning up the heat too high on the frying pan, therefore scorching my pancakes. I've found the best way to get perfect pancakes is to slowly heat the pan over medium heat, and then after the first couple of pancakes I drop the heat again since the pan has gotten pleanty hot by this time.
Apple cinnamon pancakes with vanilla cinnamon syrup
Don't mind the barley in the background. I cooked some up this morning for the awesome fall salad we're going to have tomorrow!

Apple cinnamon pancakes with vanilla cinnamon syrup
You'll know the pancake is ready to flip when there are a lot of bubbles on top, and you can firmly get your spatula underneath of it. Flip it, and let it cook for a couple more minutes. I wish I could give you an exact time frame, but it all depends on the kind of flour you use, how hot your pan is, and what type of stove you have. This batch of pancakes should make about 4 medium pancakes, more if you make them smaller. Since they have apple and are made with whole wheat flour, these things are incredible filling! As soon as they are finished, set them aside and whip up your maple syrup, which will only take about 2 minutes! I let some butter melt on my pancakes while I fixed the syrup.
Apple cinnamon pancakes with vanilla cinnamon syrup
In the same pan you cooked the pancakes in, turn off the heat and pour in your maple syrup, vanilla, and cinnamon. Turn the heat on to medium and whisk consistently for 2 minutes.

Apple cinnamon pancakes with vanilla cinnamon syrup
Pour over your warm pancakes, and dig in!
Apple cinnamon pancakes with vanilla cinnamon syrup

Apple cinnamon pancakes with vanilla cinnamon syrup
What are your favorite things to add to pancakes?

Apple cinnamon pancakes with vanilla cinnamon syrup
Can't get enough cinnamon? Check out these other cinnamon recipes:

Cinnamon-Fried Bananas

vanilla cinnamon whipped body butter

homemade granola

cinnamon roll coffee creamer

Pumpkin Spice Latte
DIY Extracts
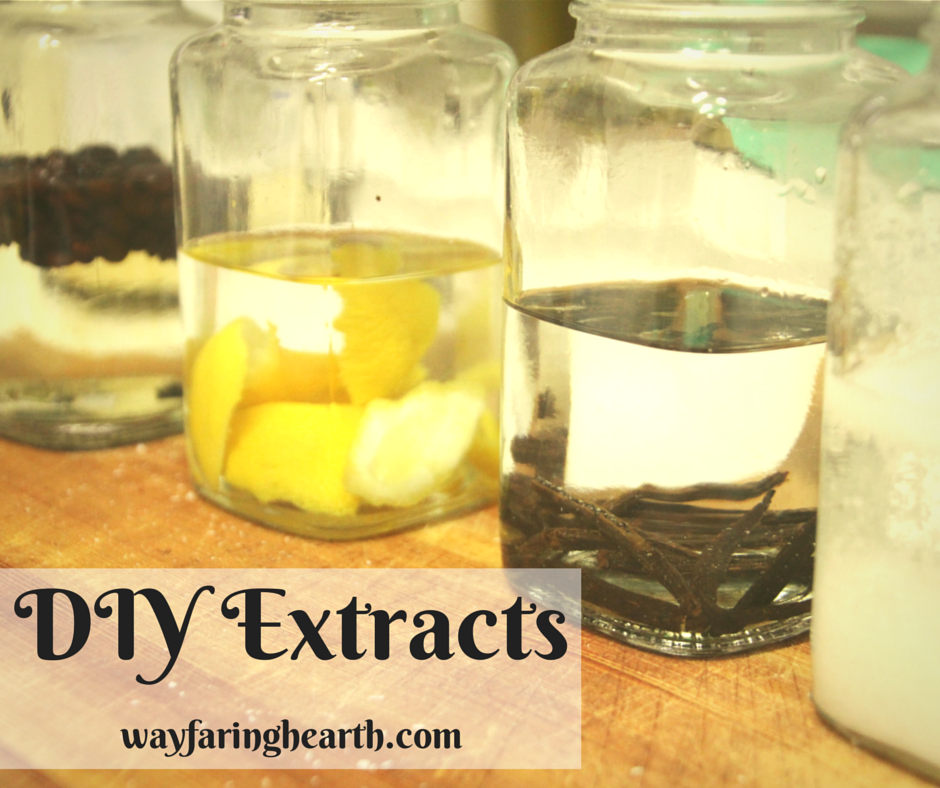
DIY Extracts
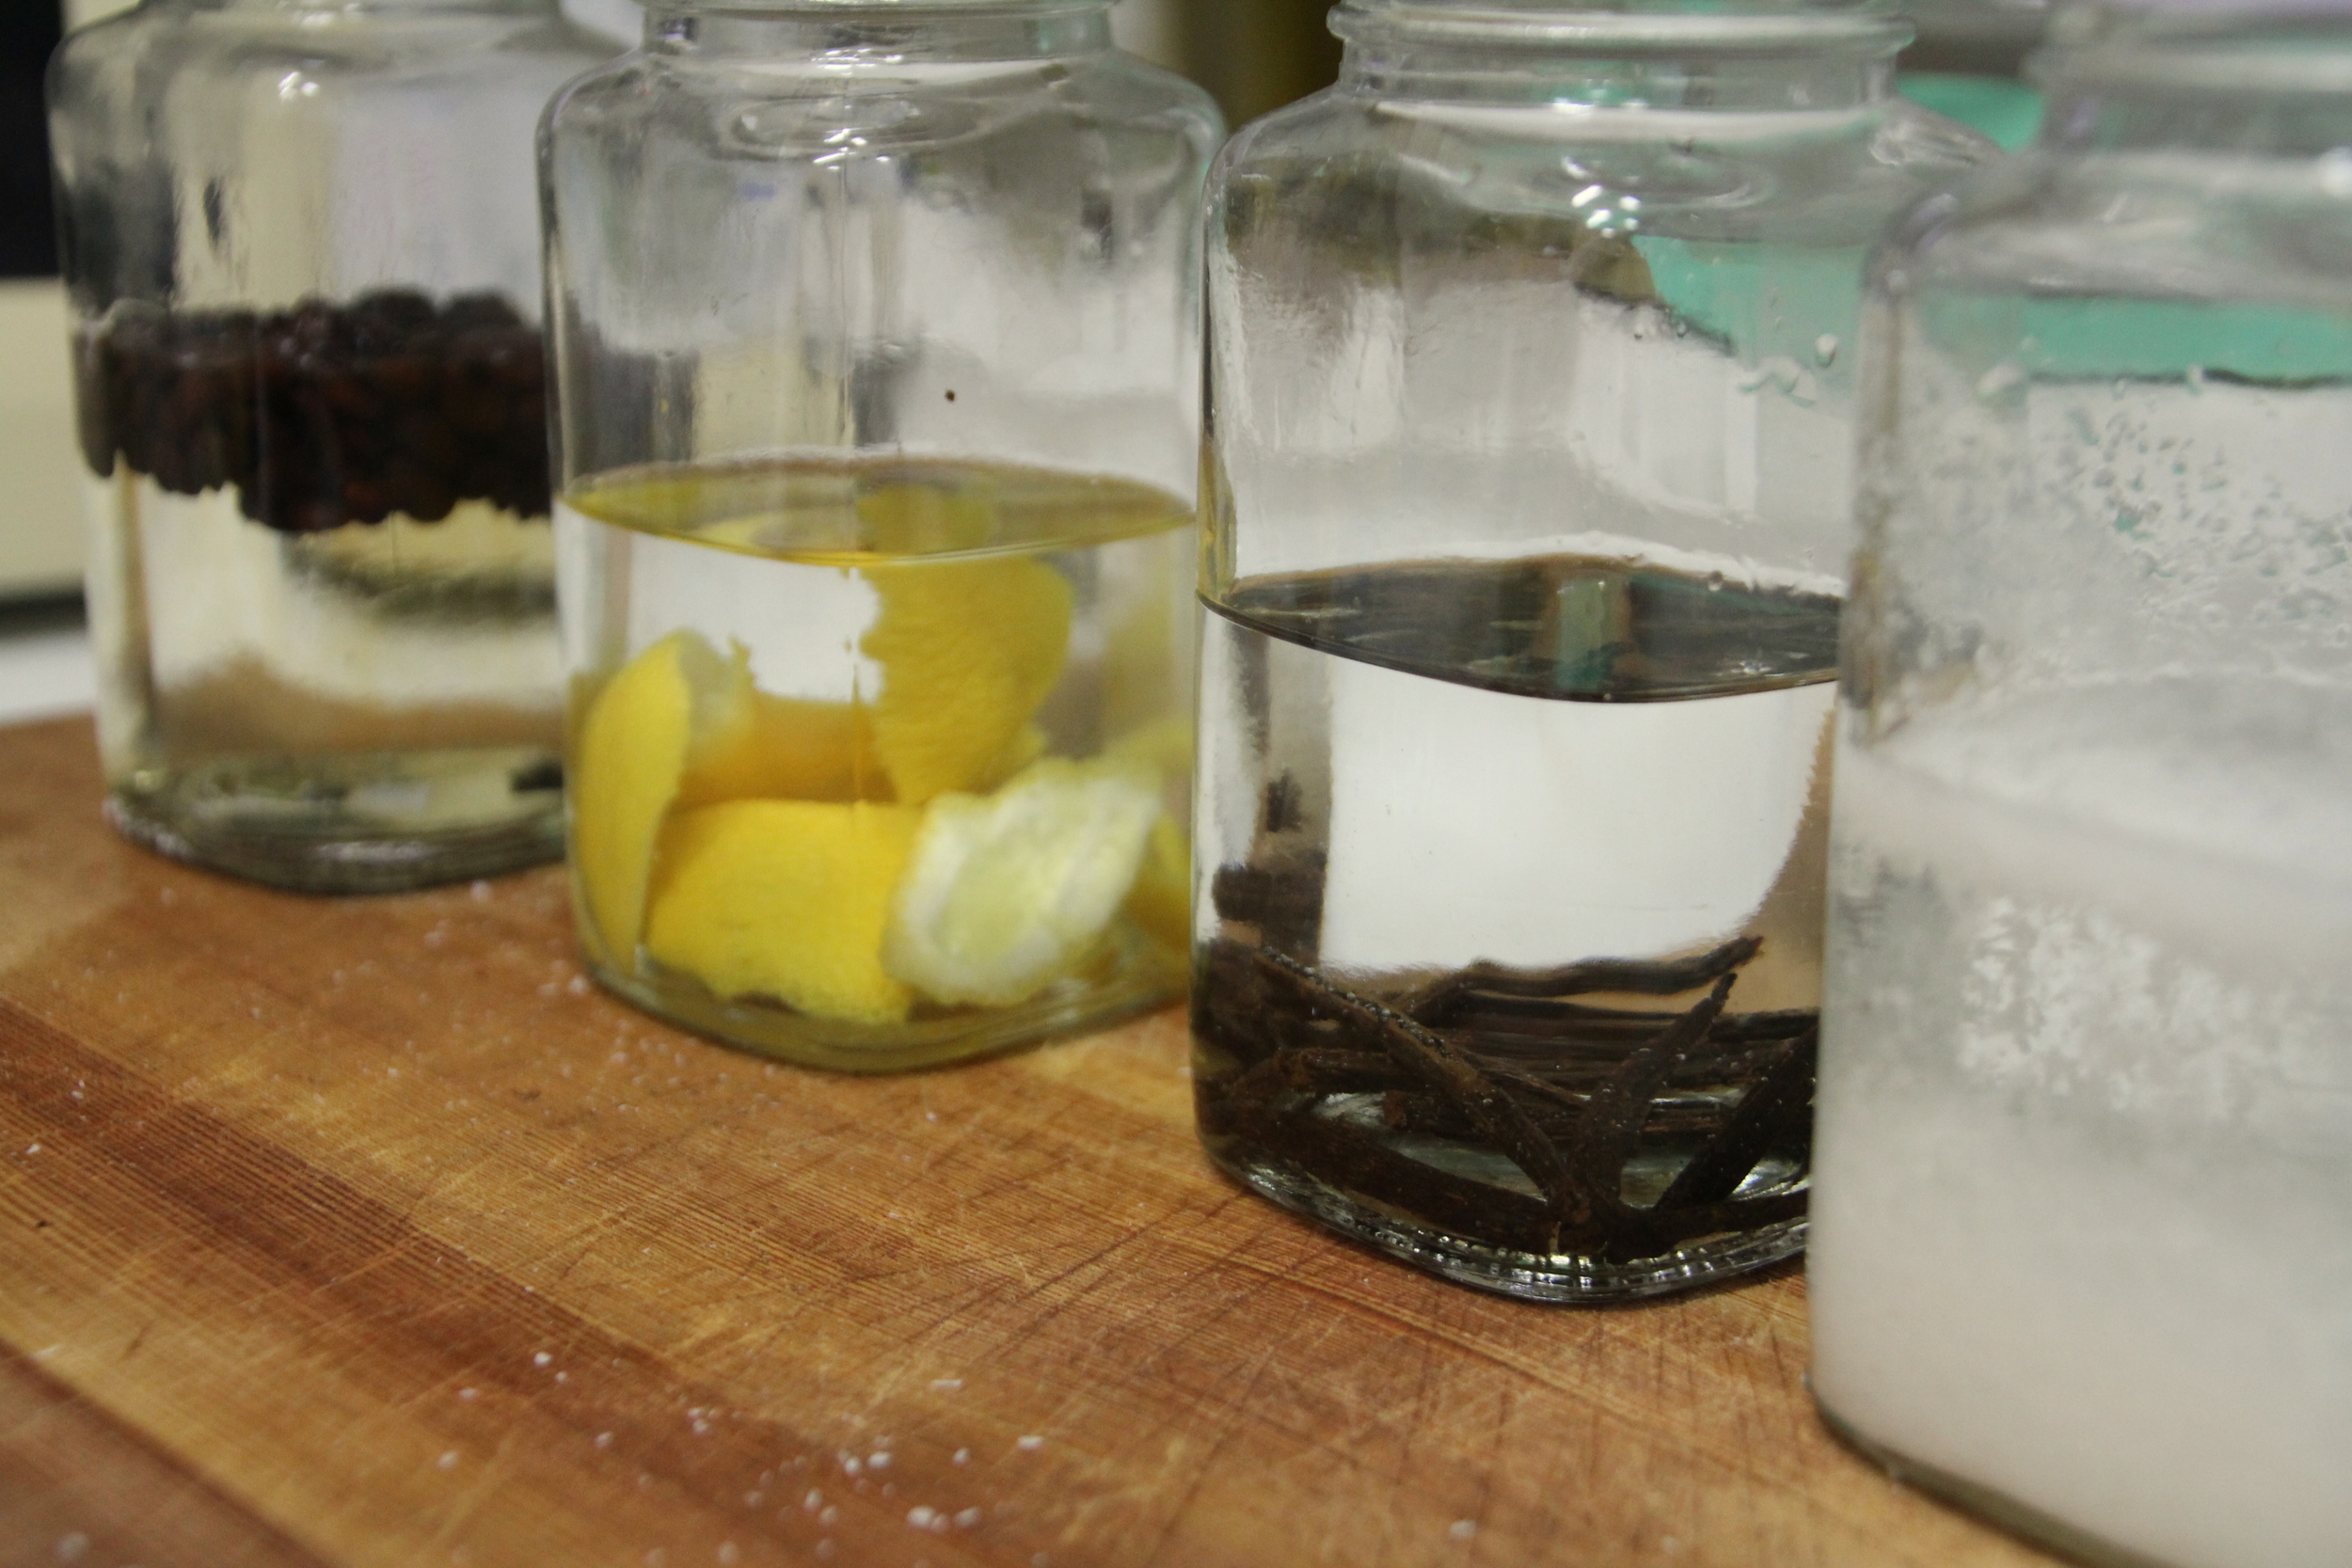
My love for baking and homemade lattes has greatly increased my collection of extracts, but have you seen the prices of pure extracts? Yikes! There is no way I will spend that much money on a tiny little bottle, when I use my extracts (especially vanilla) so often.

DIY extracts
"Vanilla Imitation" does NOT count by the way. My love for saving money, making things at home, and knowing what goes into my food led me to make some DIY extracts of my own, and it's incredibly easy. The only downside is that you have to wait for a few weeks for them to be ready, but once you get the first batch going, it's a cinch! You can make any flavor of extract you want. Just think: peppermint, almond, coconut, coffee, raspberry, lemon, and of course, vanilla. Once they are ready, you can use them in desserts, homemade creamers, DIY body butters, or whatever you like! I already have massive amount of peppermint and almond extract, so in this post I'll show you how to make coffee, lemon, coconut, and vanilla extract, but I'll include recipes for the others as well.
DIY extracts
A note about which products to buy: Many say that fruits with thick rinds (including lemons) do not need to be organic since you are peeling the thick skin off. However, for these extracts you are letting the peel steep in vodka for a few weeks, and that means everything that's in the peel is going into your food. That's why for this project I buy only organic ingredients, even if they are on the "Clean 15" list.
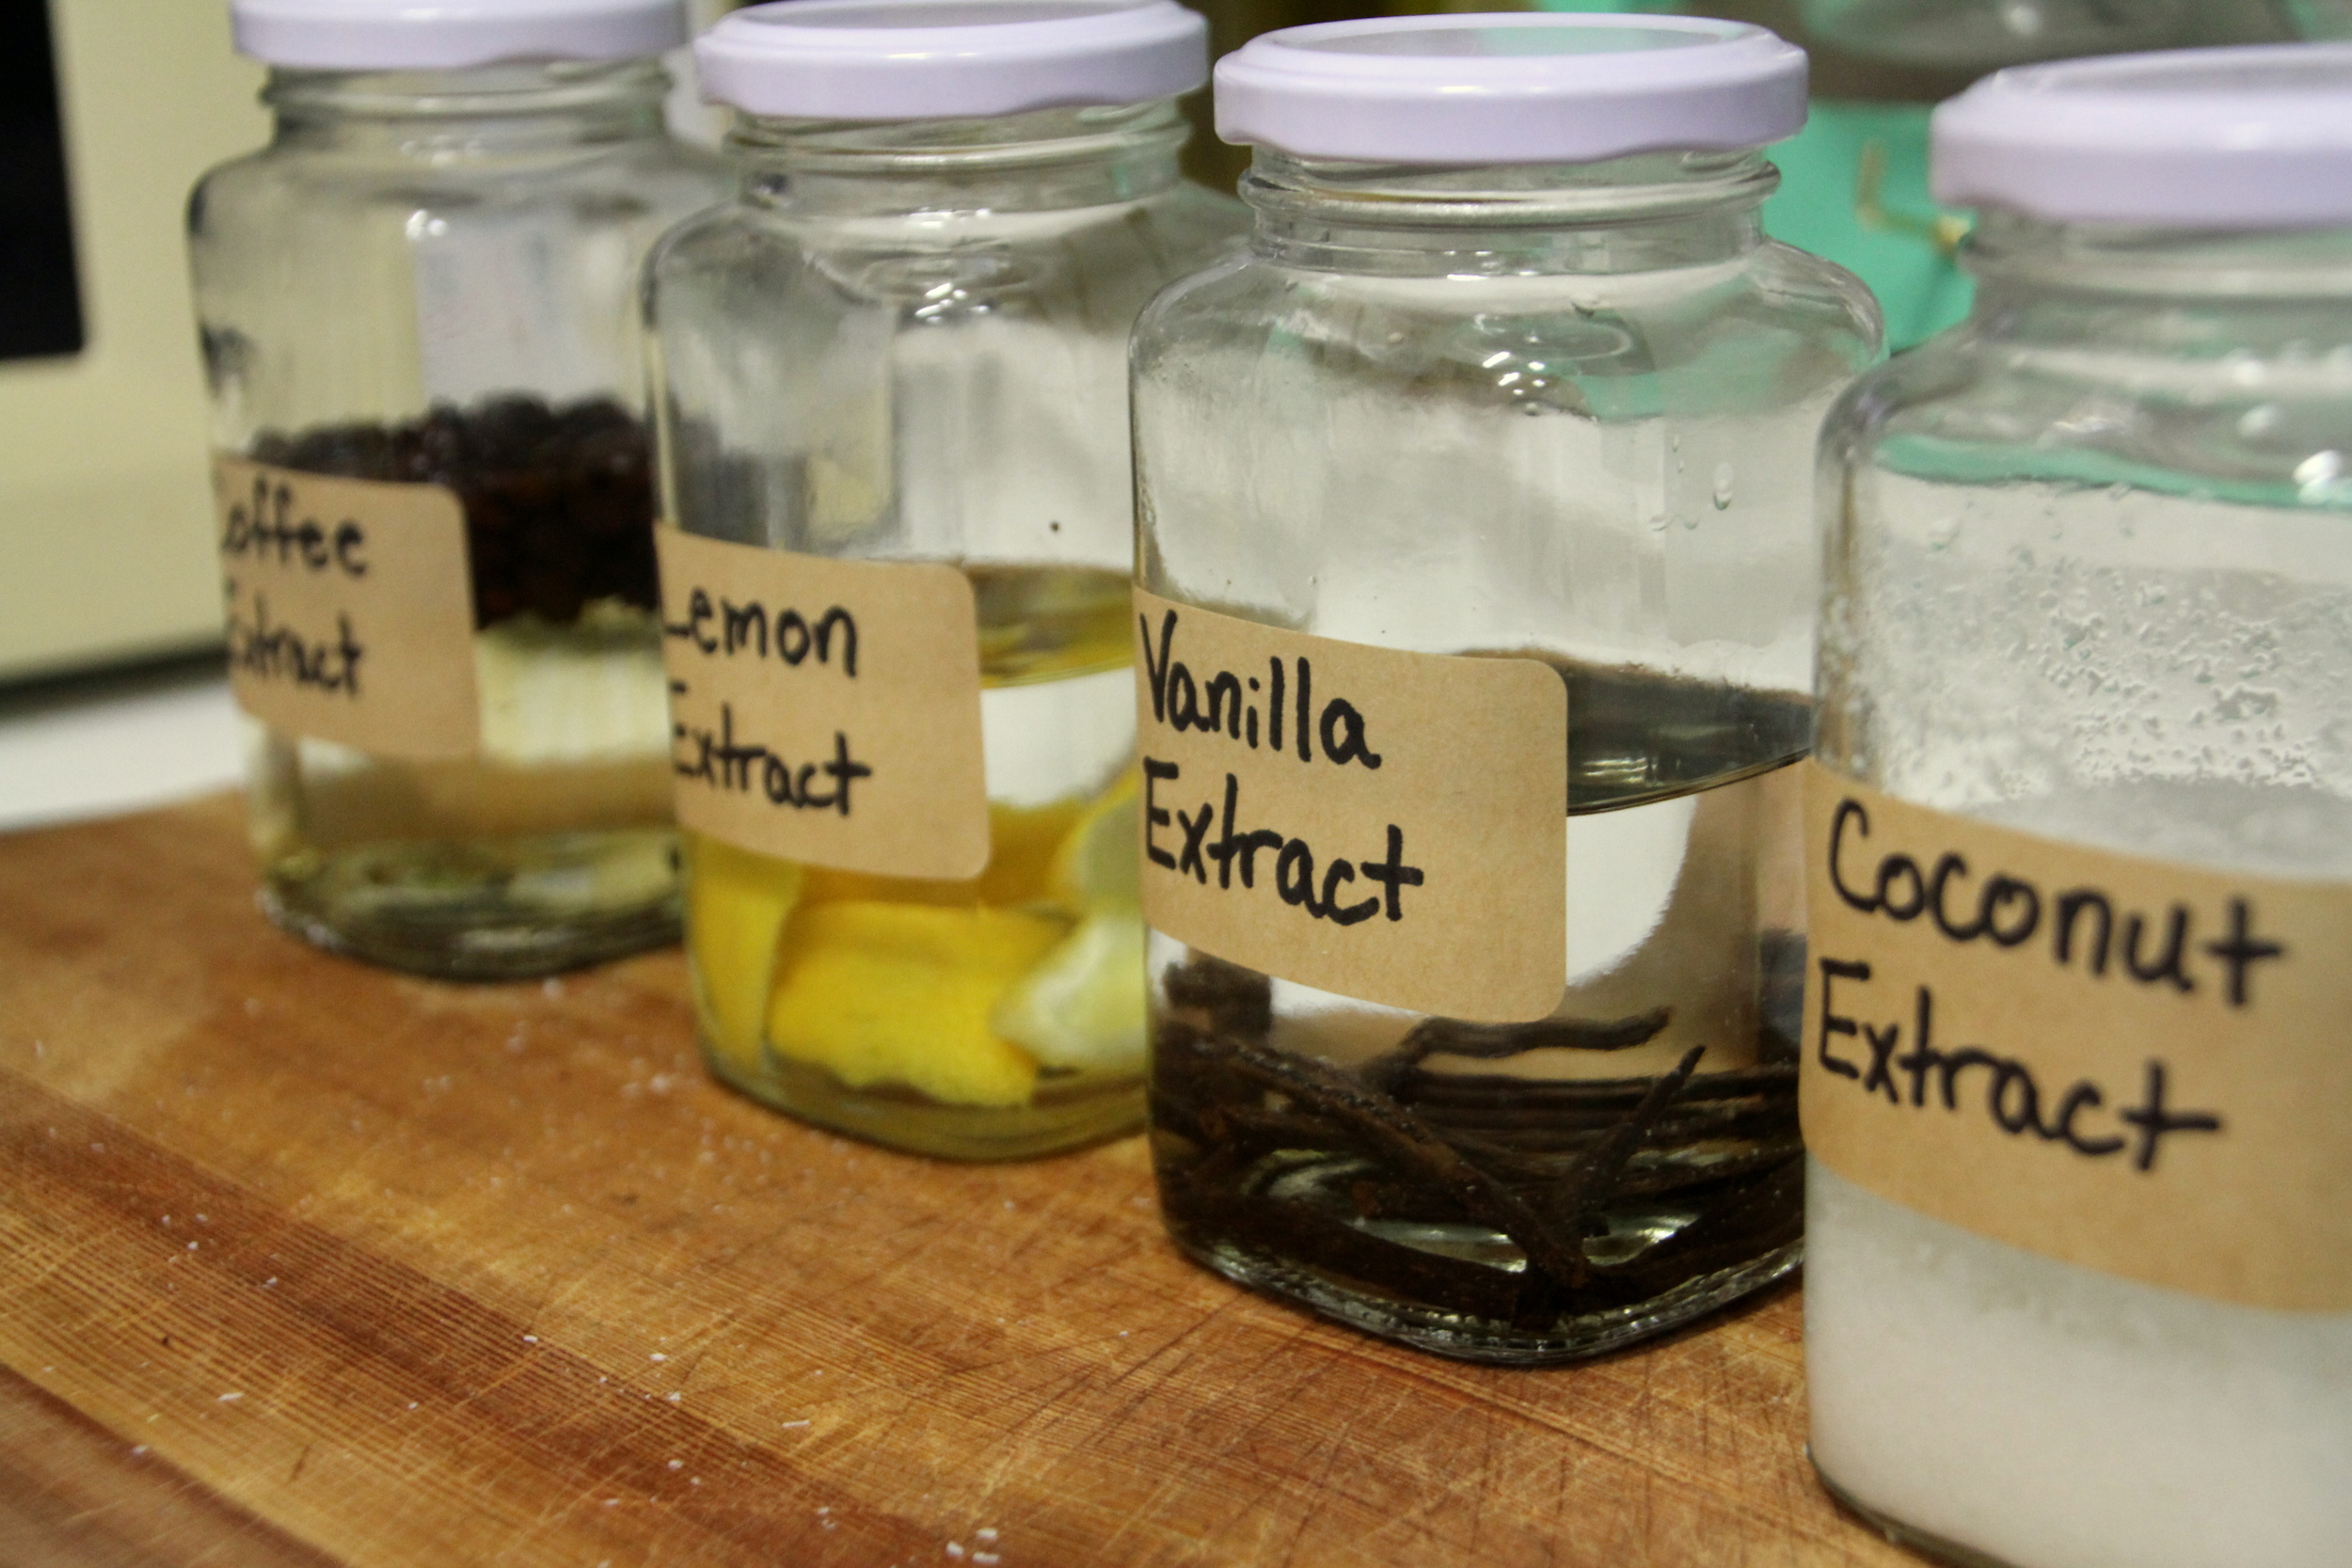
To start, you want to grab glass containers with lids that screw tight. Mason jars work fine, as do these little glass jars I got from the dollar store.

DIY extracts
The process is super simple! Just measure out the base ingredient, and add a cup of vodka. Here are the measurements for some of my favorite extracts:
Coffee Extract
1/4 cup whole, organic coffee beans
1 cup vodka
Coconut Extract
1/4 cup shredded coconut
1 cup vodka
Vanilla Extract
4 vanilla beans, sliced down the center and chopped into three segments
1 cup vodka

DIY extracts
Lemon Extract
Peel from 1 organic lemon
1 cup vodka (are you catching a pattern here?)
Peppermint Extract
1/4 cup washed, organic peppermint leaves
1 cup vodka
Almond extract
1/4 cup almonds
1 cup vodka
Other citrus fruits (grapefruit, lemon, orange, lime, etc)
Peel from 1 fruit
1 cup vodka
Instructions:
Measure out your base ingredient, and put it in a glass jar that has an airtight lid. Pour in your vodka, put on the lid, and give the jar a shake. Store it in a cool, dry place out of direct sunlight for 5-6 weeks. Be sure to shake it up every now and then.
DIY extracts
After a few weeks, your extract is ready to use! I know that with the vanilla beans, you can just leave them in a jar and refill it with vodka when you run out, but for the others, strain out the coffee beans, lemon peels, peppermint leaves, or whatever before you use them.

DIY extracts
Any great ideas for what to use these babies in? I'd love to brainstorm with you!
DIY extracts

DIY extracts
The Most Gorgeous French Bread

The most gorgeous french bread
There's nothing quite as comforting as the smell of homemade bread.

Gorgeous French Bread
My husband and I both have to resist eating the entire loaf in one sitting, and that's definitely the case with this French bread. It's perfectly fluffy and soft on the inside, with a thin, crunchy outside.

Gorgeous French Bread
Does it get any better than that?
I've made this French bread dozens of times, and with this recipe every batch is a success. It has incredibly simple ingredients, and is perfect dipped in herb-infused olive oil, paired with soup, or just eaten plain with some butter smeared on top.

Gorgeous French Bread
Do you know what the secret to perfect French bread is? Putting an oven safe bowl of water in the oven underneath your bread. The water adds humidity to the oven, and gives you that fluffy inside with the crunchy outside.
You'll need to budget about 2 1/2 hours from start to finish. That includes preparation, rising time, and baking time. To start, gather these things:
6 cups flour
2 1/2 Tablespoon yeast
3 teaspoons salt
2 cups warm water
1 Tablespoon melted butter
1 Tablespoon cornmeal
Olive oil
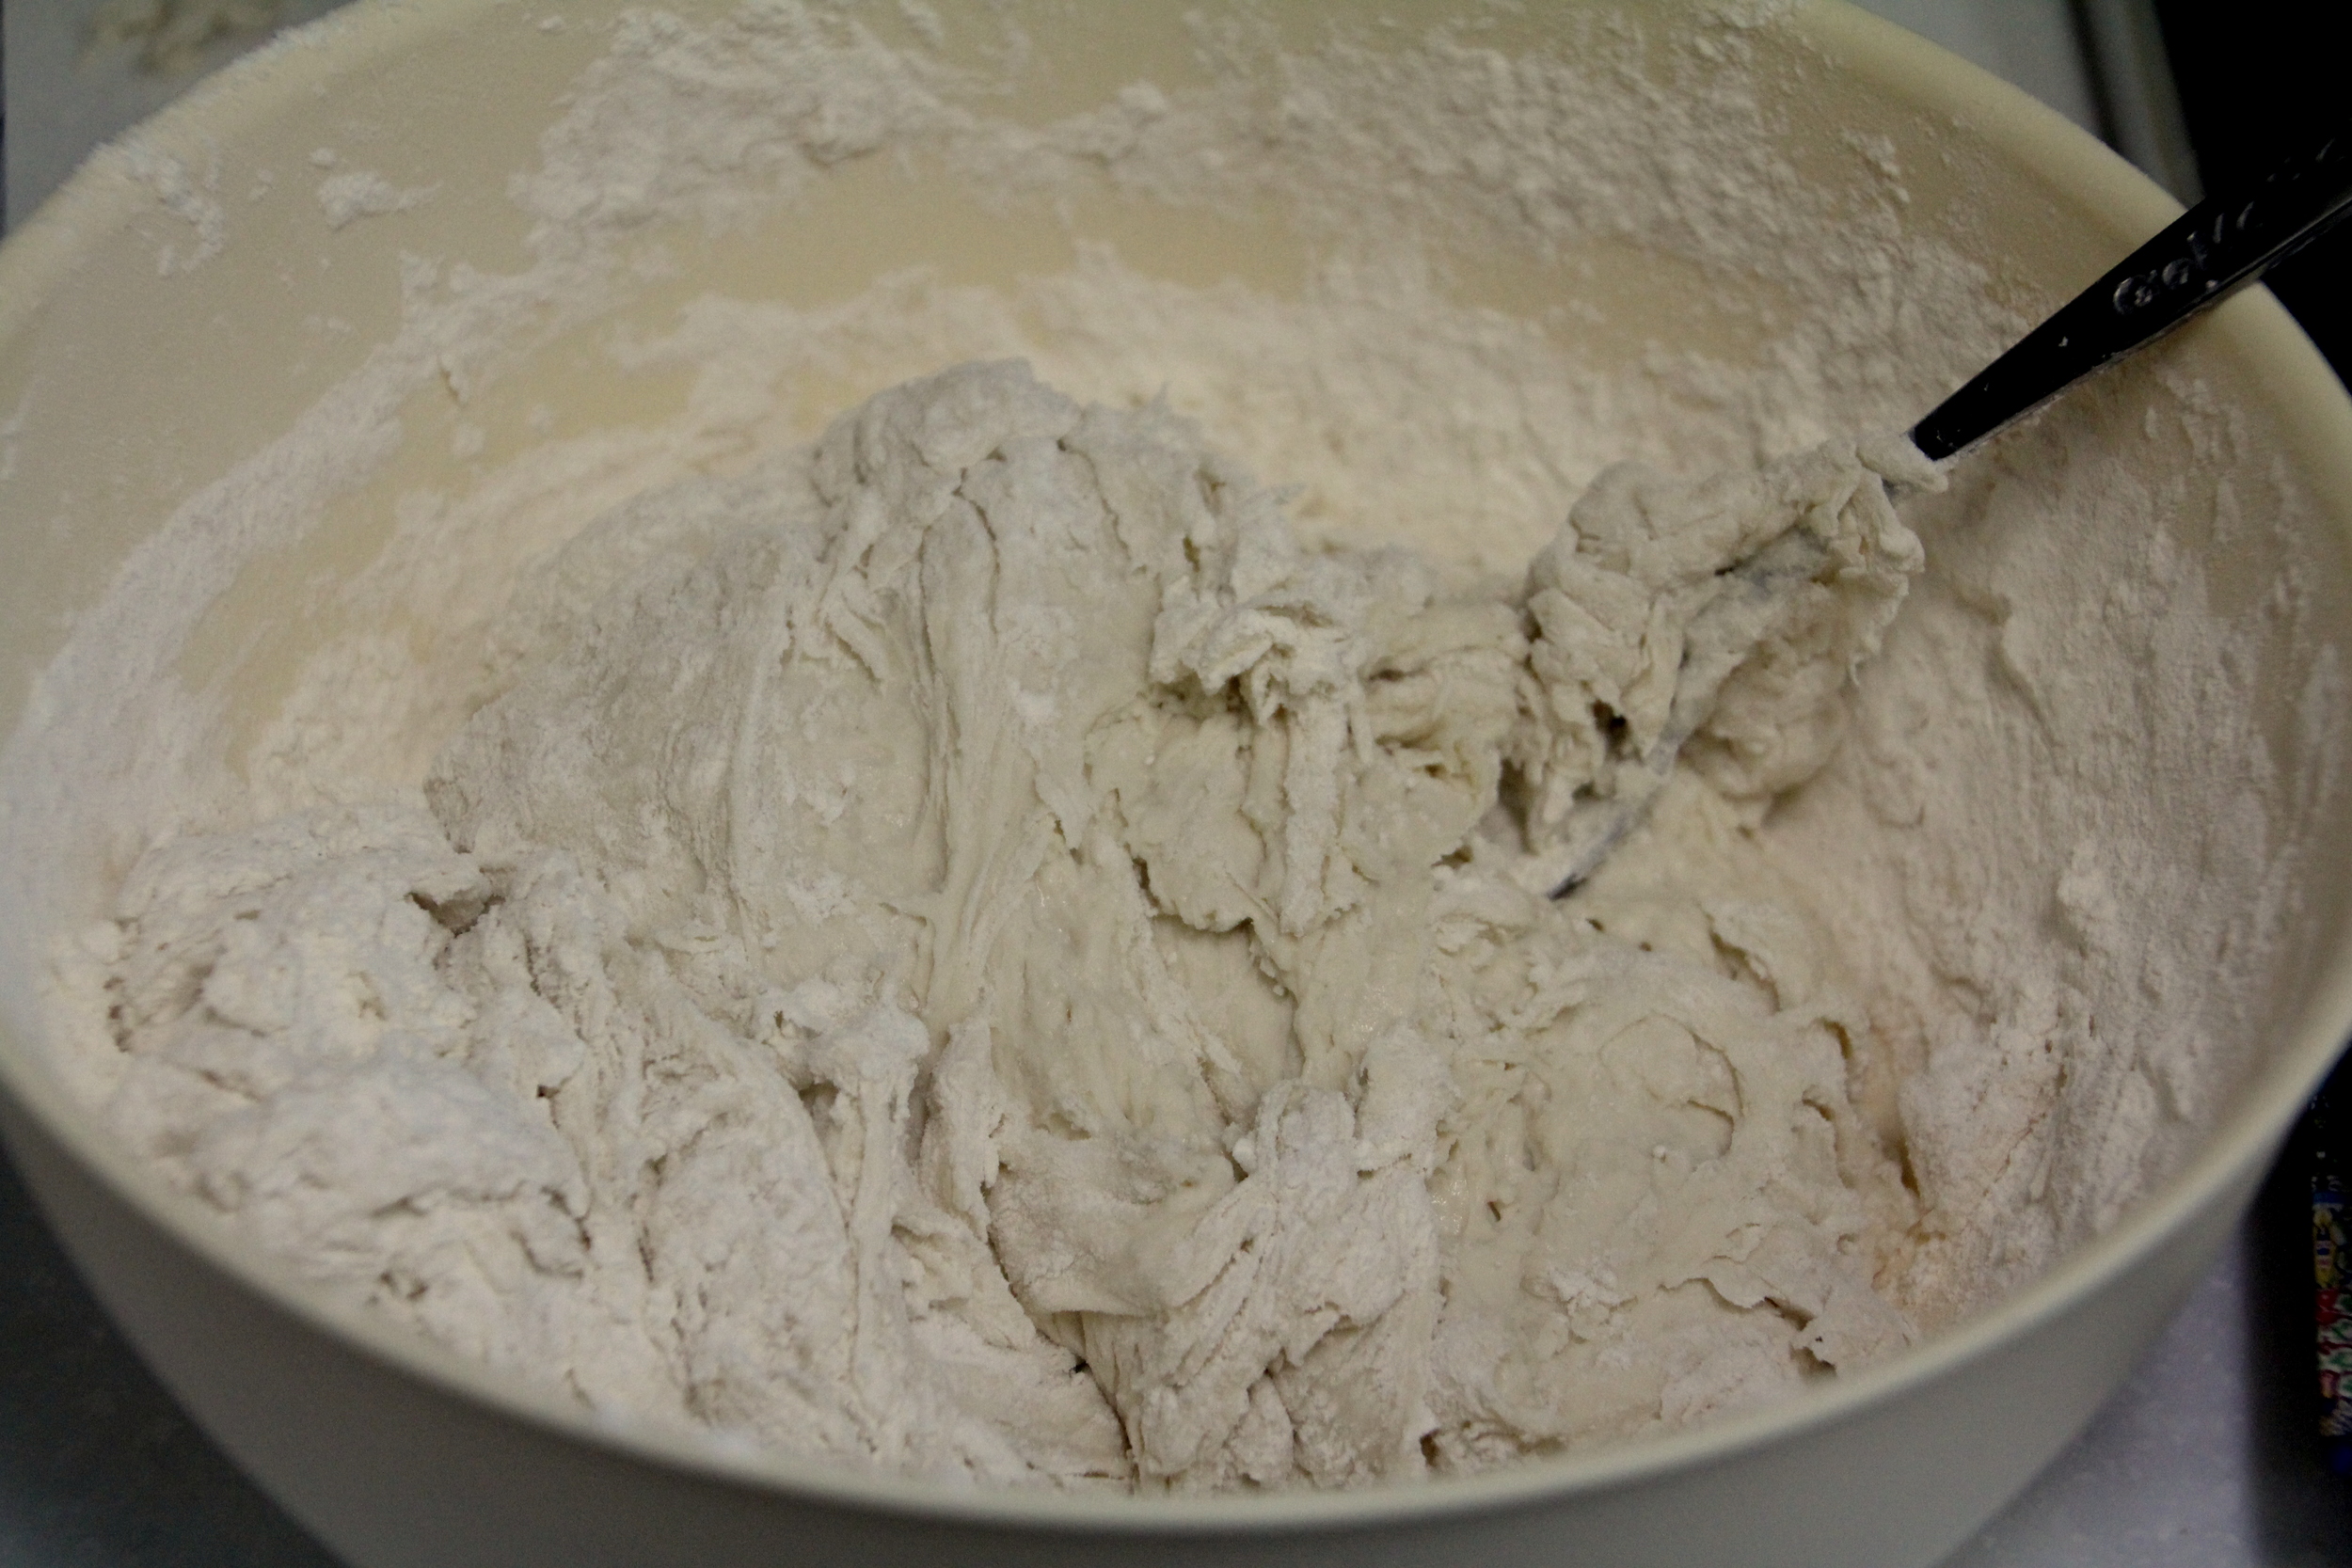
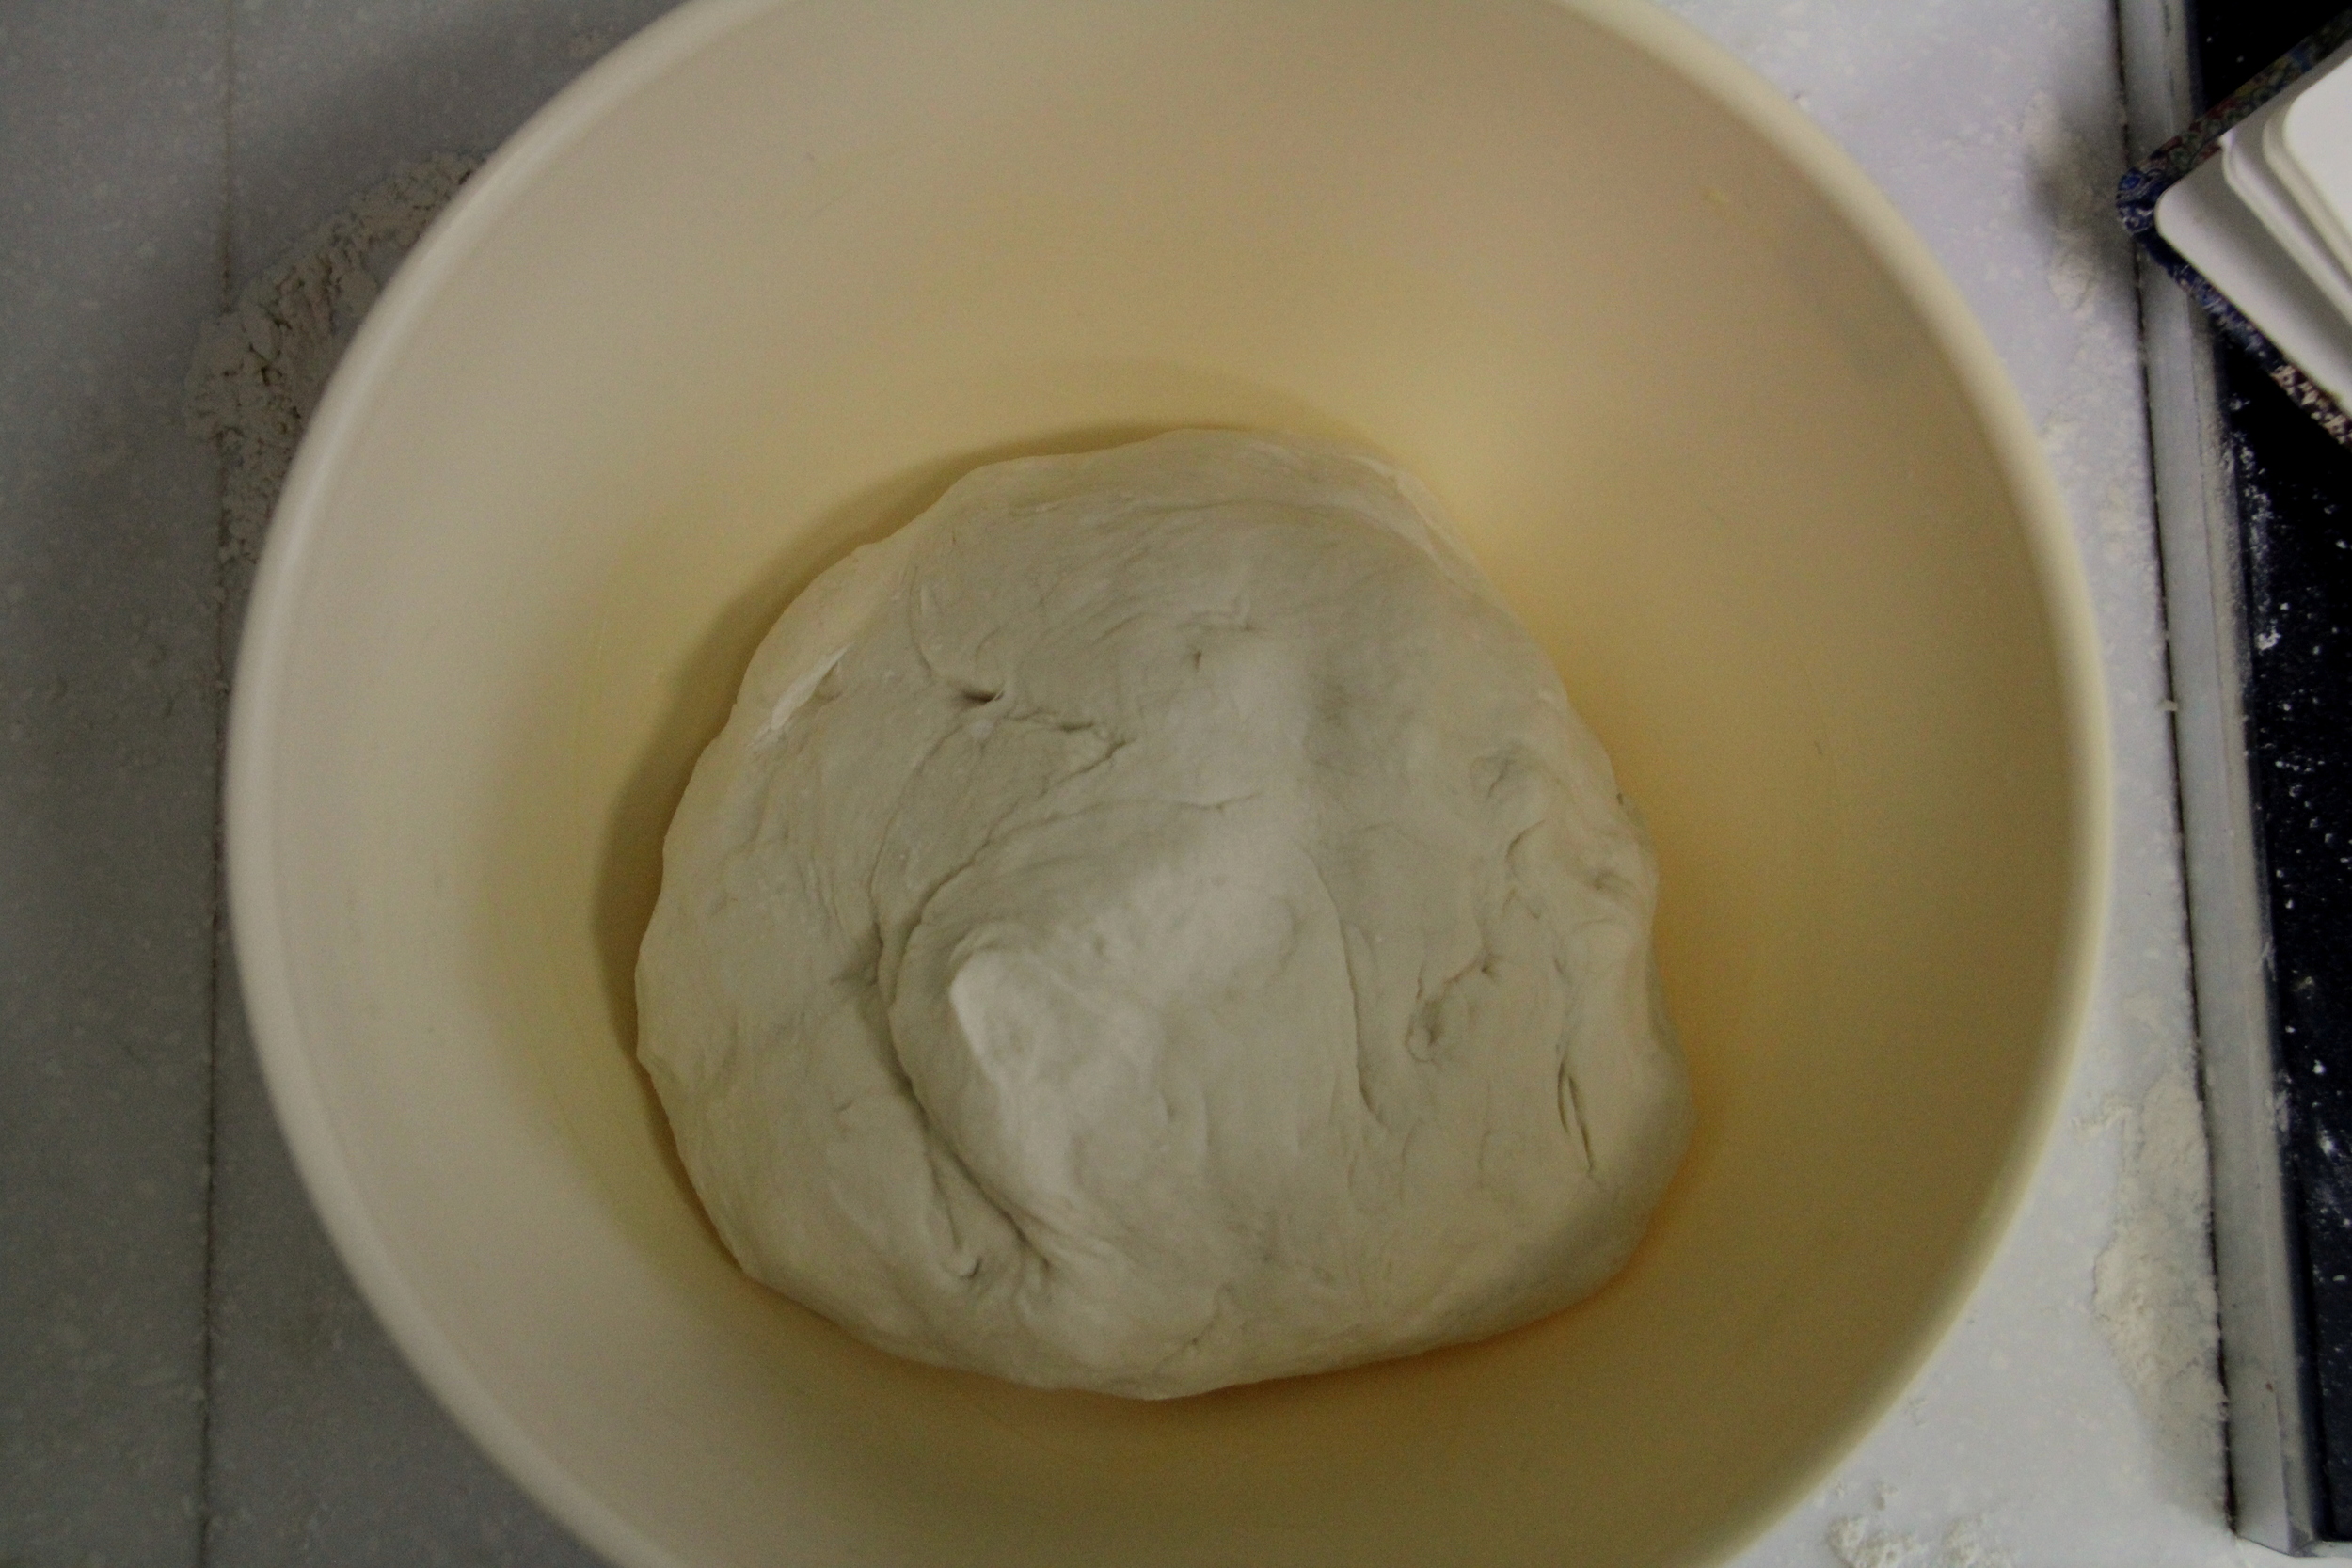
Combine 2 cups of the flour, all of the yeast, and the 2 cups of warmed water. Make sure the water is just warm, and not hot. If the water is too hot, you'll kill the yeast and the dough won't rise. Slowly add more flour, the salt, and the melted butter. If the dough is too sticky, add more flour. I've never used less than the 6 cups, but it depends on the type of flour you use. Knead the dough on a floured surface for about 5 minutes, or until the dough is smooth and elastic. If it is sticking to the counters or your hands, then add a bit more flour.
Gorgeous French Bread

Gorgeous French Bread
The dough is ready when it looks like the above picture. Place it in a greased bowl, and let rise in a warm place until doubled, or about 45 minutes.
Gorgeous French Bread

Gorgeous French Bread
Punch the dough down, and divide it in two. Let them rest for 10 minutes.
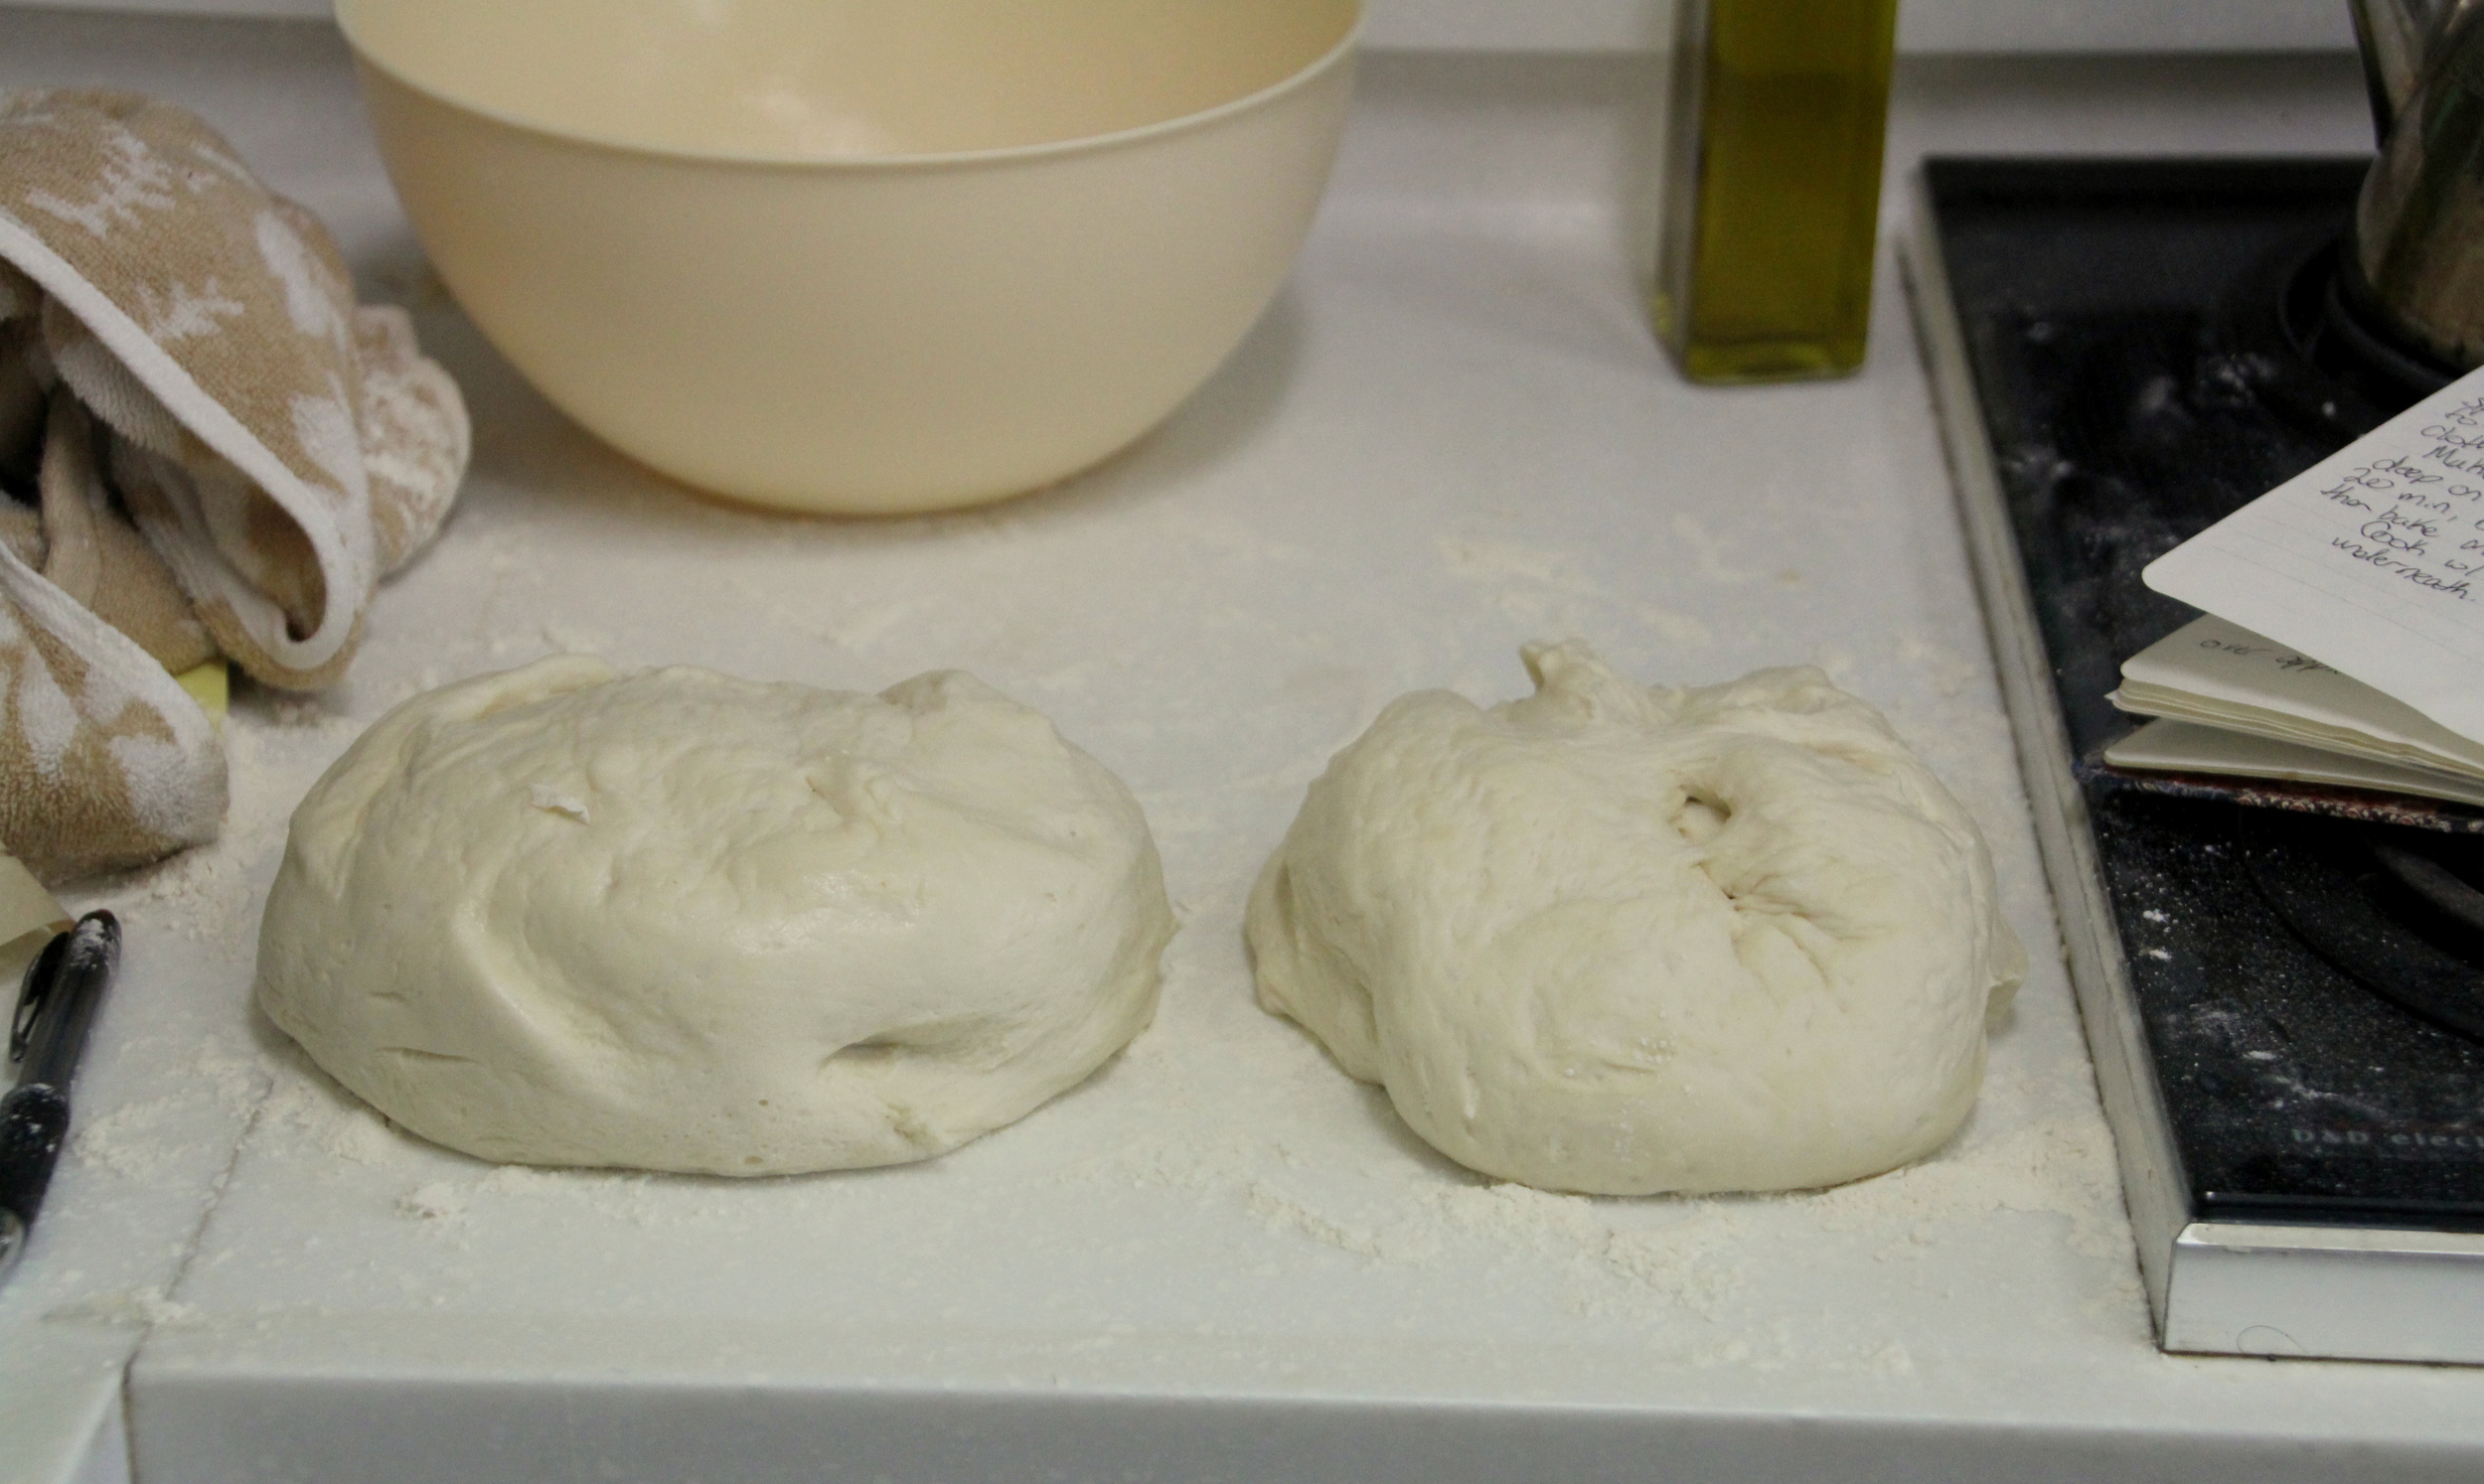
Gorgeous French Bread
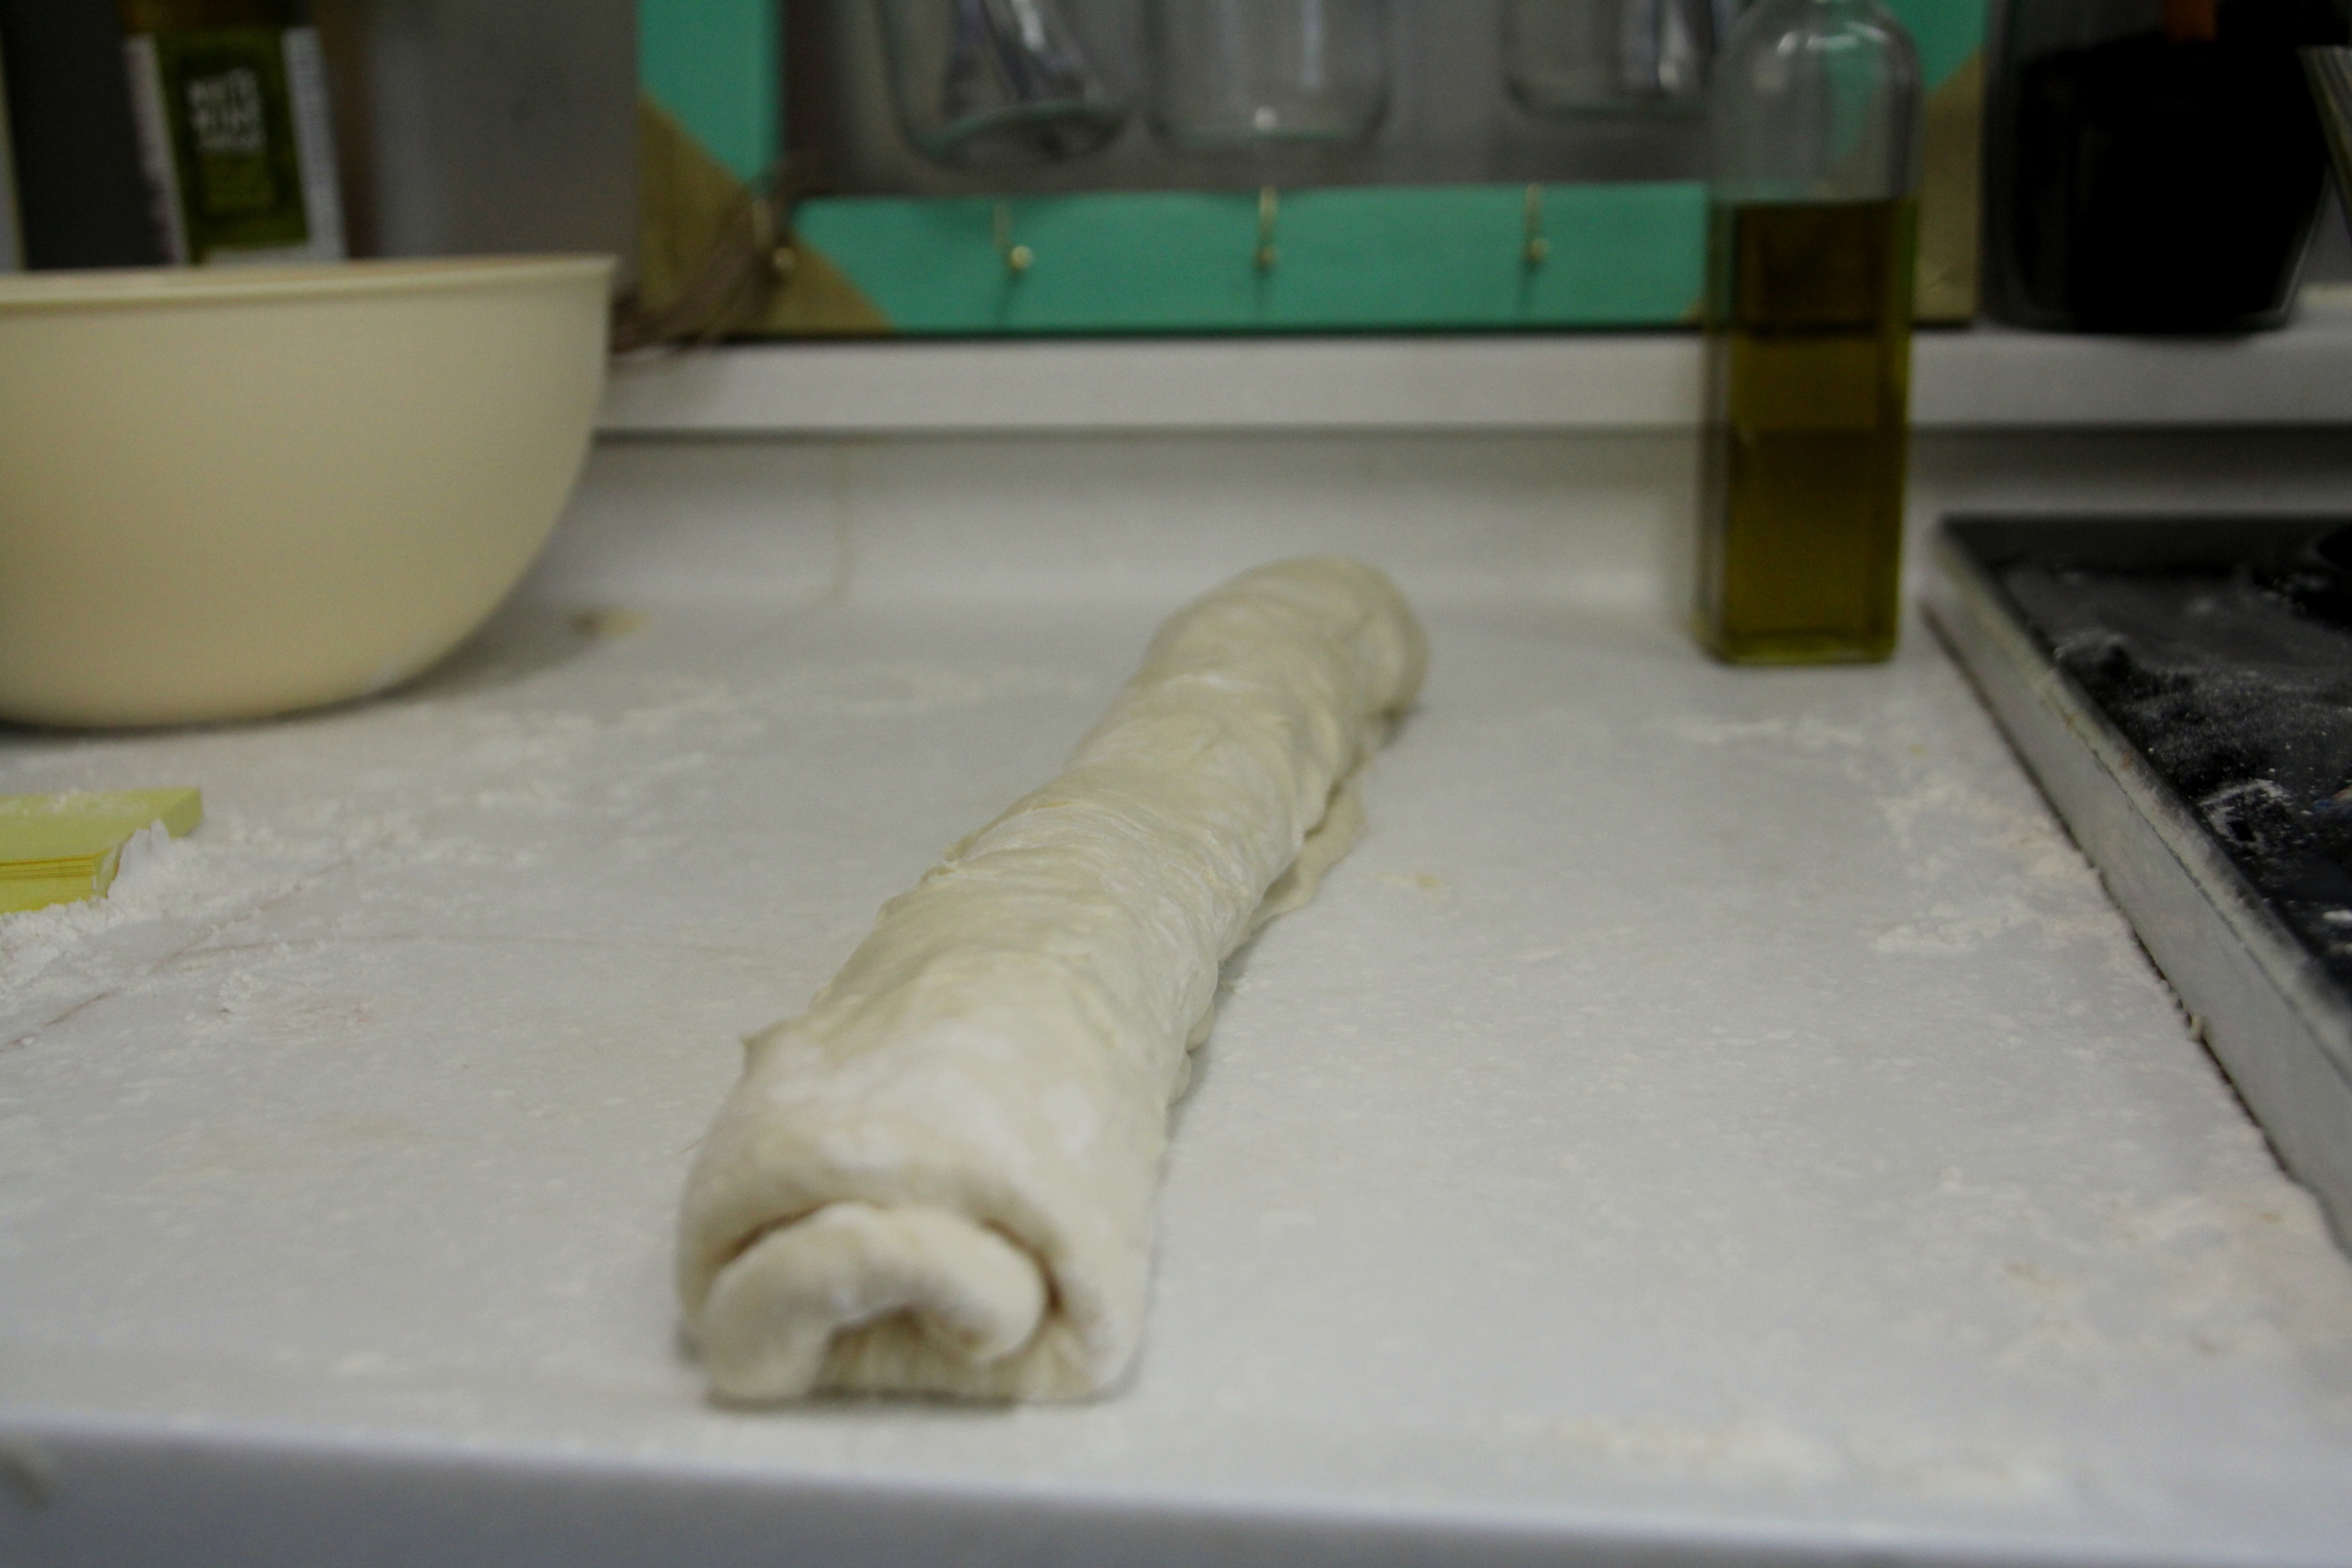
After they've rested, roll them into rectangles about 10x14 inches each. Starting from the long side, roll the dough.

Gorgeous French Bread

Gorgeous French Bread
Once that's done, dip your fingers in water, taper the ends, and fold under the dough.
Once that's done, dip your fingers in water, taper the ends, and fold under the dough.

Gorgeous French Bread
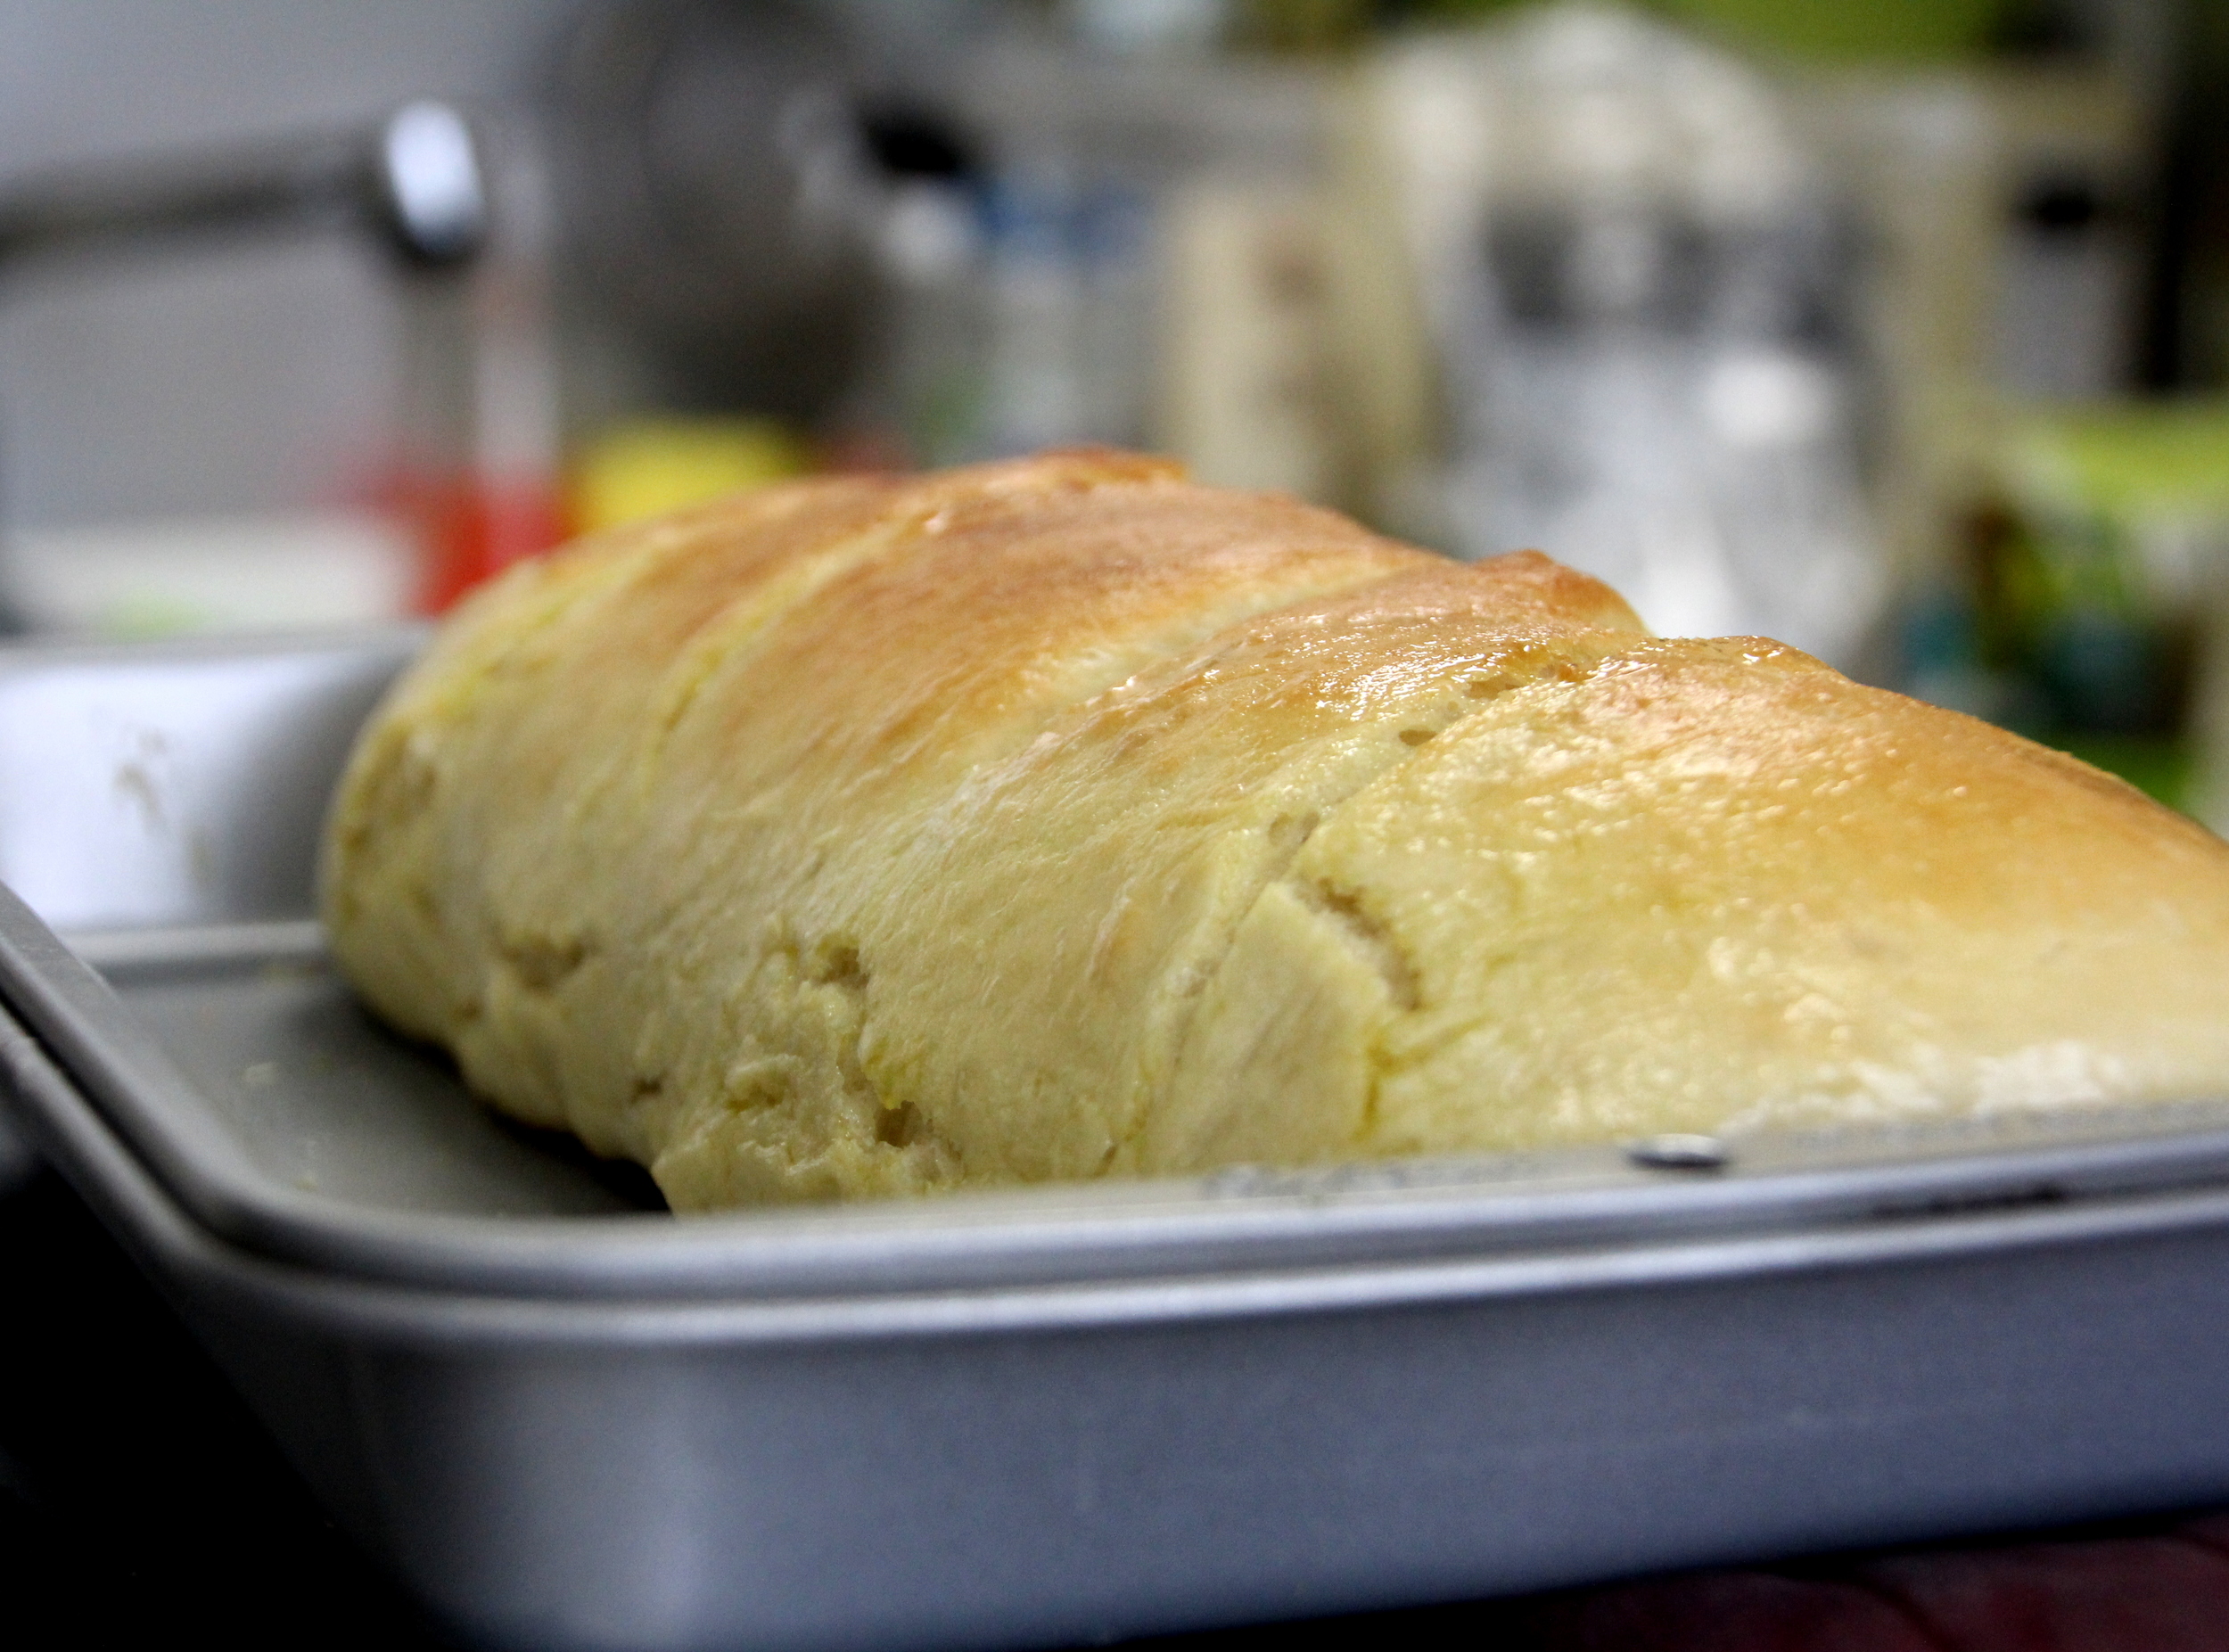
Grease a baking sheet, and sprinkle it with the cornmeal. Preheat the oven to 375 degrees, place both rolls on the sheet, brush with olive oil, and let rise under a warm damp cloth for 30 minutes. Once they have risen, make 4 diagonal cuts across the top (about 1/4 inch deep).

Gorgeous French Bread
Place an oven-safe bowl with about 3-4 inches of water in it, and bake the bread for 20 minutes on the middle rack. After the 20 minutes, take the loaves out and brush with olive oil again. At this point they should look like this:
Gorgeous French Bread
Bake for another 20 minutes, or until the top is golden brown.
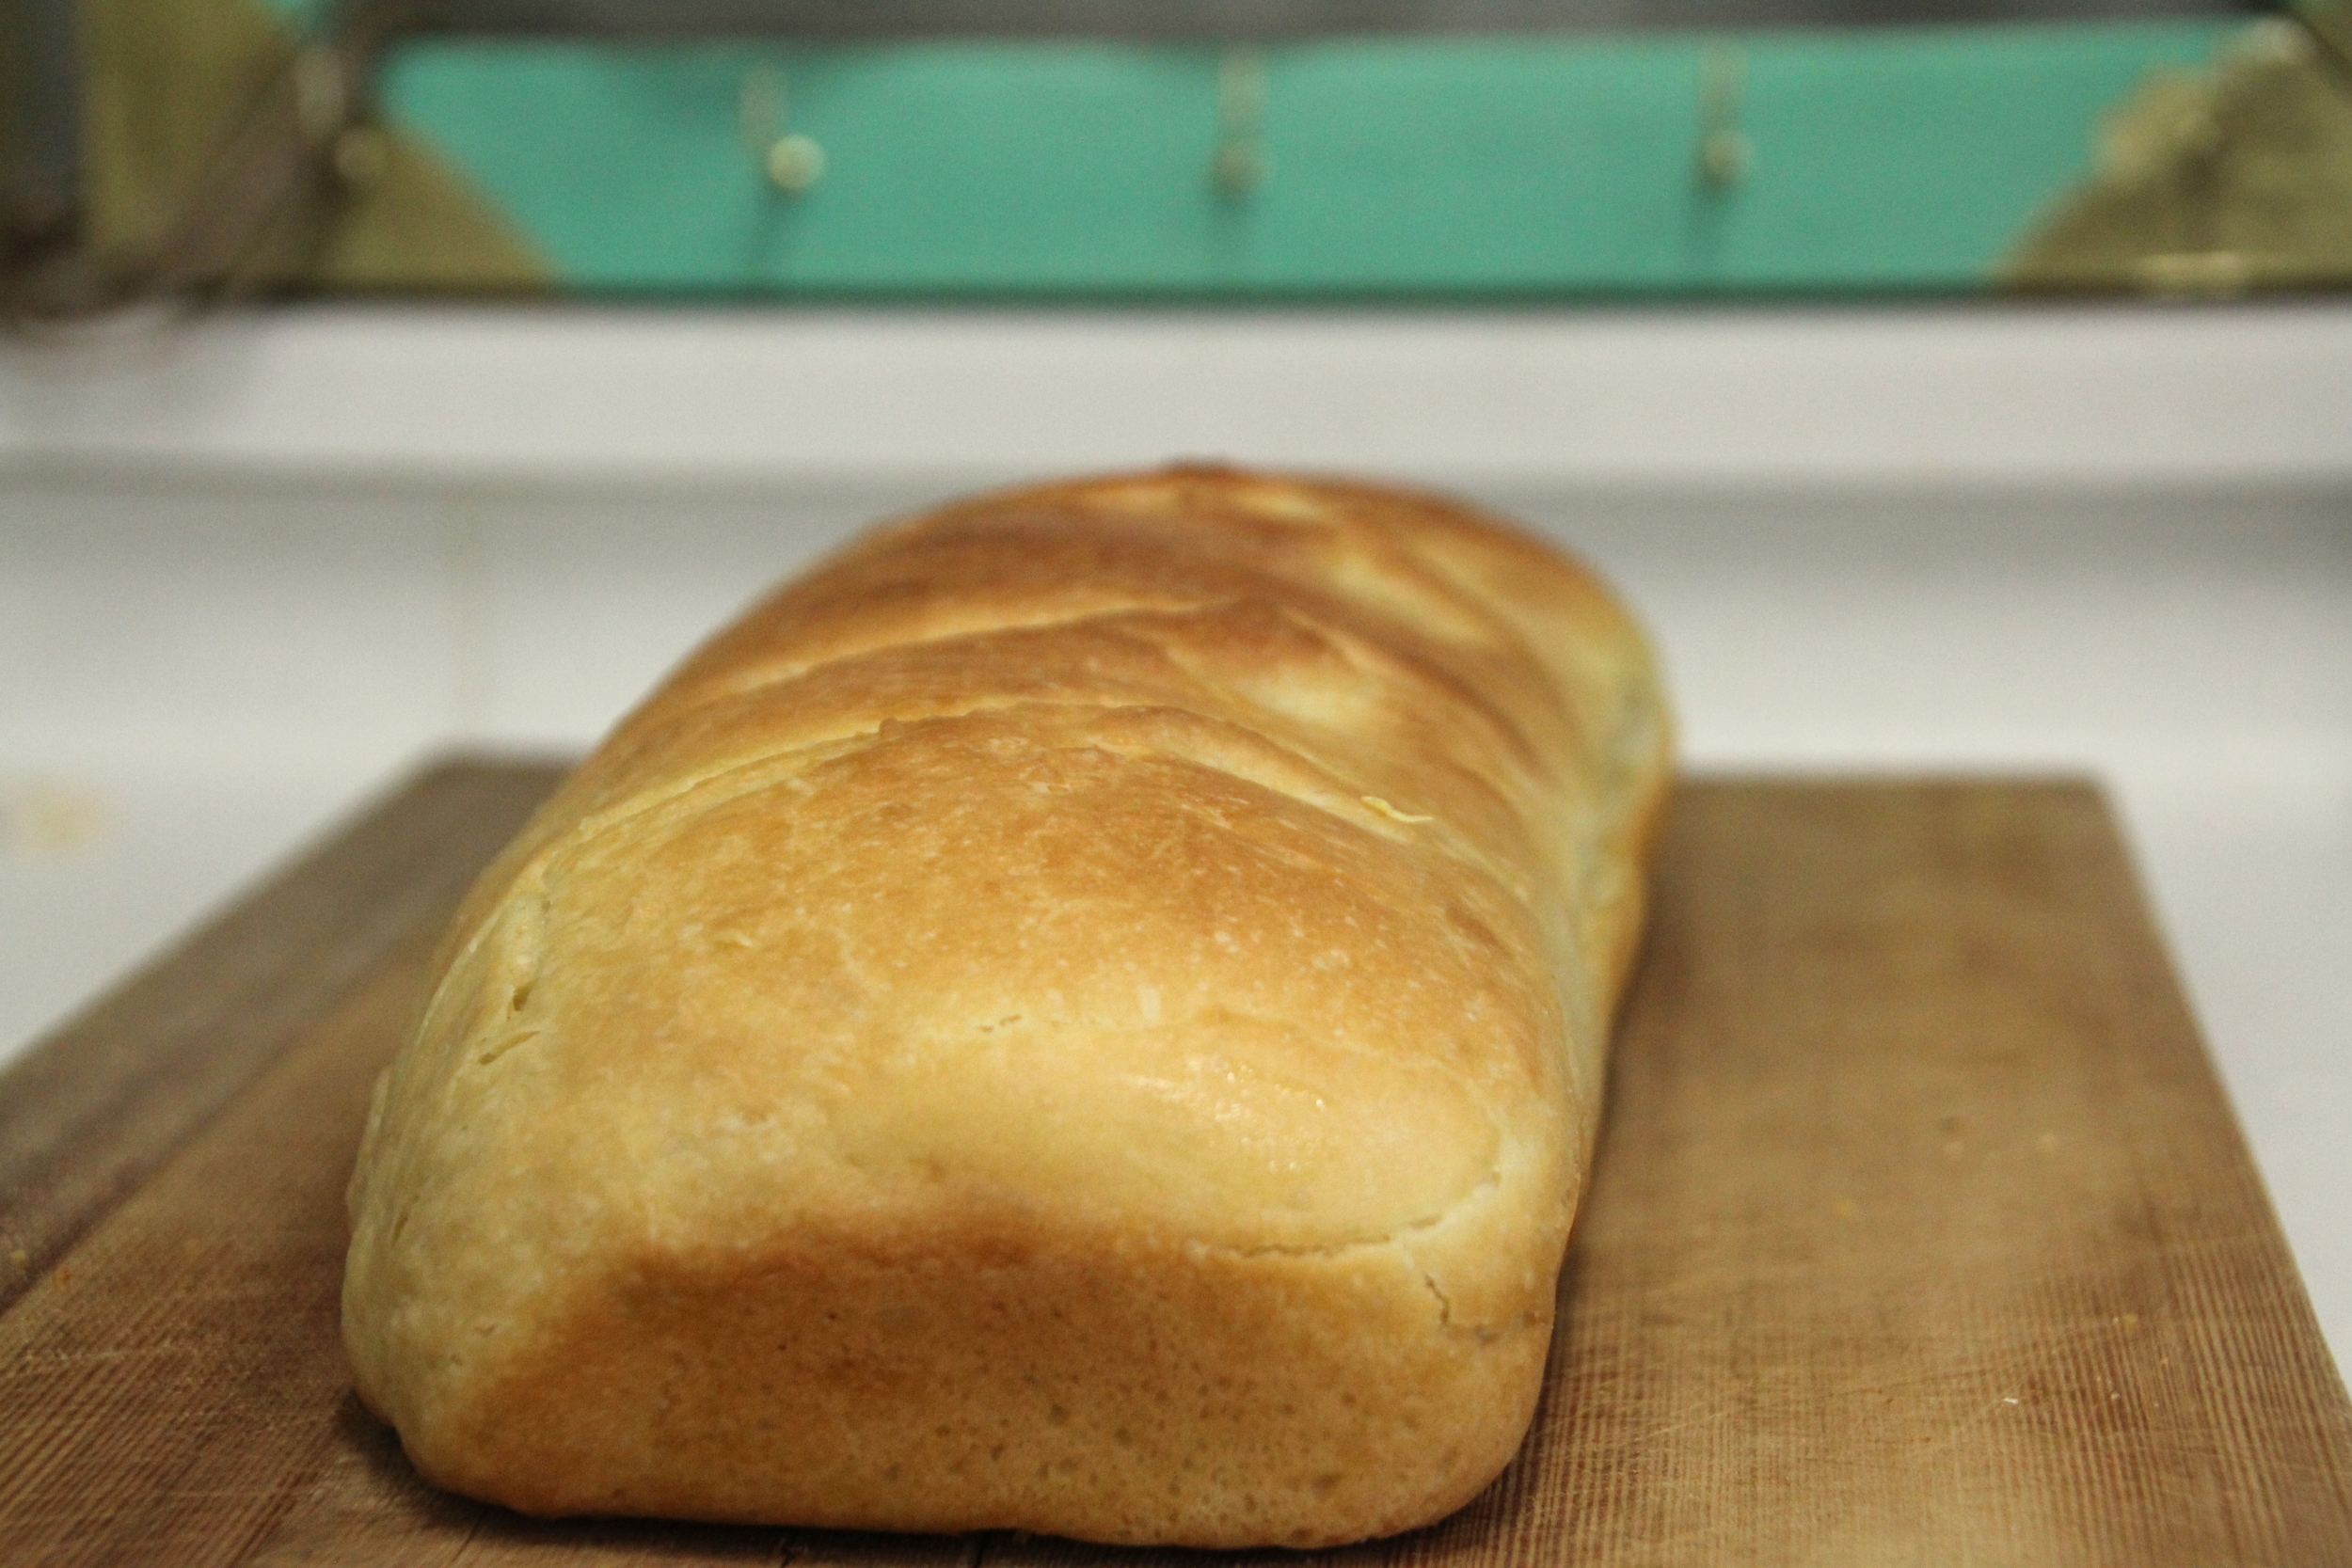
Gorgeous French Bread
Gah. I love this bread. Slice off a few pieces, and enjoy! We brought a loaf of this stuff to share with our co-teachers, and it was quickly devoured! Enjoy!
Gorgeous French Bread

Gorgeous French Bread
Gorgeous French Bread Recipe
6 cups flour
2 1/2 Tablespoon yeast
3 teaspoons salt
2 cups warm water
1 Tablespoon melted butter
1 Tablespoon cornmeal
Olive oil
Combine 2 cups of the flour, all of the yeast, and the 2 cups of warmed water. Make sure the water is just warm, and not hot. If the water is too hot, you'll kill the yeast and the dough won't rise. Slowly add more flour, the salt, and the melted butter. If the dough is too sticky, add more flour. I've never used less than the 6 cups, but it depends on the type of flour you use. Knead the dough on a floured surface for about 5 minutes, or until the dough is smooth and elastic. If it is sticking to the counters or your hands, then add a bit more flour. The dough is ready when it looks like the above picture. Place it in a greased bowl, and let rise in a warm place until doubled, or about 45 minutes. Punch the dough down, and divide it in two. Let them rest for 10 minutes. After they've rested, roll them into rectangles about 10x14 inches each. Starting from the long side, roll the dough.
Once that's done, dip your fingers in water, taper the ends, and fold under the dough. Grease a baking sheet, and sprinkle it with the cornmeal. Preheat the oven to 375 degrees, place both rolls on the sheet, brush with olive oil, and let rise under a warm damp cloth for 30 minutes. Once they have risen, make 4 diagonal cuts across the top (about 1/4 inch deep). Place an oven-safe bowl with about 3-4 inches of water in it, and bake the bread for 20 minutes on the middle rack. After the 20 minutes, take the loaves out and brush with olive oil again. Bake for another 20 minutes, or until the top is golden brown. Enjoy!
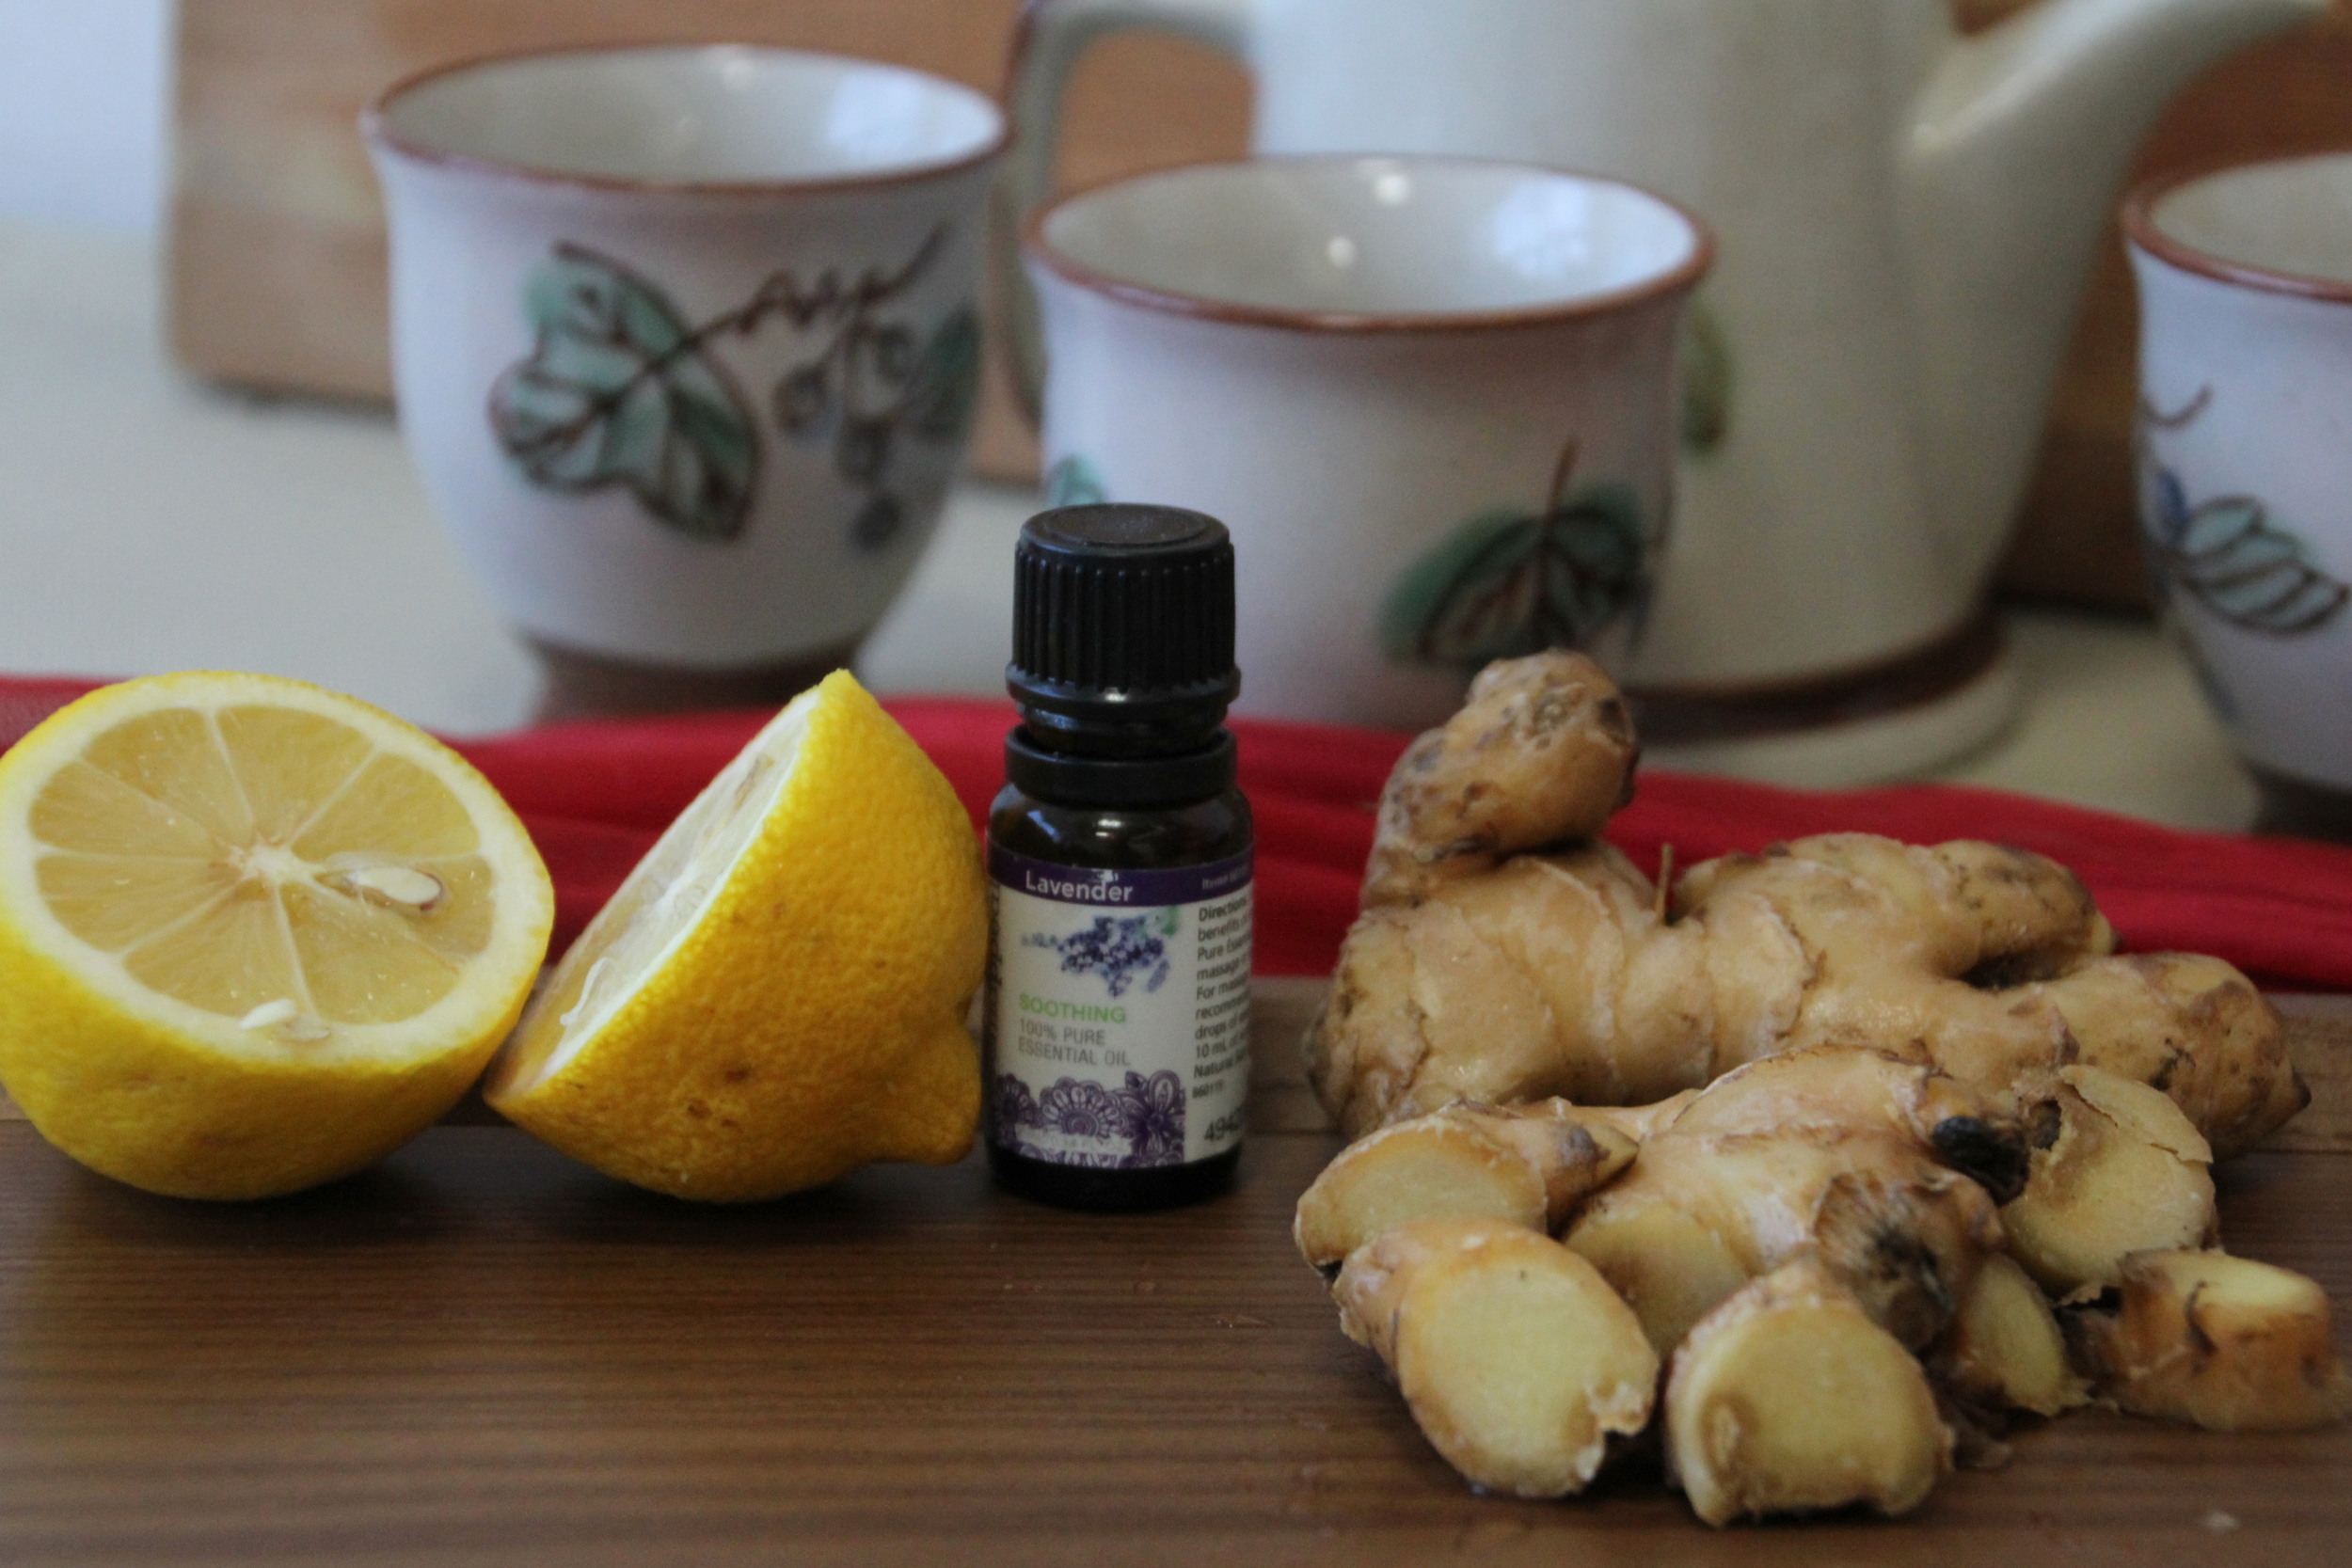
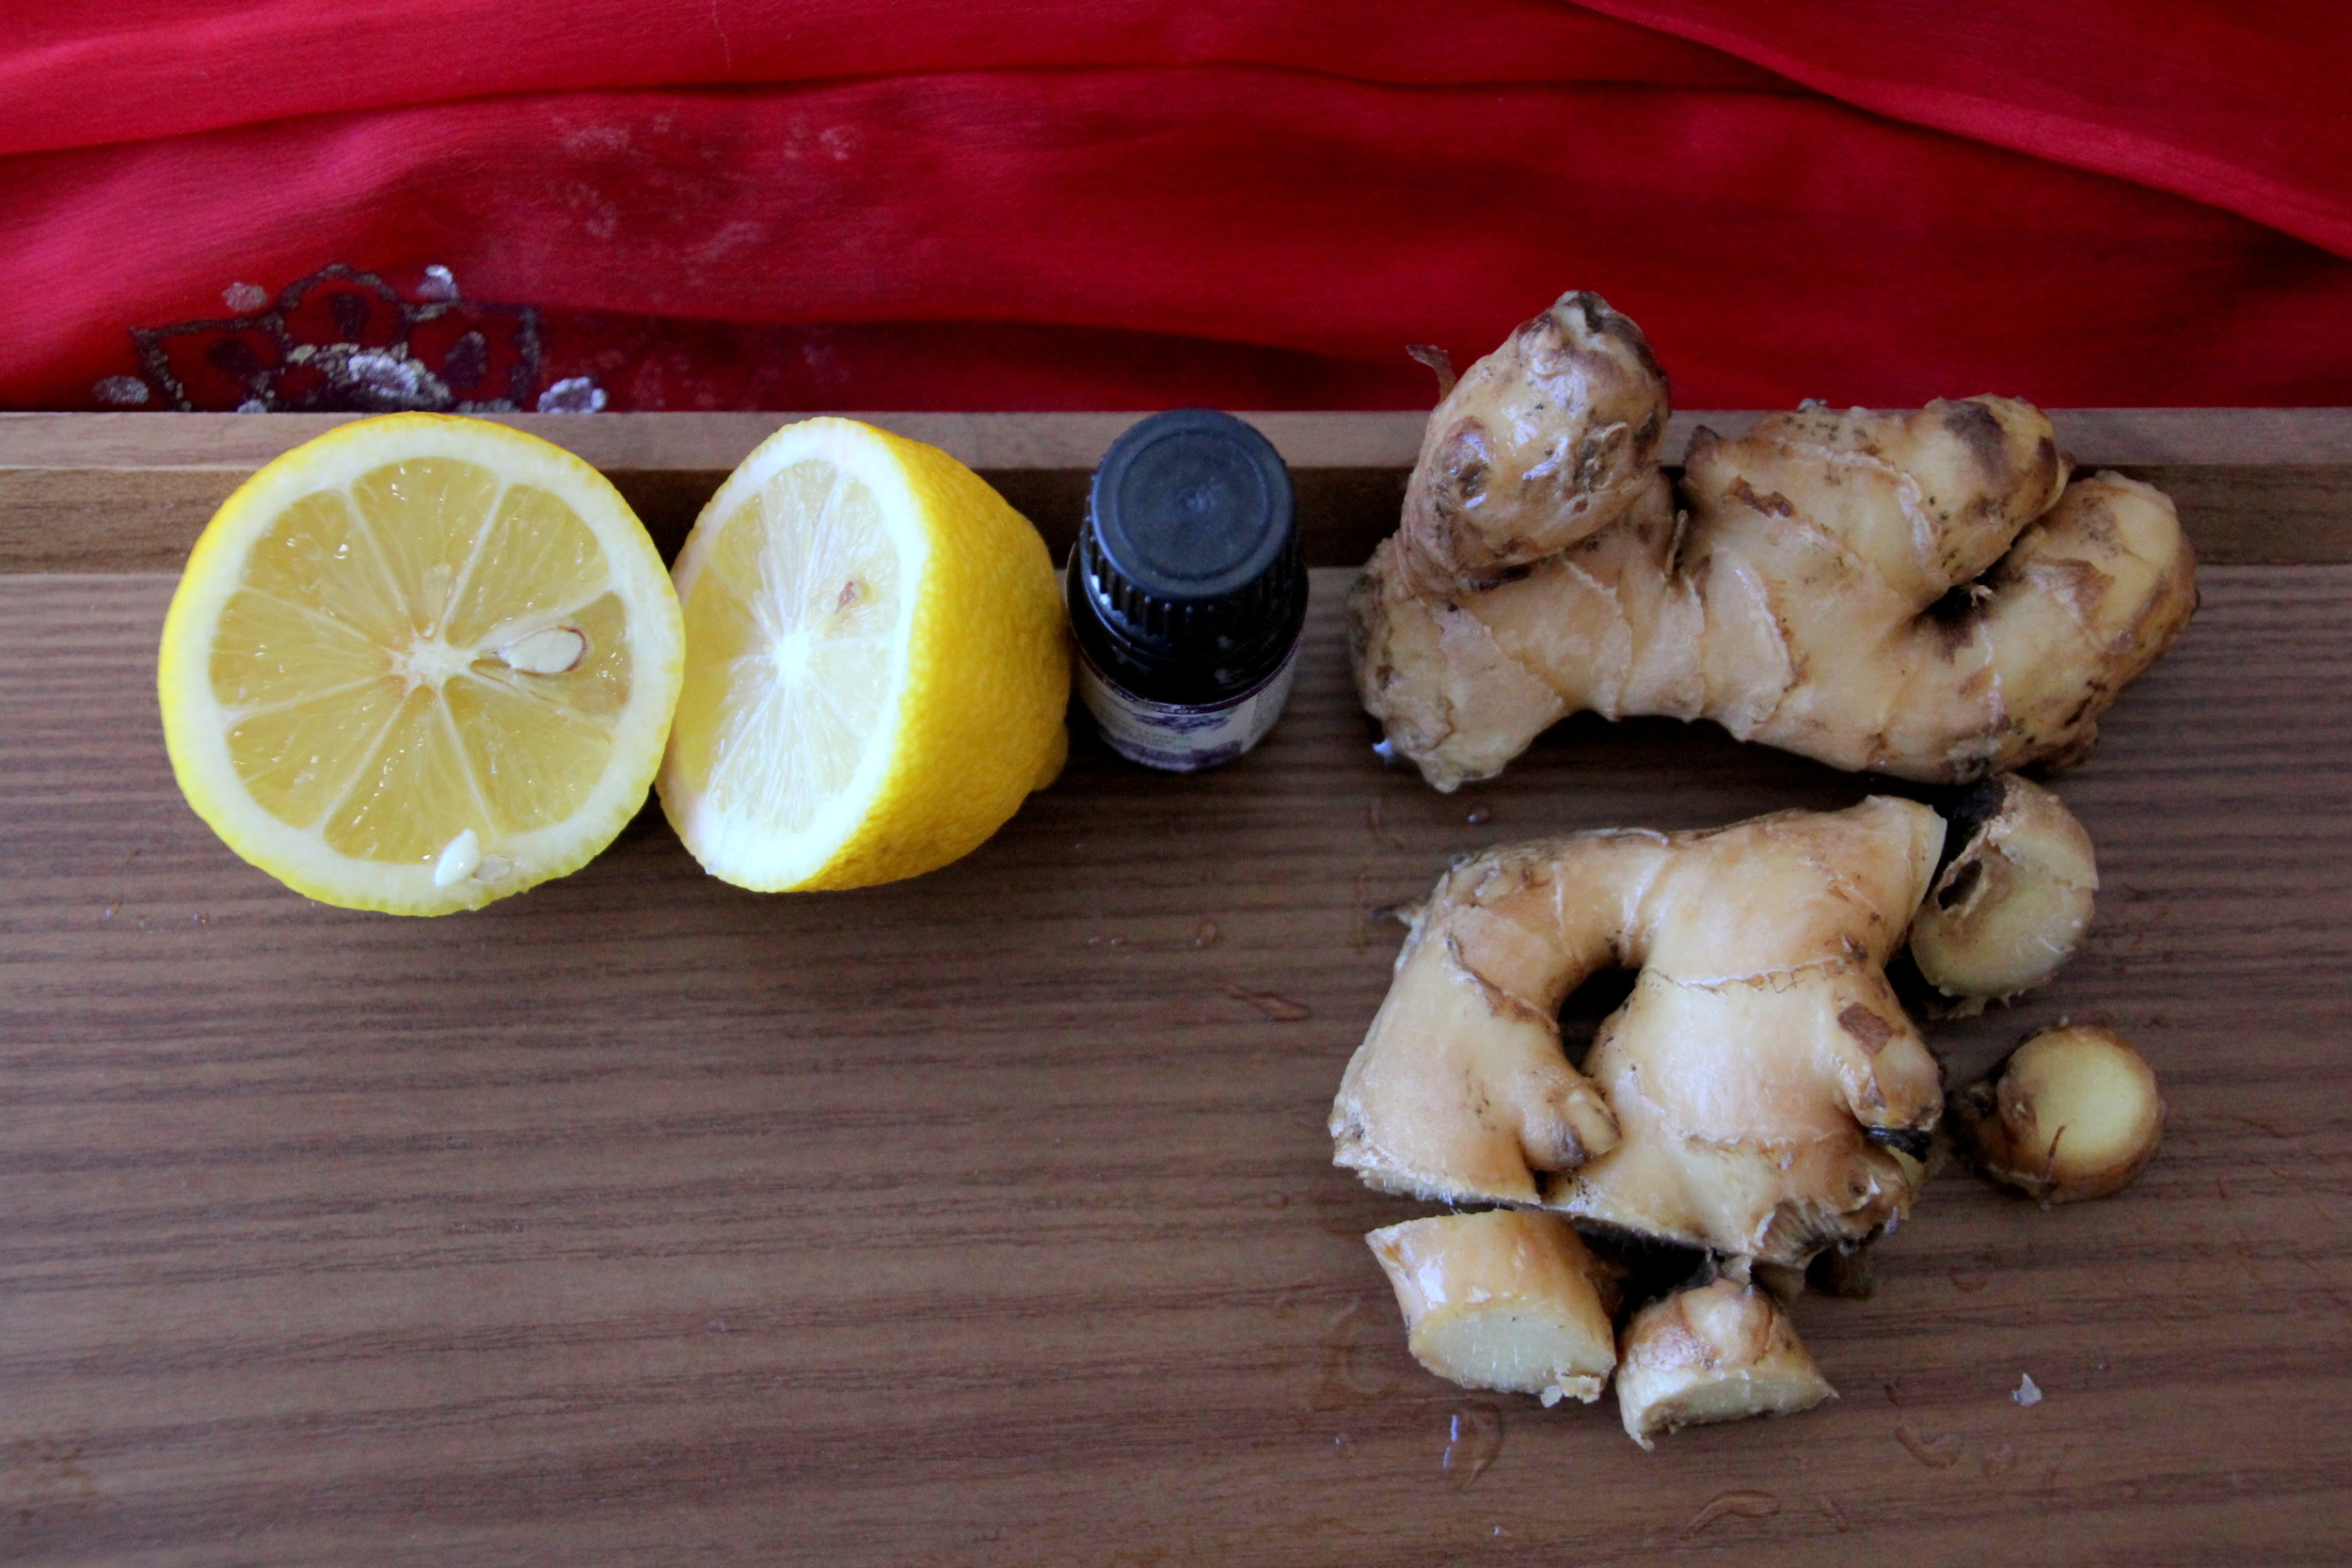
Cleansing Detox Bath

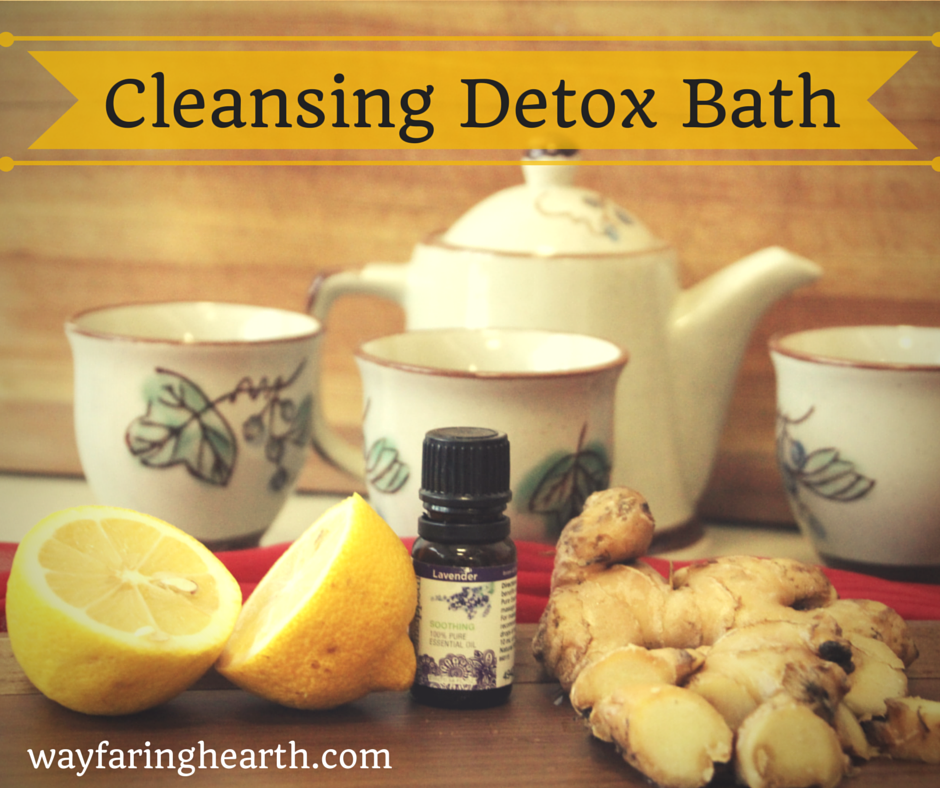 On Sunday I did a post about a purifying sea salt scrub, and I thought it only appropriate to follow that up with a post about how to do a detox bath. Hint: it's as simple as running the bath water and throwing a few things in the tub that you probably already have in your kitchen!
Detox baths are gaining popularity, and for good reason. Not only does it pull toxins from your body, but it can also increase circulation and give your body a great boost of magnesium, which has a long list of benefits that include easing muscle spasms (yes, that means menstrual cramps, too) and relieving stress. Magnesium is also a key player in absorbing other nutrients, reducing inflammation, and easing/preventing migraines. Are you hooked yet?
I usually leave myself an hour for the detox bath, but you can do 45 minutes if pressed for time. The first chunk of time is to pull the toxins from your body, and after that you will absorb the nutrients. It's never happened to me, but keep in mind that you may get lightheaded, so be cautious when getting out. You can use as many of the ingredients I list, or leave some out if you wish. Keep in mind that Epsom salts are the source of the magnesium, so I always include them in my baths.
If there's one thing you MUST do while taking these baths, it's to drink plenty of liquids. This will help flush out more toxins. I usually drink ginger-lemon tea or water. Also, if you include ginger in your bath, it will increase circulation, and may make you sweat.

Here's what I use for detox baths:
Tub filled with water as hot as you can stand it
1 Tablespoon ground ginger, or 1-inch chunk of fresh ginger
1 lemon, sliced
10 drops lavender oil
2 cups Epsom salts
1/2 cup baking soda
Lots of liquid to drink (water, tea, etc.)
Directions: Fill tub with water and pour in all ingredients. Gently swirl until the Epsom salt and baking soda have dissolved. Soak for at least 45 minutes, drinking a lot of liquids.
I always feel great after a detox bath. My mood is lifted, and I feel incredibly relaxed and rejuvenated. What do you put in your favorite detox bath?
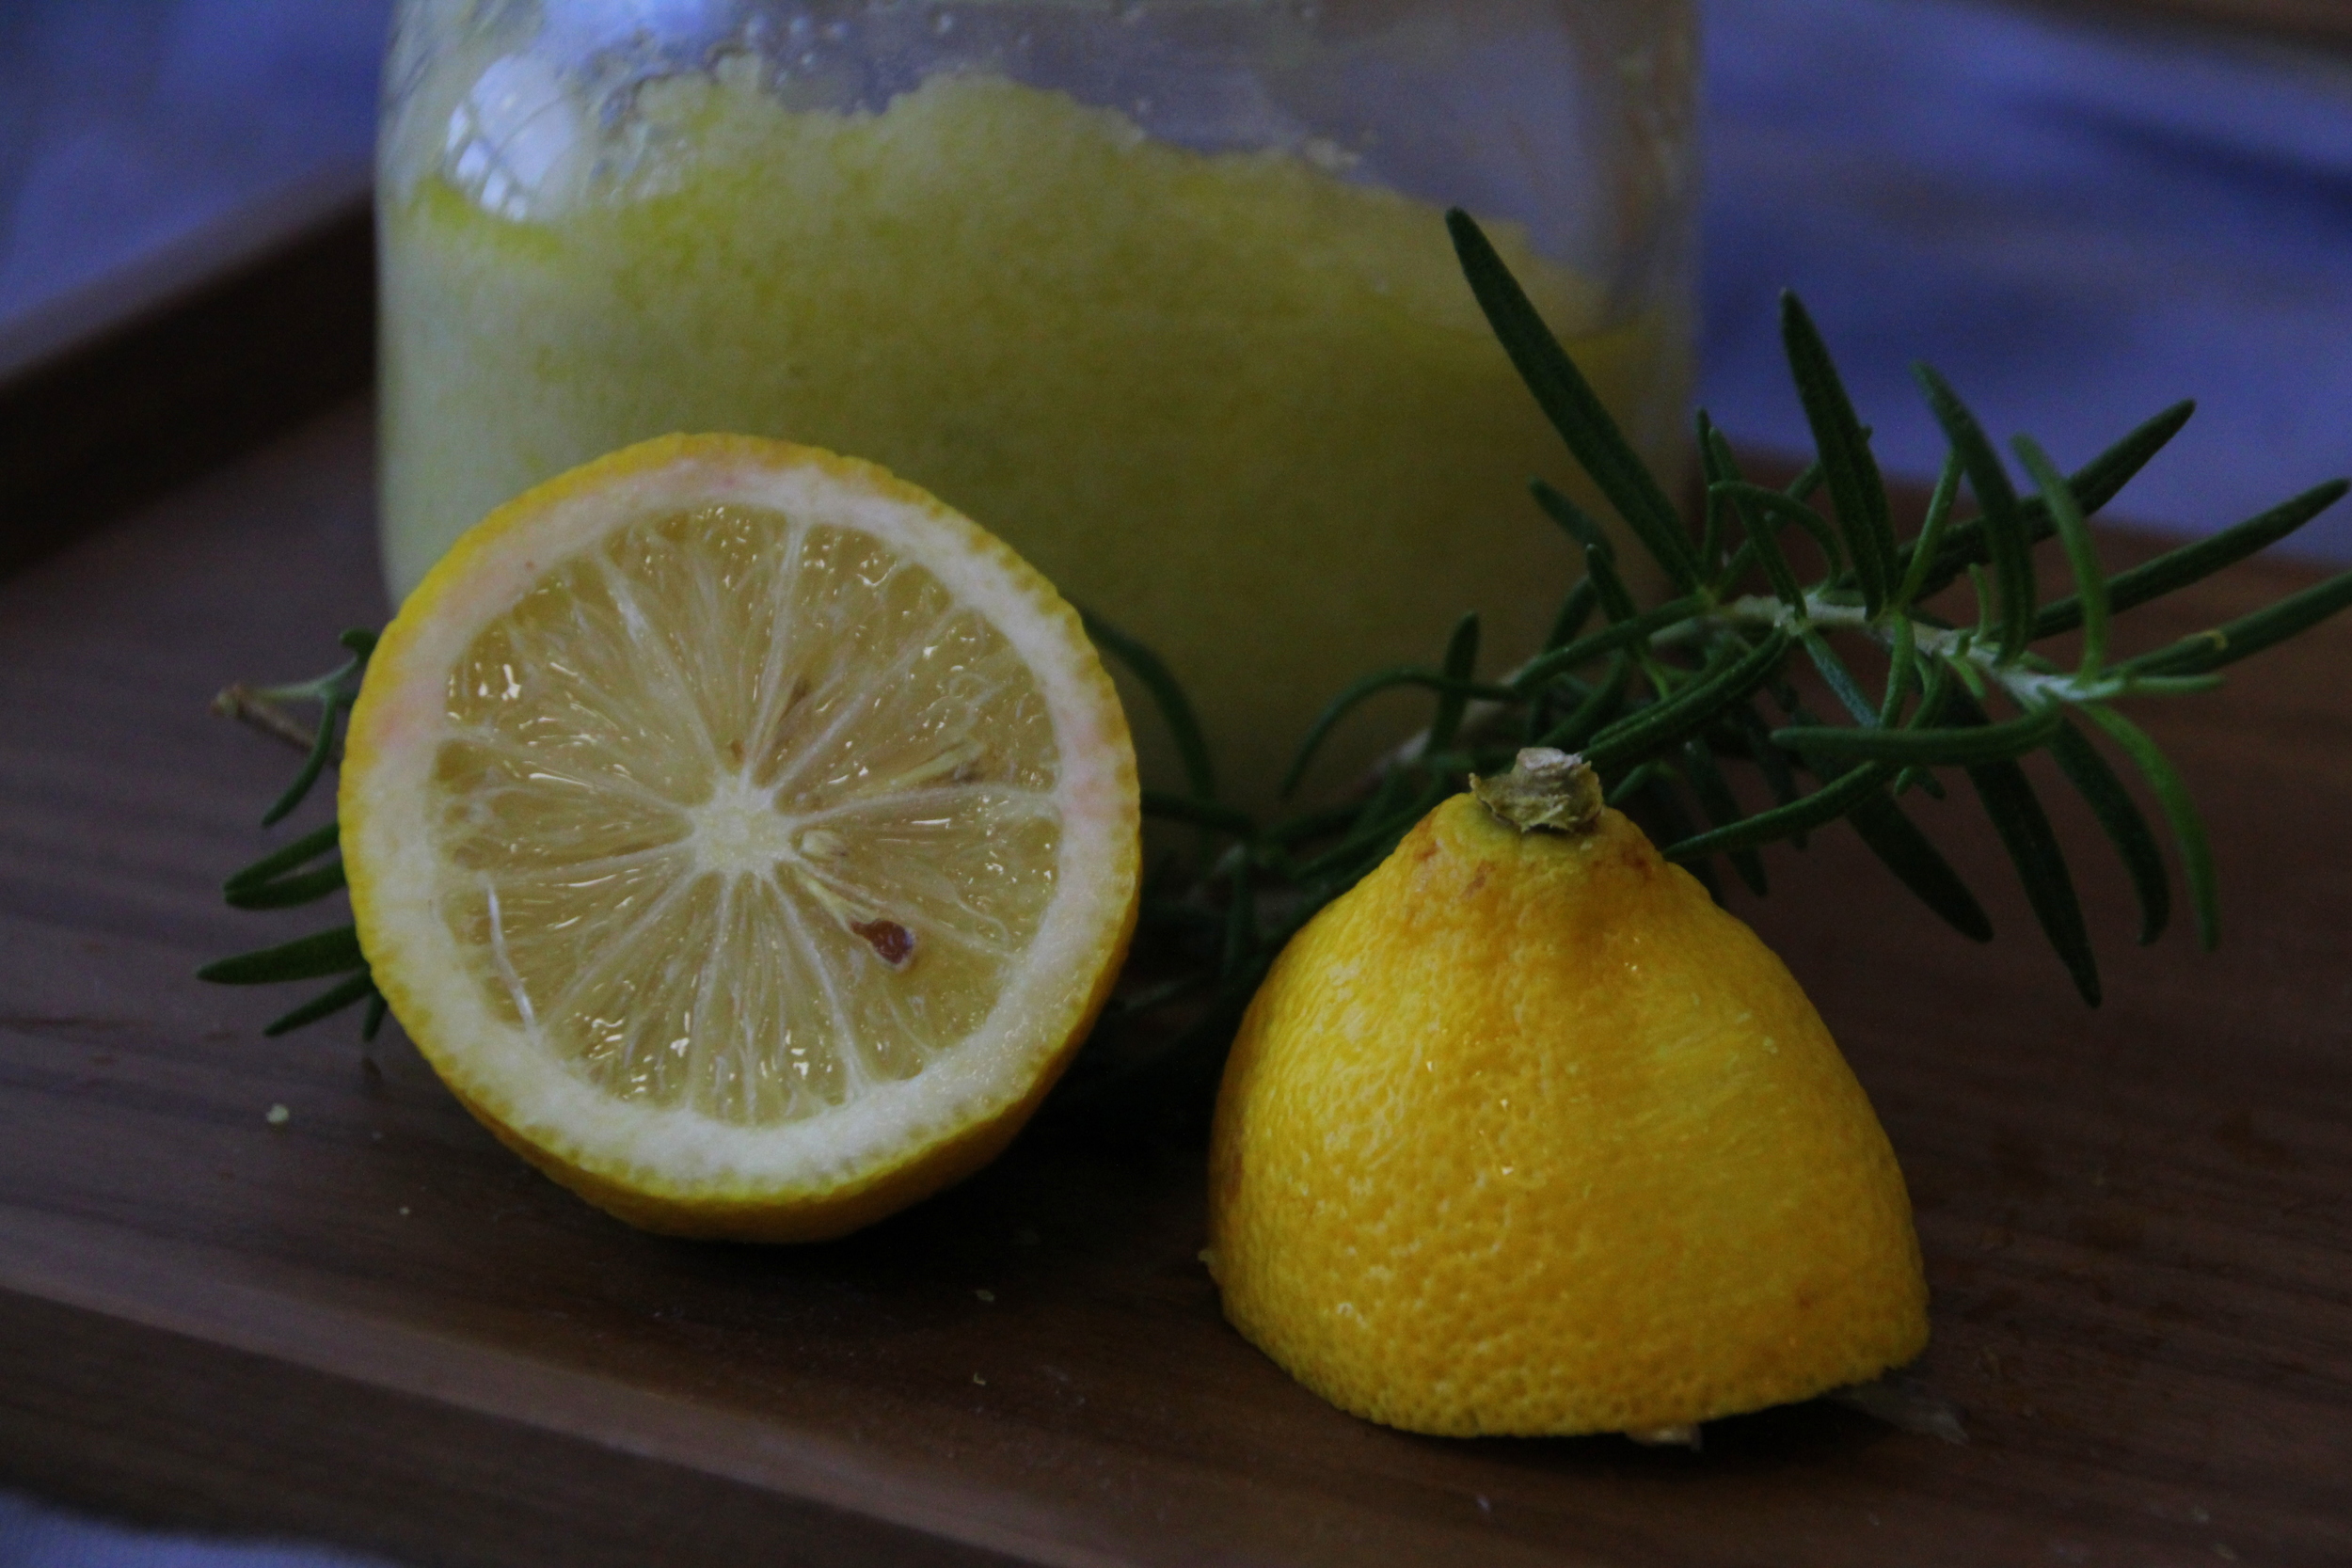
Purifying Rosemary-Lemon Scrub

Purifying Rosemary-Lemon Scrub
I miss my bathtub. On Saturdays, I would sometimes take a detox bath to relax and rid my body of toxins. Don't get me wrong, I'm thankful we have a shower with hot water. In college, I did a semester abroad in the Dominican, and had enough cold rain-water bucket baths to never underestimate the value of a hot shower again. Anyway, I decided to create a scrub with similar benefits as my beloved detox baths, and came up with this Rosemary-Lemon Sea Salt Scrub.
Rosemary's lists of benefits goes on and on, and it's one of my favorite herbs to grow and cook with (bonus: the plant is pretty hard to kill). The oil is made from the leaves of the plant, and contains antimicrobial and antioxidant properties, which makes it an excellent nemesis against skin disorders. It contains many anti-oxidants as well, and can fight free-radicals. While it has many of these purifying properties, rosemary oil does not dry out your skin. Instead, it nourishes it with many vital nutrients. Yay, rosemary!
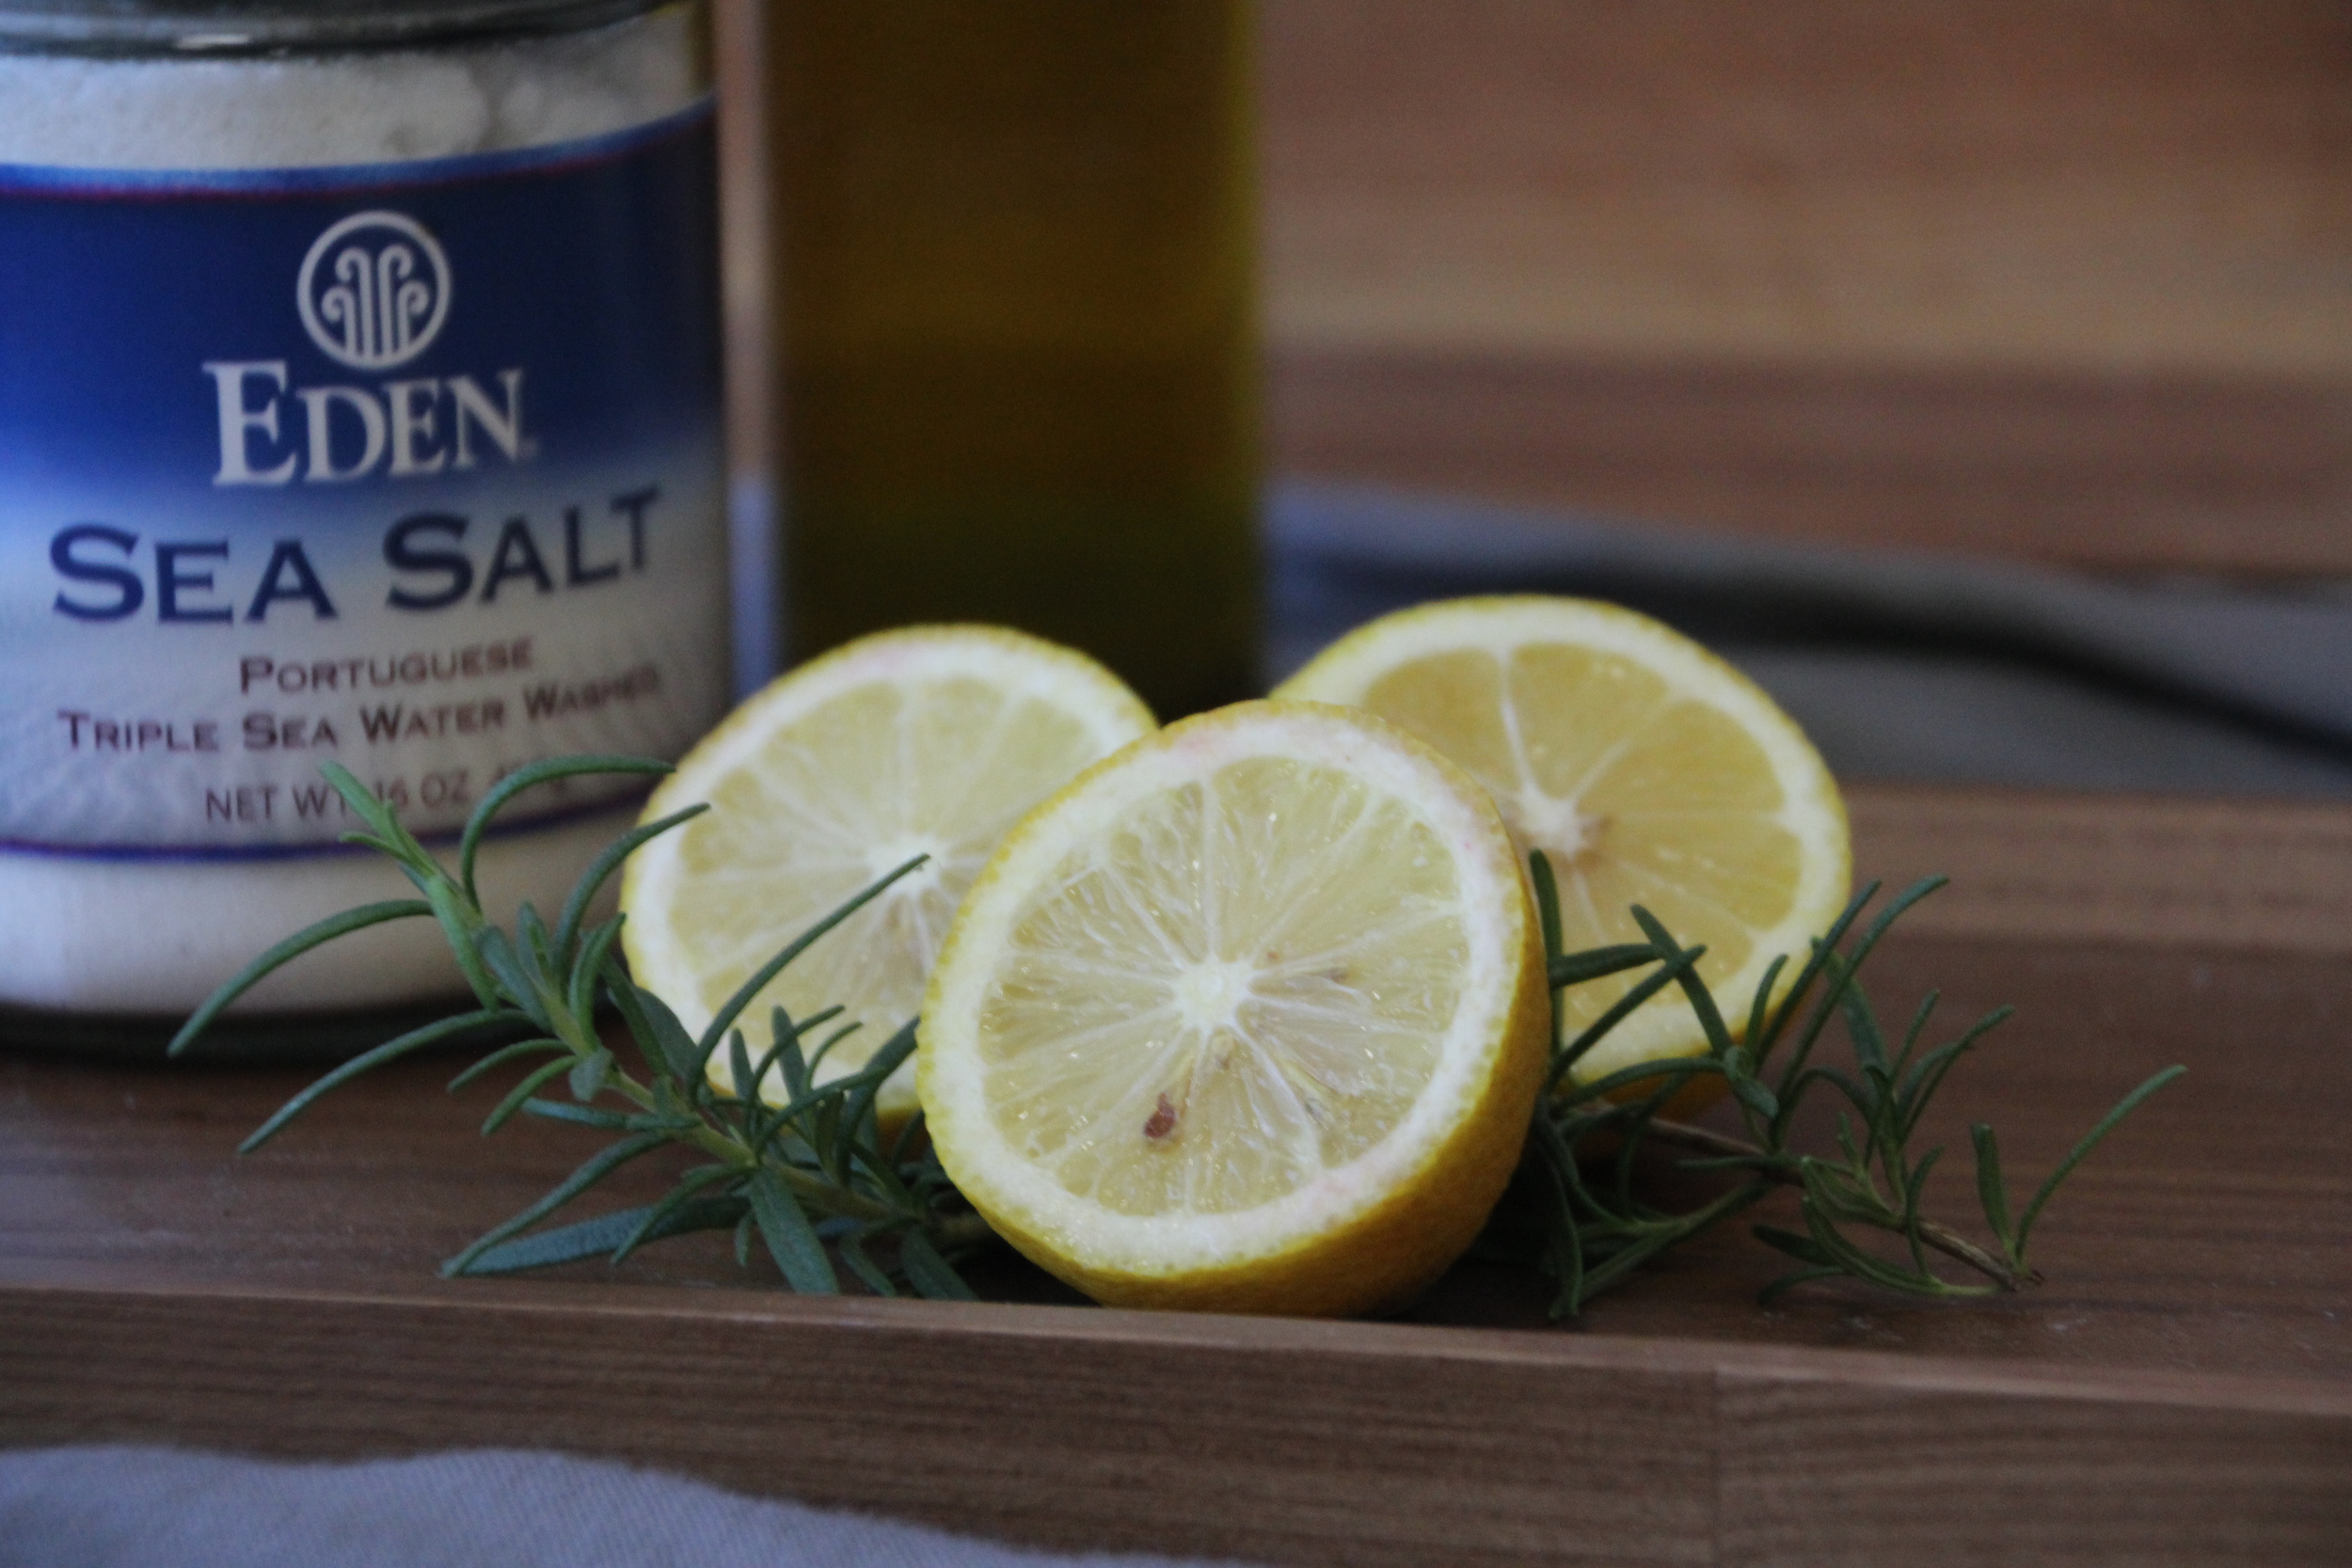
Purifying Rosemary-Lemon Scrub
You may already know of my love for lemon oil and its ability to fight heartburn, but it is also a key player in this scrub. I could go on and on about this oil, but specifically for external use, lemon oil detoxifies and rejuvenates the skin, making it the perfect partner for rosemary oil. It also increases circulation, clears the nasal passages, and gives your immune system an extra boost. BOTH rosemary and lemon are used in aromatherapy to lift the mood, so you can pamper yourself with a little aromatherapy treatment while you exfoliate!

Purifying Rosemary-Lemon Scrub
This takes about 5 minutes to whip up, and it oh so worth it! First, grab these things:
1 cup sea salt (I used fine grained sea salt since it's what I had on hand, but you can use coarser sea salt as well)
1/3 cup olive oil
1/2 Tablespoon vitamin E oil
1 lemon
Rosemary sprig (optional)
Rosemary Oil
Lemon Oil
Measure out your sea salt and pour it in a jar.

Purifying Rosemary-Lemon Scrub
Pour in your 1/3 cup of olive oil and 1/2 Tablespoon of vitamin E oil.
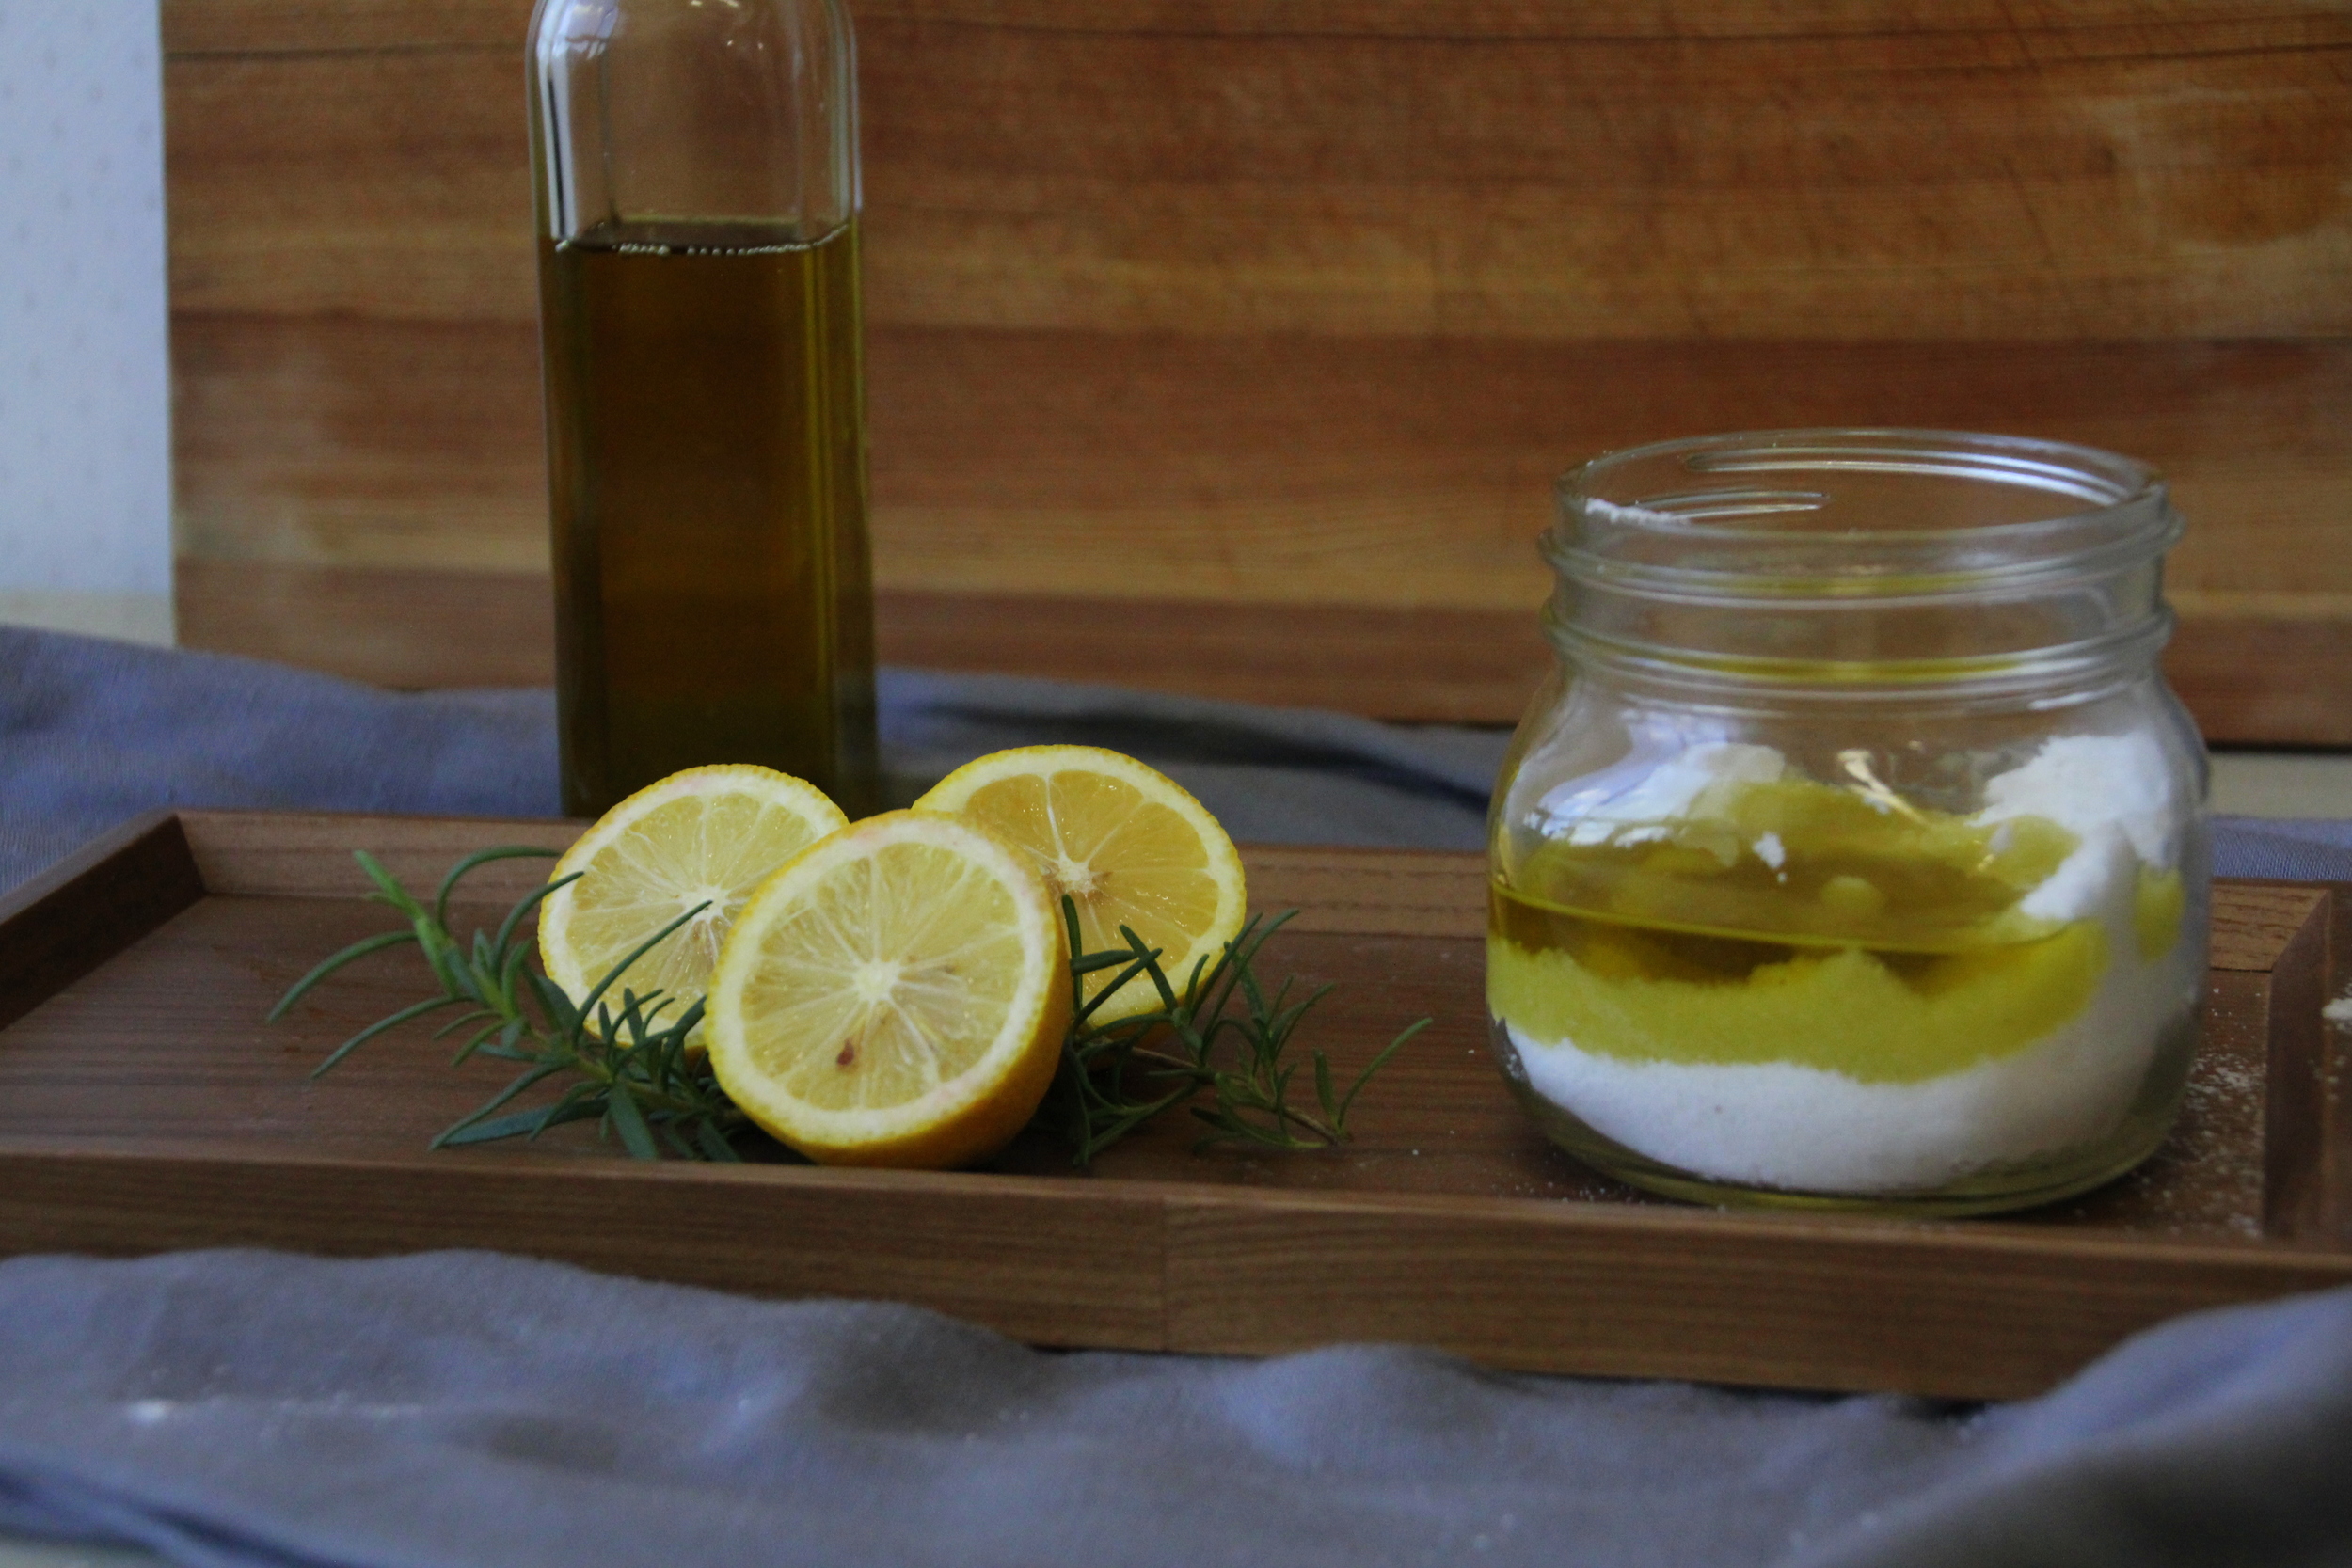
Purifying Rosemary-Lemon Scrub
Zest your lemon, and drop the zest in the jar. Cut the lemon in half and squeeze the juice into the jar as well. Add 5 drops of rosemary oil and 5 drops of lemon oil, along with a few chopped up rosemary leaves. The leaves are totally optional, but I love how they contrast with the sea salt mixture! Mix it all together, and enjoy!

Purifying Rosemary-Lemon Scrub
Purifying Rosemary-Lemon Scrub
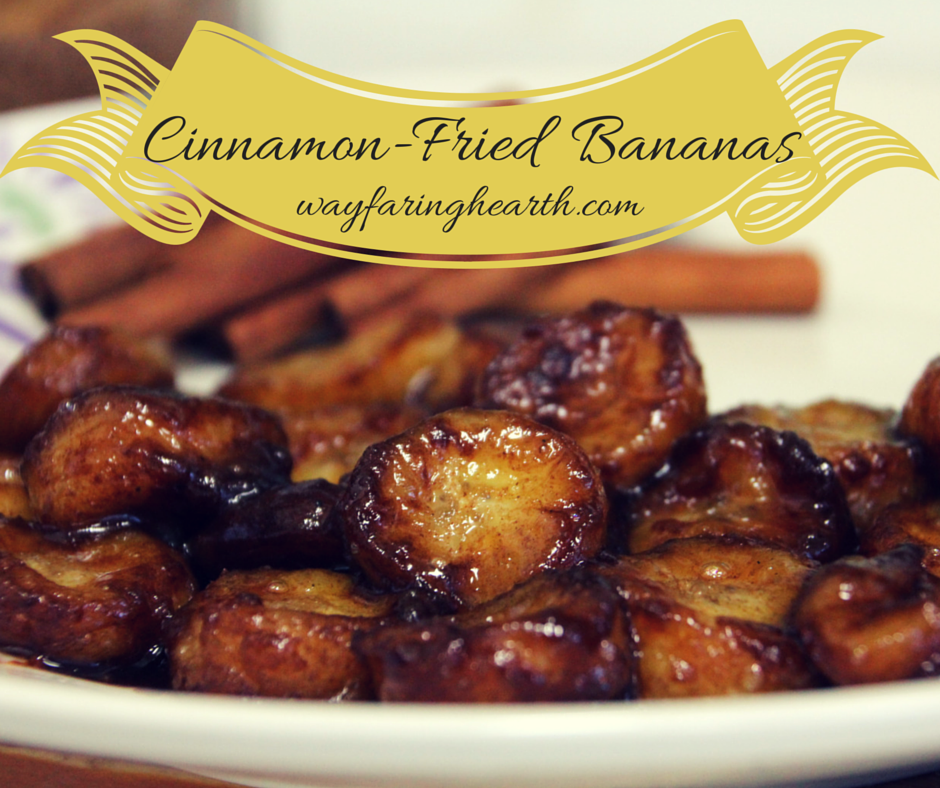
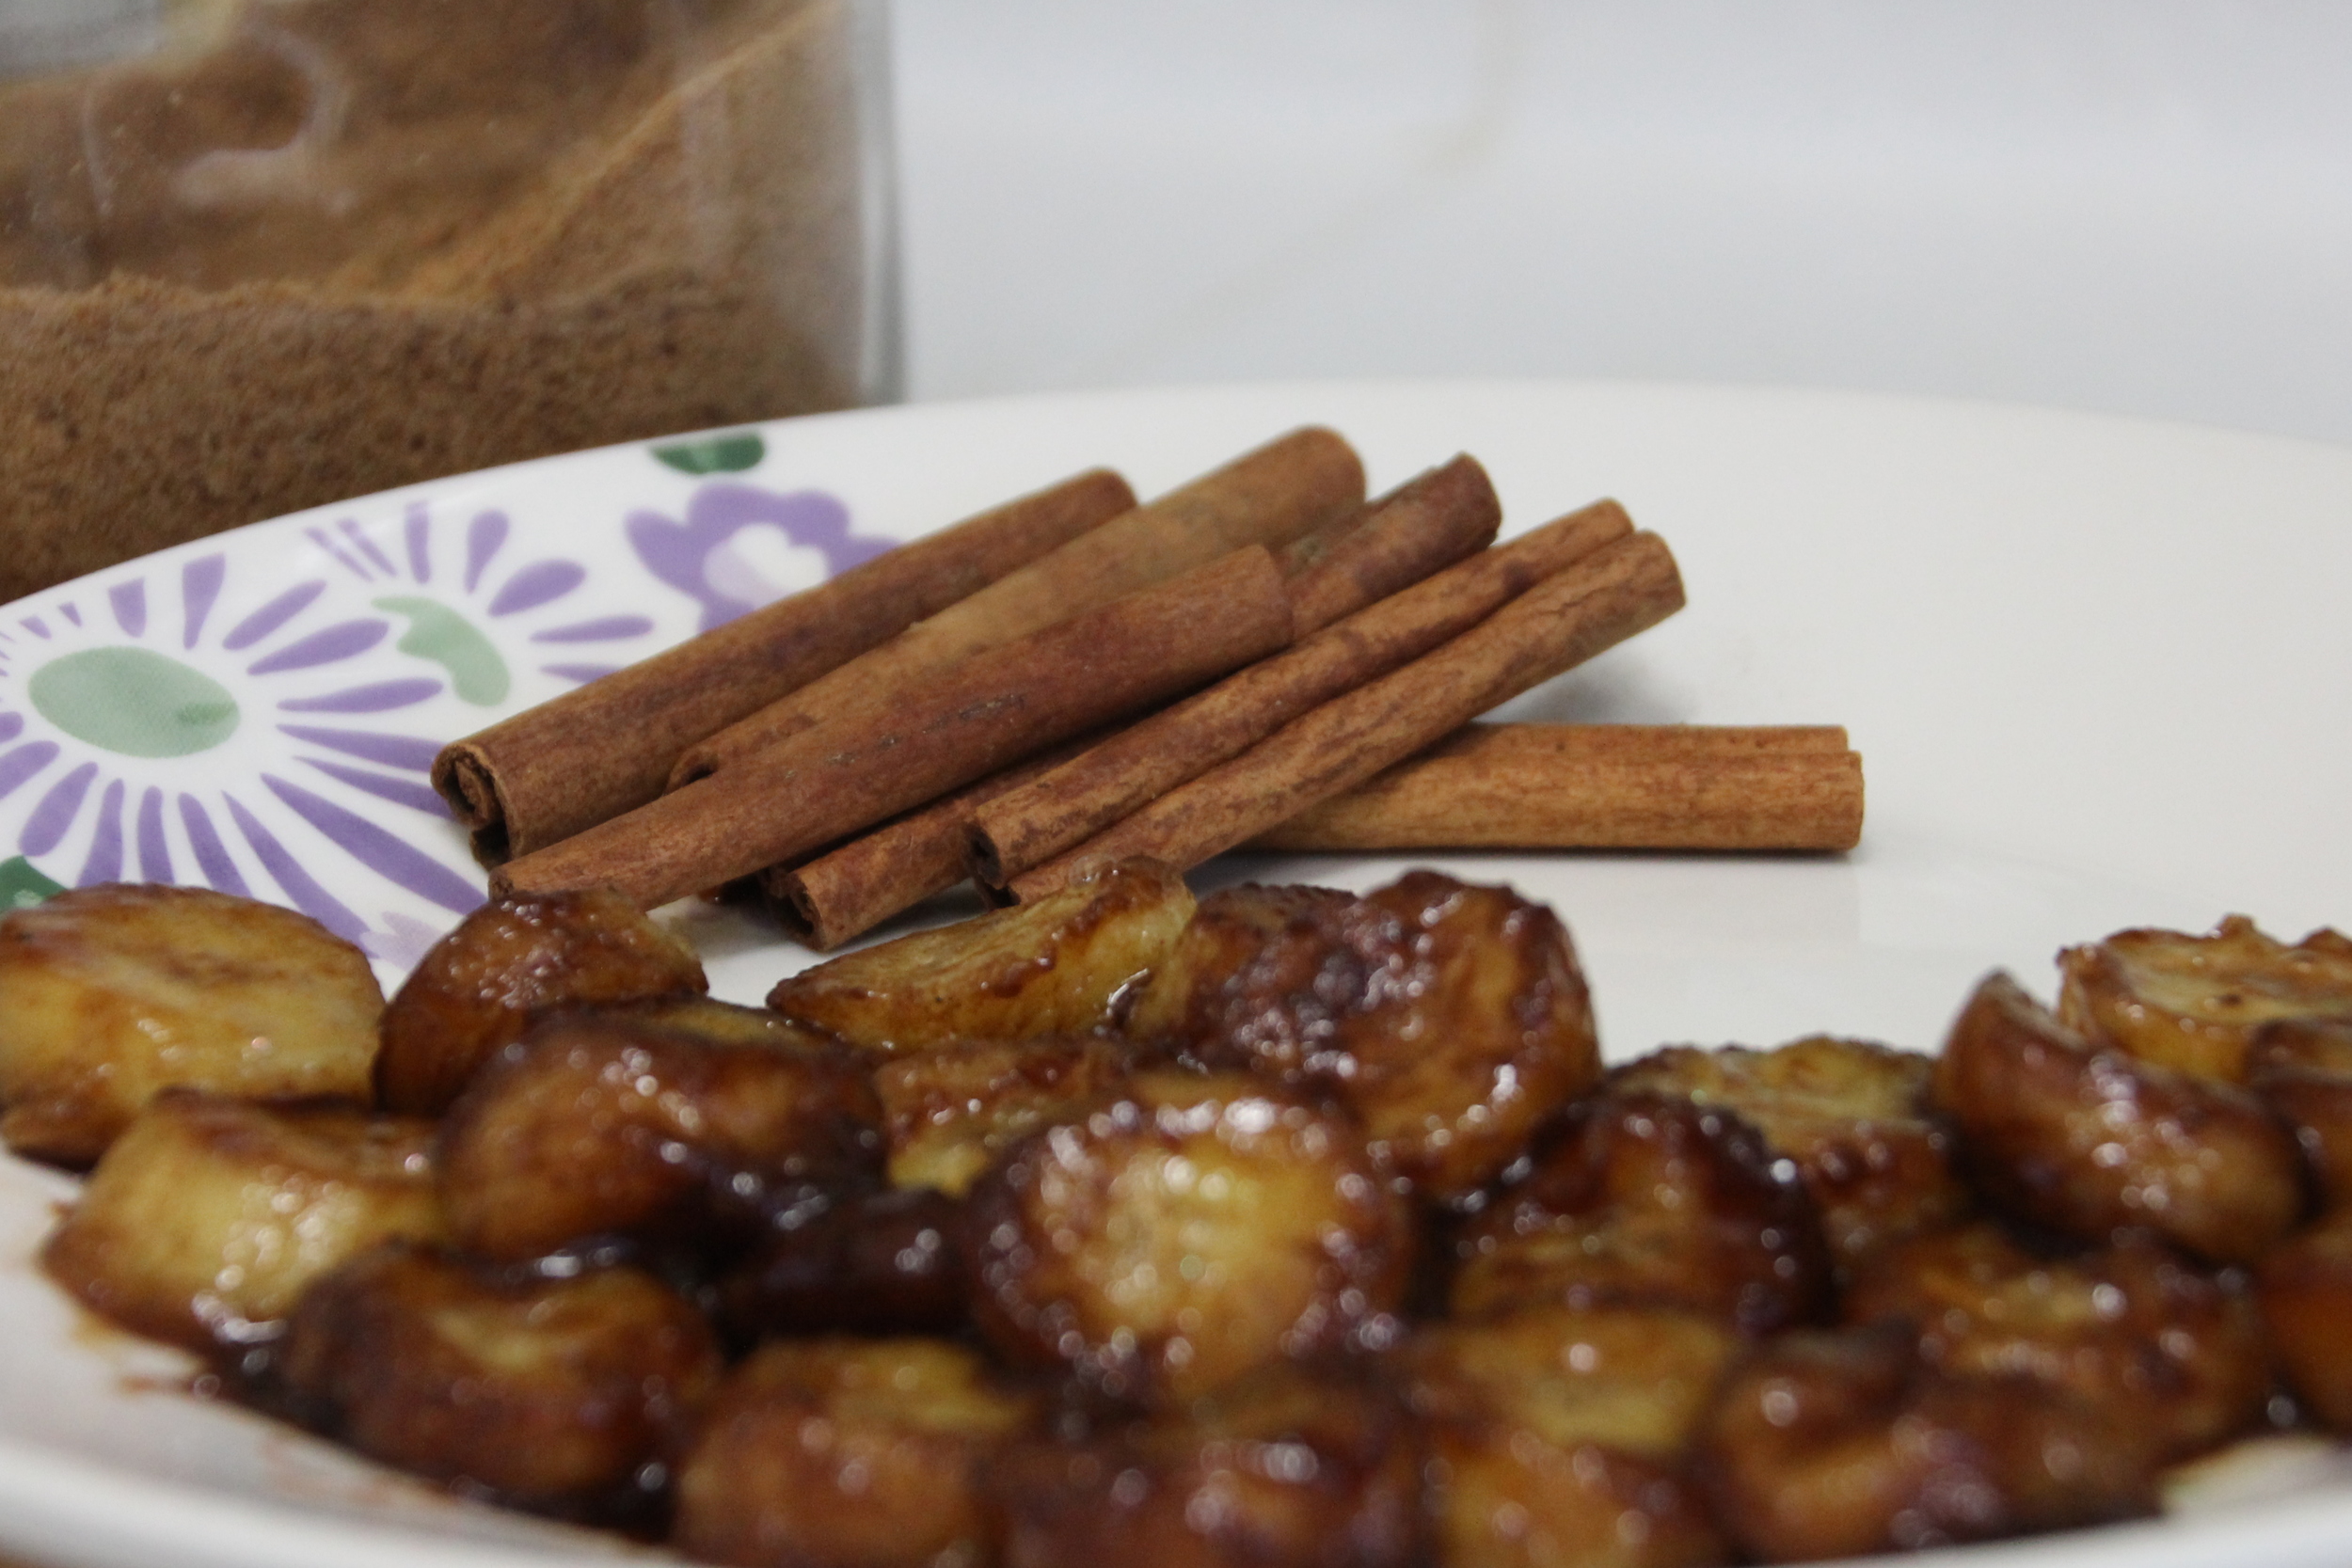
Cinnamon-Fried Bananas (Clean Eating)
 I love sweets and desserts.

My coffee is sweetened with homemade creamer, and I add a bit of honey to my tea. However, despite my love for everything sweet, I usually avoid too much refined sugar. These bananas are definitely a dessert, but since they are fried in coconut oil, and sprinkled with cinnamon and coconut sugar, they are incredible healthy and full of essential nutrients. You would think they taste strongly of coconut, however all you can taste is sweet banana with melt-in-your-mouth caramelized cinnamon and sugar. Holy yum.
I'm sure you all know of the benefits of coconut oil, but have you tried coconut sugar? It's packed full of nutrients, and is THE most sustainably grown sugar on the market. If you are going to substitute in in recipes, just use 1:1 measurements for brown sugar. Depending on the recipe, it may or may not change the taste. In the case of these bananas, it ended up tasting like delicious cinnamon sugar.
This recipe takes about 12 minutes to prepare AND cook. First you need to grab these things:
Medium frying pan
3 medium bananas or two large bananas
About 1/4 cup coconut sugar
1 Tablespoon cinnamon
3 Tablespoons coconut oil
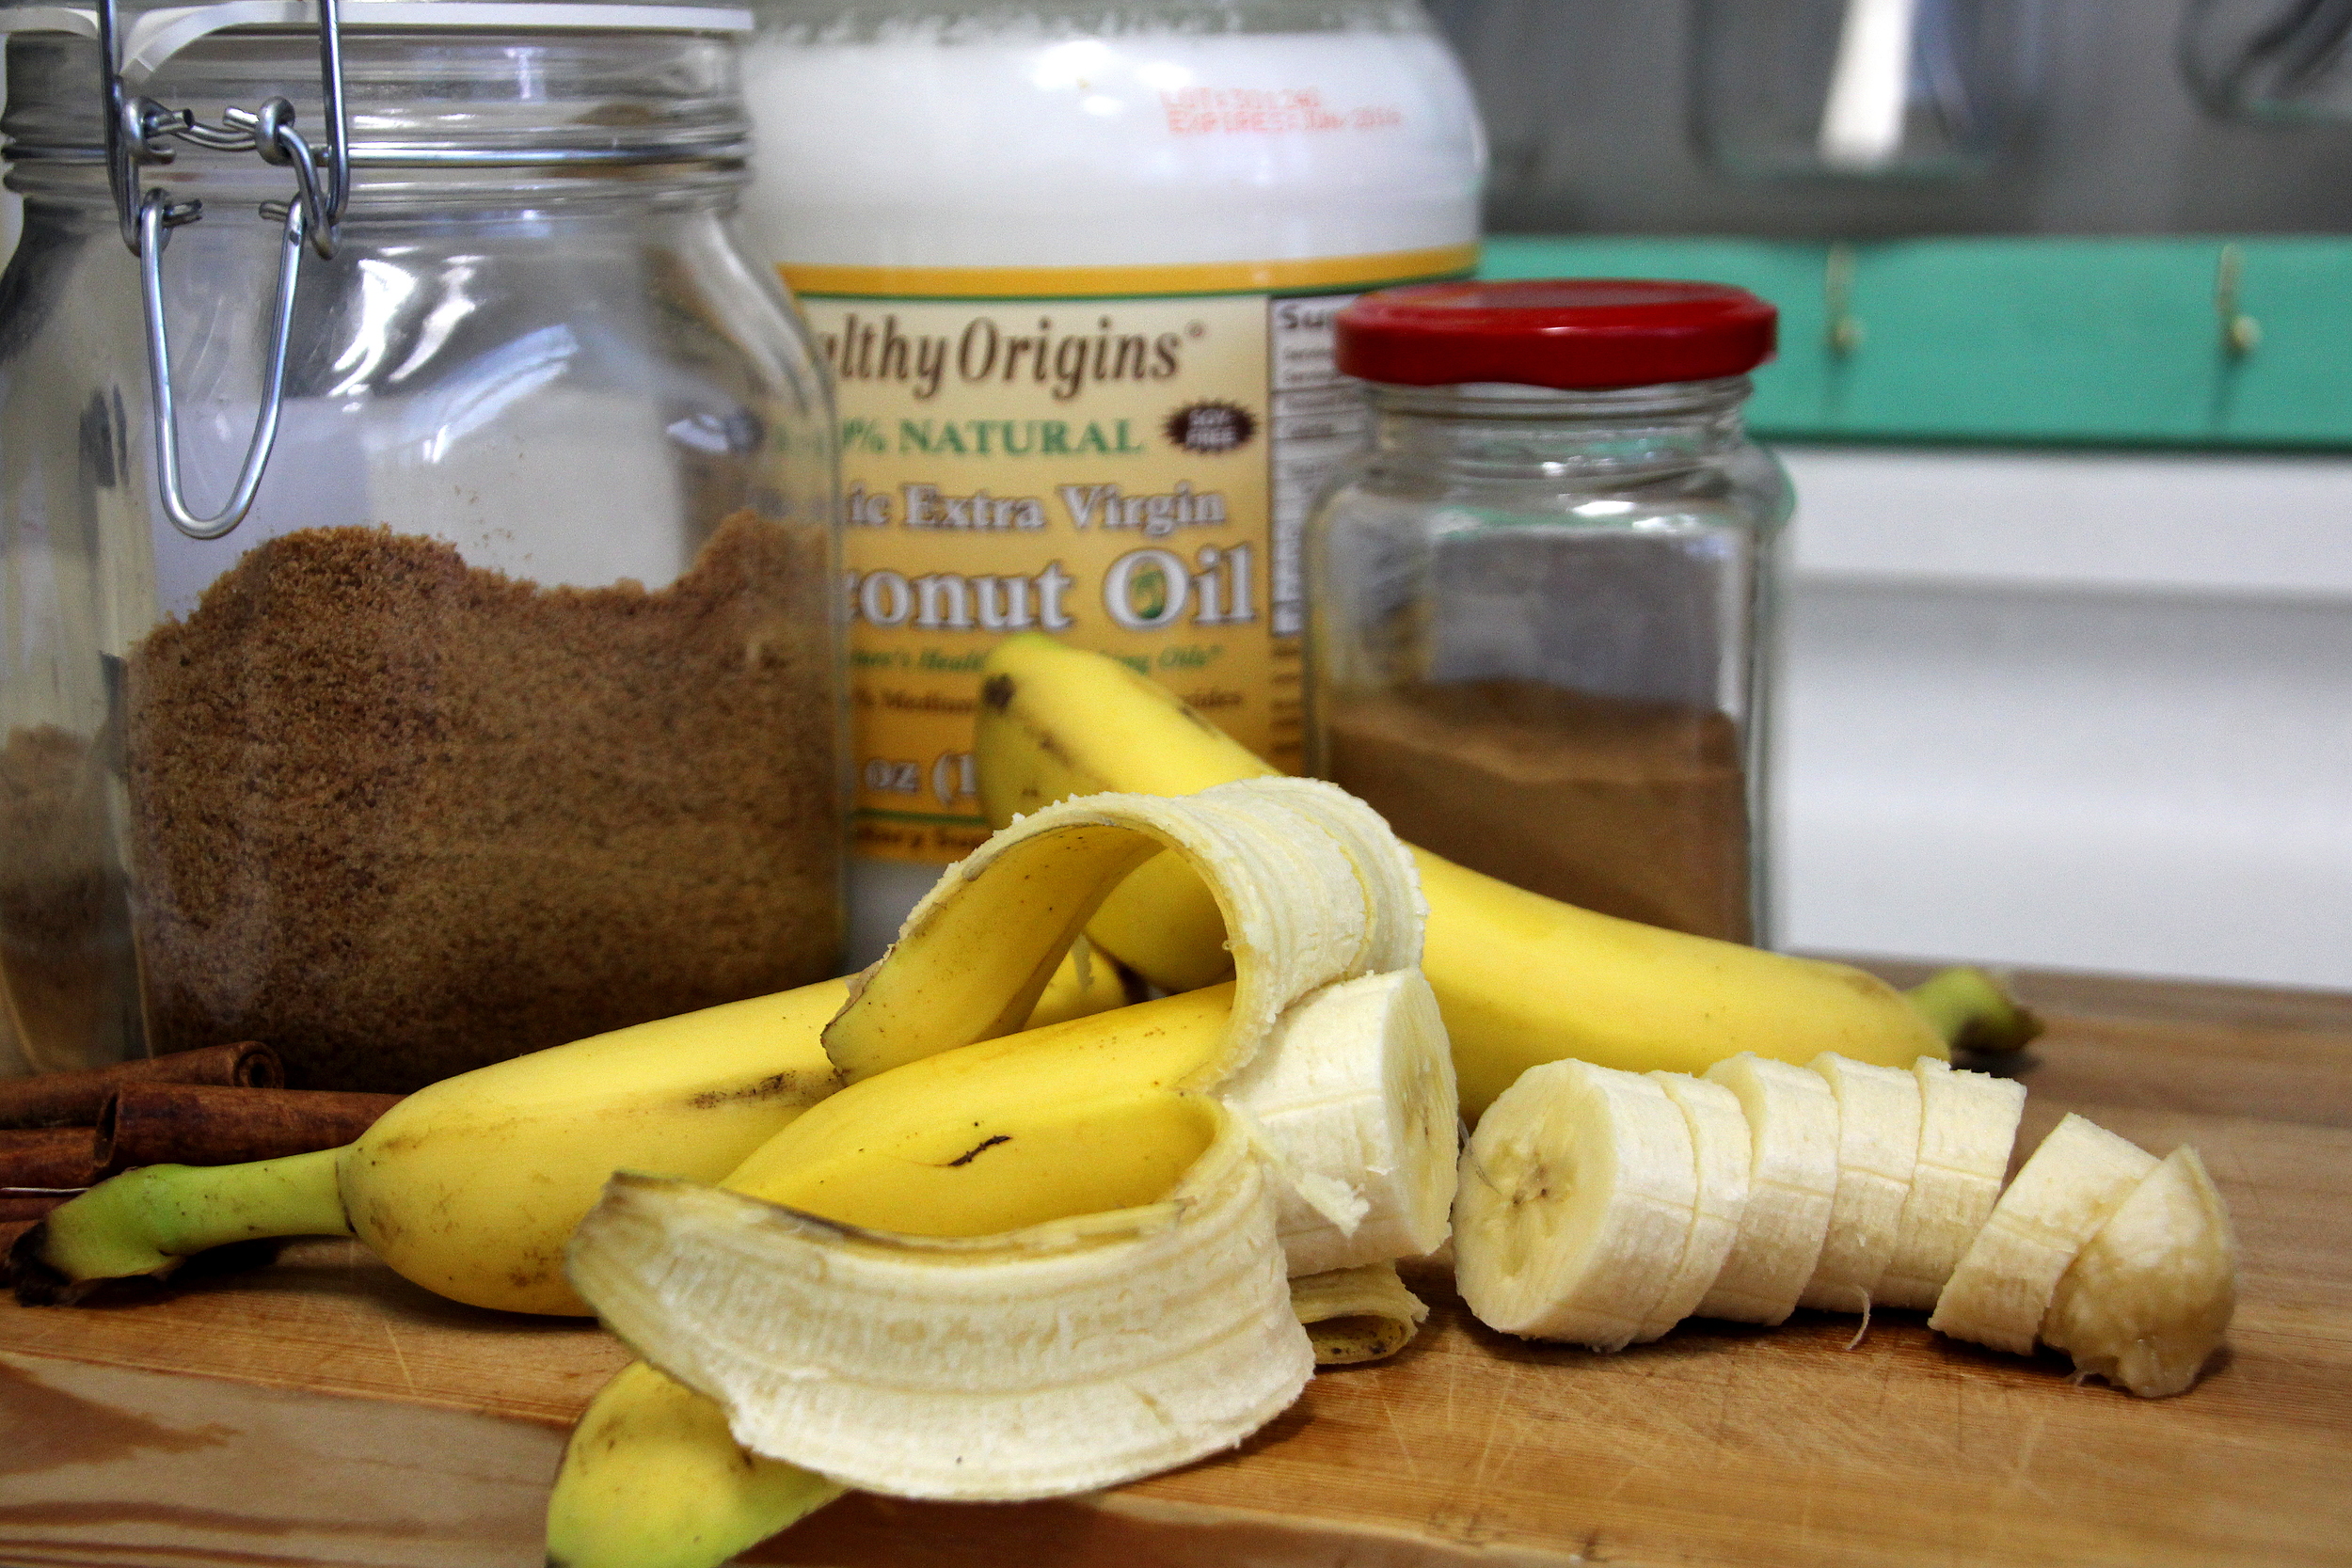
Put your coconut oil in the frying pan and turn the heat to high. While it's heating up, slice up your bananas to be about a half-inch thick. They really don't have to be super even, so don't stress it. The coconut oil will melt, and should be ready to fry things in 1 1/2-2 minutes depending on your stove. It will bubble a bit when you place the bananas in, and that's how you know it's good to go.

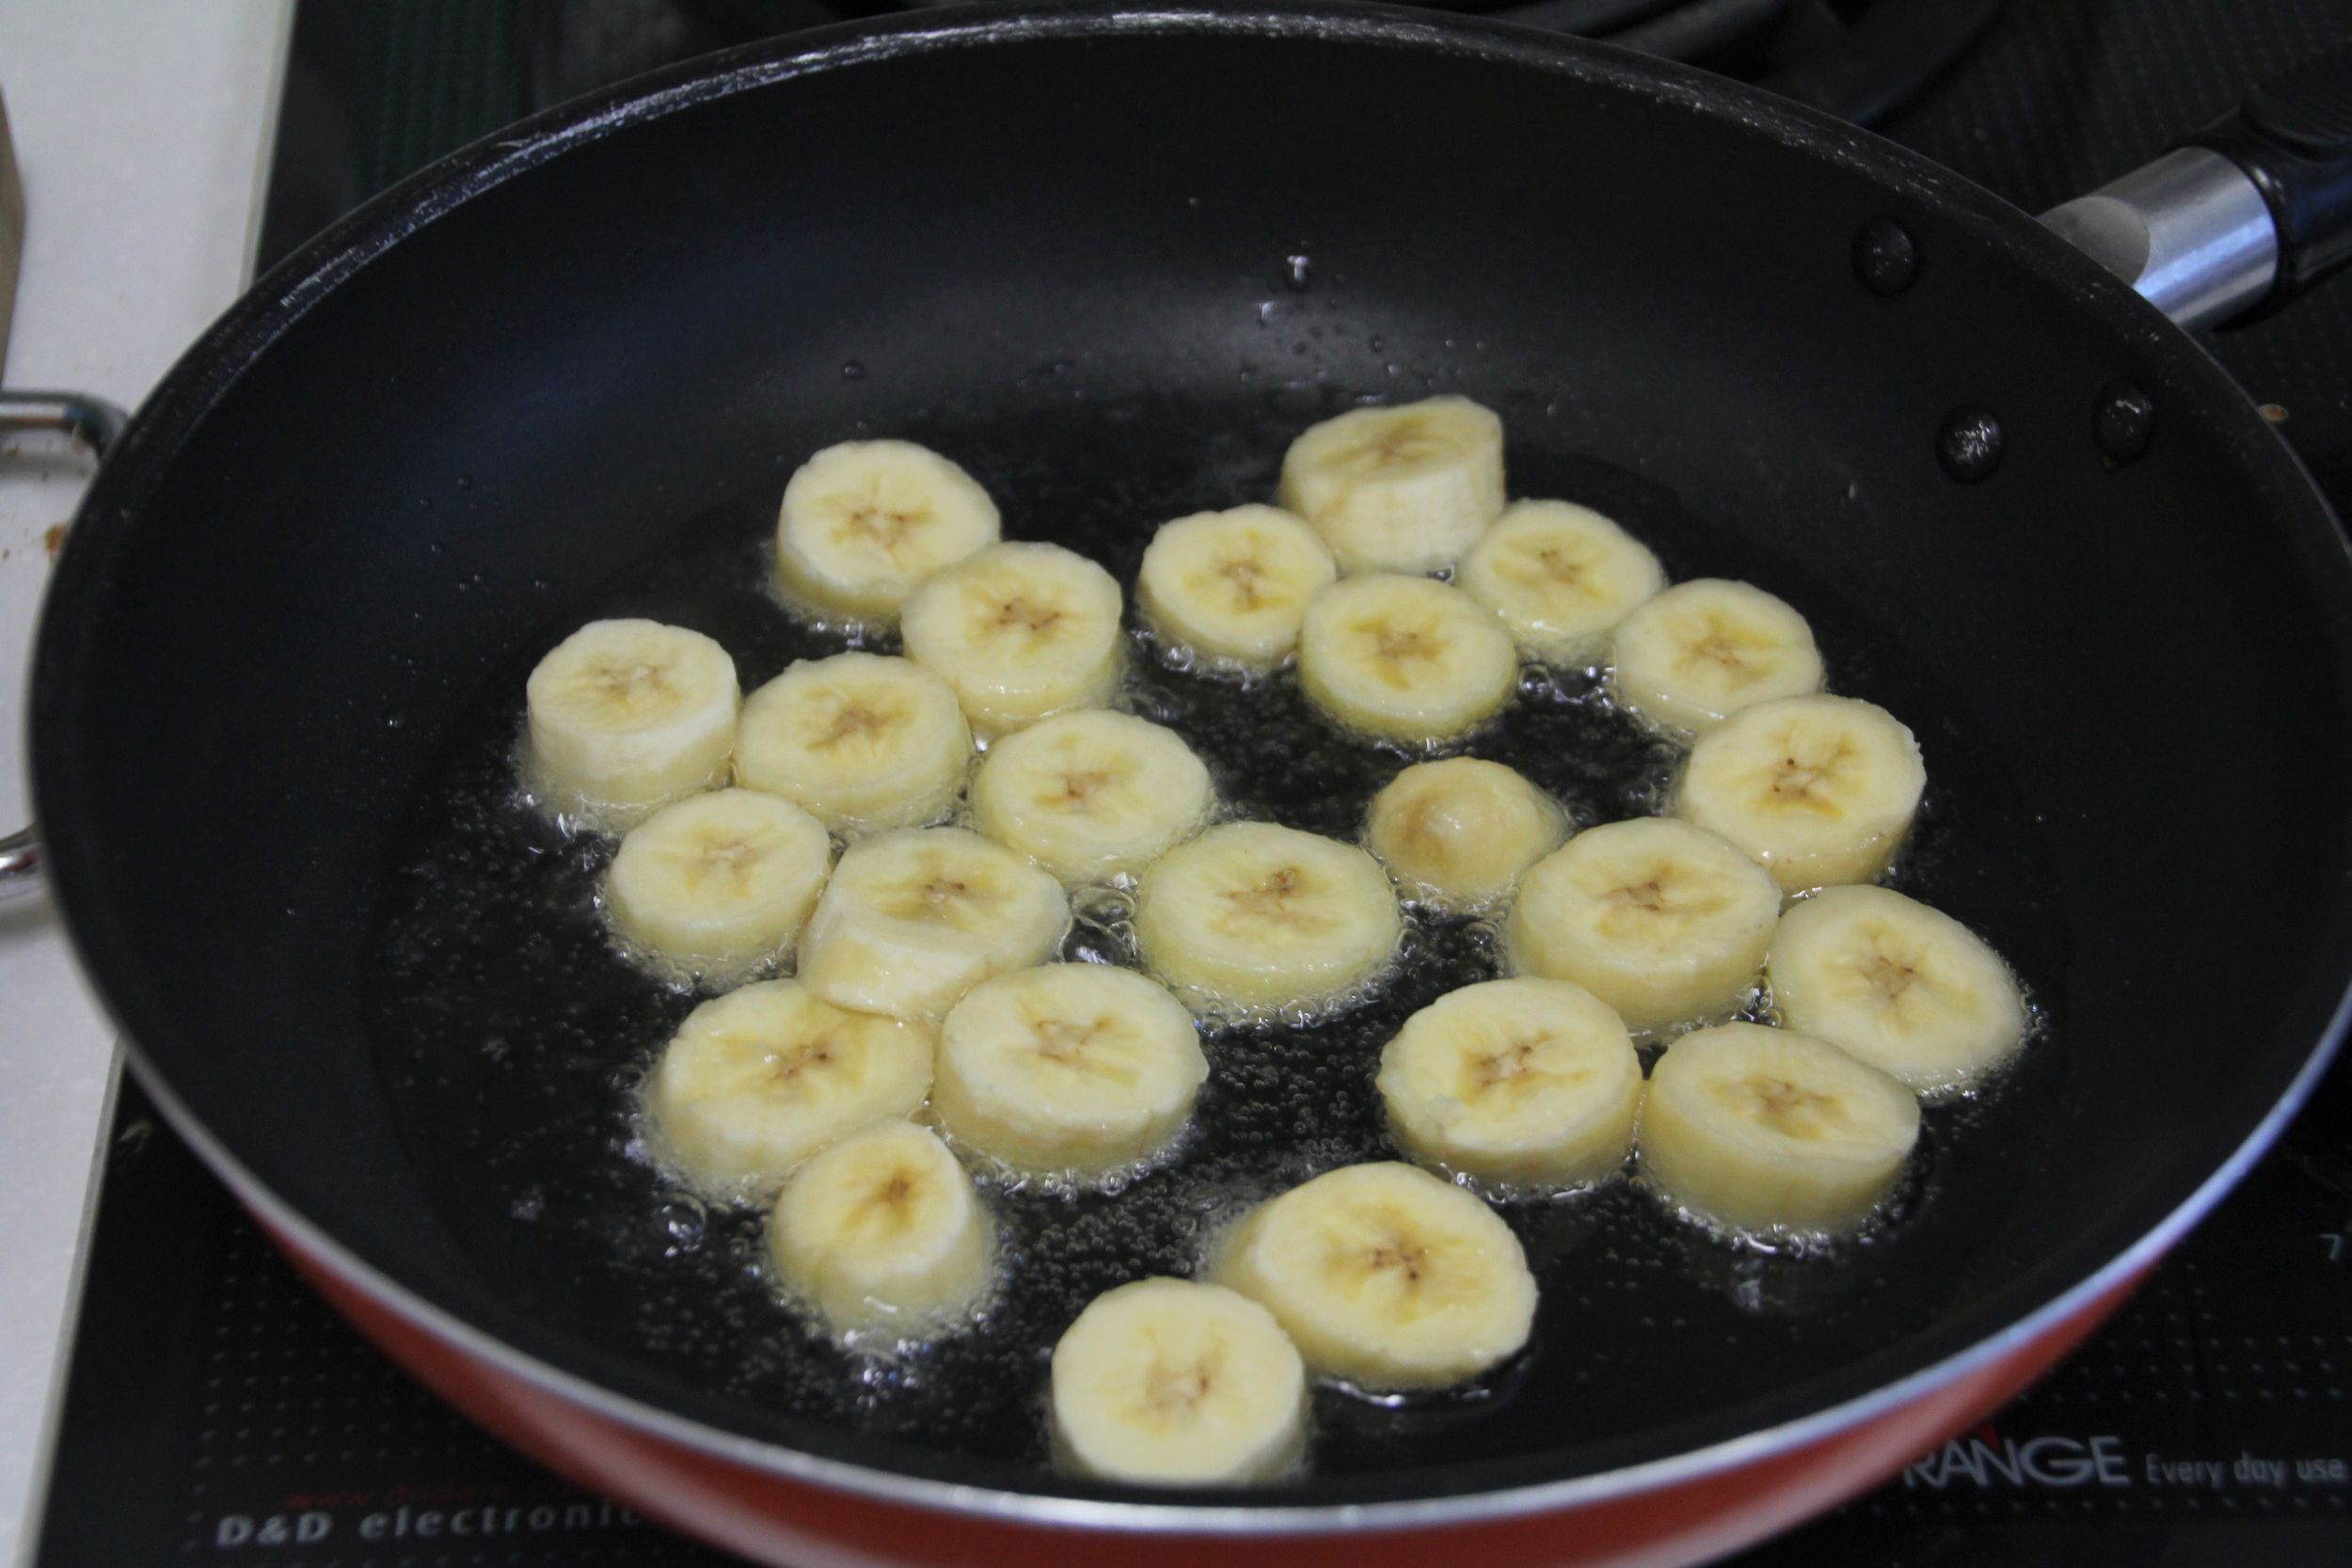
After you place the bananas in the hot oil, reduce the heat to medium-high and sprinkle the top with half of the coconut sugar, and half of the cinnamon. Leave it alone for about 2 minutes.
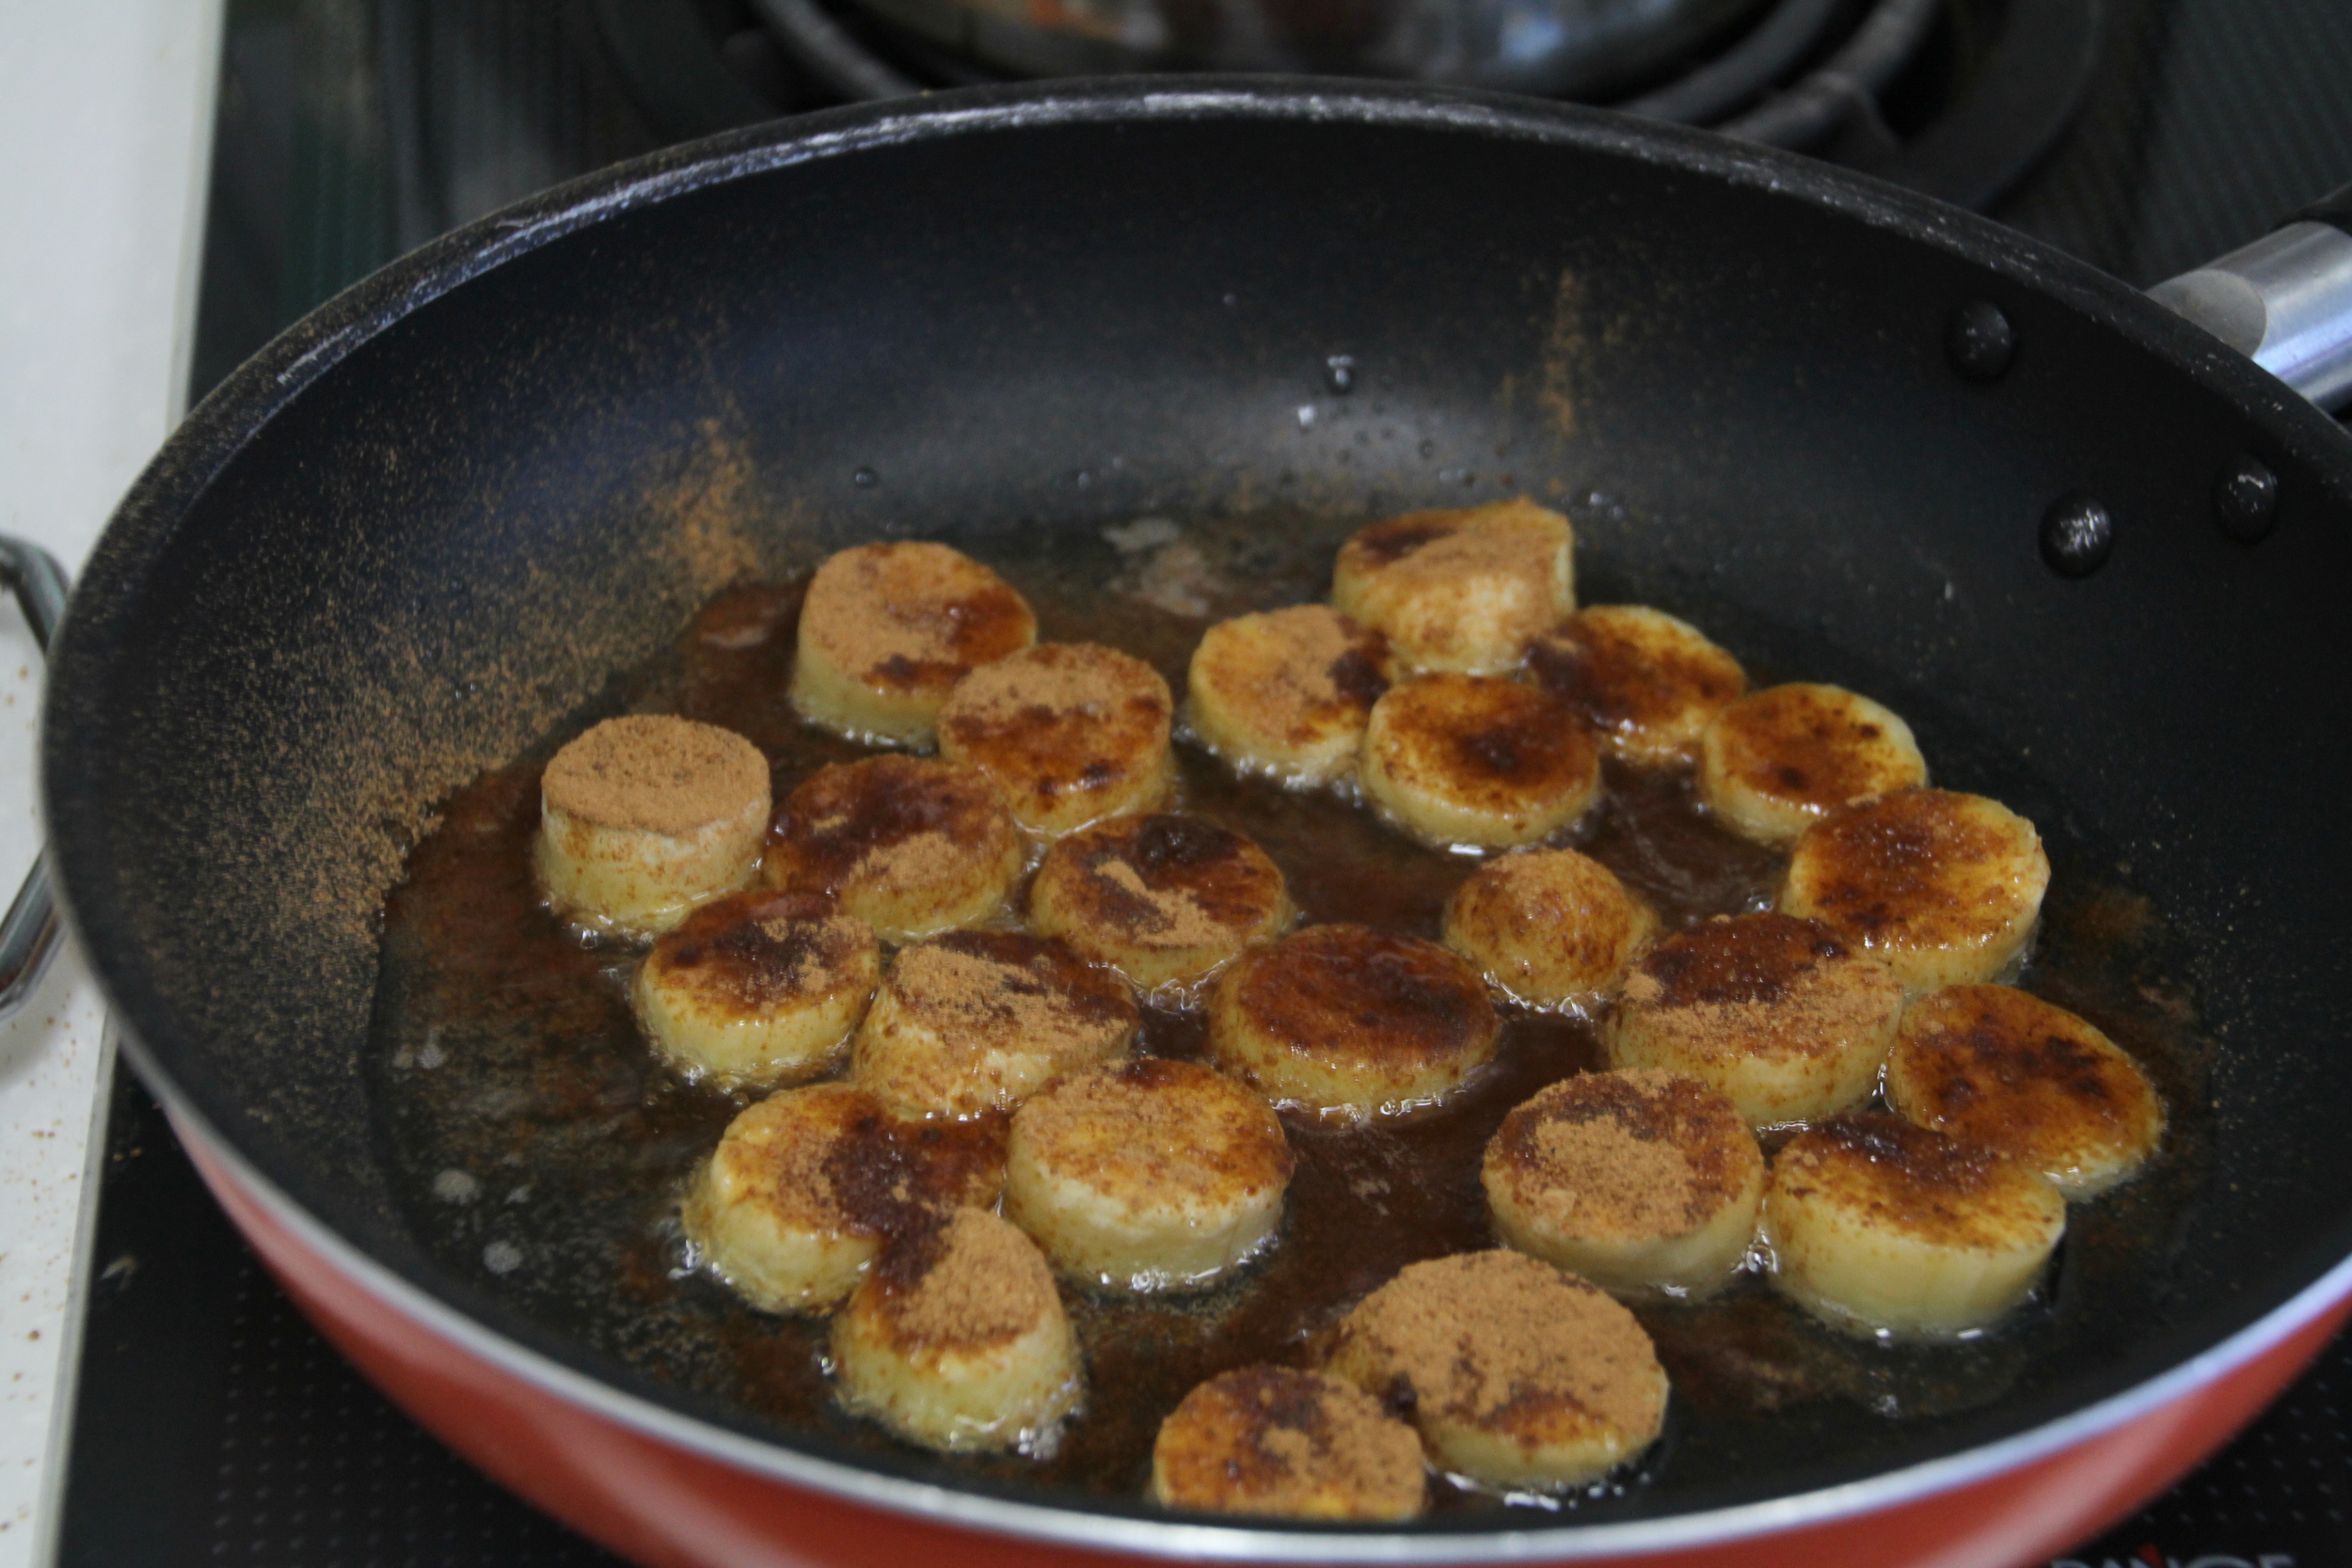
After the two minutes, flip the little guys over and sprinkle with the rest of the cinnamon and coconut sugar. Leave it for about 3 1/2 minutes, and then flip one more time. Let it fry for 2 more minutes, then take them out of the frying pan and put right on a plate! I found that I don't even have to drain them of excess oil. Let cool as they will be incredibly hot, and enjoy!
Cinnamon-Fried Bananas Recipe
3 medium bananas or 2 large bananas
1/4 cup coconut sugar
1 Tablespoon cinnamon
3 Tablespoons coconut oil
Drop the coconut oil in a pan and turn the heat to high. While it's heating, slice the bananas in 1/2 inch pieces. After the oil has heated for about 2 minutes, place your bananas in the pan. Sprinkle the top with half of the coconut sugar and half of the cinnamon. Let fry for 2 minutes, then flip. Sprinkle the other side with the rest of the coconut sugar and cinnamon, and let fry for about 3 1/2 minutes. Flip once more, and fry for 2 minutes. Take out of the pan and serve on a place after letting them cool for a bit.


What's your favorite healthy dessert?
Vanilla Cinnamon Whipped Body Butter
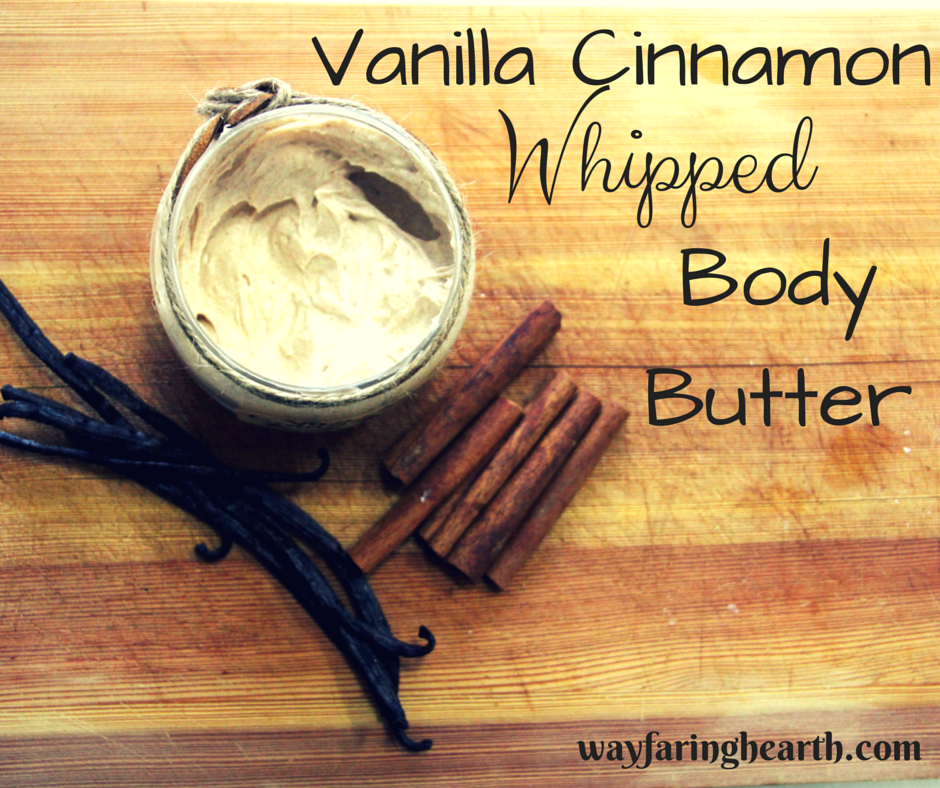 As the cold weather settles in, I change out my sandals for boots, my blouses for sweaters, and add more blankets to our bed. Fall invokes different sentiments than the vibrant summertime. It makes you want to cuddle up on the couch with hot chocolate and a good book, and suddenly there seems nothing wrong with staying in all day. I also tend to change out my usually light and fruity perfumes for warmer, more comforting scents. This Vanilla Cinnamon Whipped Body Butter is just what the doctor ordered.


A while ago I asked Facebook to vote on a scent, and Vanilla Cinnamon was among the most popular. I decided today was the day to finally whip it up (literally), and less than 10 minutes after starting the process, I was done. There are so many reasons to make your own body butter. It's much less expensive, you can choose your scents, and you don't have to worry about your skin soaking up any toxins or chemicals.

Here's what you'll need:
1/2 cup fair trade shea butter
1 Tablespoon vanilla extract
1/2 Tablespoon almond oil
1 teaspoon Vitamin E oil
1 teaspoon cinnamon
First, add all of your ingredients into a bowl.

Grab your hand-mixer and whip the ingredients at medium speed for 30 seconds, then increase the speed to high and whip until your body butter is light, beautiful, and fluffy (about 1-2 minutes).
It should look something like this:

Gorgeous, isn't it? Now, all you have to do is throw it in a jar and it's ready to use! Since this is a body butter, it's heavier than a regular lotion, and will make your skin oh-so-soft. I love to use this after shaving my legs. The light and fluffy texture makes this look like frosting! Enjoy!


Natural Food Poisoning Remedy: Activated Charcoal


Natural Food Poisoning Remedy: activated charcoal
So, this happened this week:

IMG_9938

IMG_9935
We're fostering these two little Jindo mix girls until they are ready to be adopted, which could be a month, or ten months. They were previously at a kill shelter here in Korea. Thankfully, we got in touch with an organization that finds foster families for the dogs that are there. We've already fallen in love with them! Fortunately, all three couples that work at Hans have dogs, so we've already talked of play dates and dog-sitting.

IMG_9907
Anyway, this week's "Health, Naturally" post has nothing to do with puppies. I just like showing pictures of them. We're actually going to talk about food poisoning, which is anything but cute and cuddly (how's that for a segue?).
Before we came to Korea, I researched remedies for food poisoning, parasites, and other things that always tend to happen when one travels overseas. I was finding that the best remedy for parasites is oregano oil capsules, however it was hard to find a solution for food poisoning that you could take on an empty stomach. Sorry, but I'm not going to eat a meal in the middle of expelling my previous one.
I finally found some information about activated charcoal, and after a few hours of obsessive research, I purchased some for the inevitable, dreaded food poisoning. We've used it three times, with great results. Folks, there's no quick solution, but activated charcoal can help your body get rid of the toxin much faster, which means less sick time for you.
One of the things I love about charcoal is that it doesn't stop you from getting rid of the toxin, it simply binds it up and passes through when you use the bathroom. I avoid taking things like Imodium, since it stops your body from getting rid of whatever is bothering it. Charcoal can bring relief, but does so by soaking up the toxins. It turns out that hospitals keep this stuff on hand for food poisoning as well
The first time we tried using charcoal was when my husband decided to try some pork ribs, which should be fine, but for some reason every other time he had pork ribs he would be up all night getting sick. We're not sure what exactly it is about BBQ ribs, since he can have bacon, and he can eat BBQ. Ribs never sit well with him. He decided to take a chance and have them again, and within a couple hours was feeling horrible. I promptly gave him two capsules of charcoal, and a full glass of water. After he took it, he felt relief within a half hour, and never got sick. Now we just stay away from barbecue ribs.
Now, I wouldn't say he had experienced food poisoning, but the situation at least showed me there was something to using charcoal. I decided to bring it with us to Korea, and a couple weeks ago I couldn't have been happier that I did.
For dinner we tried some new Korean food, which tasted great, but later that night I awoke and found that Nate had been getting sick for the past half hour, and my stomach was starting to feel terrible. It came suddenly, and was obvious that food was the culprit. I made some peppermint tea for both of us, and then we both took the activated charcoal.
Like I said, there is no instant fix for food poisoning, but the charcoal definitely lessened our symptoms. I had caught mine in time, and never got sick. After Nate took the charcoal, his vomiting stopped, and he was able to go back to sleep. Compared to being sick all night, it was much easier to deal with.
It's really important that you drink a lot of liquid with the charcoal, or else you won't pass it through as fast. Being hydrated helps it work through your system, and soak up the toxins in your stomach and intestines. Like I said, the charcoal will pass through your body (it will not absorb the charcoal), so don't be alarmed when there is, um, evidence, of charcoal in your stool.
Some people choose to mix the powder in some water or food, but I prefer the capsules so I don't have to taste it.

Here is the short and sweet of what to do you if you start to feel food poisoning coming on:
1) Sip a mix of organic apple cider vinegar and water if you are able
2)Take two capsules of activated charcoal, with a lot of peppermint tea, water, or other liquid of your choosing
Personally, I have a hard time drinking the apple cider vinegar if I am feeling ill, but if you can stomach it, the vinegar will really speed up the process. The day after we got the food poisoning, we stuck to just eating things like rice and homemade chicken broth .
Of course, don't avoid going to the hospital if things get serious or if you feel too dehydrated. However, taking the charcoal can turn a few days of misery into only a few hours of sickness. It definitely has a permanent spot in my medicine cabinet.
What do you do at the onset of food poisoning? What have you found to be most effective?

DIY Citrus Cleaner
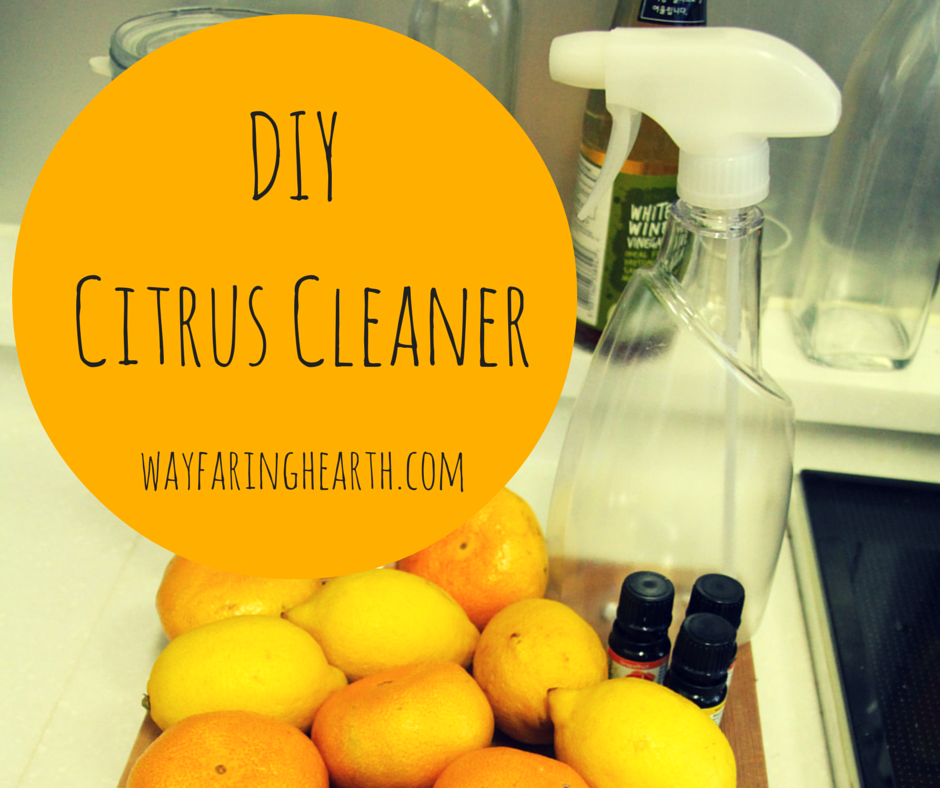
 I wish I could keep the counters clean when I cook. However, every time I step foot in the kitchen, it seems that I cause an explosion of some sort, whether it be flour, sauce, butter, or vegetable peels cluttering up our already sparse counter space.
Usually, I would just grab any old cleaner, spray the counters, and move on with my life. However, I finally made the connection that FOOD is prepared on my counters, and heaven forbid the store-bought cleaner should contaminate it. From this moment I set out to make my own cleaner, and after a good deal of Pinteresting I finally have a formula I am proud of. Not only is it safe, it actually works better than the store-bought cleaner I was using in the first place! Win.
Just grab these things:
1/2 cup white vinegar
Any citrus oil (I used lemon, grapefruit, orange, and tangerine)
2 cups warm water
1 Tablespoon Baking soda
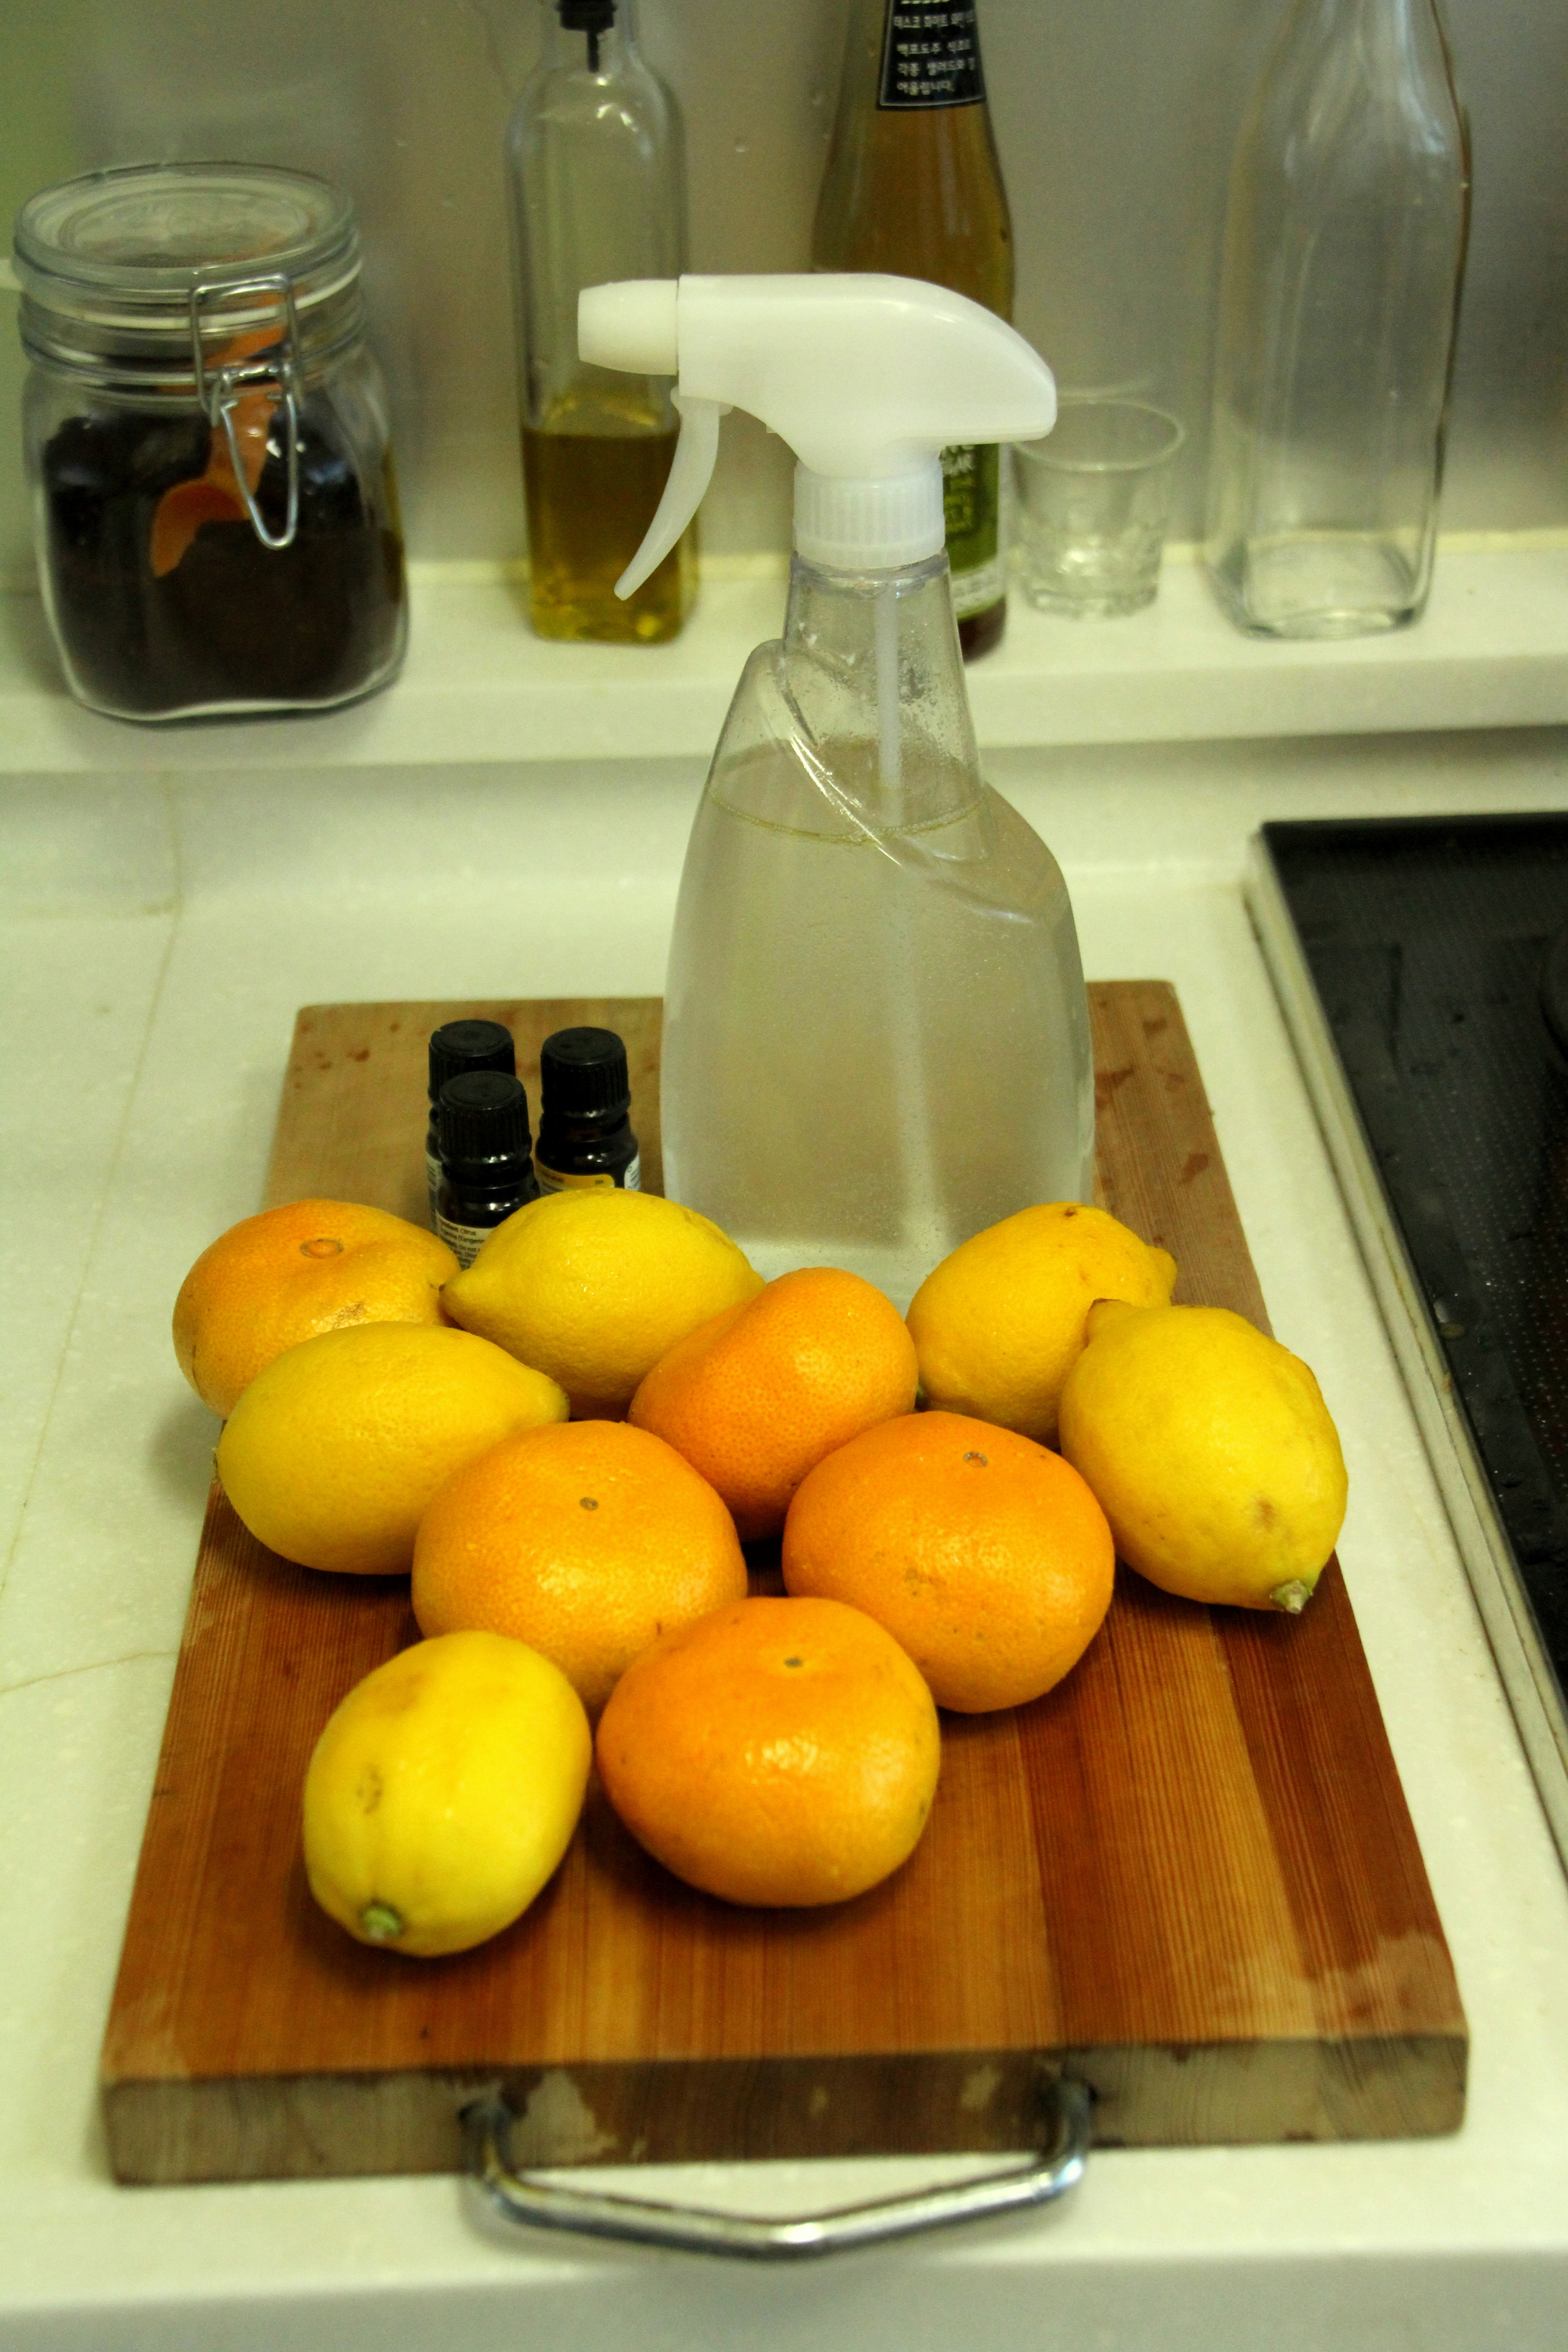
You can mix everything right in the bottle, which makes this process super easy. First, using a funnel, pour in the 1 Tablespoon of baking soda. Next, add 2 cups of warm water and swish around to help the baking soda dissolve.
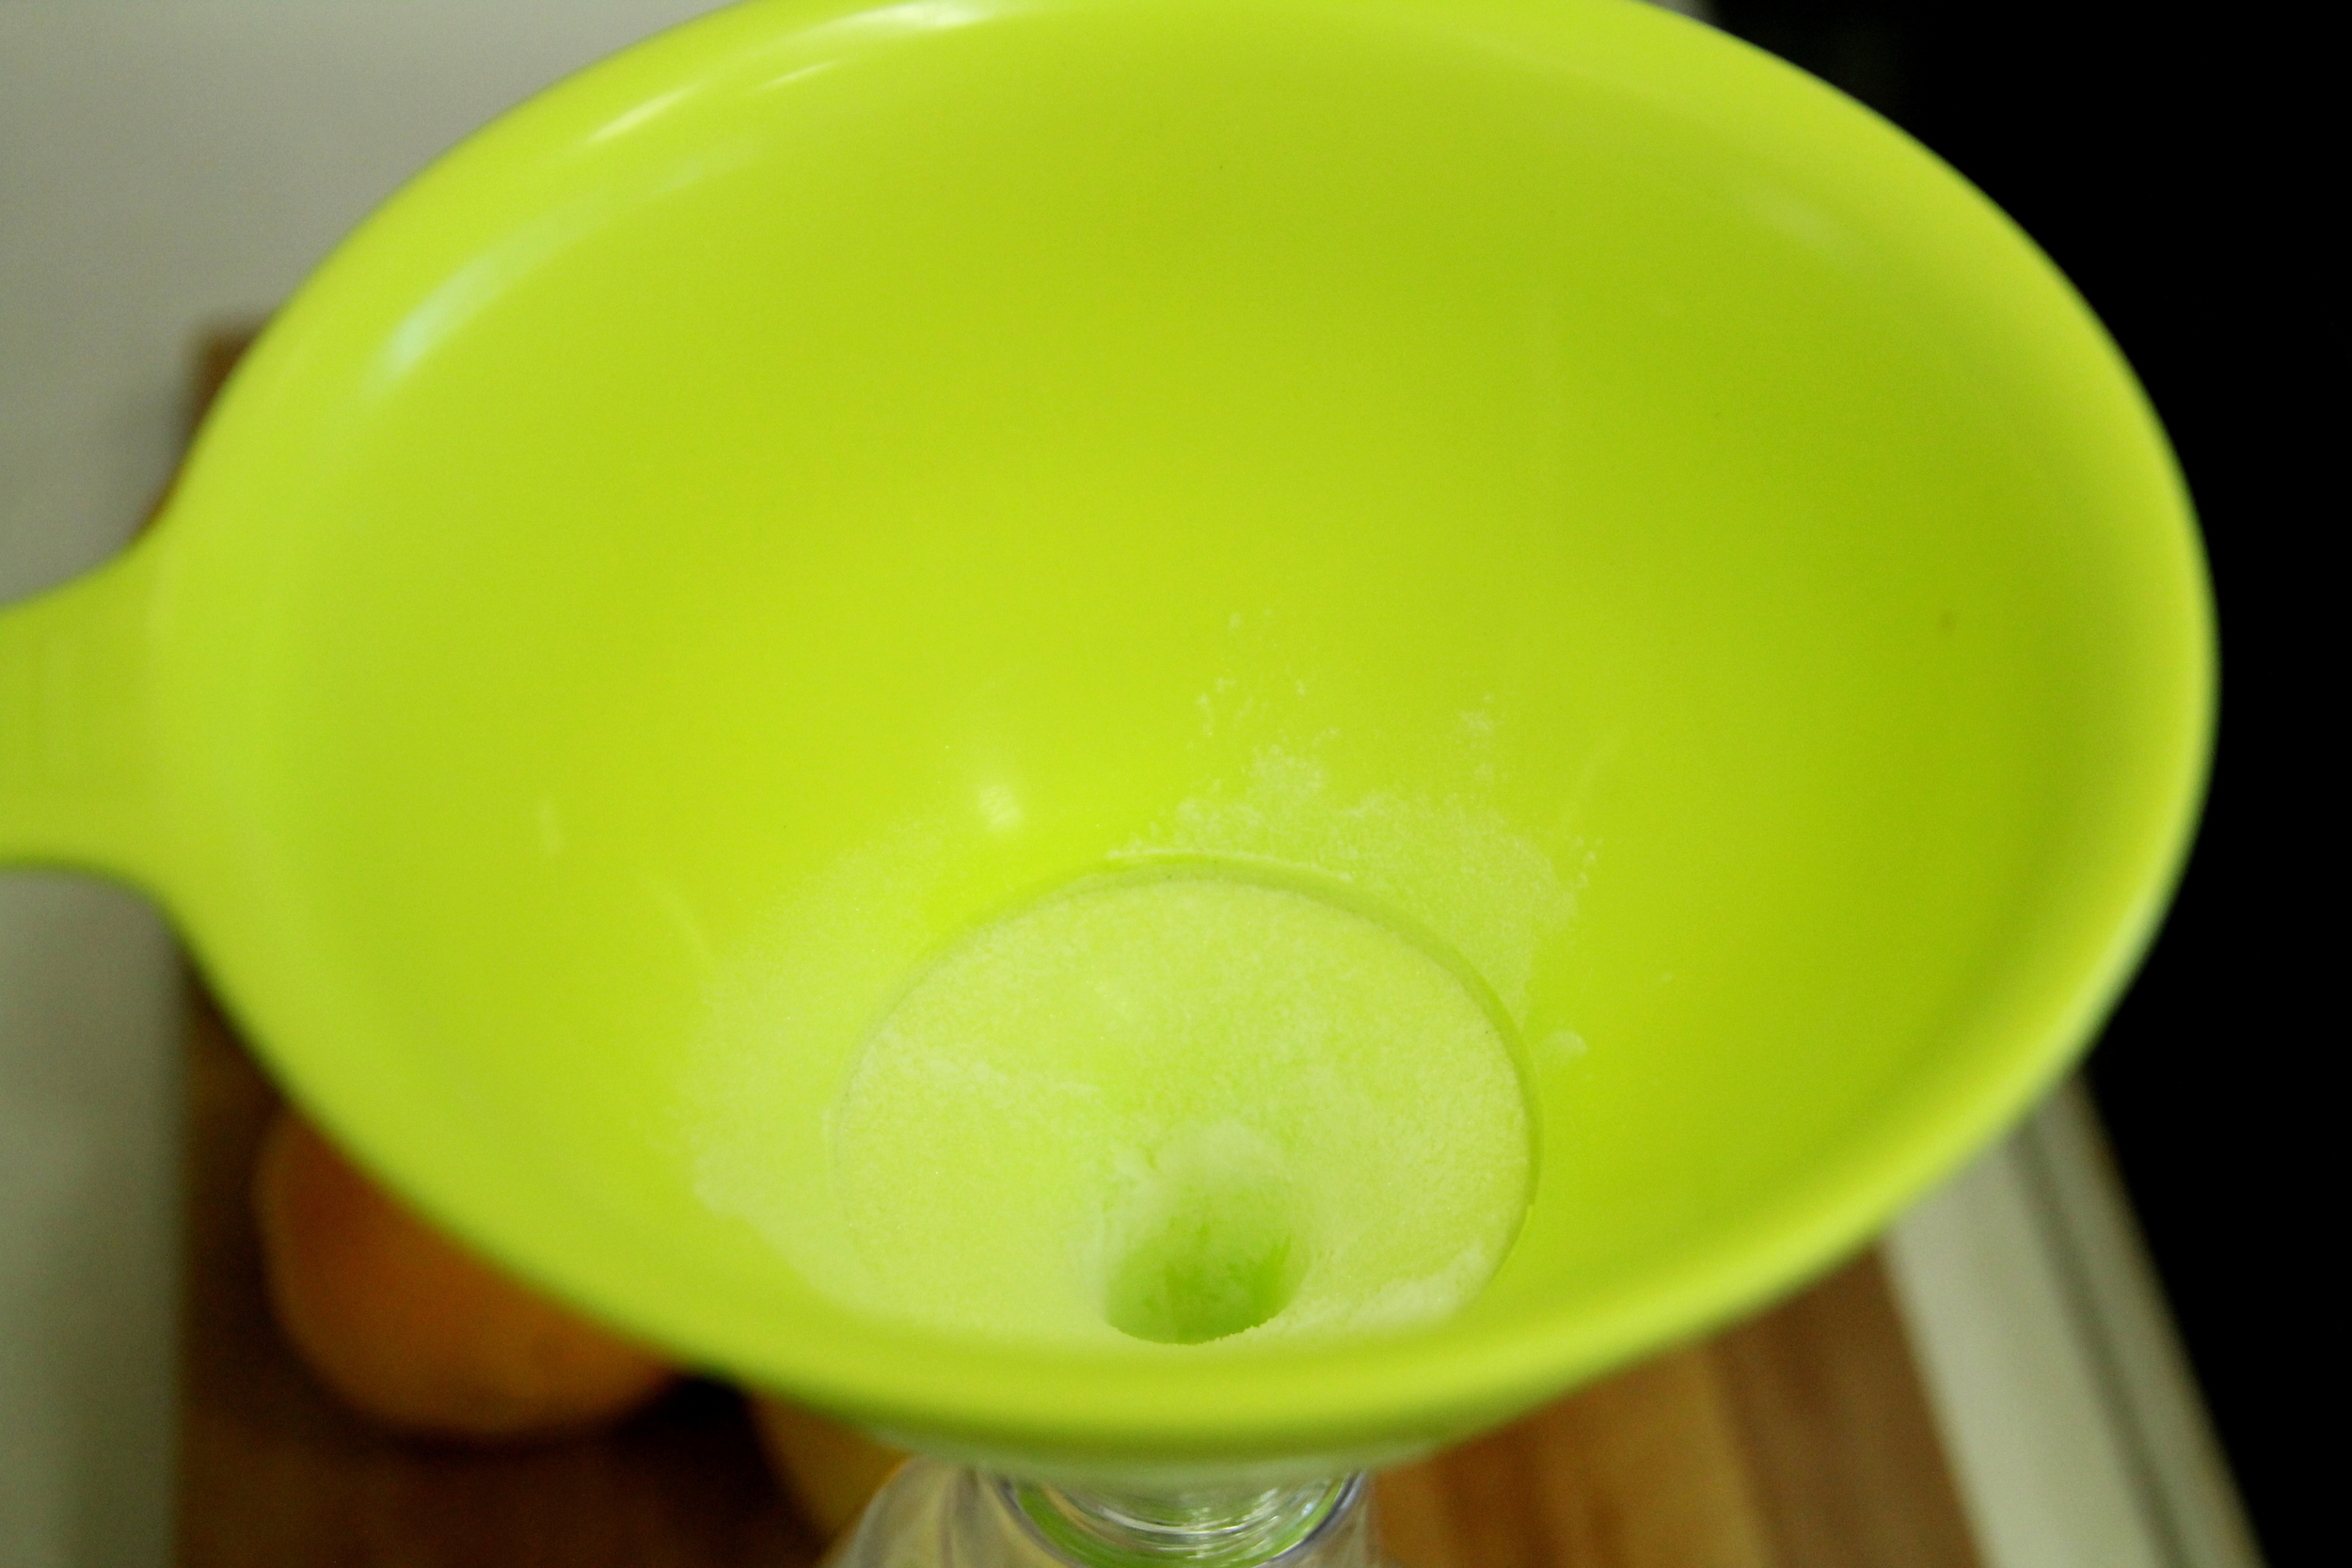
Now, for this next part, I have only one tip: Put the bottle in the sink before hand. I made the mistake of not only sealing the top with the funnel, but also doing this without the protection of the sink. The result was a vinegar explosion 10 minutes before we had to leave for school. Anyway, grab your vinegar and pour it into the bottle, but NOT to press down the funnel while you do this, or you will create a "seal" and the gasses created will have nowhere to go.

You can now add any scent you wish! I added lemon, orange, grapefruit, and tangerine (about 10 drops of each). Citrus has long been known for it's purifying abilities, and it smells great! Add the oils, swish it around again in the bottle, screw on the lid, and you're all set!

The thing I love most about this cleaner is that I could literally spray it on my food, and it wouldn't harm me (not that I would recommend that for flavor's sake. Plus, the oils I use aren't quite therapeutic grade). I use this spray for the kitchen, bathroom, and any other surface that needs some sanitizing and cleaning. Try this at home and let me know how it goes!
Secret Agent Banana Bread

secret agent banana bread
I've long harbored a love for a proper breakfast.
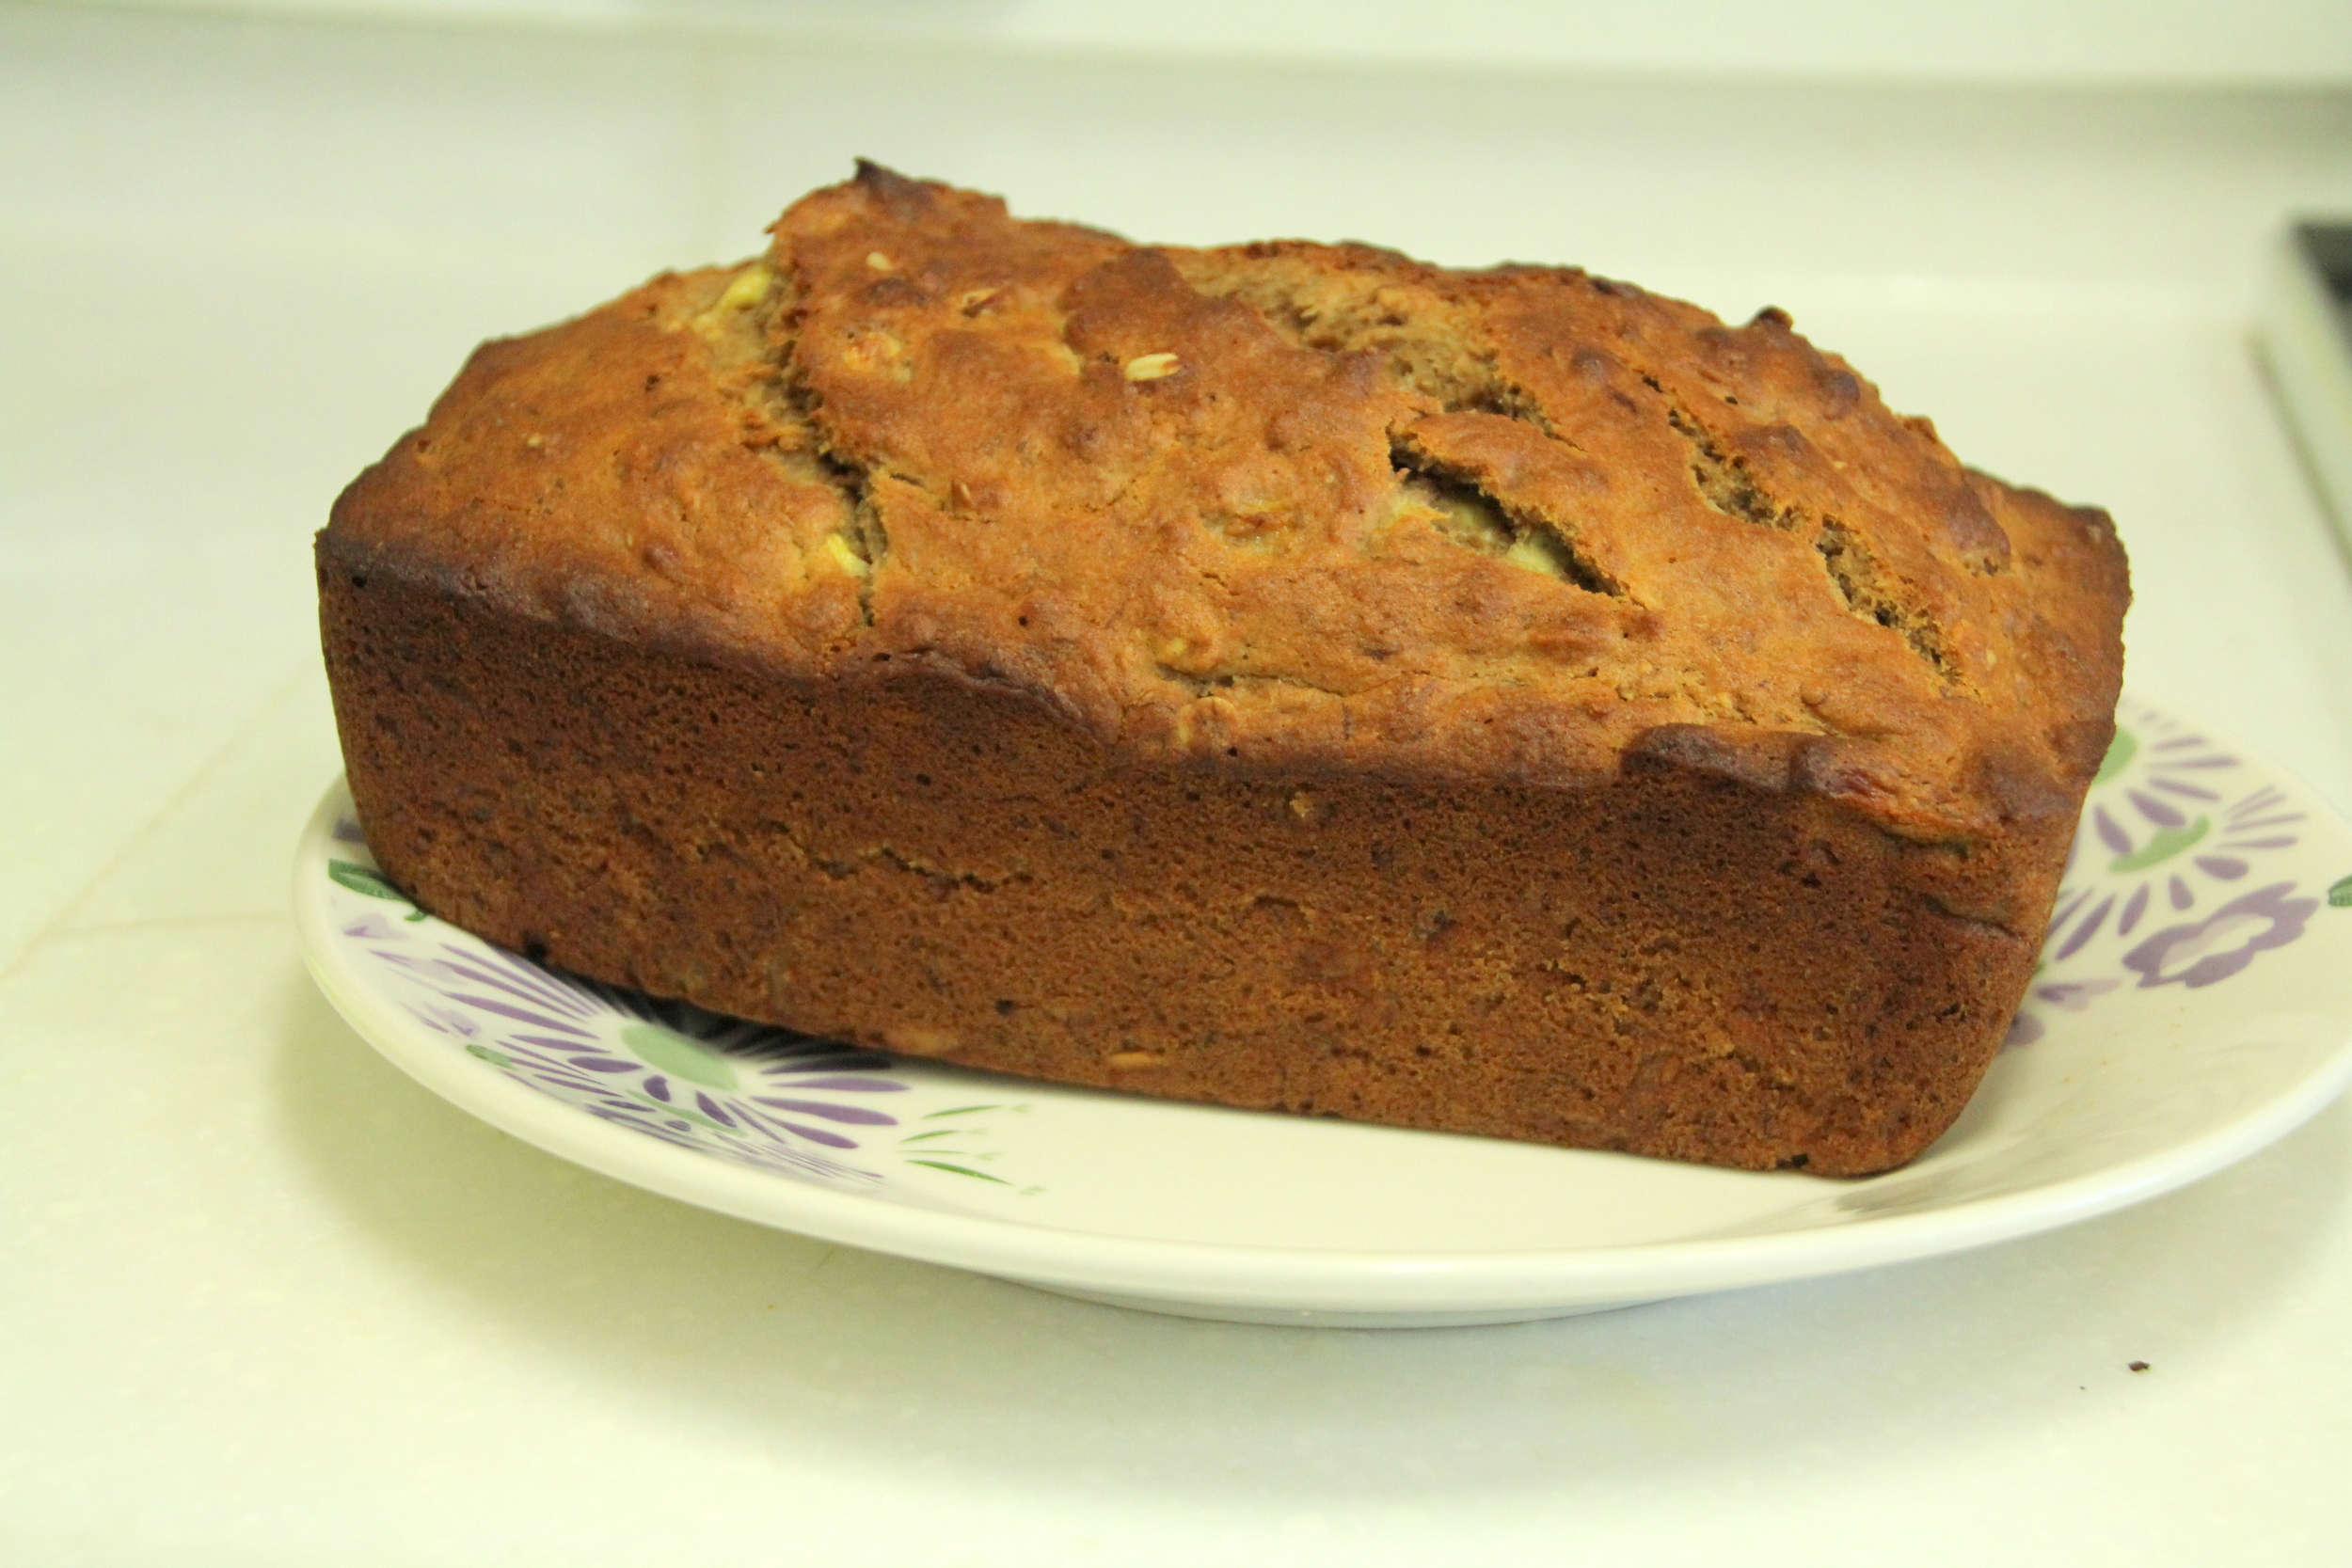
Secret agent banana bread
It feels like a celebration of the weekend to spend time making perfect coffee while enjoying a warm slice of banana bread. When I taught in the States, I took some of this bread with me to school and ate it on the way. The hearty bread kept me full through the hectic morning, and with all clean ingredients, I felt good about what I was stuffing my face with. That's why I call it "Secret Agent Banana Bread". It tastes incredible, yet has only the good stuff.

Secret agent banana bread
Now that we work in the evenings, I make it a ritual to prepare a really good breakfast, and then eat a lighter lunch. Banana bread is a classic, and after much trial and error I finally have my recipe that makes this a winner in both taste and health department. This recipe comes husband approved!
Secret agent banana bread
I used butter in this recipe, but feel free to use coconut oil if you prefer that. Otherwise, grab the following ingredients:
2 cups whole wheat flour
1/2 cup rolled oats
1 teaspoon baking soda
1/4 teaspoon salt
Dash of nutmeg, cinnamon, and cloves to taste
1/2 cup butter, softened
3/4 cups honey
2 eggs
1 teaspoon vanilla
3 or 4 ripe mashed bananas
Combine flour, baking soda, salt, spices and rolled oats. In a separate bowl, mash the bananas, then add the honey, eggs, and vanilla. Combine the wet and dry ingredients, and then stir in the very soft butter. Mix to combine (you don't need to over-mix it, just make sure there are no clumps of flour. That wouldn't be fun to bite into.

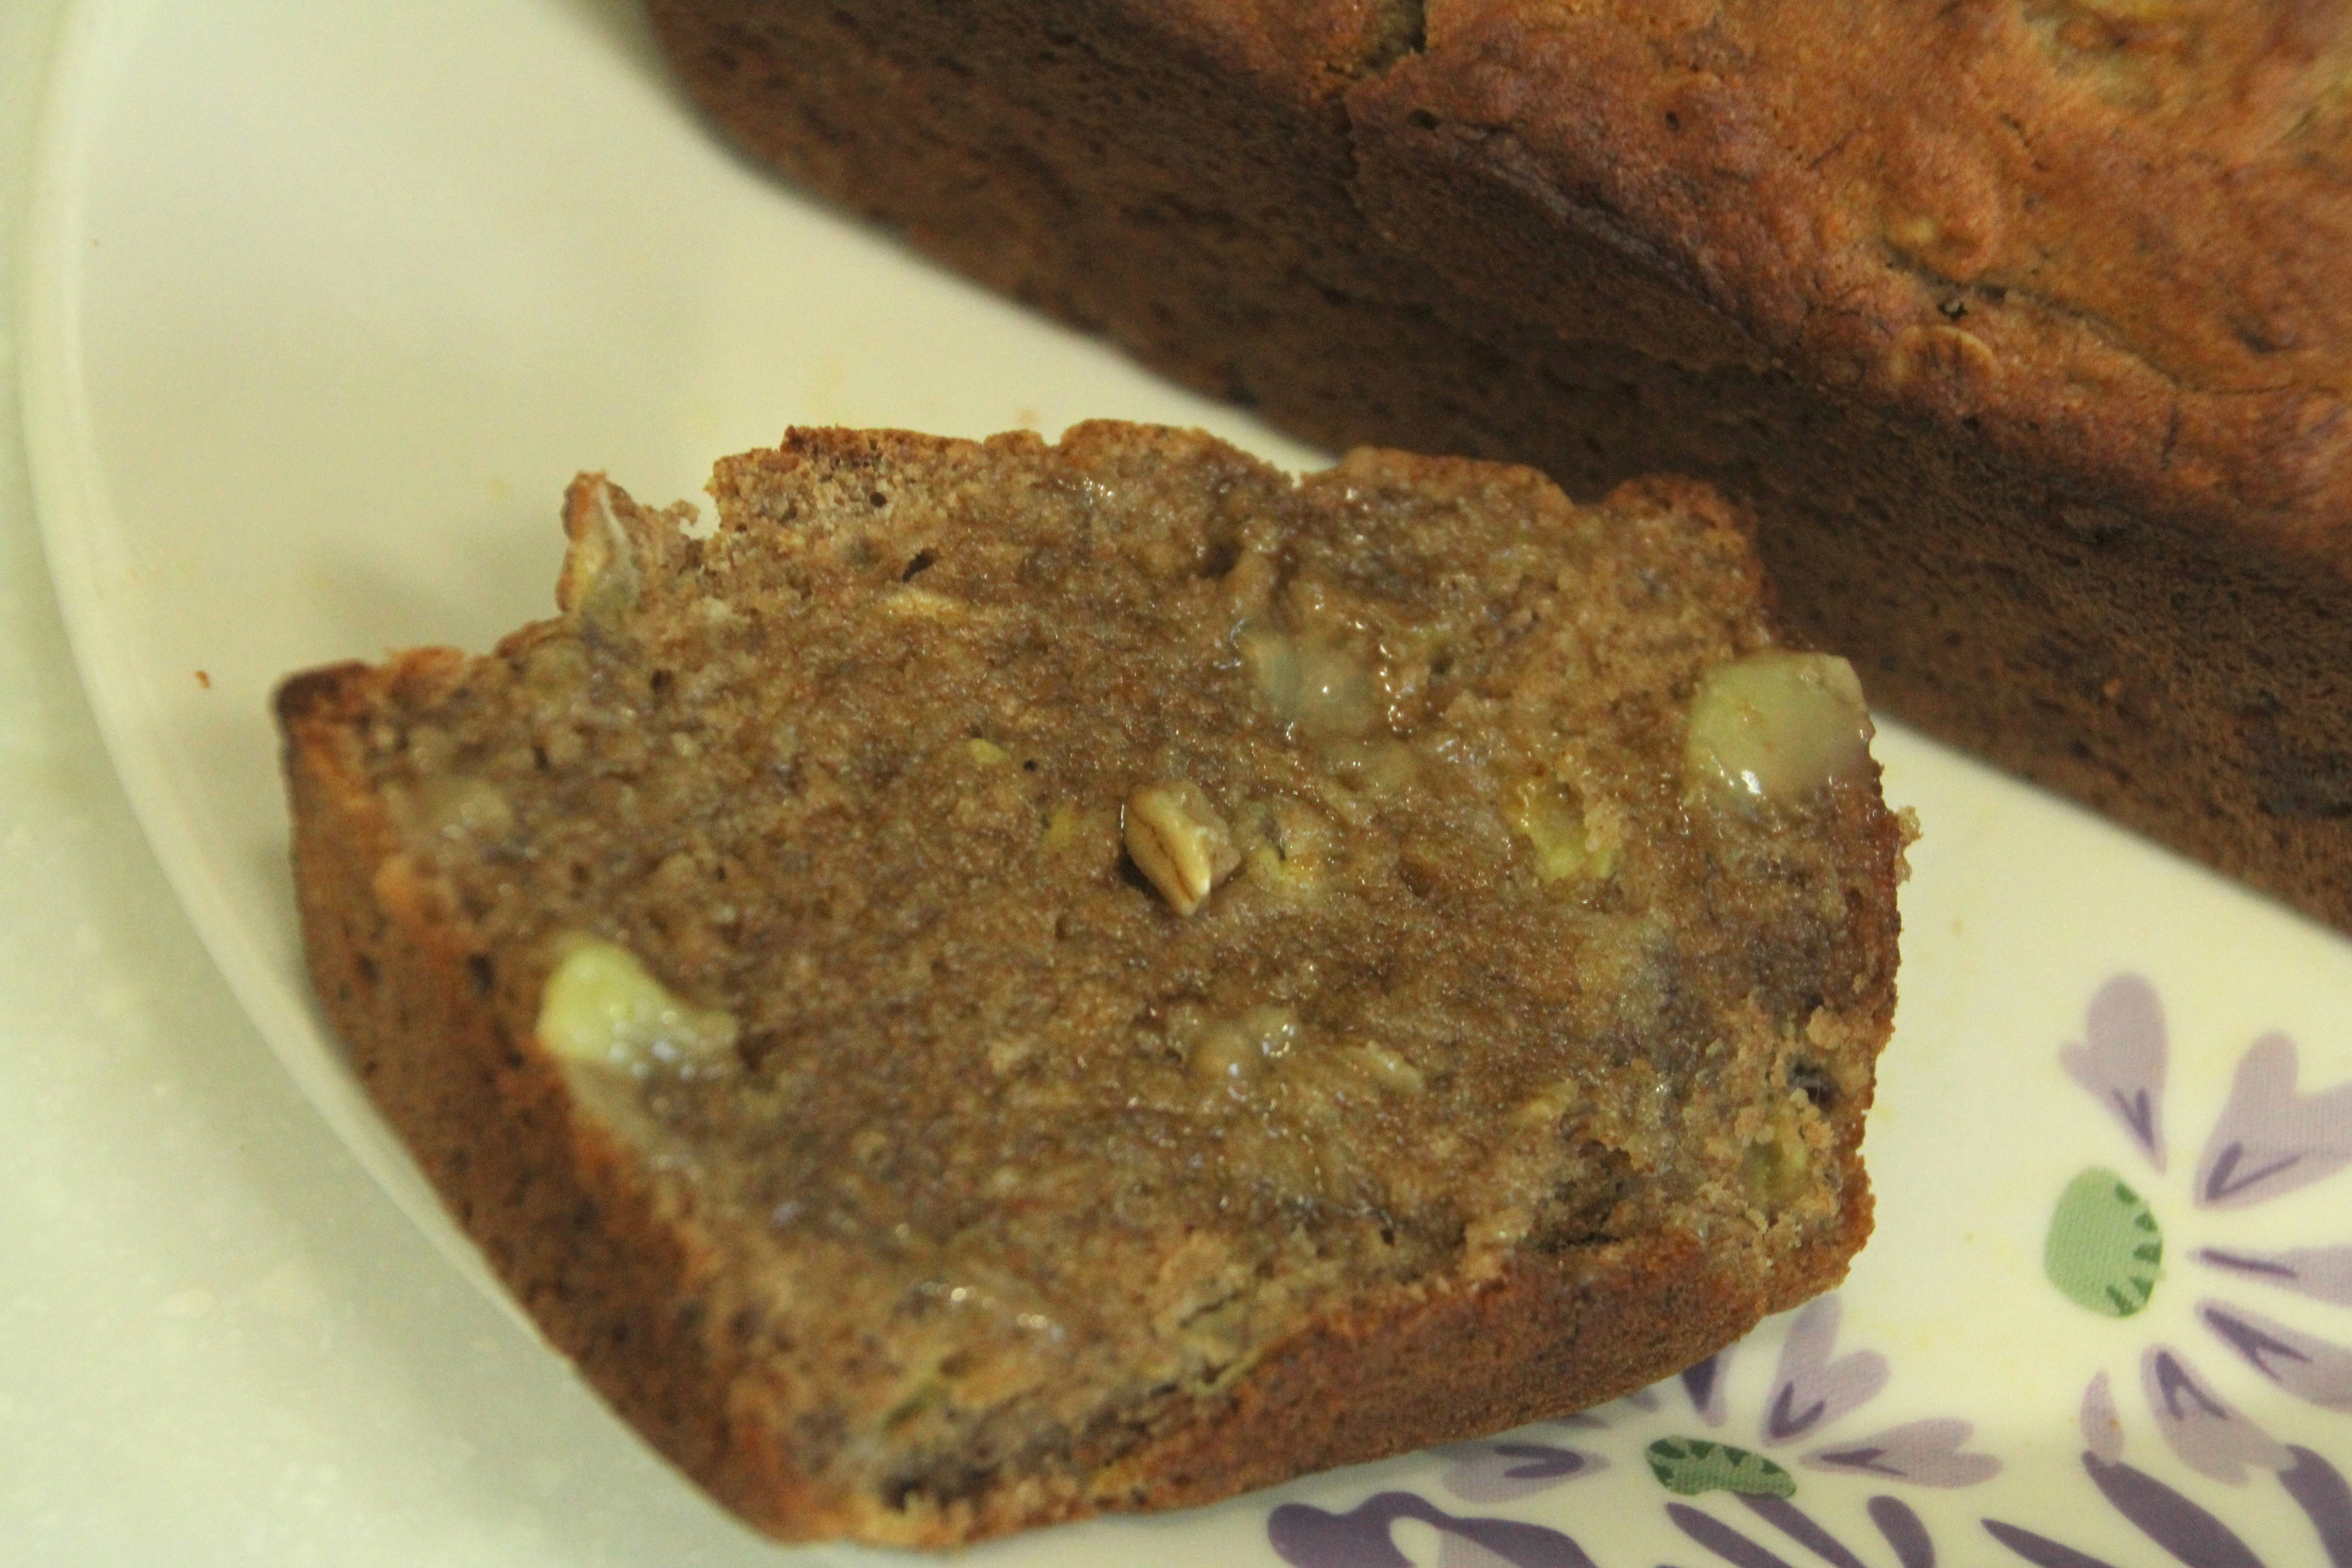
Secret agent banana bread

Secret agent banana bread
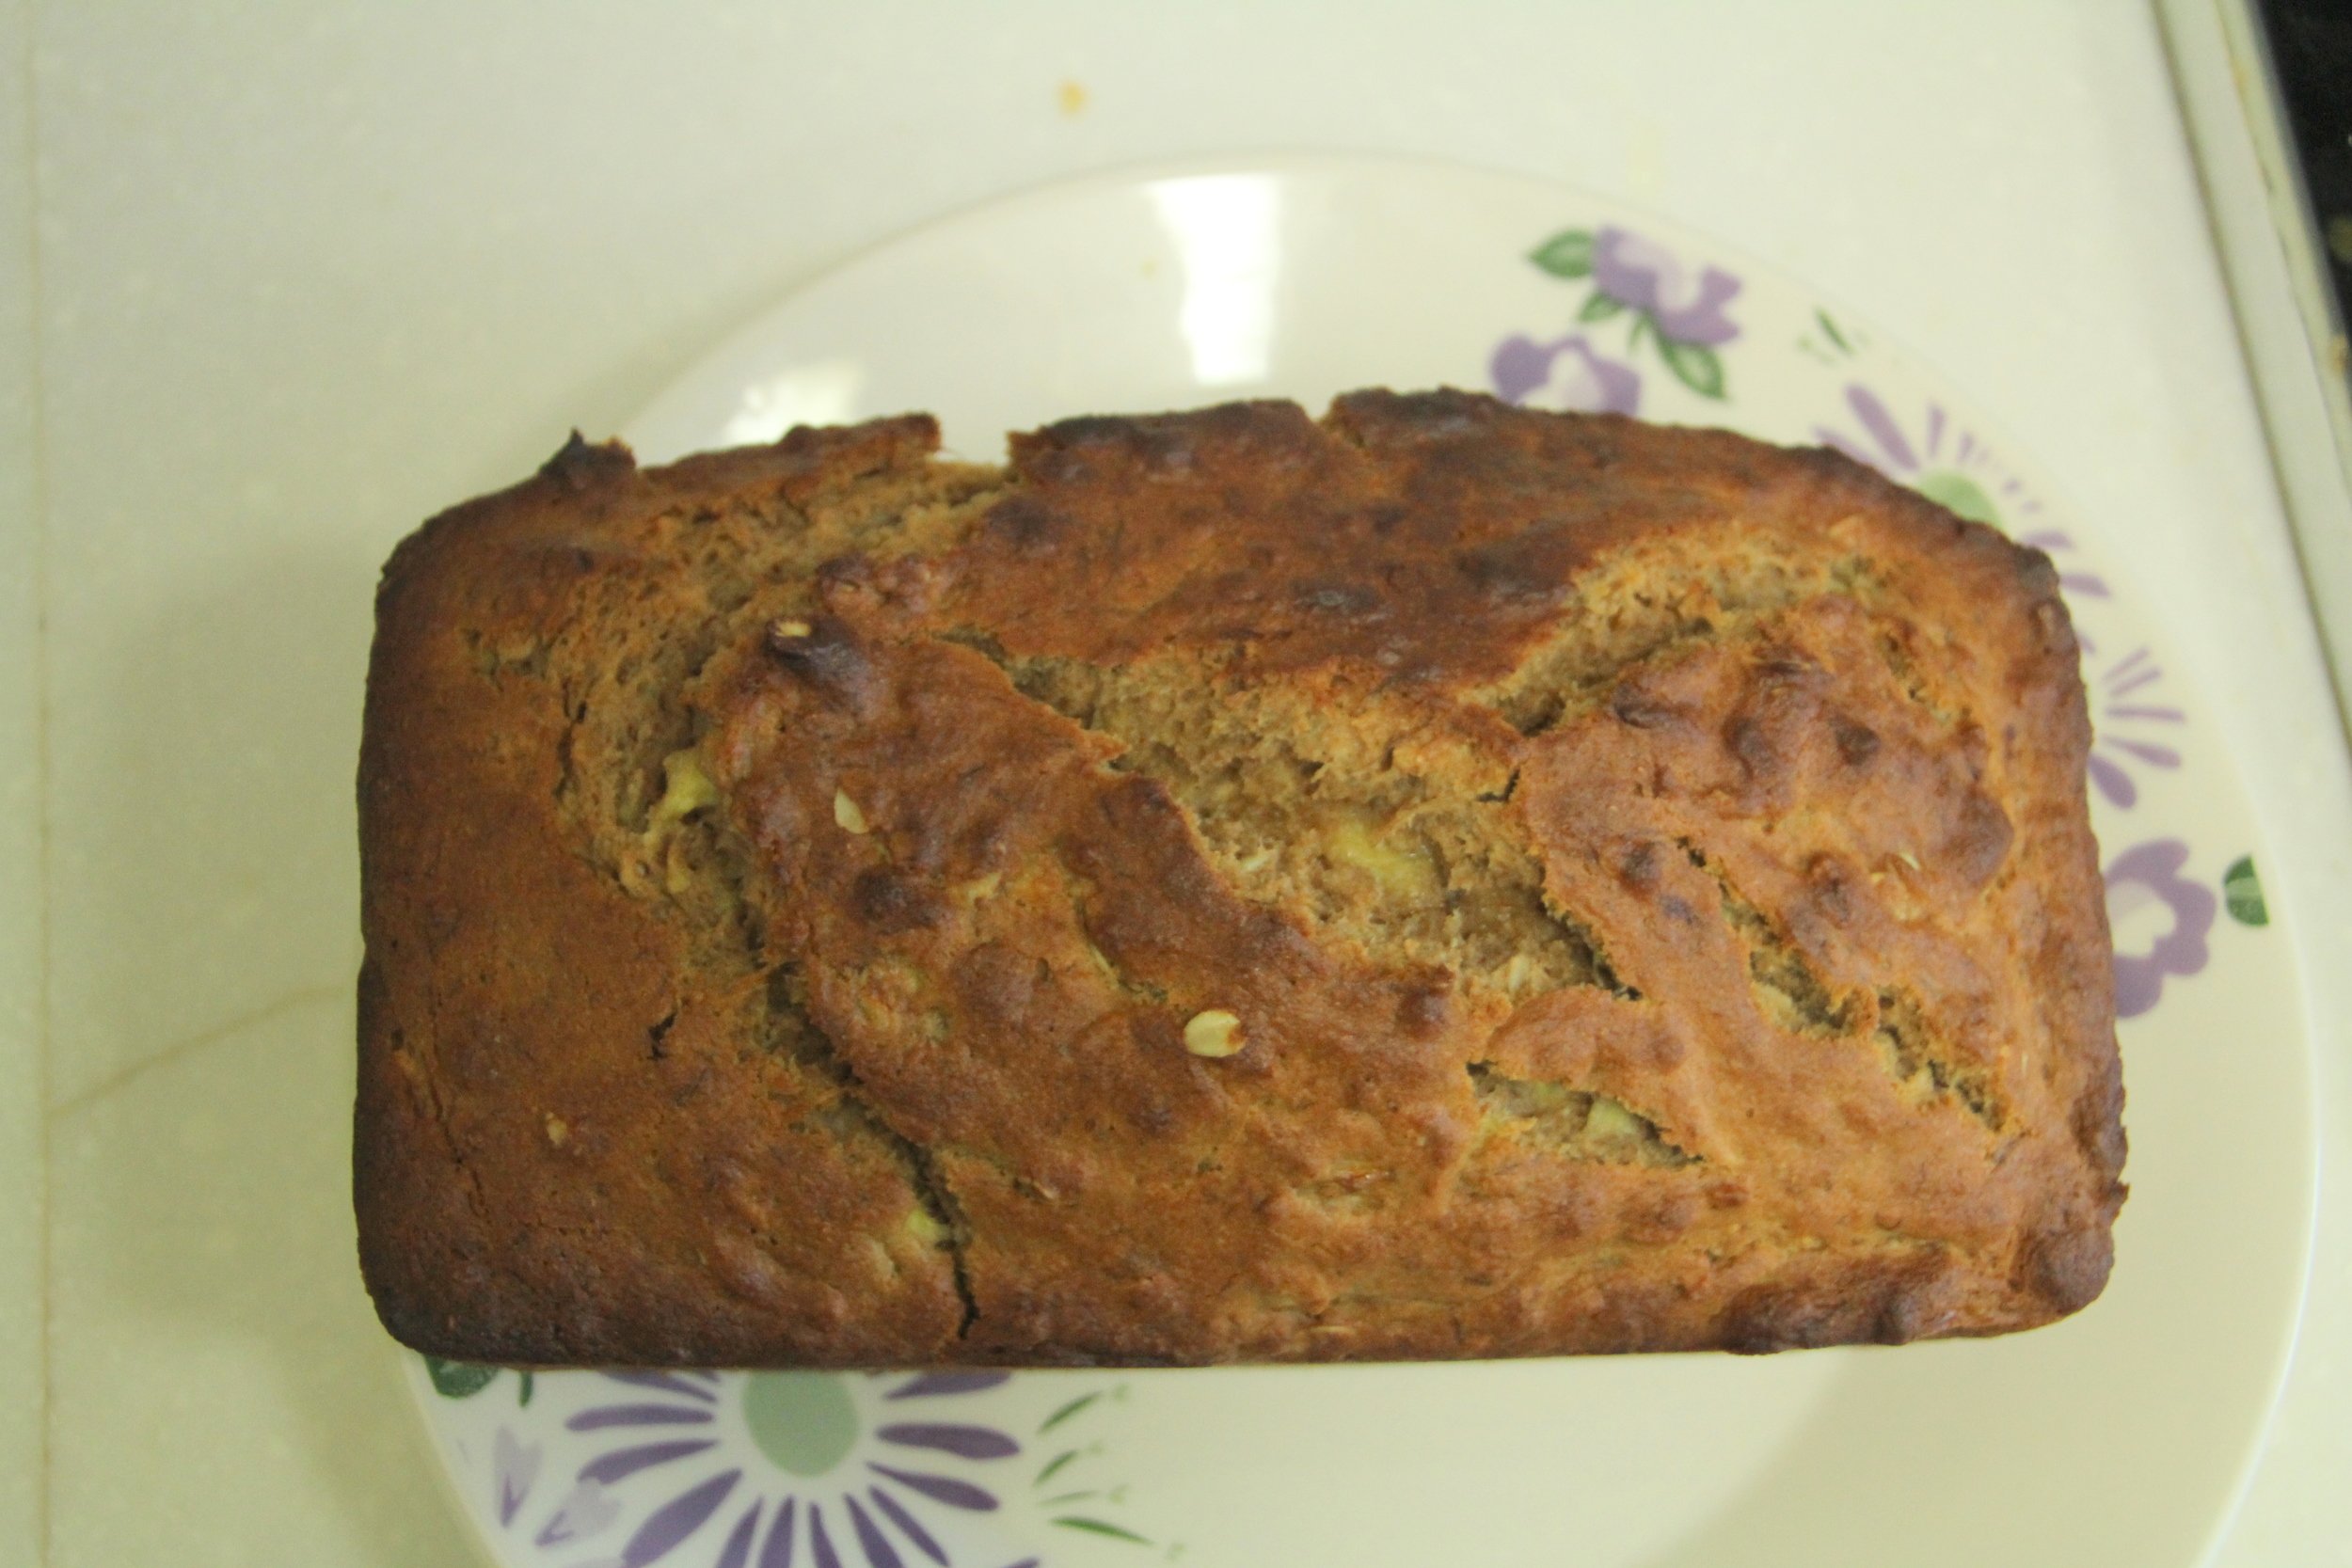
Bake in a preheated oven at 350 degrees for around 45 minutes, rotating once. Wait for it to get a dark golden color on top, and then remove and then let cool a bit. Once it's relatively cool, remove from bread pan.
Secret agent banana bread
Slice yourself and a loved one a big piece, and enjoy!

Secret agent banana bread

Secret agent banana bread

Secret agent banana bread

Secret agent banana bread
Homemade Granola

I have grand plans for cinnamon rolls, dinner rolls, bread, muffins and more. Today, however, was dedicated to one of my favorite snacks: granola.
Read moreSteamed Pumpkin


Steamed pumpkin
To this mid-west girl, Fall=pumpkins. For all of my fall recipes and pumpkin spice lattes, I usually pick up some of the canned stuff (gasp, how dare I?!). However, here in Korea I have yet to find some, even with many online searches. Sigh... However, I can't complain too much because the lack of canned pumpkin gave me the opportunity to discover a beautiful thing: fresh steamed pumpkin. Yes, I know that pumpkins should be orange. No, I have no idea why Korea only has green ones.
Steamed pumpkin was so incredibly easy that I may never go back. I was expecting a long, complicated process, but what I got was a simple, easy way to continue making the many pumpkin recipes I love.
Here's what you will need:
Vegetable steamer (either a pot and a separate steamer or an actual steamer pot)
1 pumpkin
Knife
Spoon
First, slice the pumpkin and scrape out the seeds (you can save these for roasting!).

Steamed pumpkin
Fill the bottom of your pot with an inch or two of water, put your steamer inside, and place your pumpkin in the steamer.

Steamed pumpkin
Now, you don't want to boil your pumpkins, so make sure the water does not cover them. Place the lid on top, turn the heat to medium, and let steam for about 15 minutes. Each stove, pot, and pumpkin is different, so check with a fork every few minutes. When the pumpkin is soft, it's ready! It should look like this:

Steamed pumpkin
Usually you can peel the skin right off, but my pumpkin decided to be difficult, so I just had to scrape the pumpkin out.

Steamed pumpkin
The most common thing I use it for it my pumpkin spice lattes, so I'm going to freeze this little guy in tablespoon cubes. Enjoy!
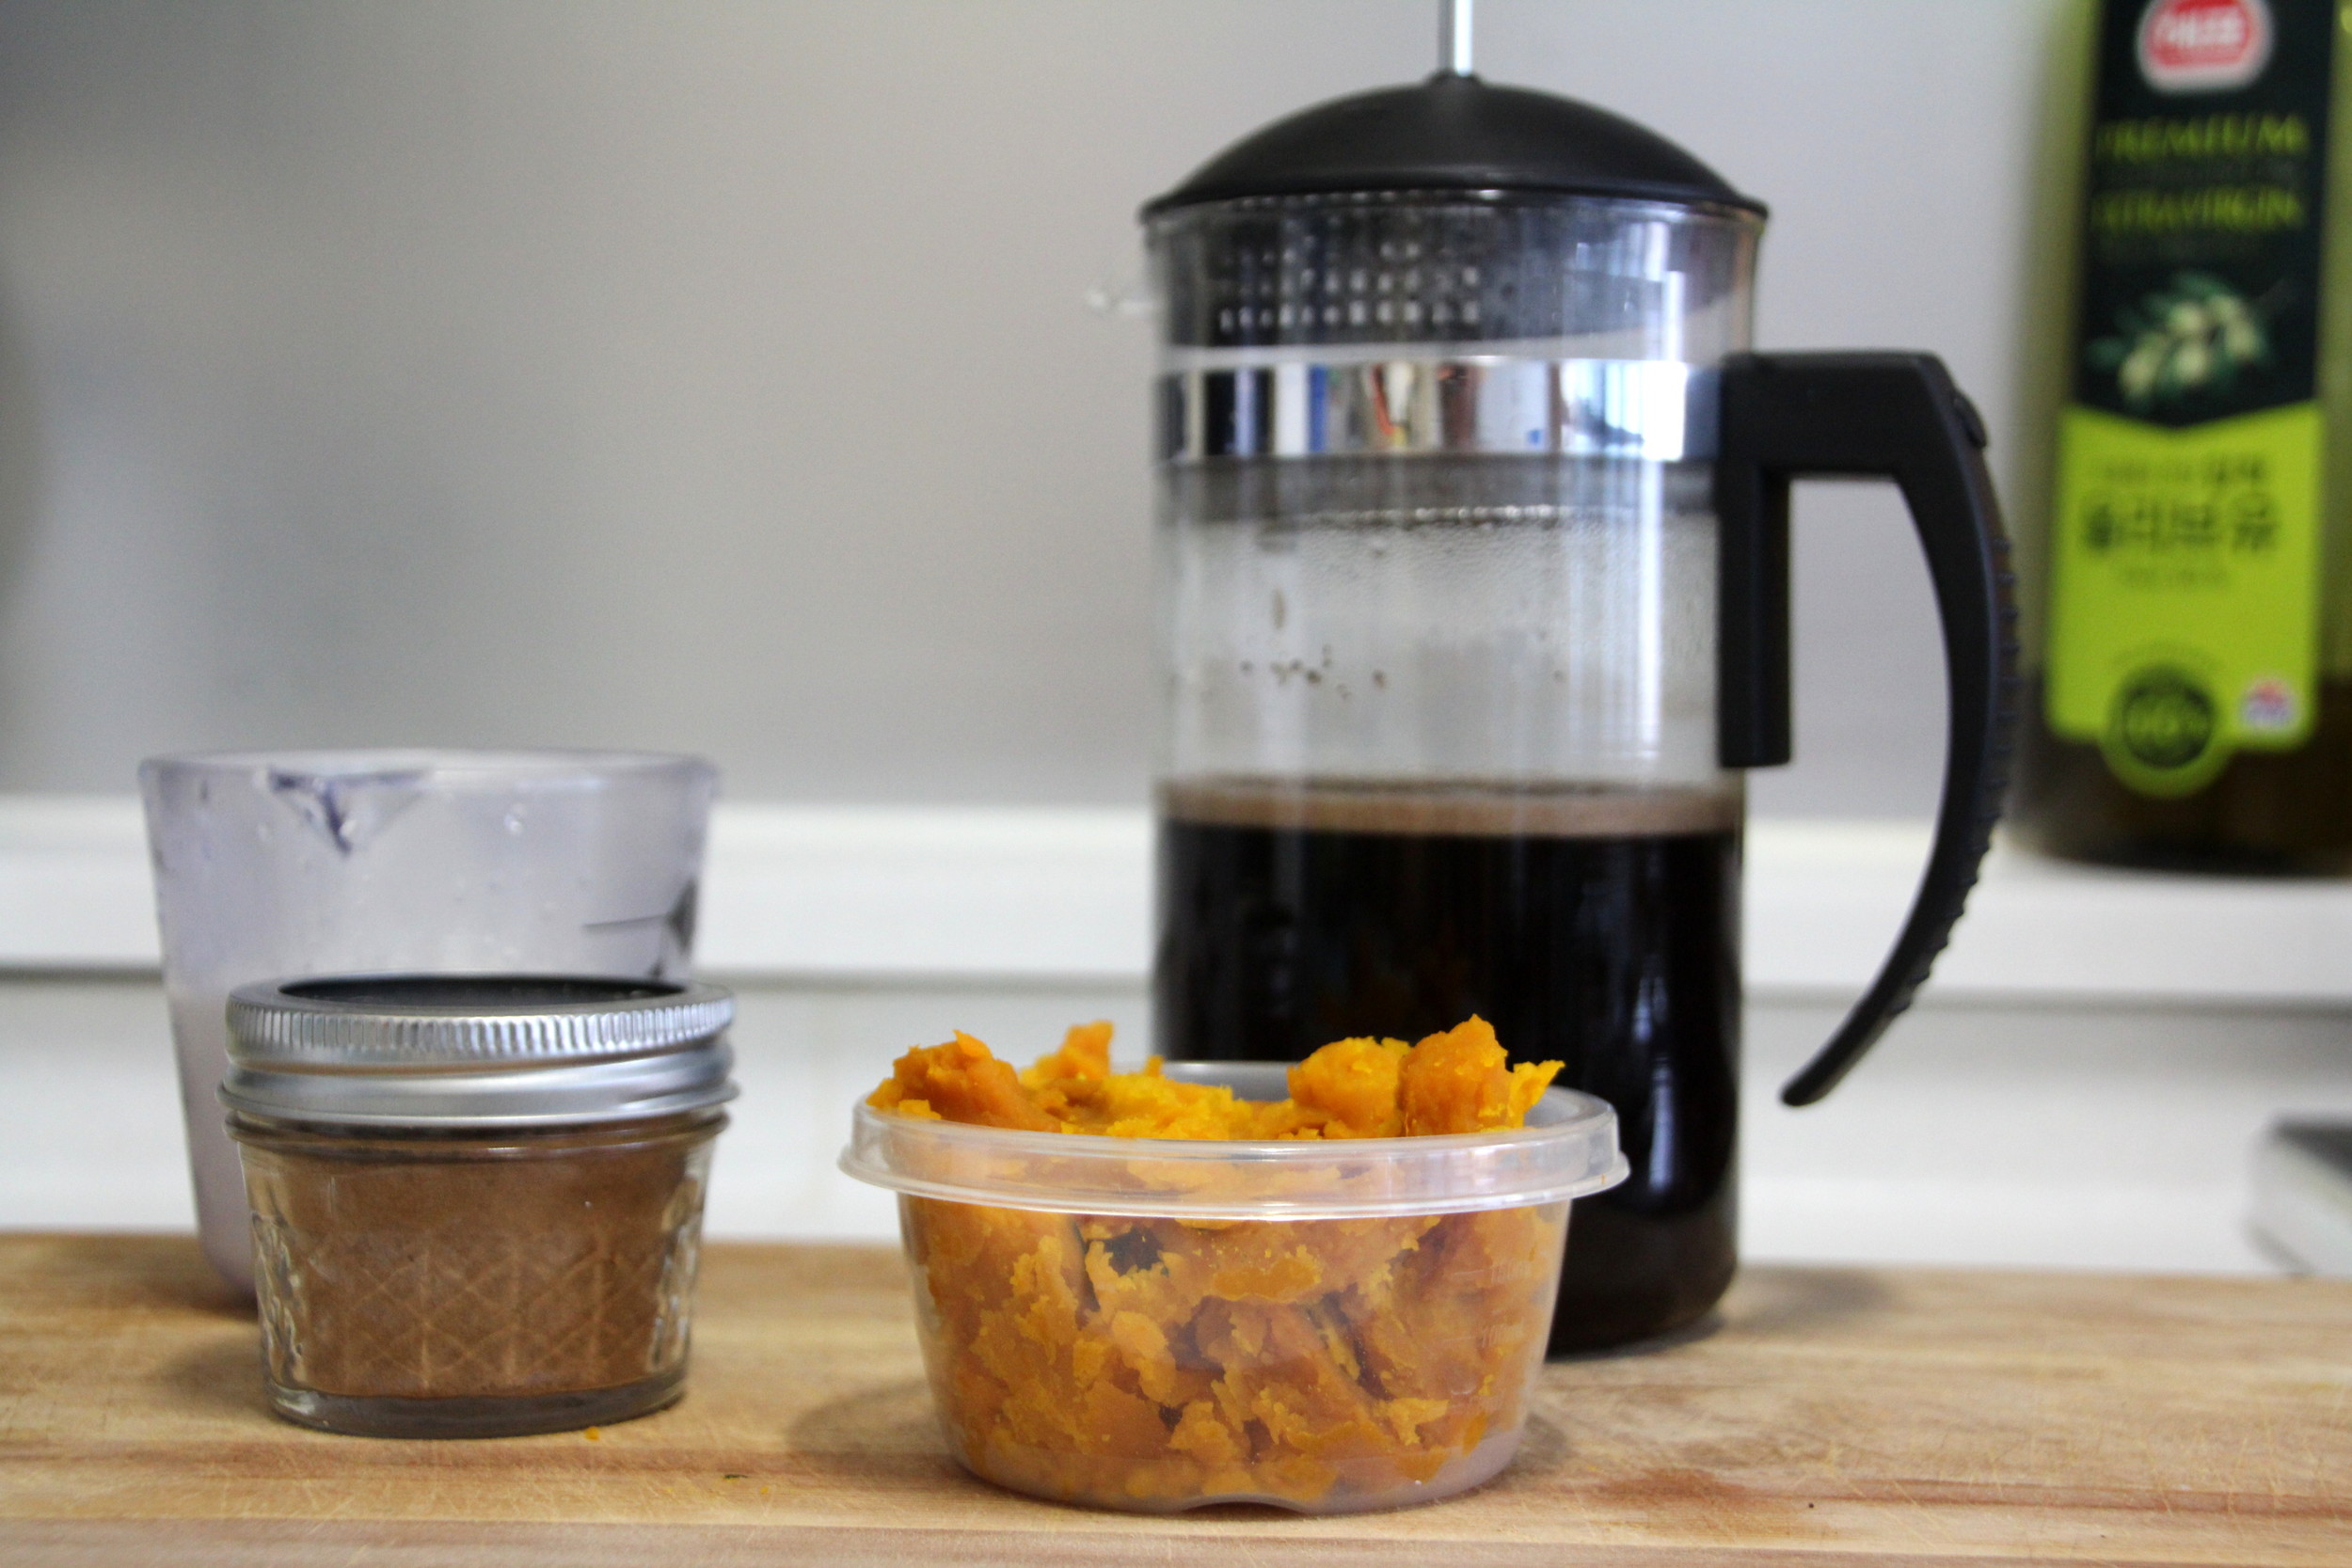
Pumpkin Spice Latte

Pumpkin Spice Latte
Here in Korea, September doesn't include the colorful leaves, sweaters, and pumpkin spice everything that I am used to. Indiana still has some warm days in September, but it's nothing compared to the consistently 80-90 degree days here, with almost oppressive humidity. However, is that going to stop me from Pumpkin Spicing everything? No. No it will not.
To Korea's credit, it does have an actual fall season, it just comes later than in the mid-west. And I've heard that it's beautiful.
Anyway, to celebrate the coming of fall, I've decided to share my recipe for pumpkin spice lattes. It's carefully made with real pumpkin and homemade pumpkin spice. You might be used to big, orange pumpkins, but in Korea they look like this:
Pumpkin Spice Latte
Even when they are larger, they remain the same green color. However, when cut, open they look, smell and taste the same as a regular old pumpkin. If you want to see my recipe on how to steam this and use instead of canned pumpkin, check out the instructions here.
Now, back to the good stuff.
If you have a latte maker or milk frother, then this will be even easier for you. However, at the moment I am limited to a whisk. Confession: A latte maker is at the top of our list to buy as soon as possible.
Supplies (if you have a latte maker you can skip this part):
Mixing bowl
Whisk or mixer
Coffee maker
Ingredients:
1 Tablespoon fresh or canned pumpkin
1 cup strongly brewed coffee
1/2 teaspoon pumpkin spice (you can add more if you want a stronger flavor)
Tiny splash of vanilla extract
1/2 cup warm milk + 1 Tablespoon sugar OR about 3 tablespoons sweetened condensed milk (my recent obsession)
Pumpkin spice latte
I like to warm the milk so it doesn't cool off the coffee too much. If you have a latte maker, it will heat the milk for you, please excuse me while I turn green with jealousy. As green as a...Korean pumpkin? Anyway, combine all of the ingredients into a bowl, and whisk for about 2 minutes, or until the spices and pumpkin have dissolved. There might be some settling of spices after a while, but just swirl it around a few times.

Pumpkin Spice Latte
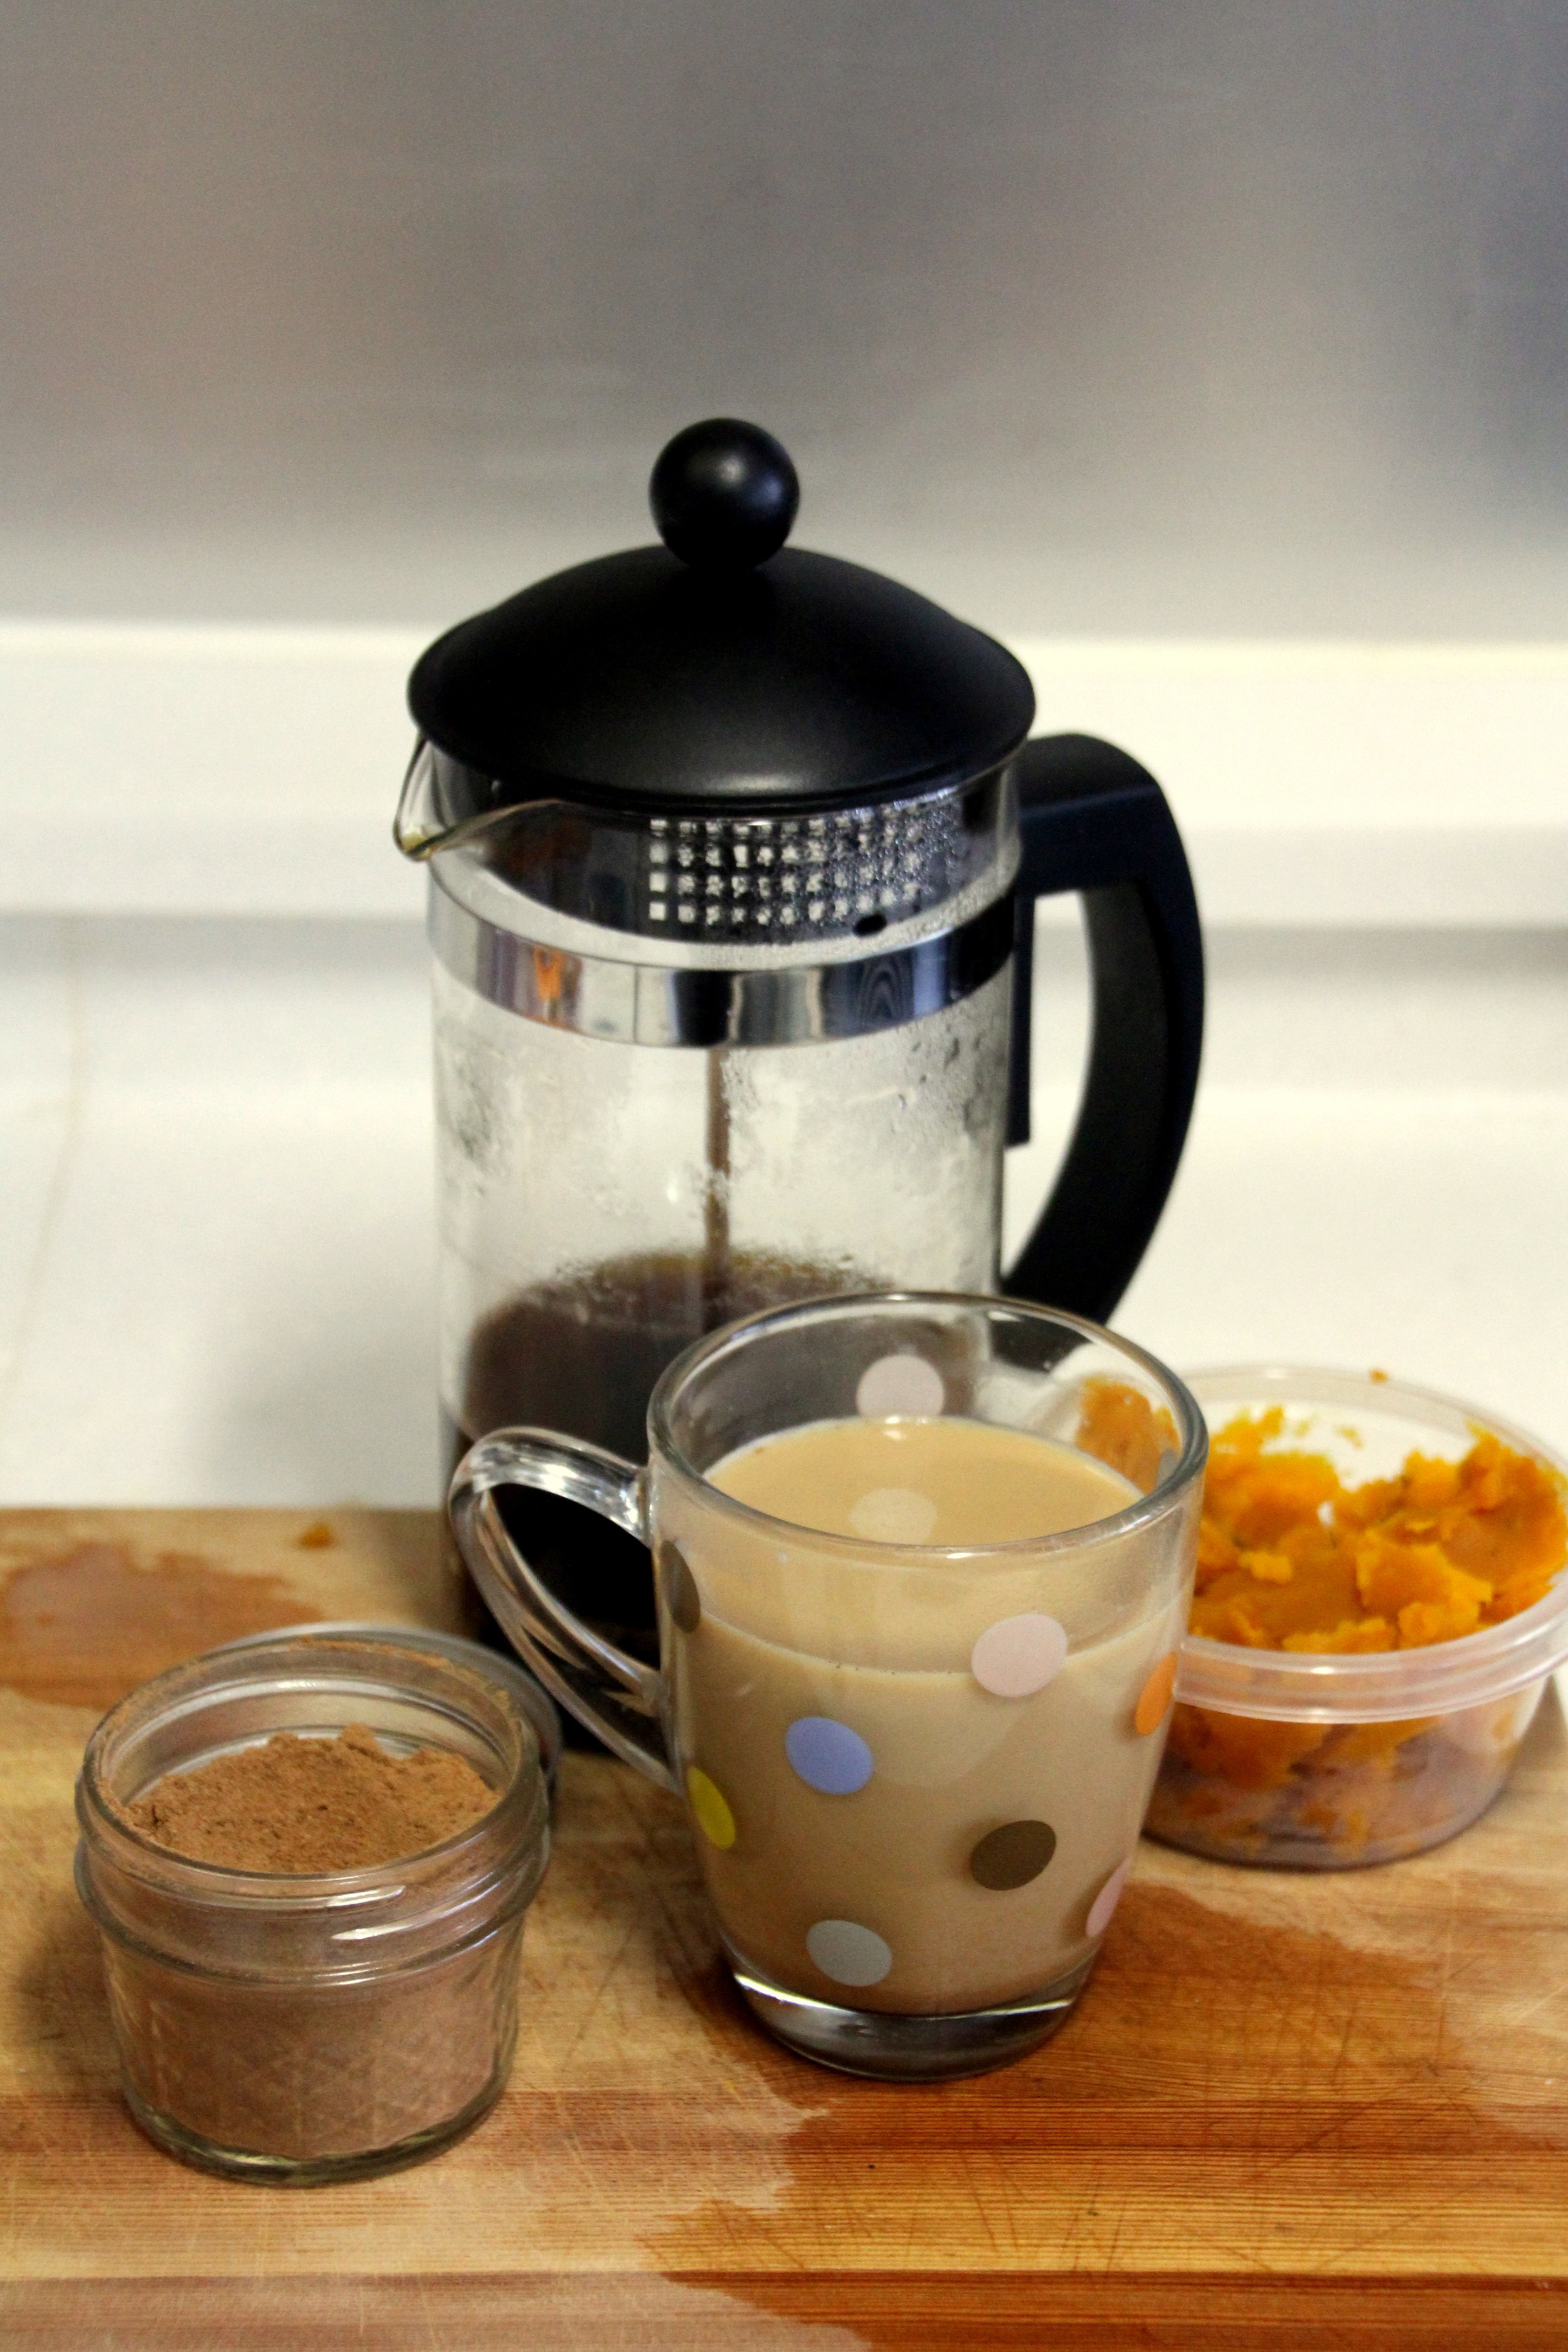
Pumpkin Spice Latte
Pour into a mug, and you've got the very essence of fall in a glass.