

One thing I am never without when we travel is my small bag of health essentials, and "in case of emergency" supplements. It is the WORST to be sick away from home, so I like to know I have some of my basic, go to remedies close at hand. The kit is
Read moreHow to Start Seeds in Eggshells

I've long had a love for indoor gardening. Not only does it clean your air, it also gives me something pretty and green to look at! I've been growing herbs
Read moreHow to Freeze Fresh Herbs

Korea has some great fresh veggies, however the only “familiar” herbs you will find in supermarkets is (sometimes) parsley (on a good day). It makes sense, because
Read moreGreen Clean Monday: DIY Toilet Bowl Cleaner
I have been on a mad search to somehow get internet while we are at school. While we work full time, there is sometimes a lot of desk warming involved in being an English teacher in Korea. Not that I’m complaining, but
Read moreVinegar: The All Natural Fabric Softener
The past couple months I've been working hard to "greenify" my laundry routine. I started out with homemade laundry detergent, and then began using wool dryer balls in place of dryer sheets. Not only am I saving the environment from
Read moreD.I.Y. Air Freshener and Furniture Spray

Green Clean Monday: Eco-Friendly Swiffer Refills

I have to be honest, I'm a die-hard fan of steam mops. I cleaned houses for years, and when one of the women I worked for excitedly showed me the new steam mop she purchased
Read moreGreen Clean Monday: Homemade Laundry Detergent

DIY Coconut Lime Lotion
DIY coconut lime lotion
During the Snowcalypse of 2013 I often dreamed of being whisked away to a tropical place. I love snow,and sweaters, and turning the heat on...until after Christmas. Anyone with me? I'm a summer girl at heart, and this DIY Coconut Lime Lotion takes me back to sun-filled days with it's scent. The best part about it is that there is absolutely NOTHING artificial about its smell. The combination of coconut oil and lime essential oil does the trick, and to date is the best smelling coconut lime lotion I've experienced.

DIY coconut lime lotion
This lotion is not as heavy as my Vanilla Cinnamon Whipped Body Butter, and is a great apply-and-go lotion. It is even the perfect texture to put in a squeeze bottle!
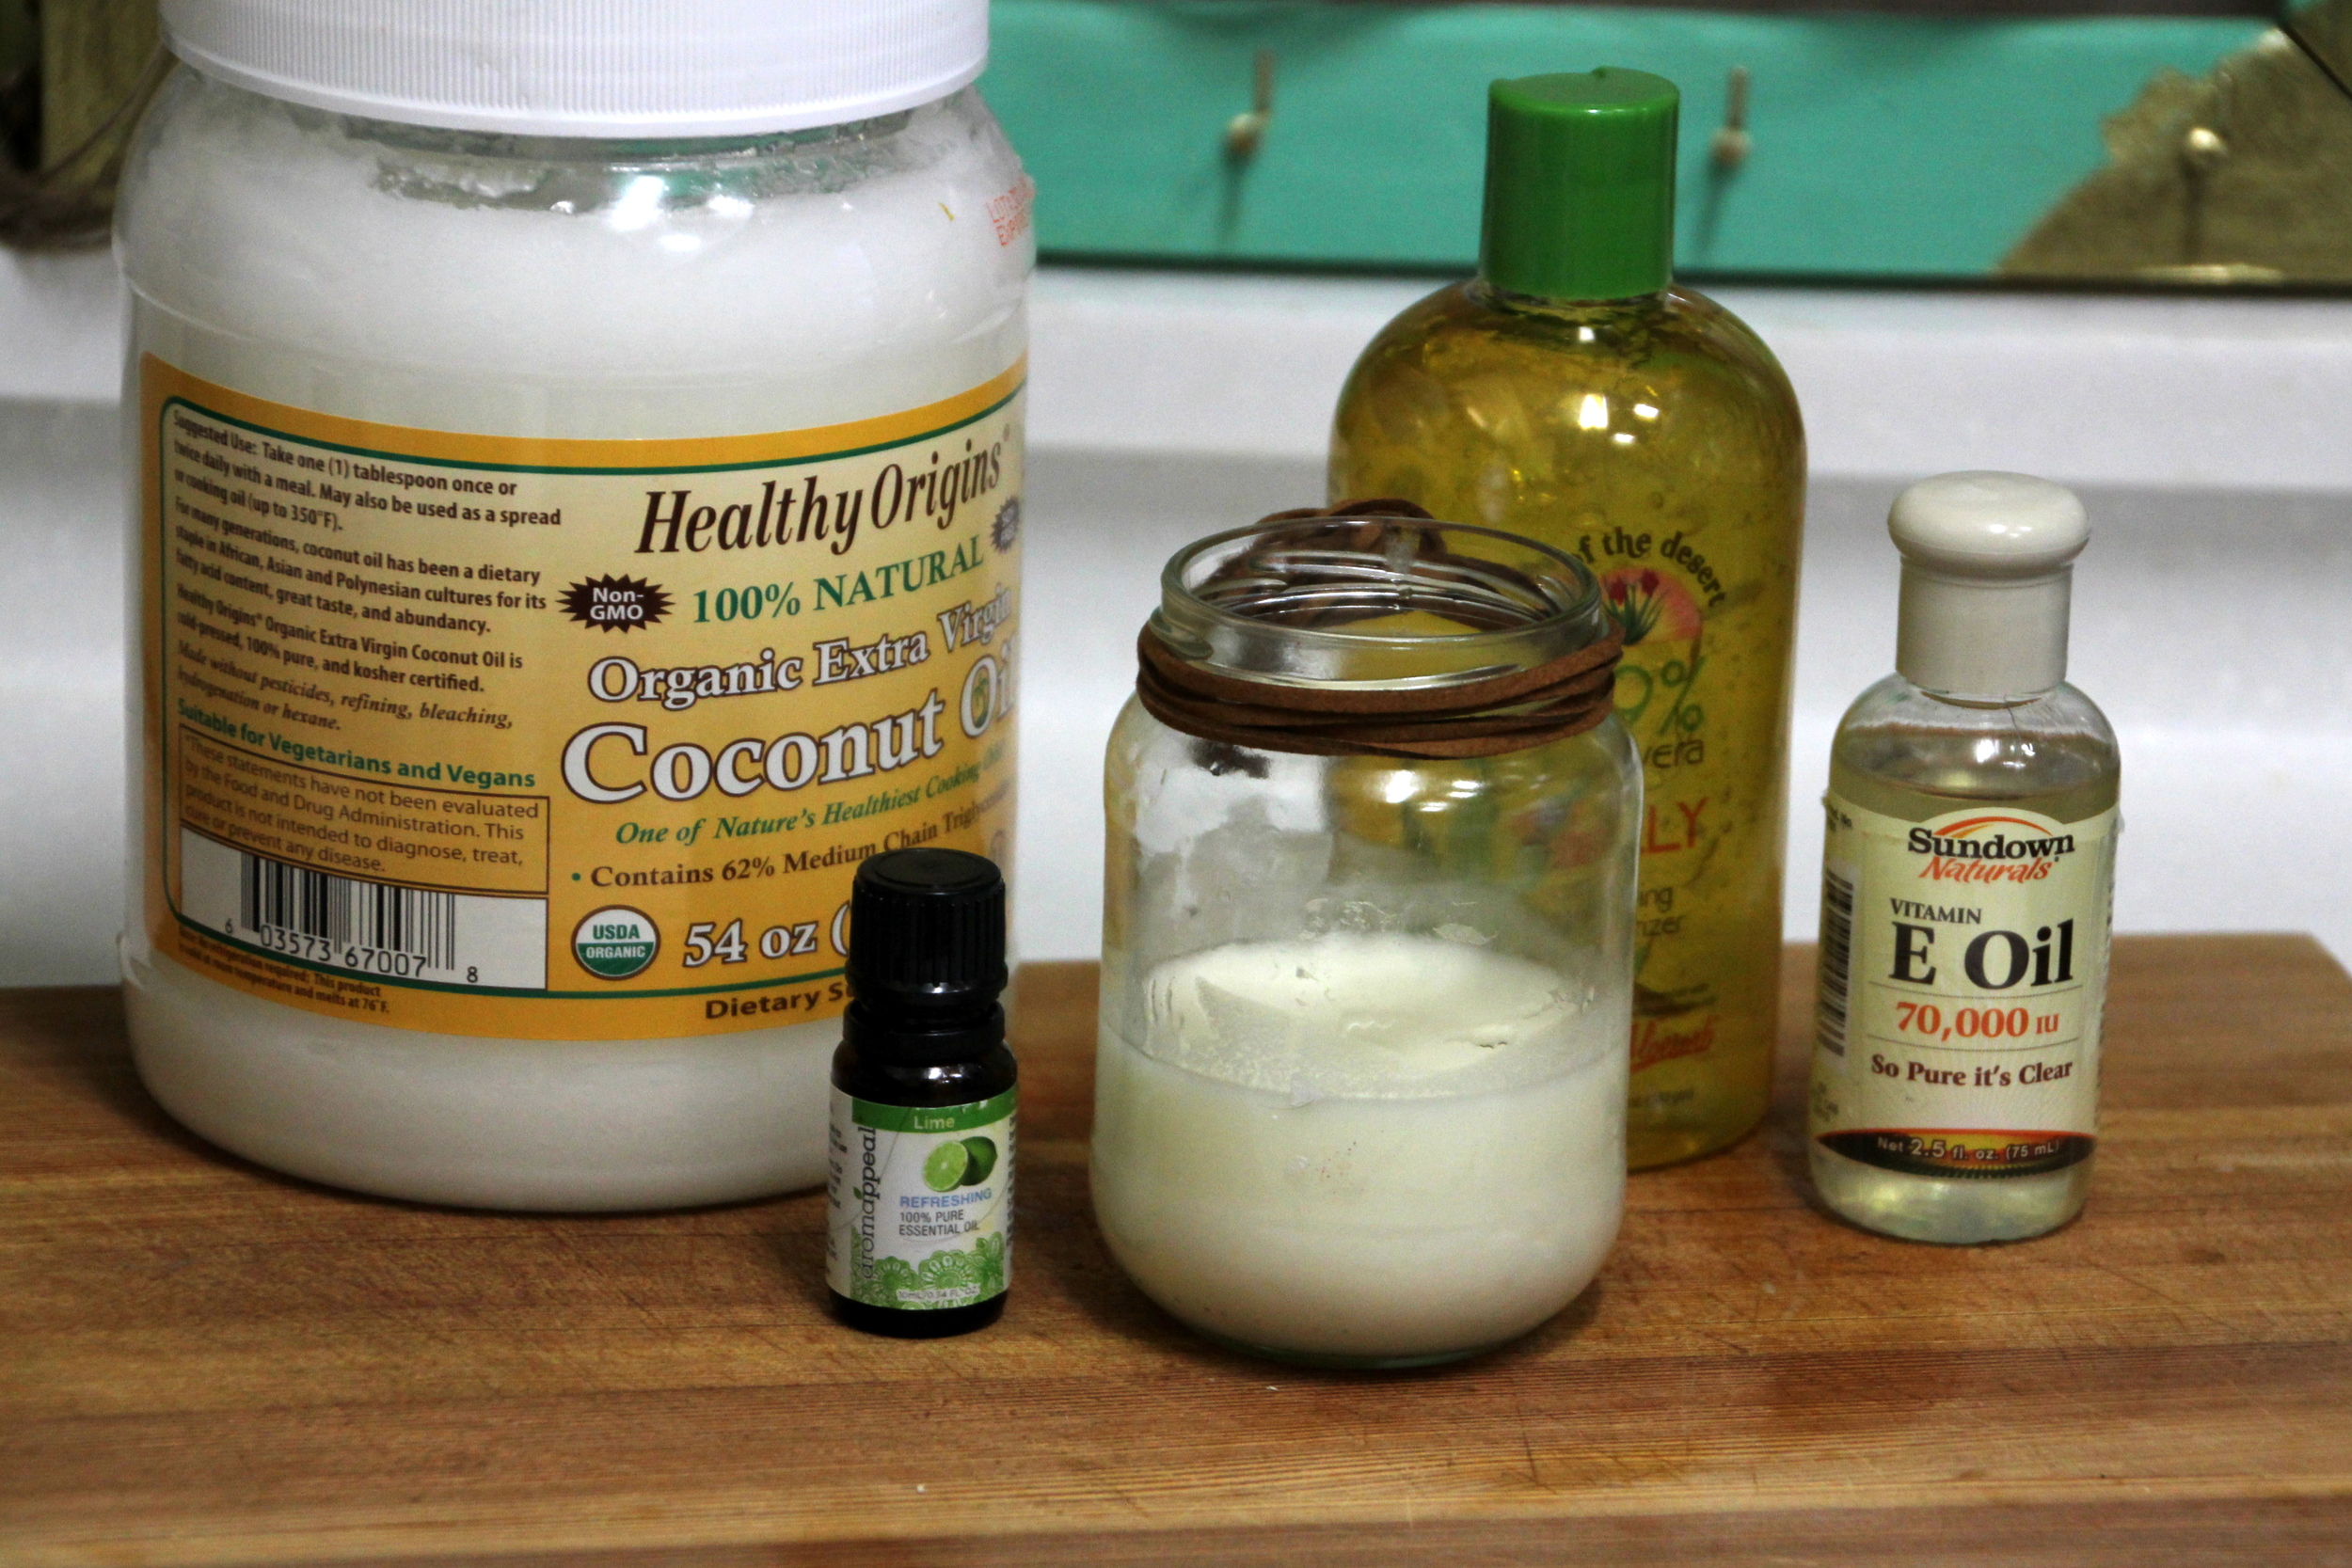
The recipe is super simple, and takes about 5 minutes (no kidding) from start to finish. Get started by grabbing these things:
1/8 cup aloe vera gel
1/4 cup coconut oil (I but this stuff in bulk since I use it so much)
1/4 cup fair trade shea butter
1 teaspoon vitamin E oil
10 drops lime essential oil
A note about aloe vera gel: 100% aloe vera gel is perishable, so I buy the next best thing, which is 99% aloe vera gel from a company I trust. Be sure to check ingredients when choosing your favorite brand.

DIY coconut lime lotion
Do you see my homemade extracts spicing up the background? I can't wait for them to be done!
Measure out all of your ingredients and put them in a bowl. Using a hand mixer, mix them on medium for 2 minutes, or until completely smooth with no lumps.

DIY coconut lime lotion

DIY coconut lime lotion
As you probably know, coconut oil solidifies at cool temperatures, but with this combination of ingredients you don't have to worry about that. It stays beautifully spreadable even if it's chilly in your home.
Throw your lotion in an up-cycled jar, and you're finished! Try it out and tell me what you think! What's your favorite ingredients to add to homemade lotions?
DIY coconut lime lotion
DIY coconut lime lotion
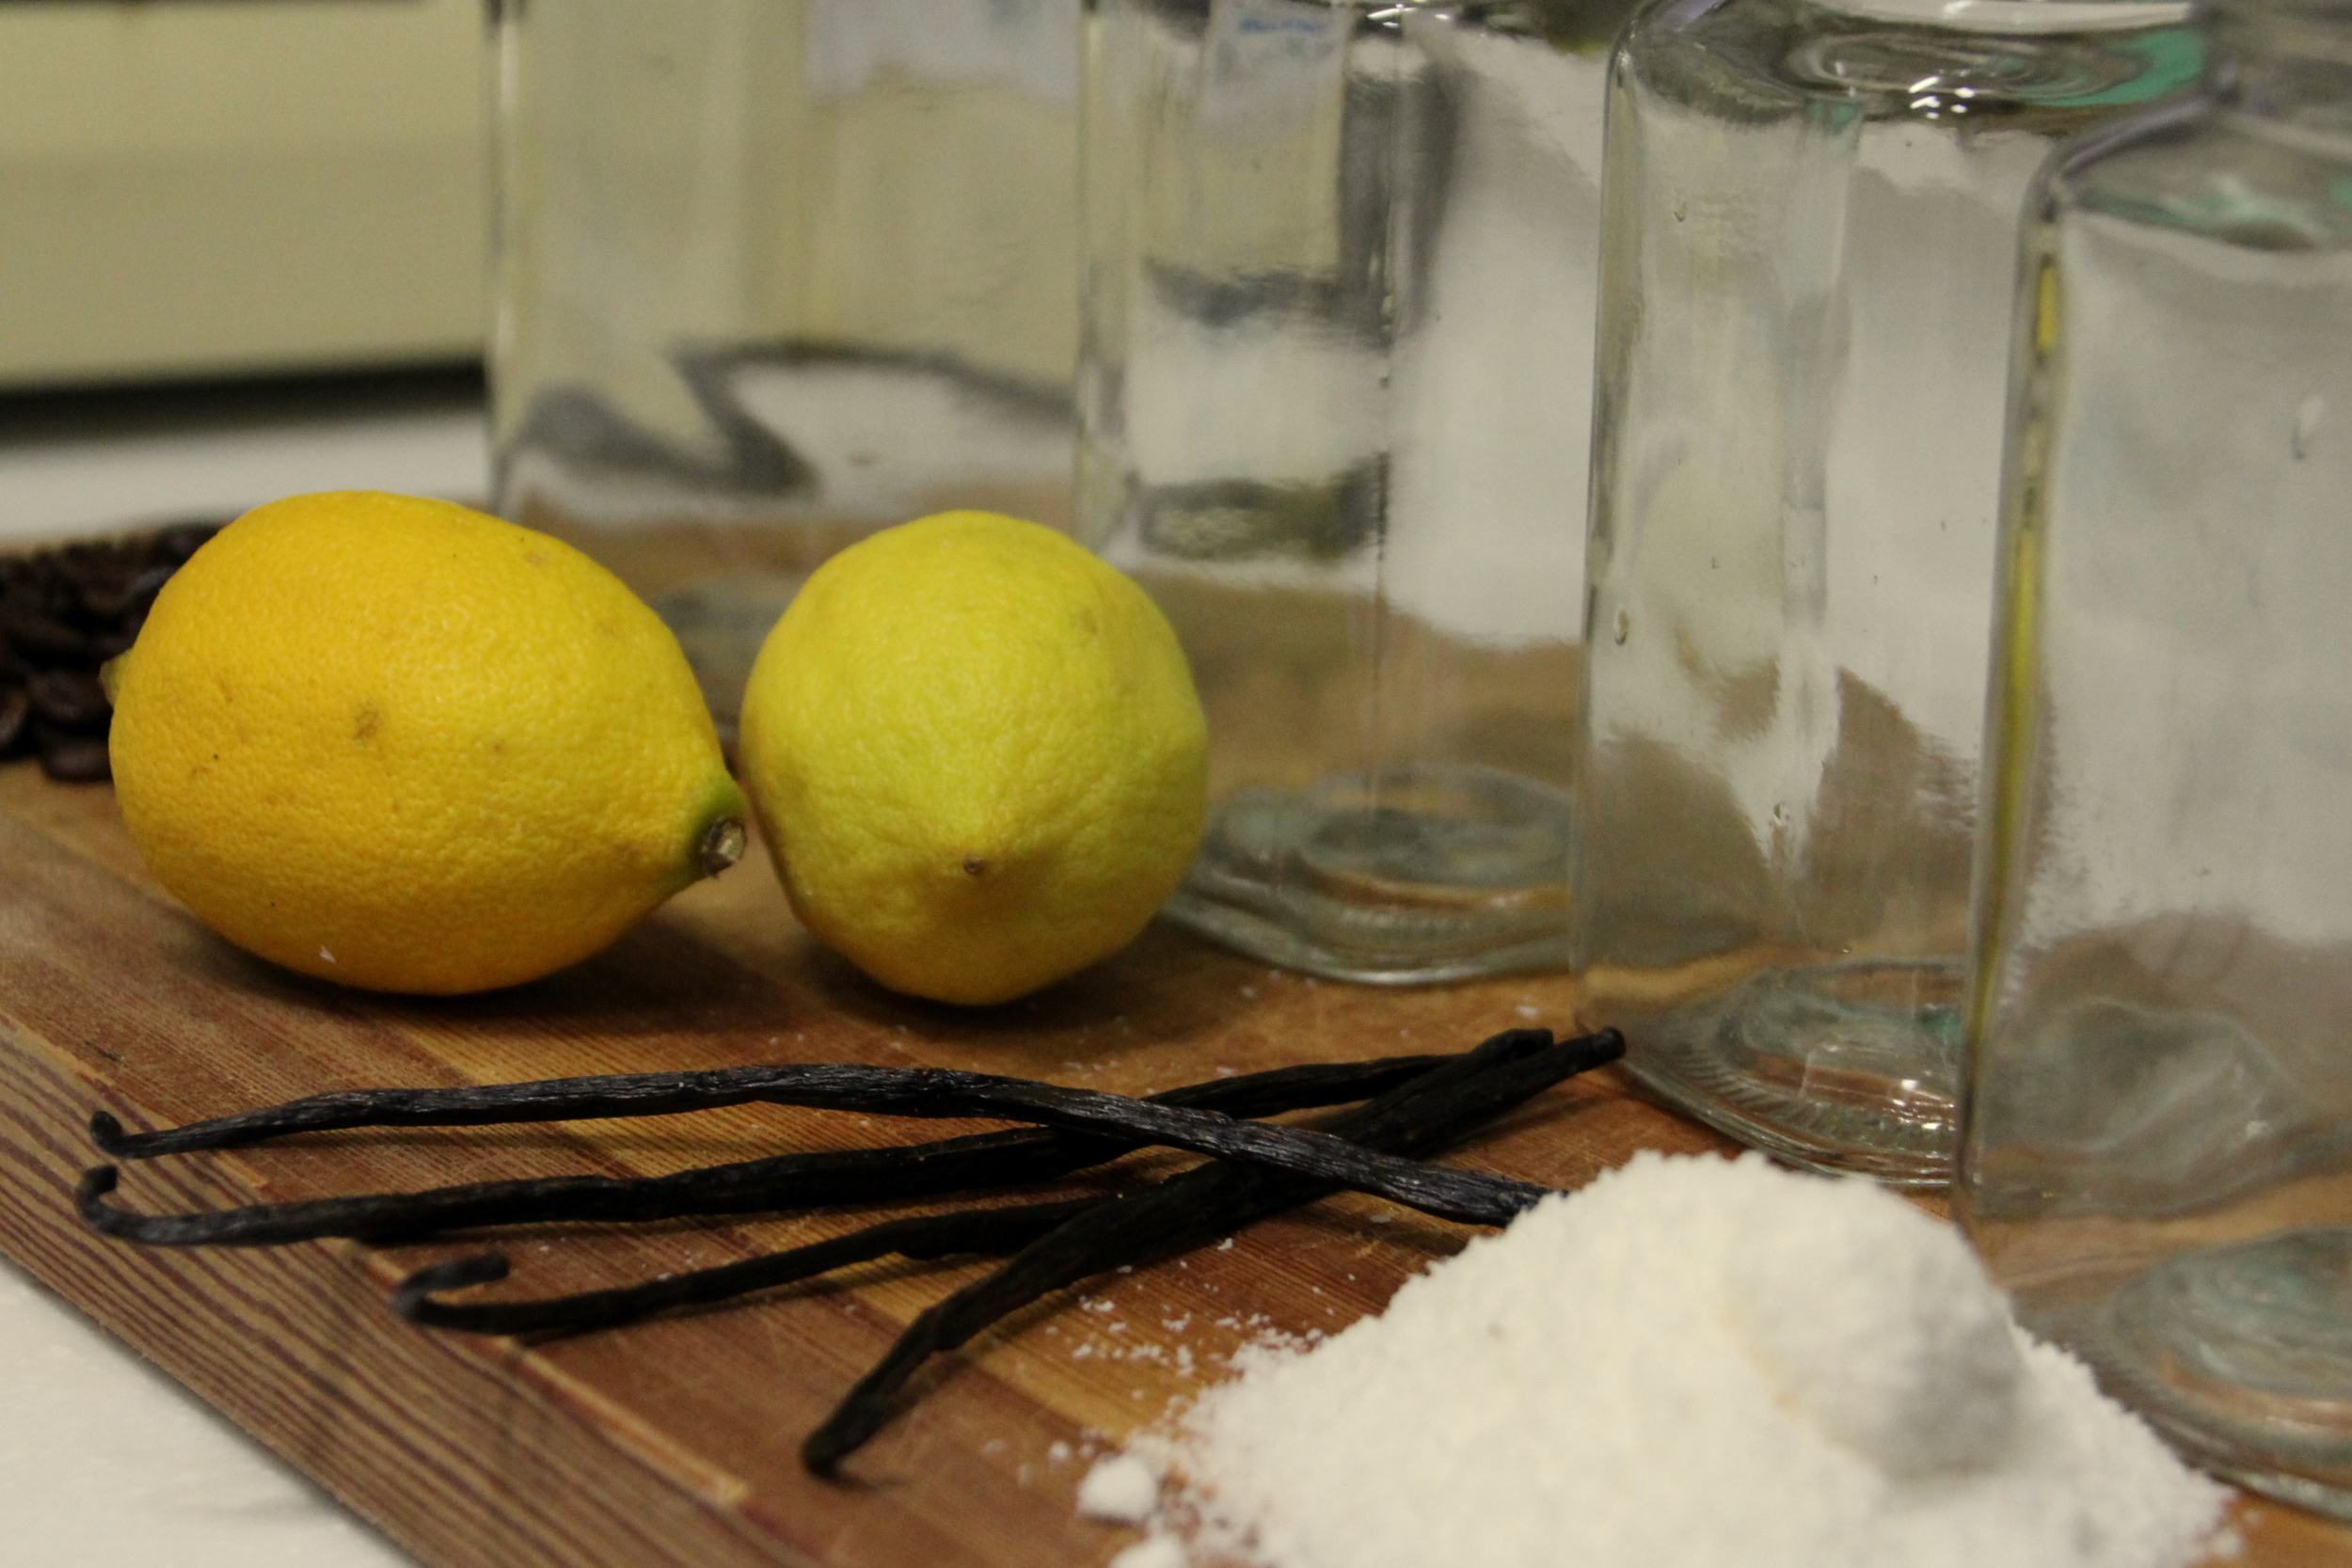
DIY Extracts
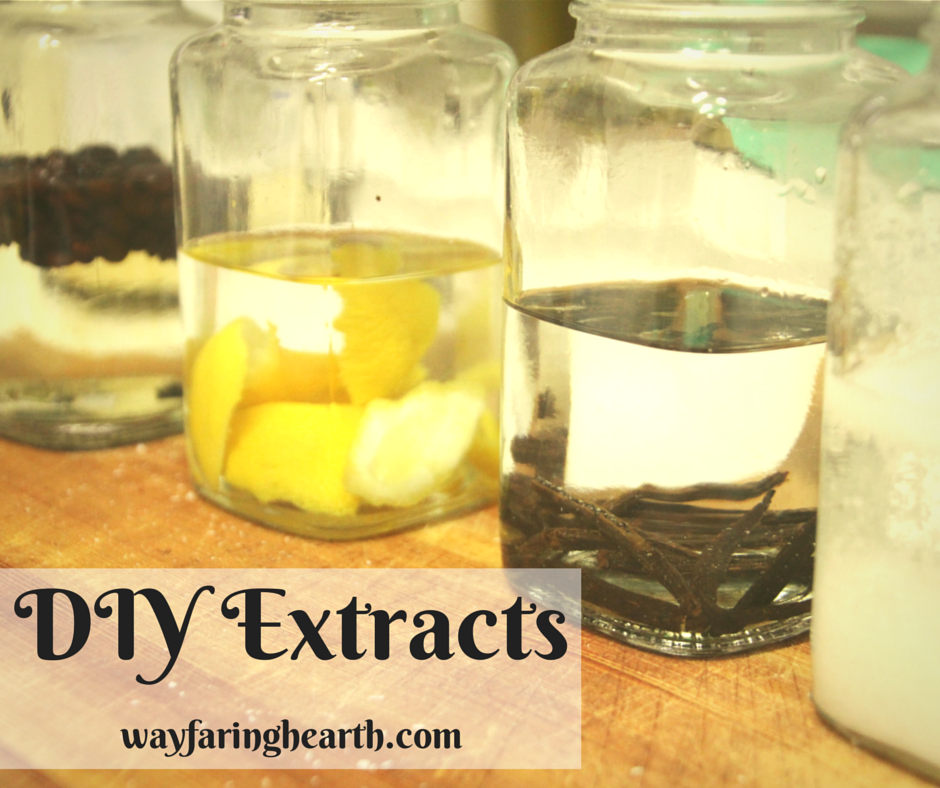
DIY Extracts
My love for baking and homemade lattes has greatly increased my collection of extracts, but have you seen the prices of pure extracts? Yikes! There is no way I will spend that much money on a tiny little bottle, when I use my extracts (especially vanilla) so often.

DIY extracts
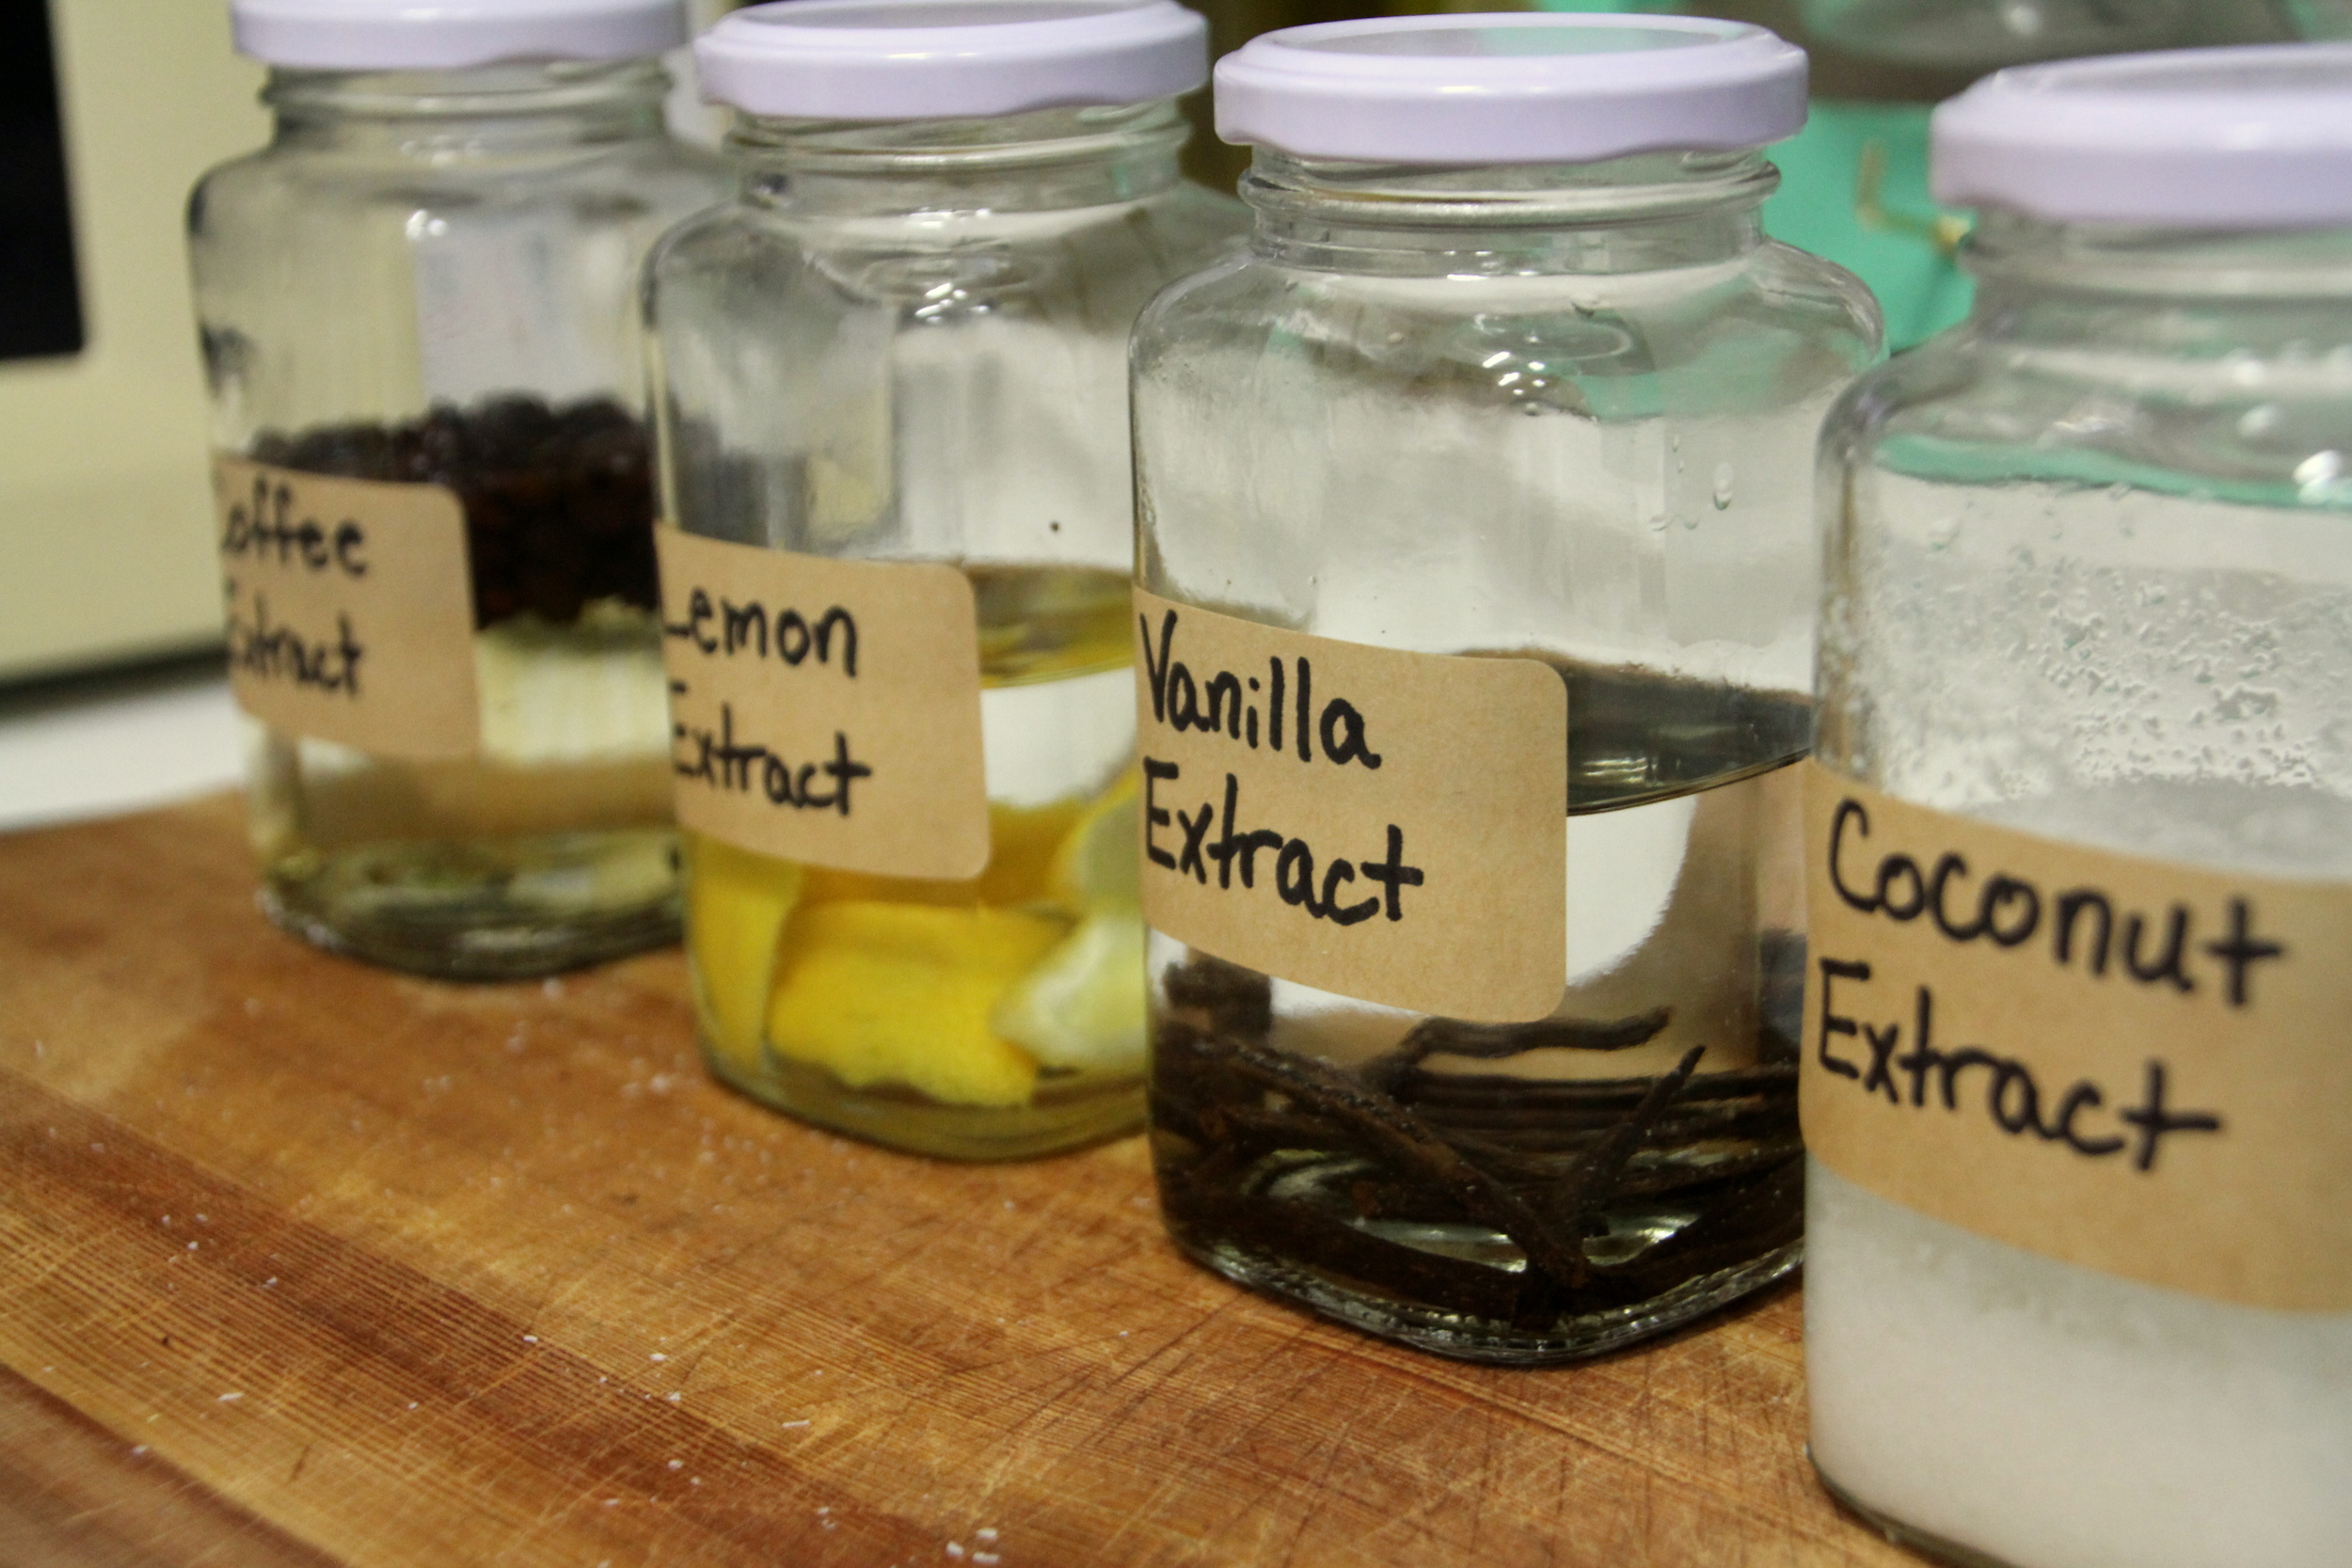
"Vanilla Imitation" does NOT count by the way. My love for saving money, making things at home, and knowing what goes into my food led me to make some DIY extracts of my own, and it's incredibly easy. The only downside is that you have to wait for a few weeks for them to be ready, but once you get the first batch going, it's a cinch! You can make any flavor of extract you want. Just think: peppermint, almond, coconut, coffee, raspberry, lemon, and of course, vanilla. Once they are ready, you can use them in desserts, homemade creamers, DIY body butters, or whatever you like! I already have massive amount of peppermint and almond extract, so in this post I'll show you how to make coffee, lemon, coconut, and vanilla extract, but I'll include recipes for the others as well.
DIY extracts
A note about which products to buy: Many say that fruits with thick rinds (including lemons) do not need to be organic since you are peeling the thick skin off. However, for these extracts you are letting the peel steep in vodka for a few weeks, and that means everything that's in the peel is going into your food. That's why for this project I buy only organic ingredients, even if they are on the "Clean 15" list.
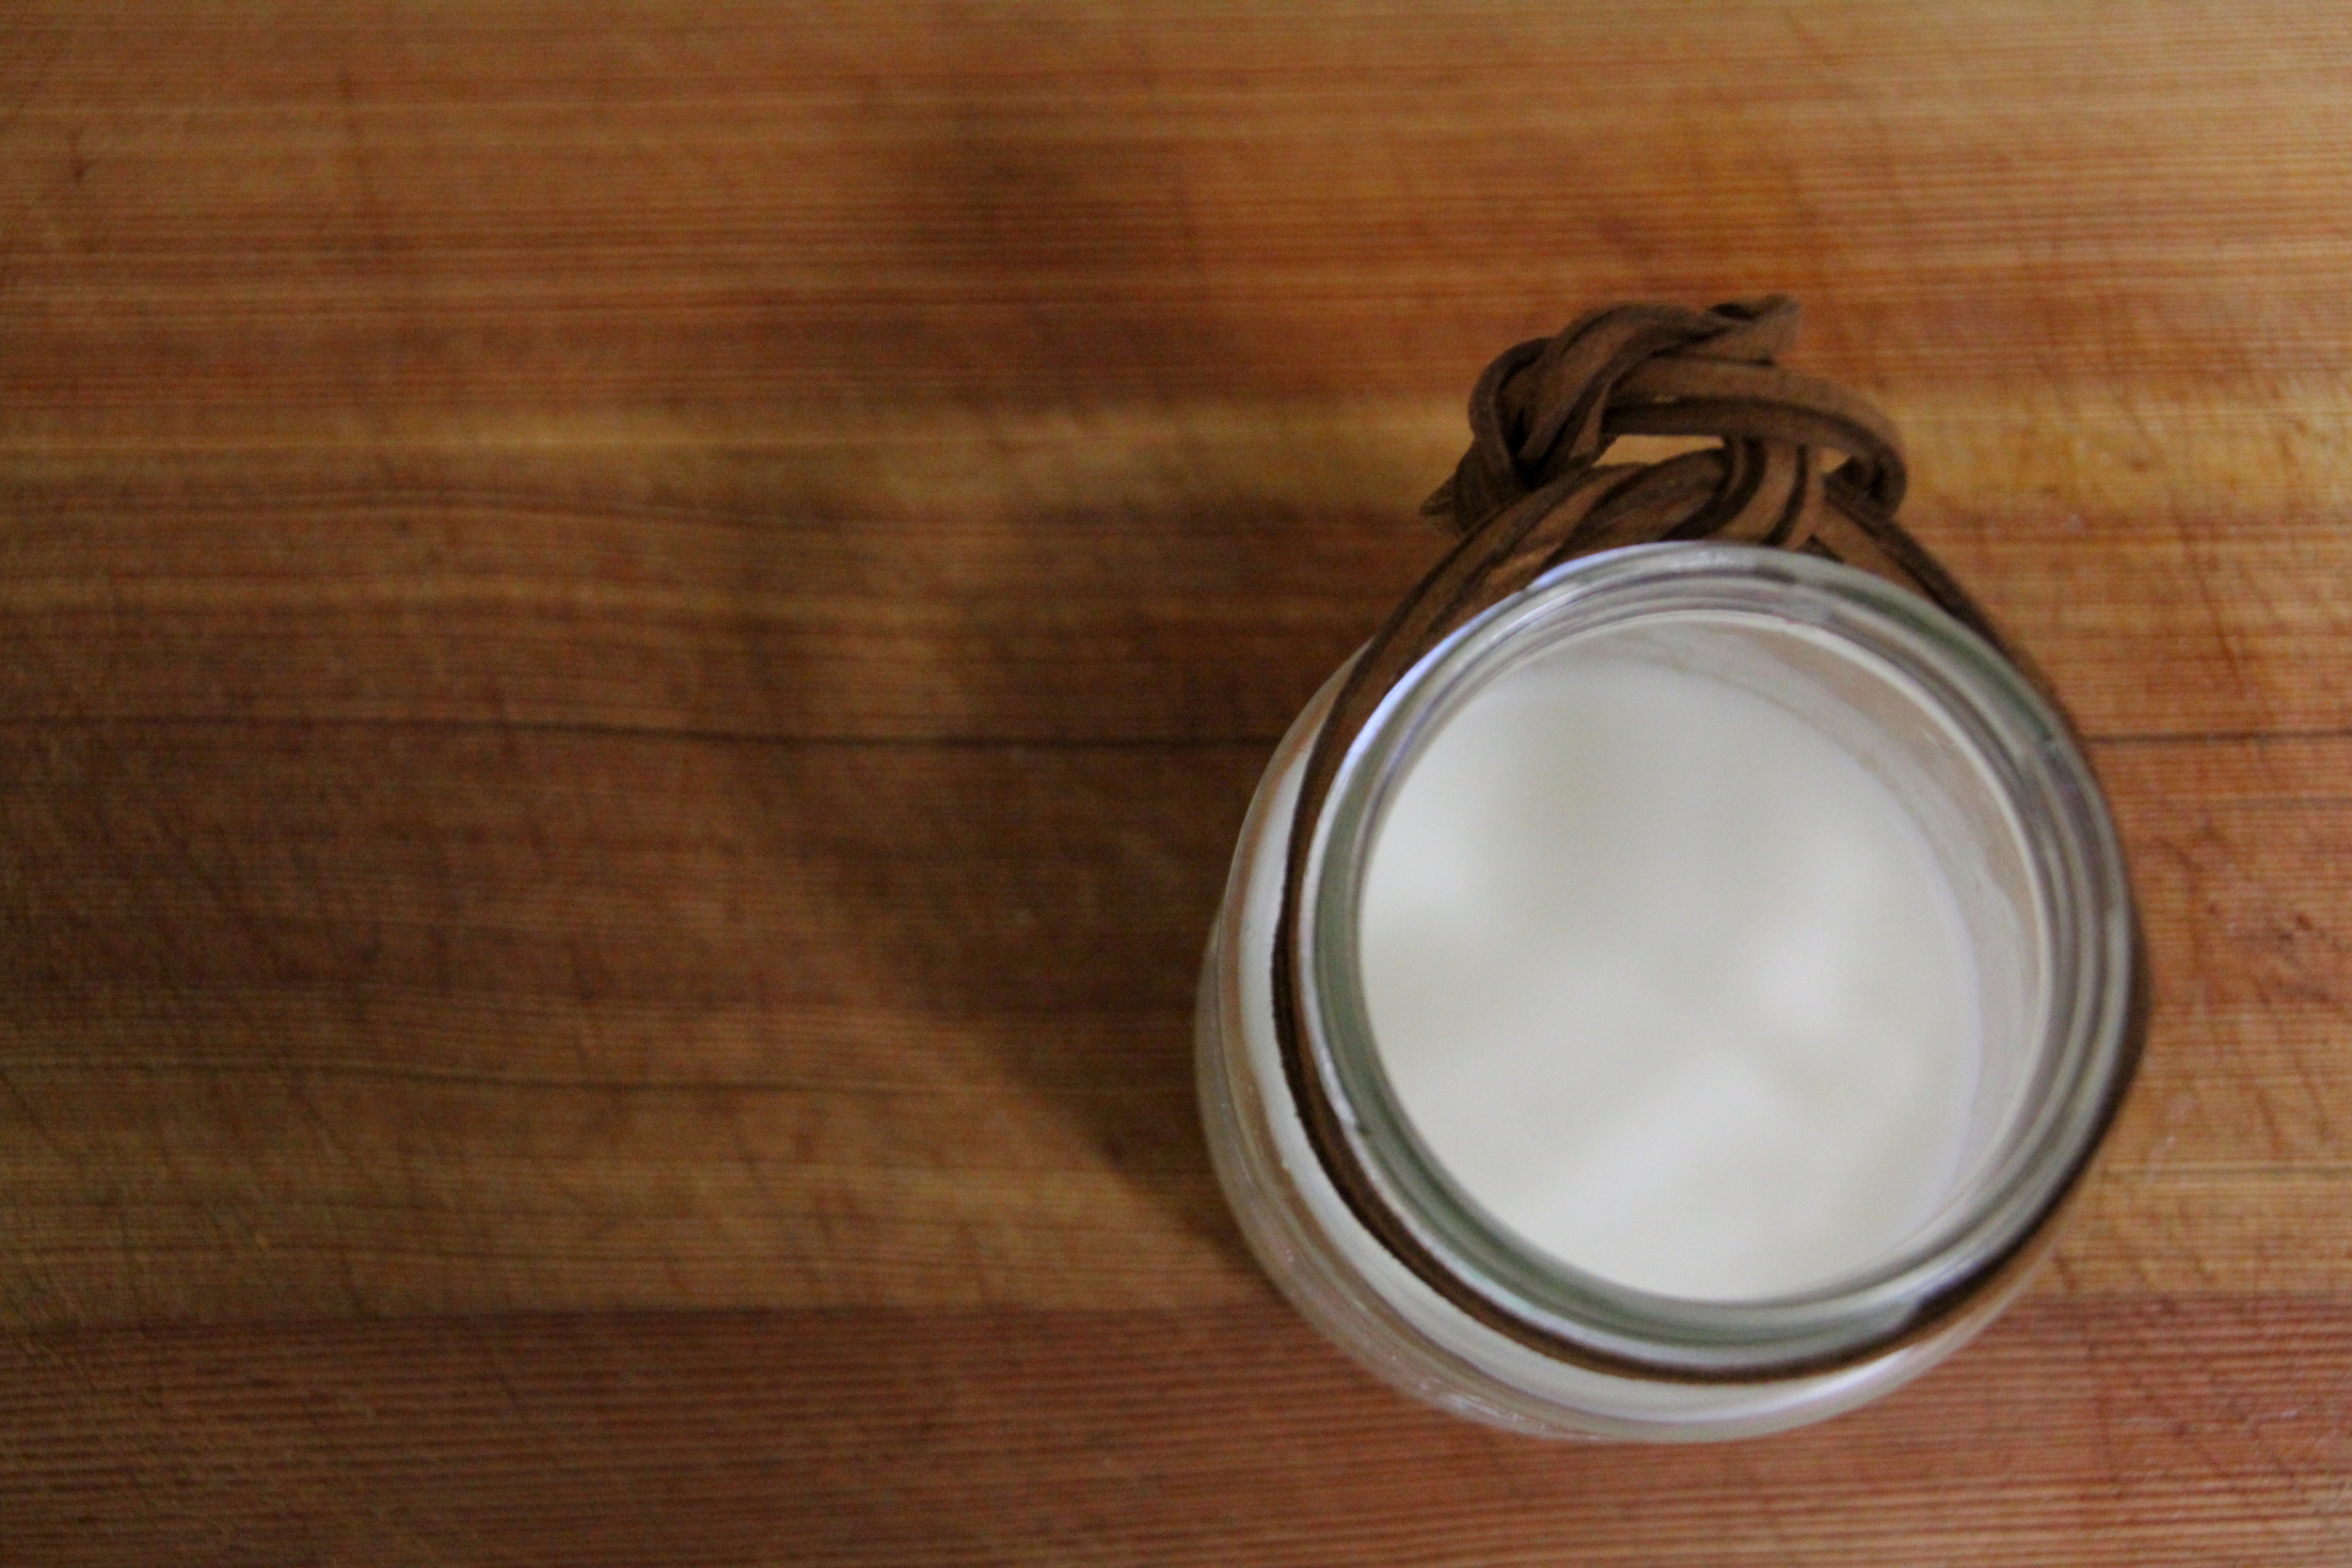
To start, you want to grab glass containers with lids that screw tight. Mason jars work fine, as do these little glass jars I got from the dollar store.

DIY extracts
The process is super simple! Just measure out the base ingredient, and add a cup of vodka. Here are the measurements for some of my favorite extracts:
Coffee Extract
1/4 cup whole, organic coffee beans
1 cup vodka
Coconut Extract
1/4 cup shredded coconut
1 cup vodka
Vanilla Extract
4 vanilla beans, sliced down the center and chopped into three segments
1 cup vodka

DIY extracts
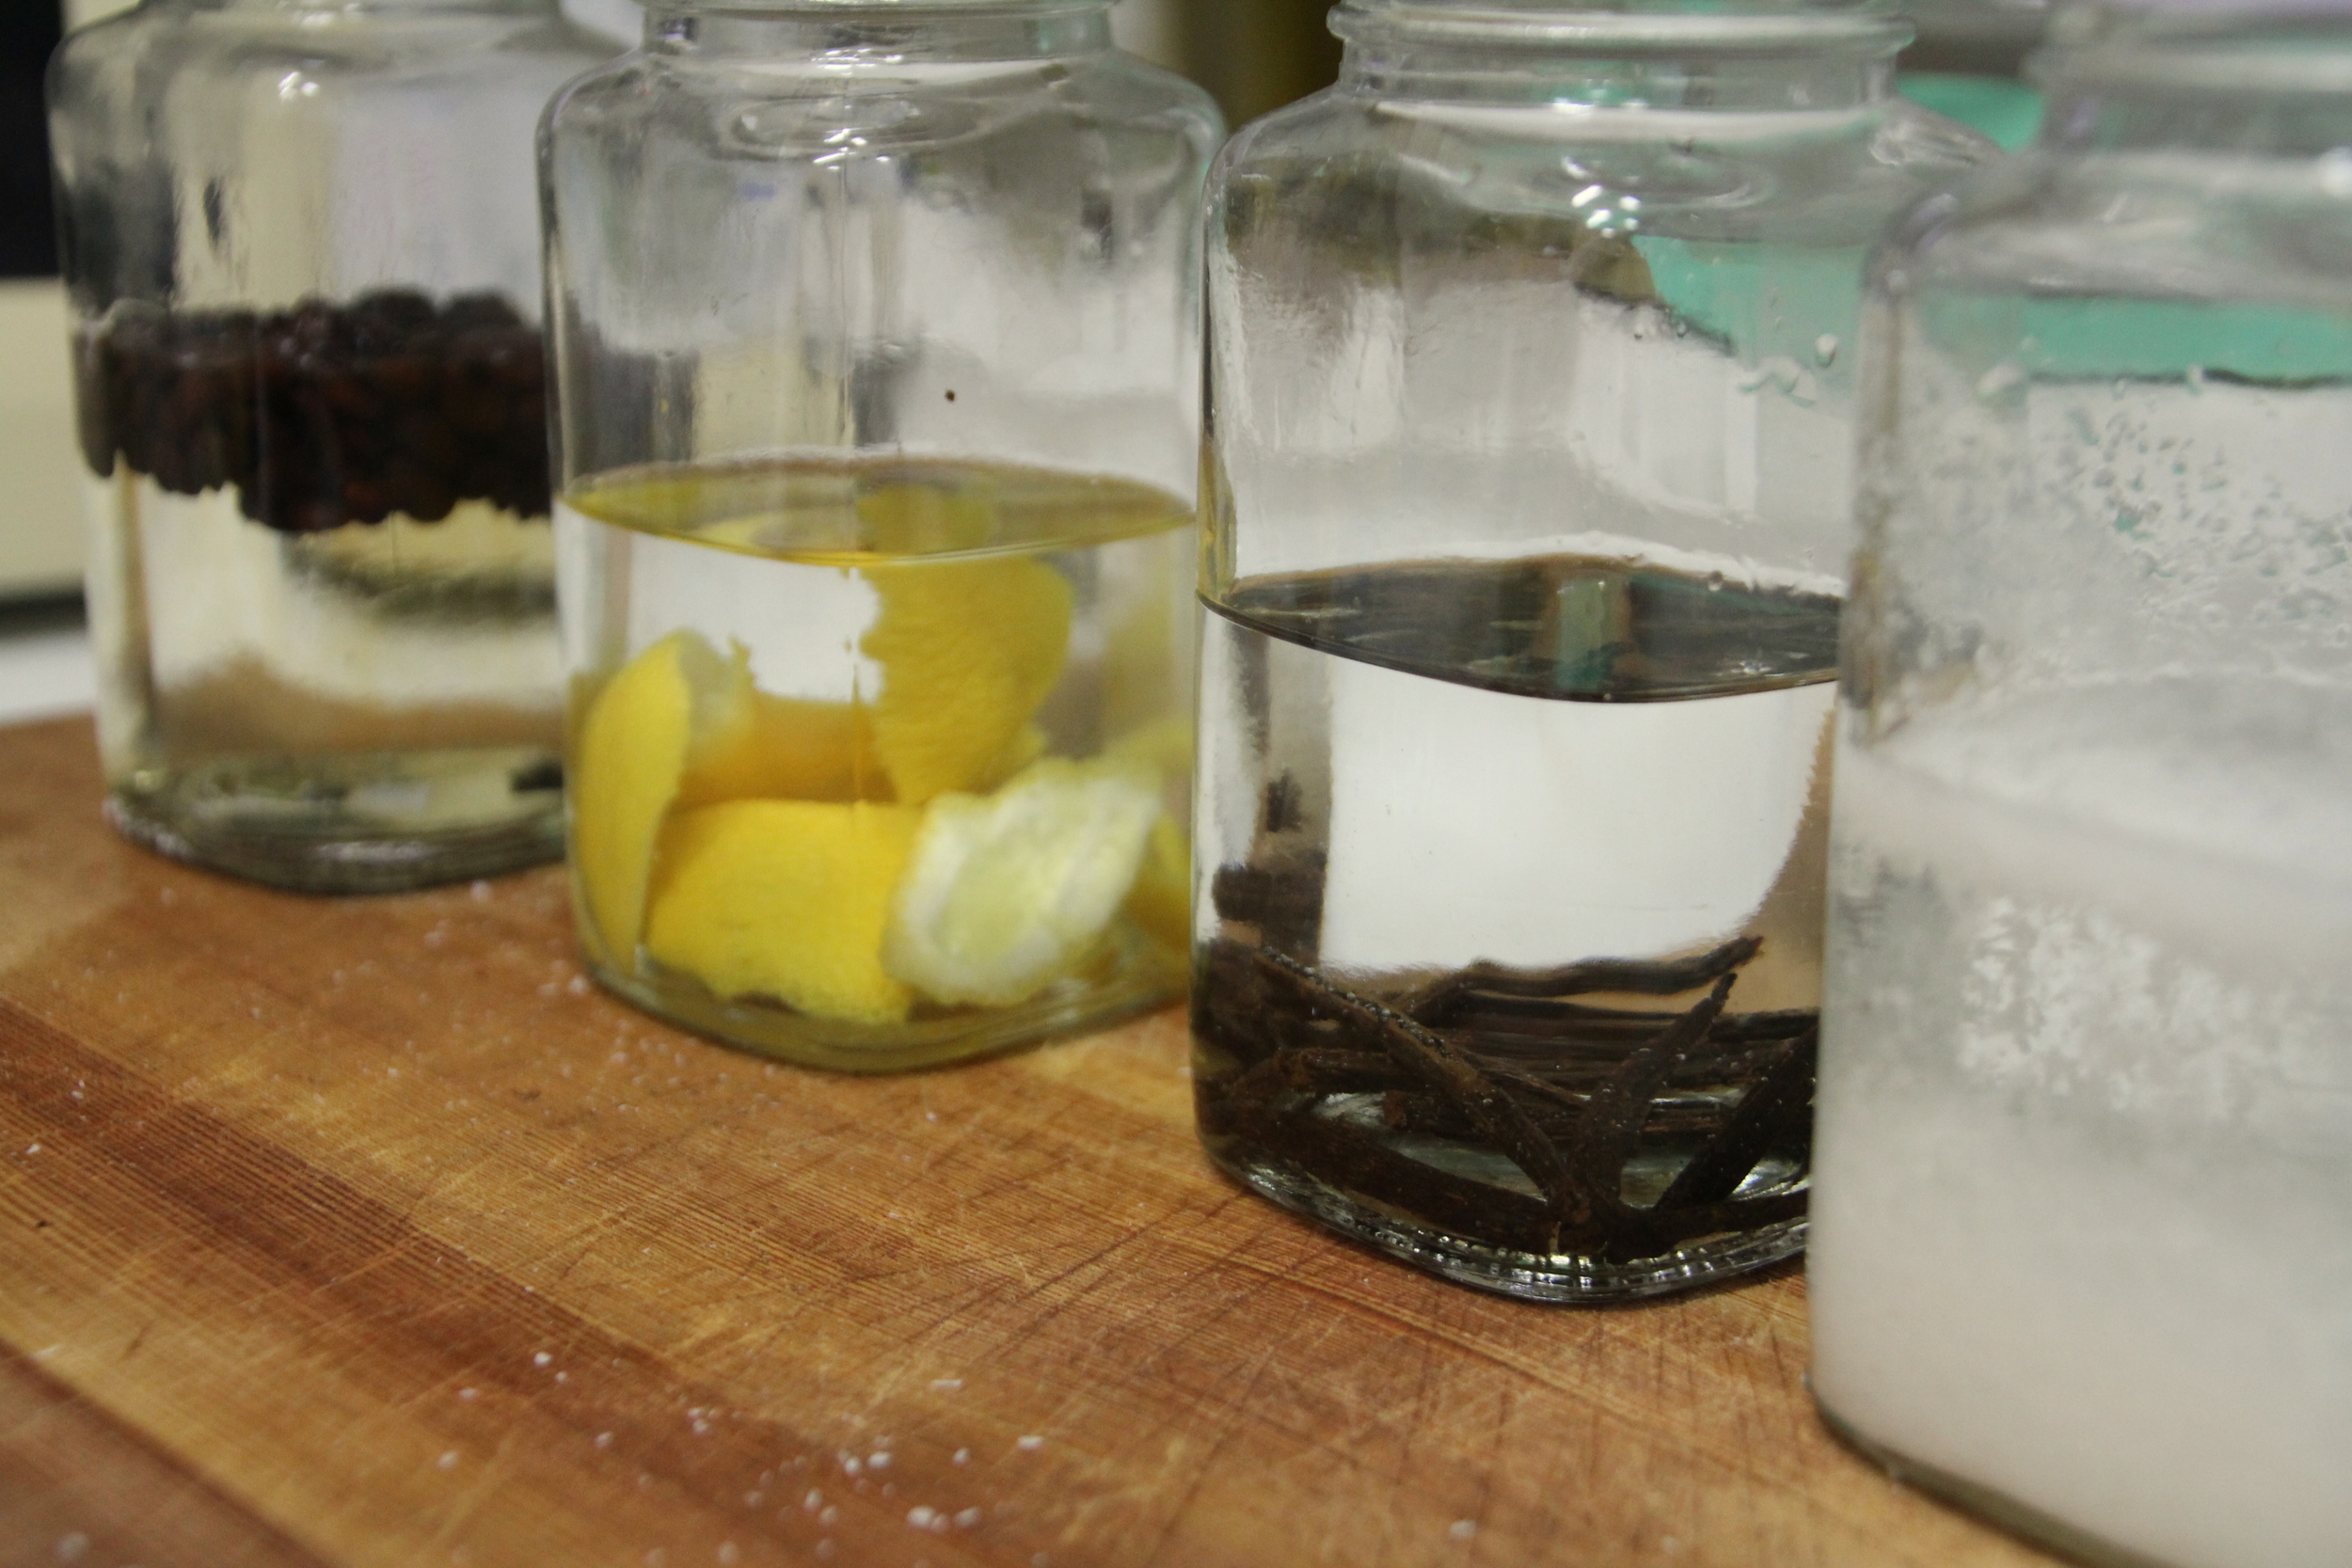
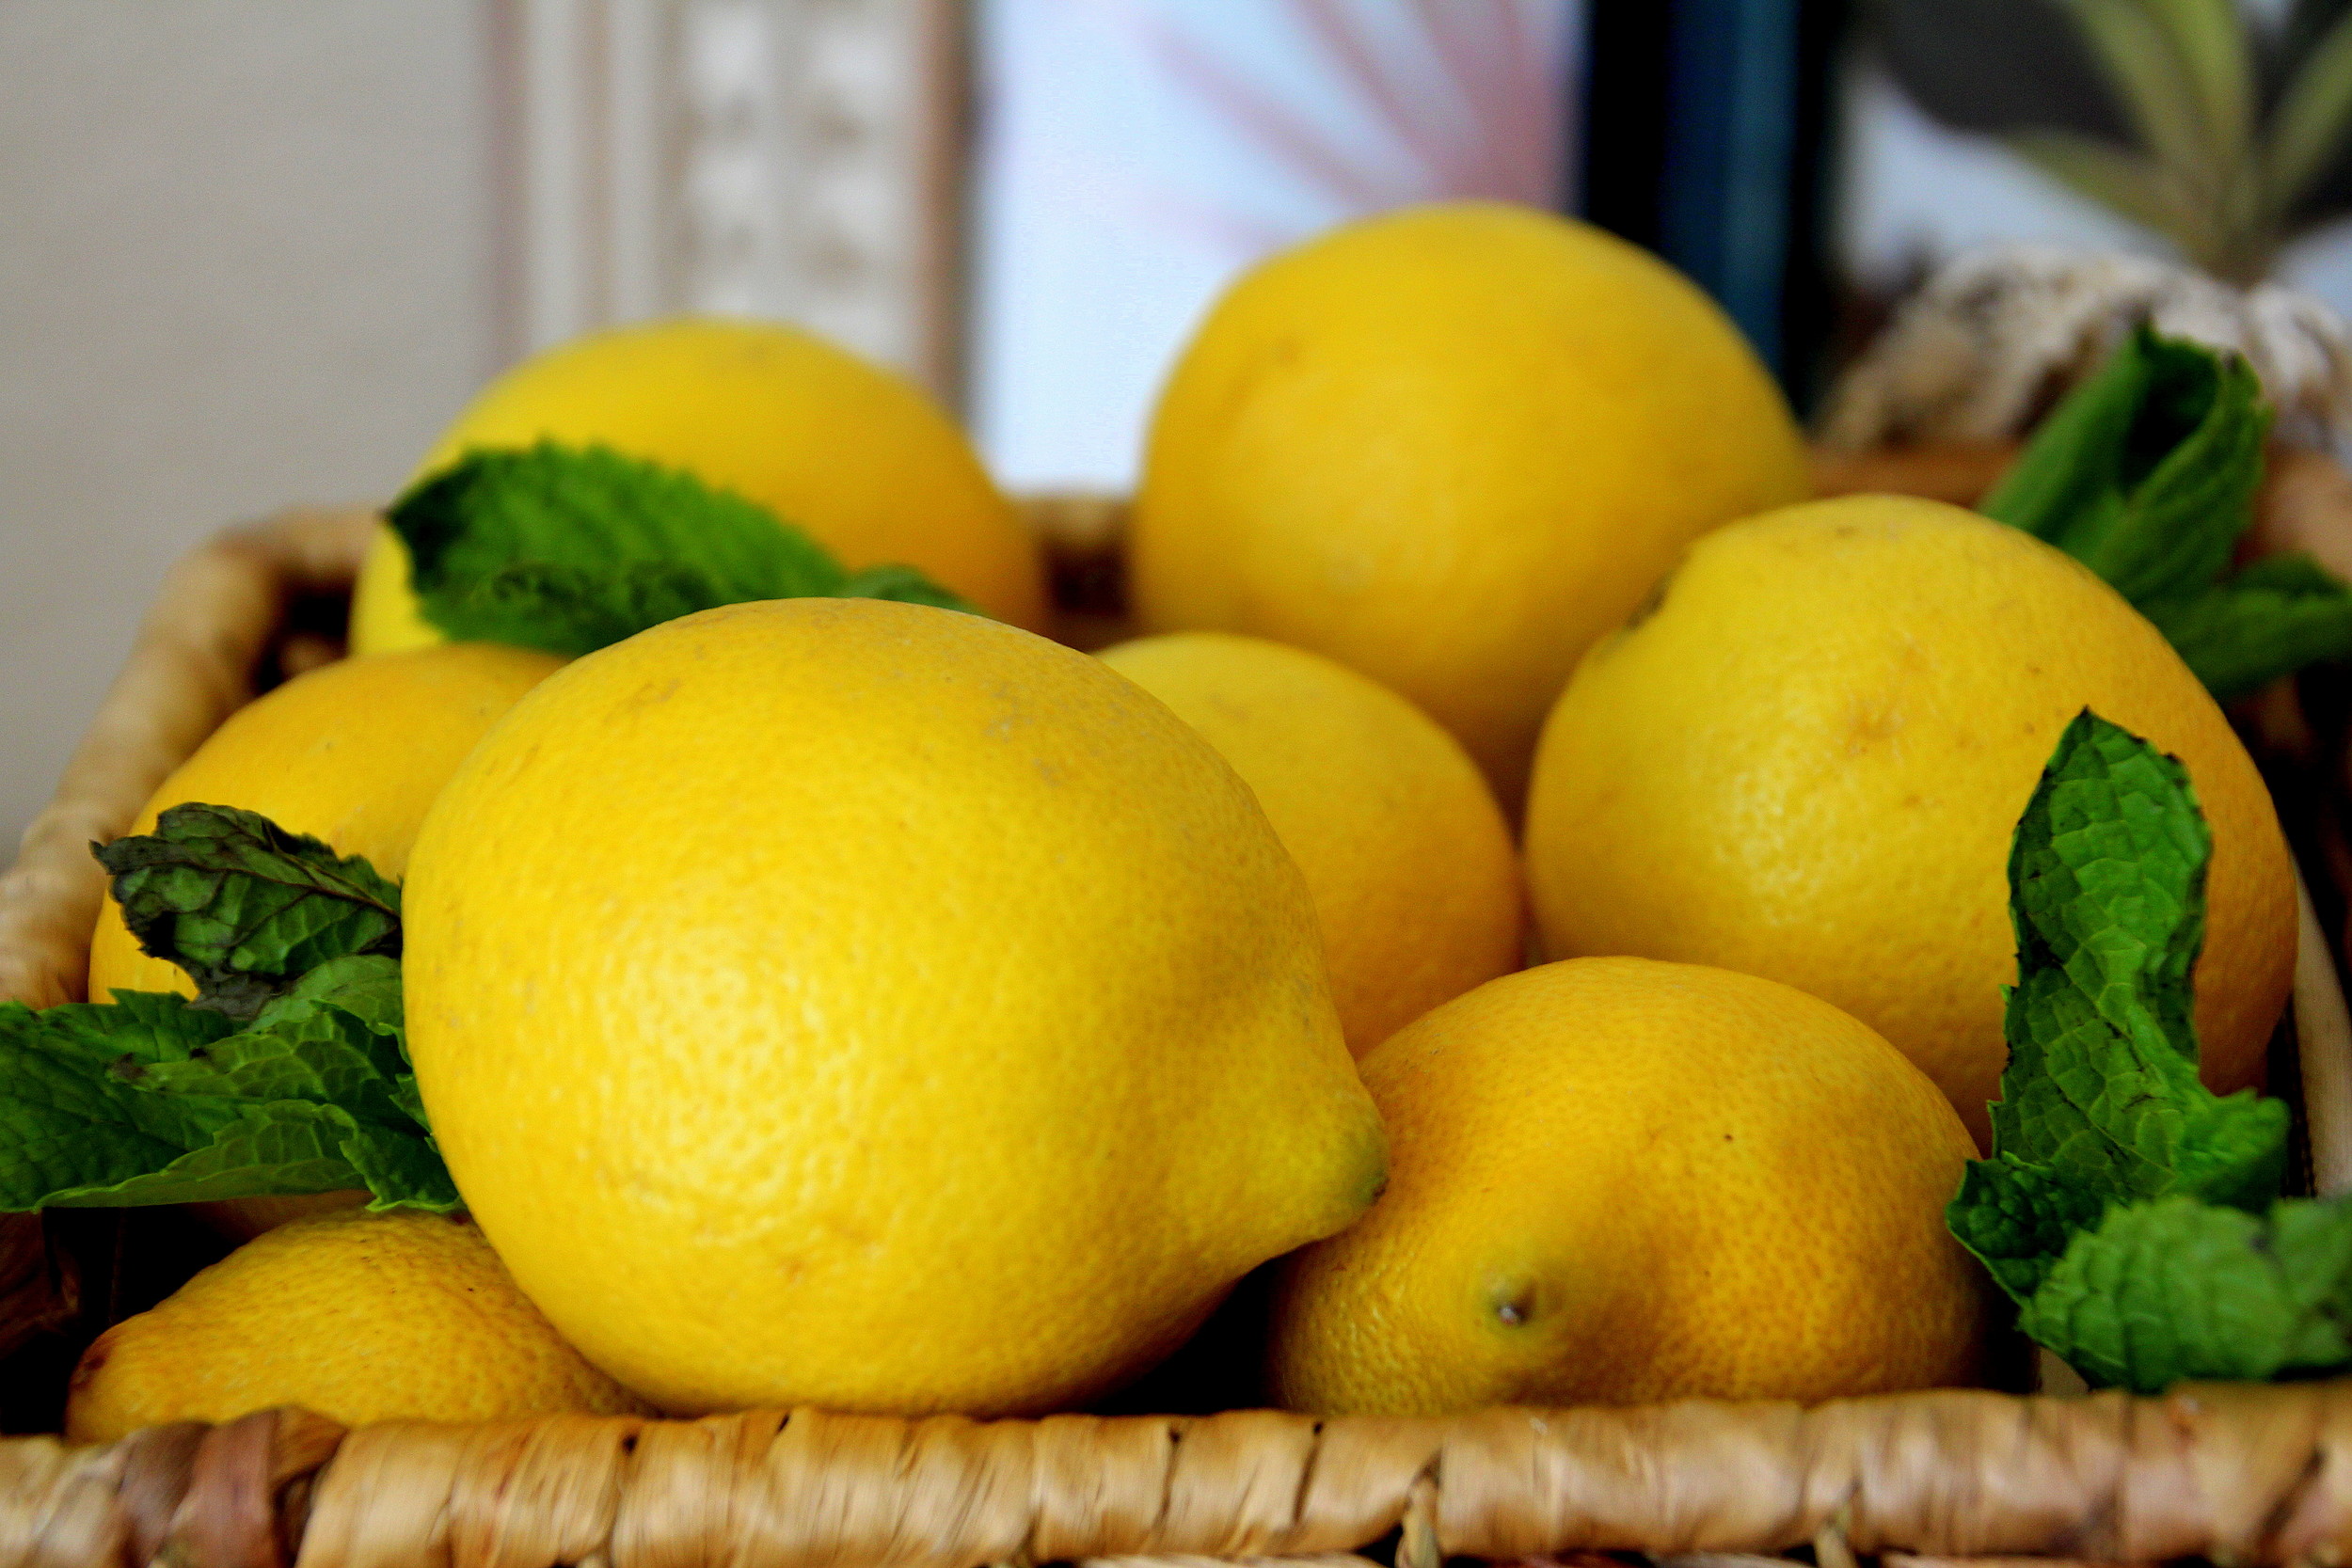
Lemon Extract
Peel from 1 organic lemon
1 cup vodka (are you catching a pattern here?)
Peppermint Extract
1/4 cup washed, organic peppermint leaves
1 cup vodka
Almond extract
1/4 cup almonds
1 cup vodka
Other citrus fruits (grapefruit, lemon, orange, lime, etc)
Peel from 1 fruit
1 cup vodka
Instructions:
Measure out your base ingredient, and put it in a glass jar that has an airtight lid. Pour in your vodka, put on the lid, and give the jar a shake. Store it in a cool, dry place out of direct sunlight for 5-6 weeks. Be sure to shake it up every now and then.
DIY extracts
After a few weeks, your extract is ready to use! I know that with the vanilla beans, you can just leave them in a jar and refill it with vodka when you run out, but for the others, strain out the coffee beans, lemon peels, peppermint leaves, or whatever before you use them.

DIY extracts
Any great ideas for what to use these babies in? I'd love to brainstorm with you!
DIY extracts

DIY extracts
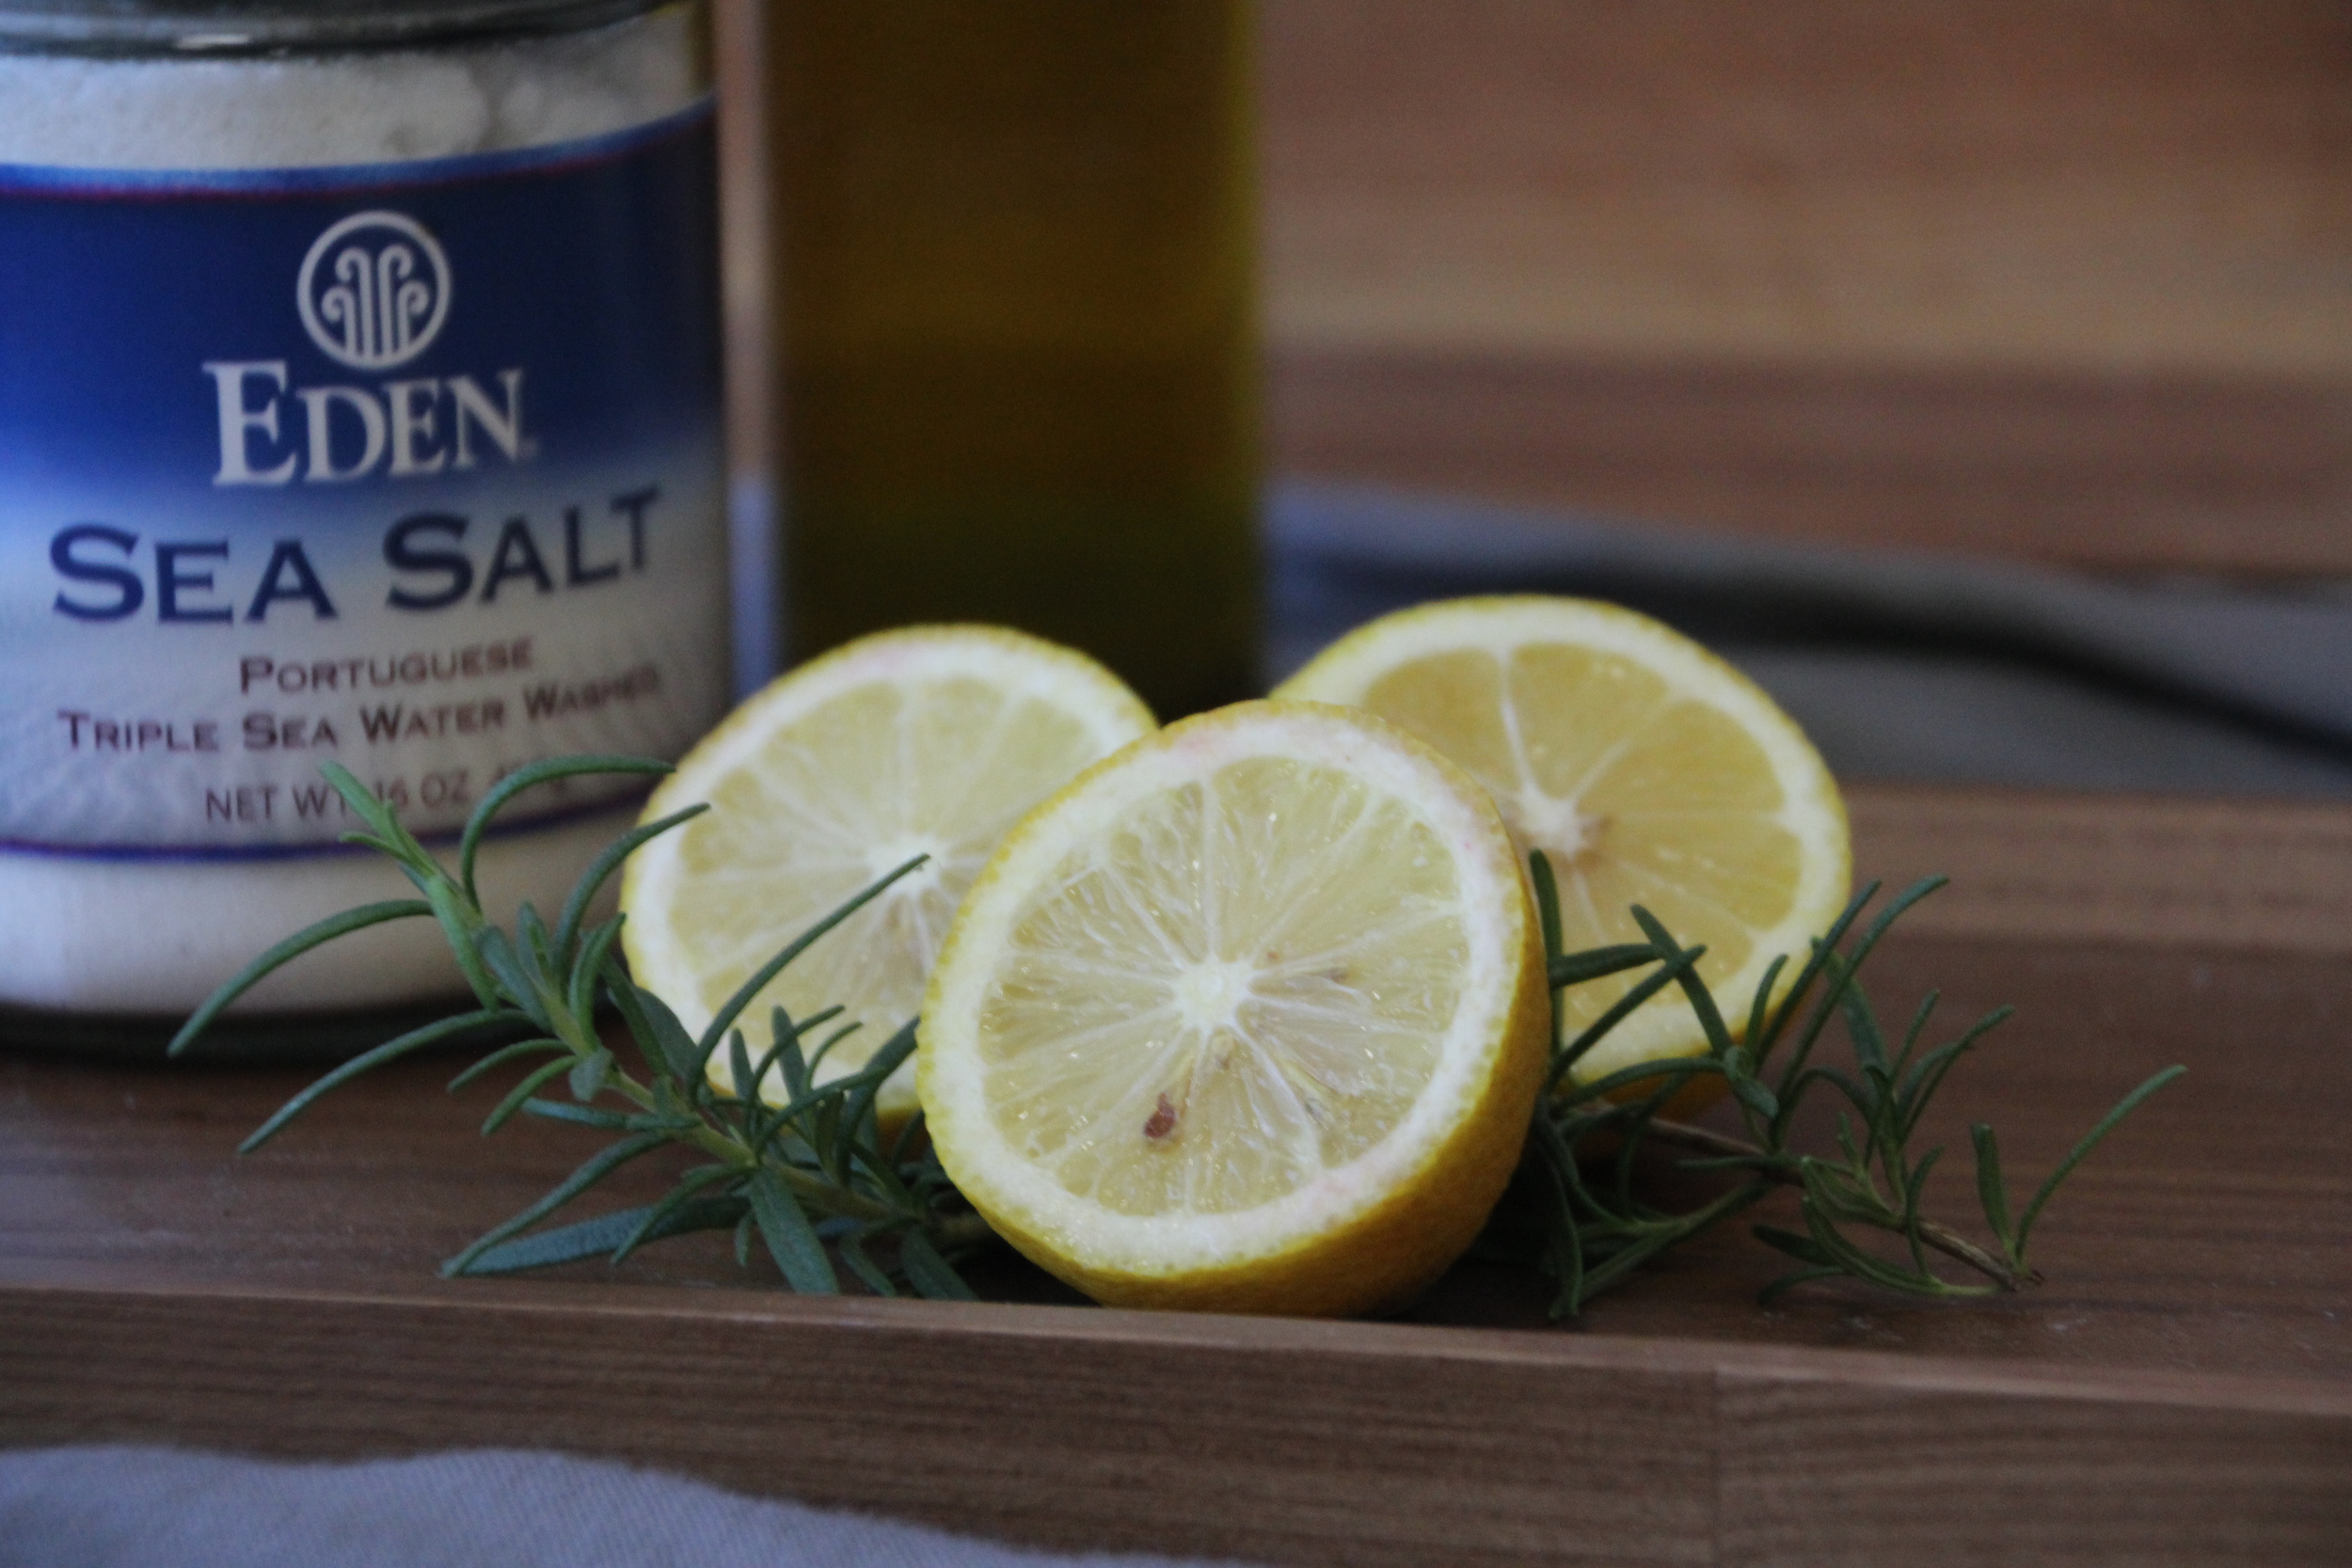
Purifying Rosemary-Lemon Scrub

Purifying Rosemary-Lemon Scrub
I miss my bathtub. On Saturdays, I would sometimes take a detox bath to relax and rid my body of toxins. Don't get me wrong, I'm thankful we have a shower with hot water. In college, I did a semester abroad in the Dominican, and had enough cold rain-water bucket baths to never underestimate the value of a hot shower again. Anyway, I decided to create a scrub with similar benefits as my beloved detox baths, and came up with this Rosemary-Lemon Sea Salt Scrub.
Rosemary's lists of benefits goes on and on, and it's one of my favorite herbs to grow and cook with (bonus: the plant is pretty hard to kill). The oil is made from the leaves of the plant, and contains antimicrobial and antioxidant properties, which makes it an excellent nemesis against skin disorders. It contains many anti-oxidants as well, and can fight free-radicals. While it has many of these purifying properties, rosemary oil does not dry out your skin. Instead, it nourishes it with many vital nutrients. Yay, rosemary!
Purifying Rosemary-Lemon Scrub
You may already know of my love for lemon oil and its ability to fight heartburn, but it is also a key player in this scrub. I could go on and on about this oil, but specifically for external use, lemon oil detoxifies and rejuvenates the skin, making it the perfect partner for rosemary oil. It also increases circulation, clears the nasal passages, and gives your immune system an extra boost. BOTH rosemary and lemon are used in aromatherapy to lift the mood, so you can pamper yourself with a little aromatherapy treatment while you exfoliate!

Purifying Rosemary-Lemon Scrub
This takes about 5 minutes to whip up, and it oh so worth it! First, grab these things:
1 cup sea salt (I used fine grained sea salt since it's what I had on hand, but you can use coarser sea salt as well)
1/3 cup olive oil
1/2 Tablespoon vitamin E oil
1 lemon
Rosemary sprig (optional)
Rosemary Oil
Lemon Oil
Measure out your sea salt and pour it in a jar.

Purifying Rosemary-Lemon Scrub
Pour in your 1/3 cup of olive oil and 1/2 Tablespoon of vitamin E oil.
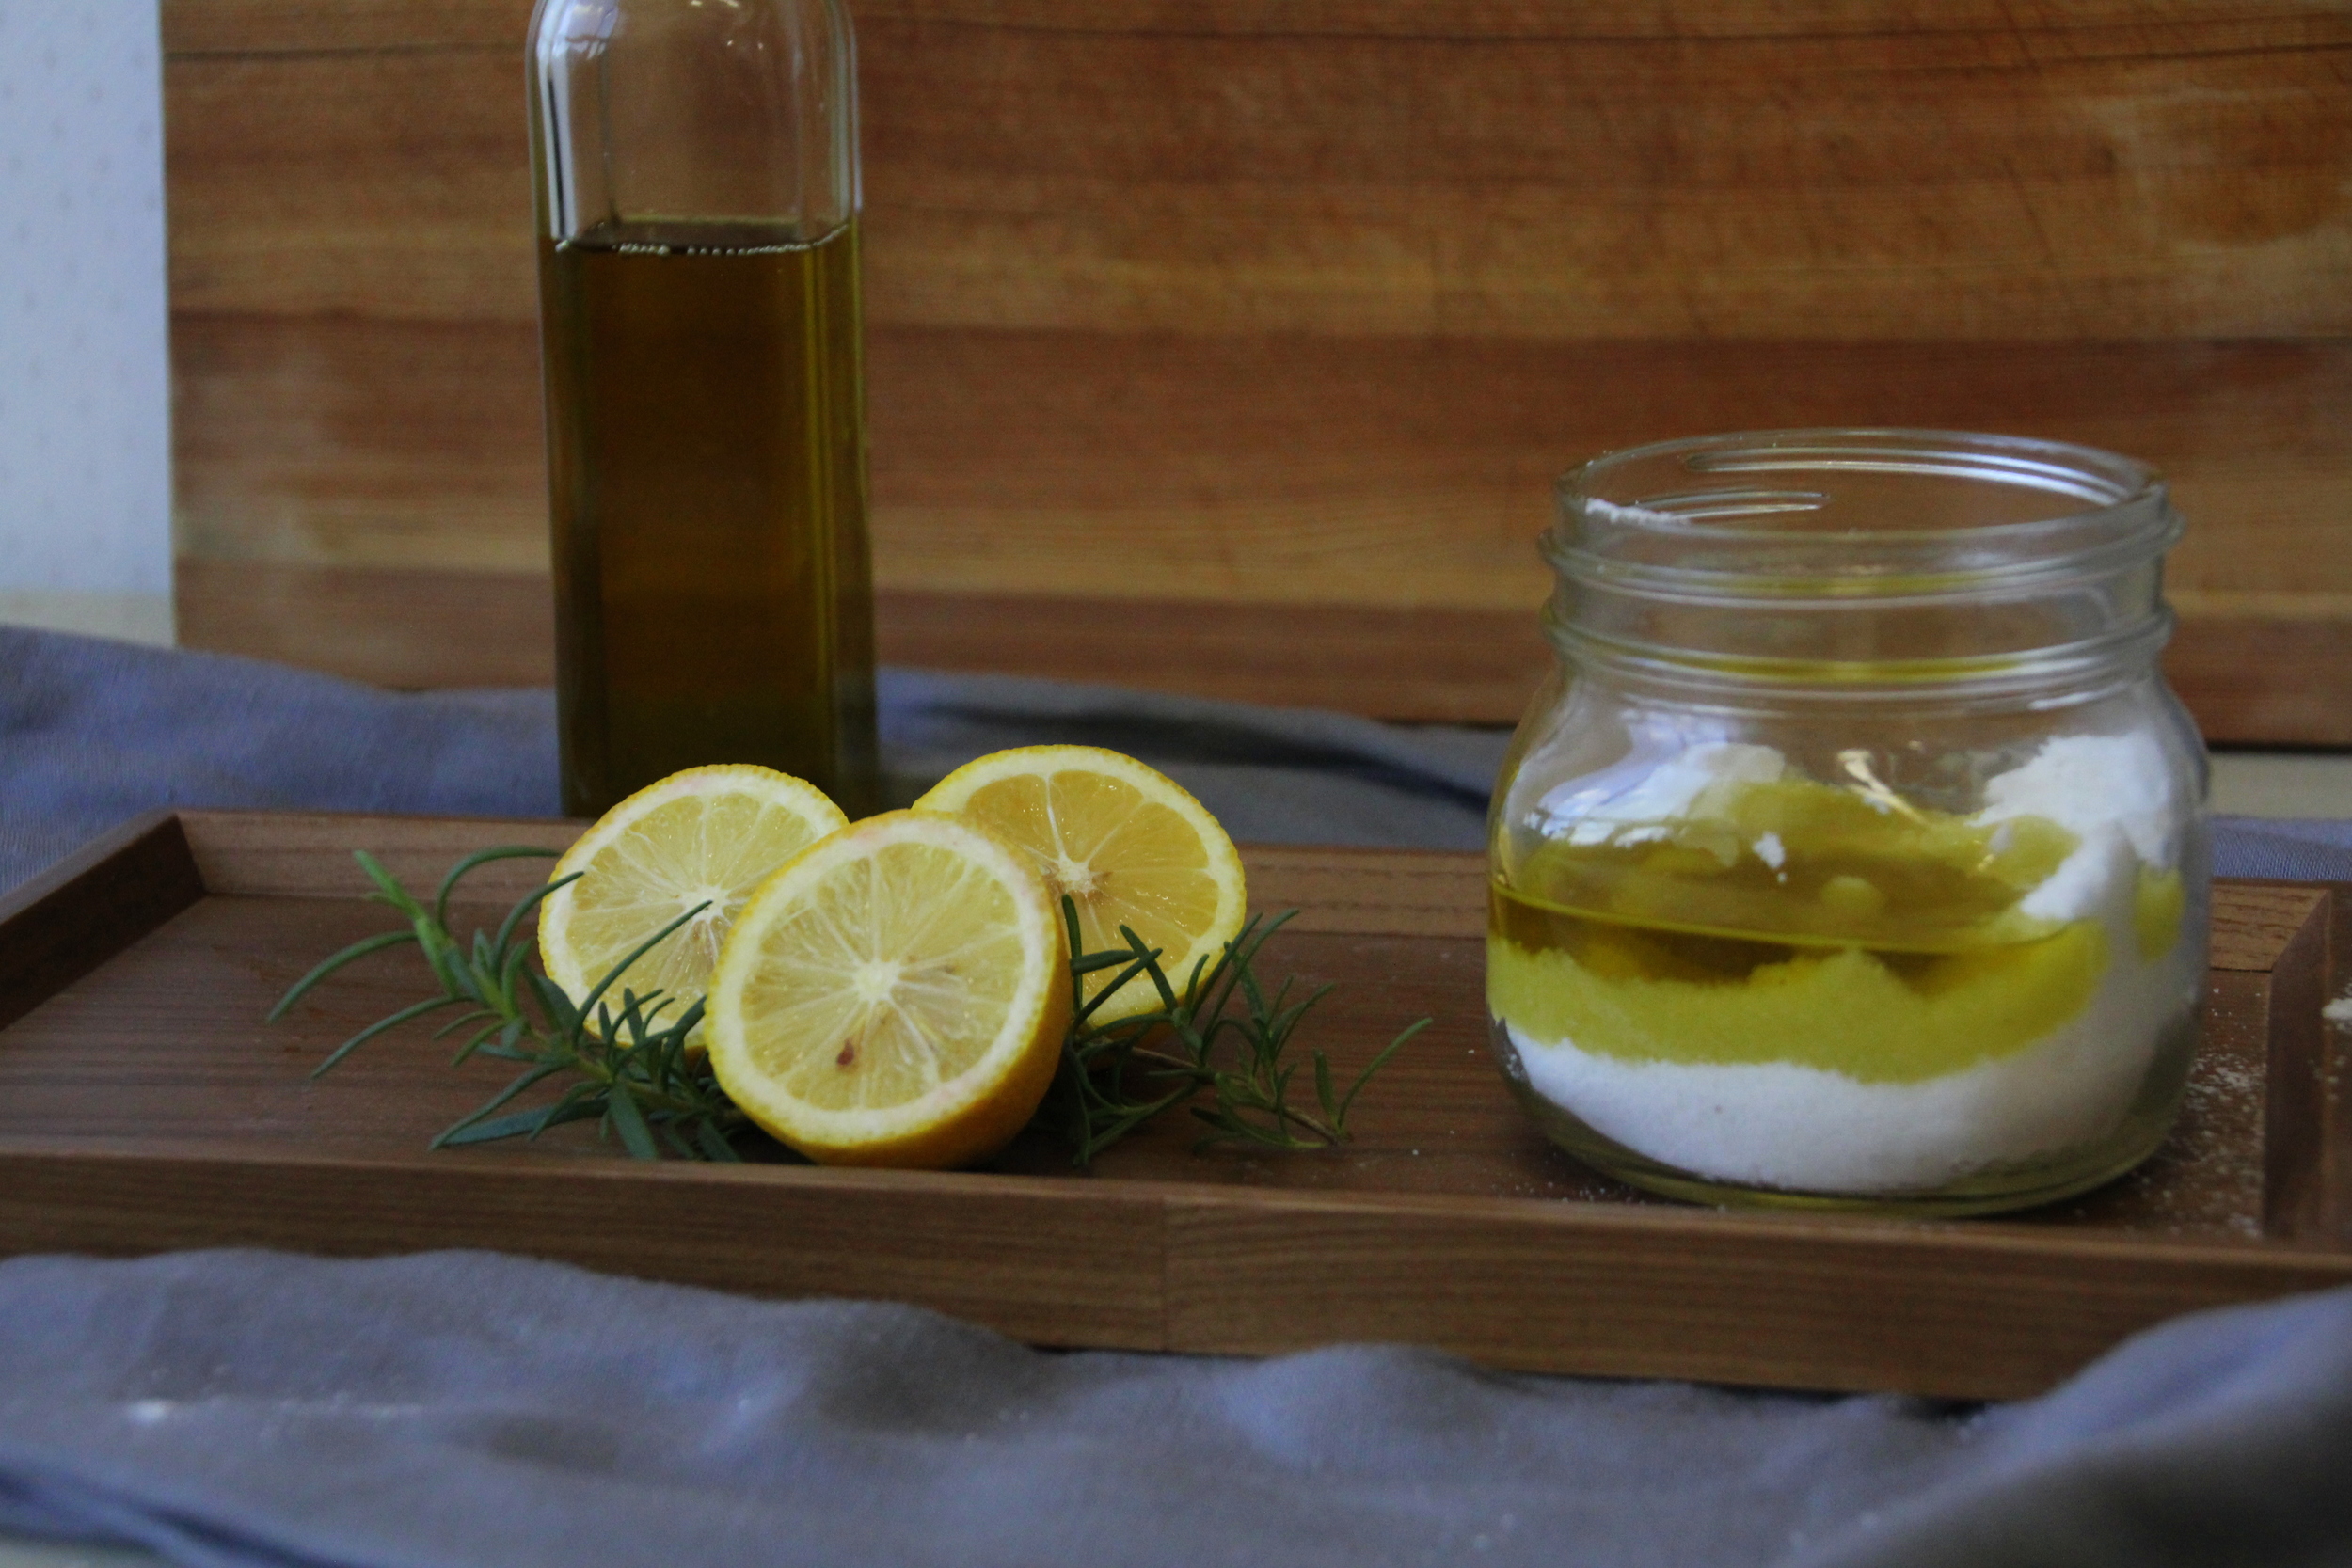
Purifying Rosemary-Lemon Scrub
Zest your lemon, and drop the zest in the jar. Cut the lemon in half and squeeze the juice into the jar as well. Add 5 drops of rosemary oil and 5 drops of lemon oil, along with a few chopped up rosemary leaves. The leaves are totally optional, but I love how they contrast with the sea salt mixture! Mix it all together, and enjoy!

Purifying Rosemary-Lemon Scrub
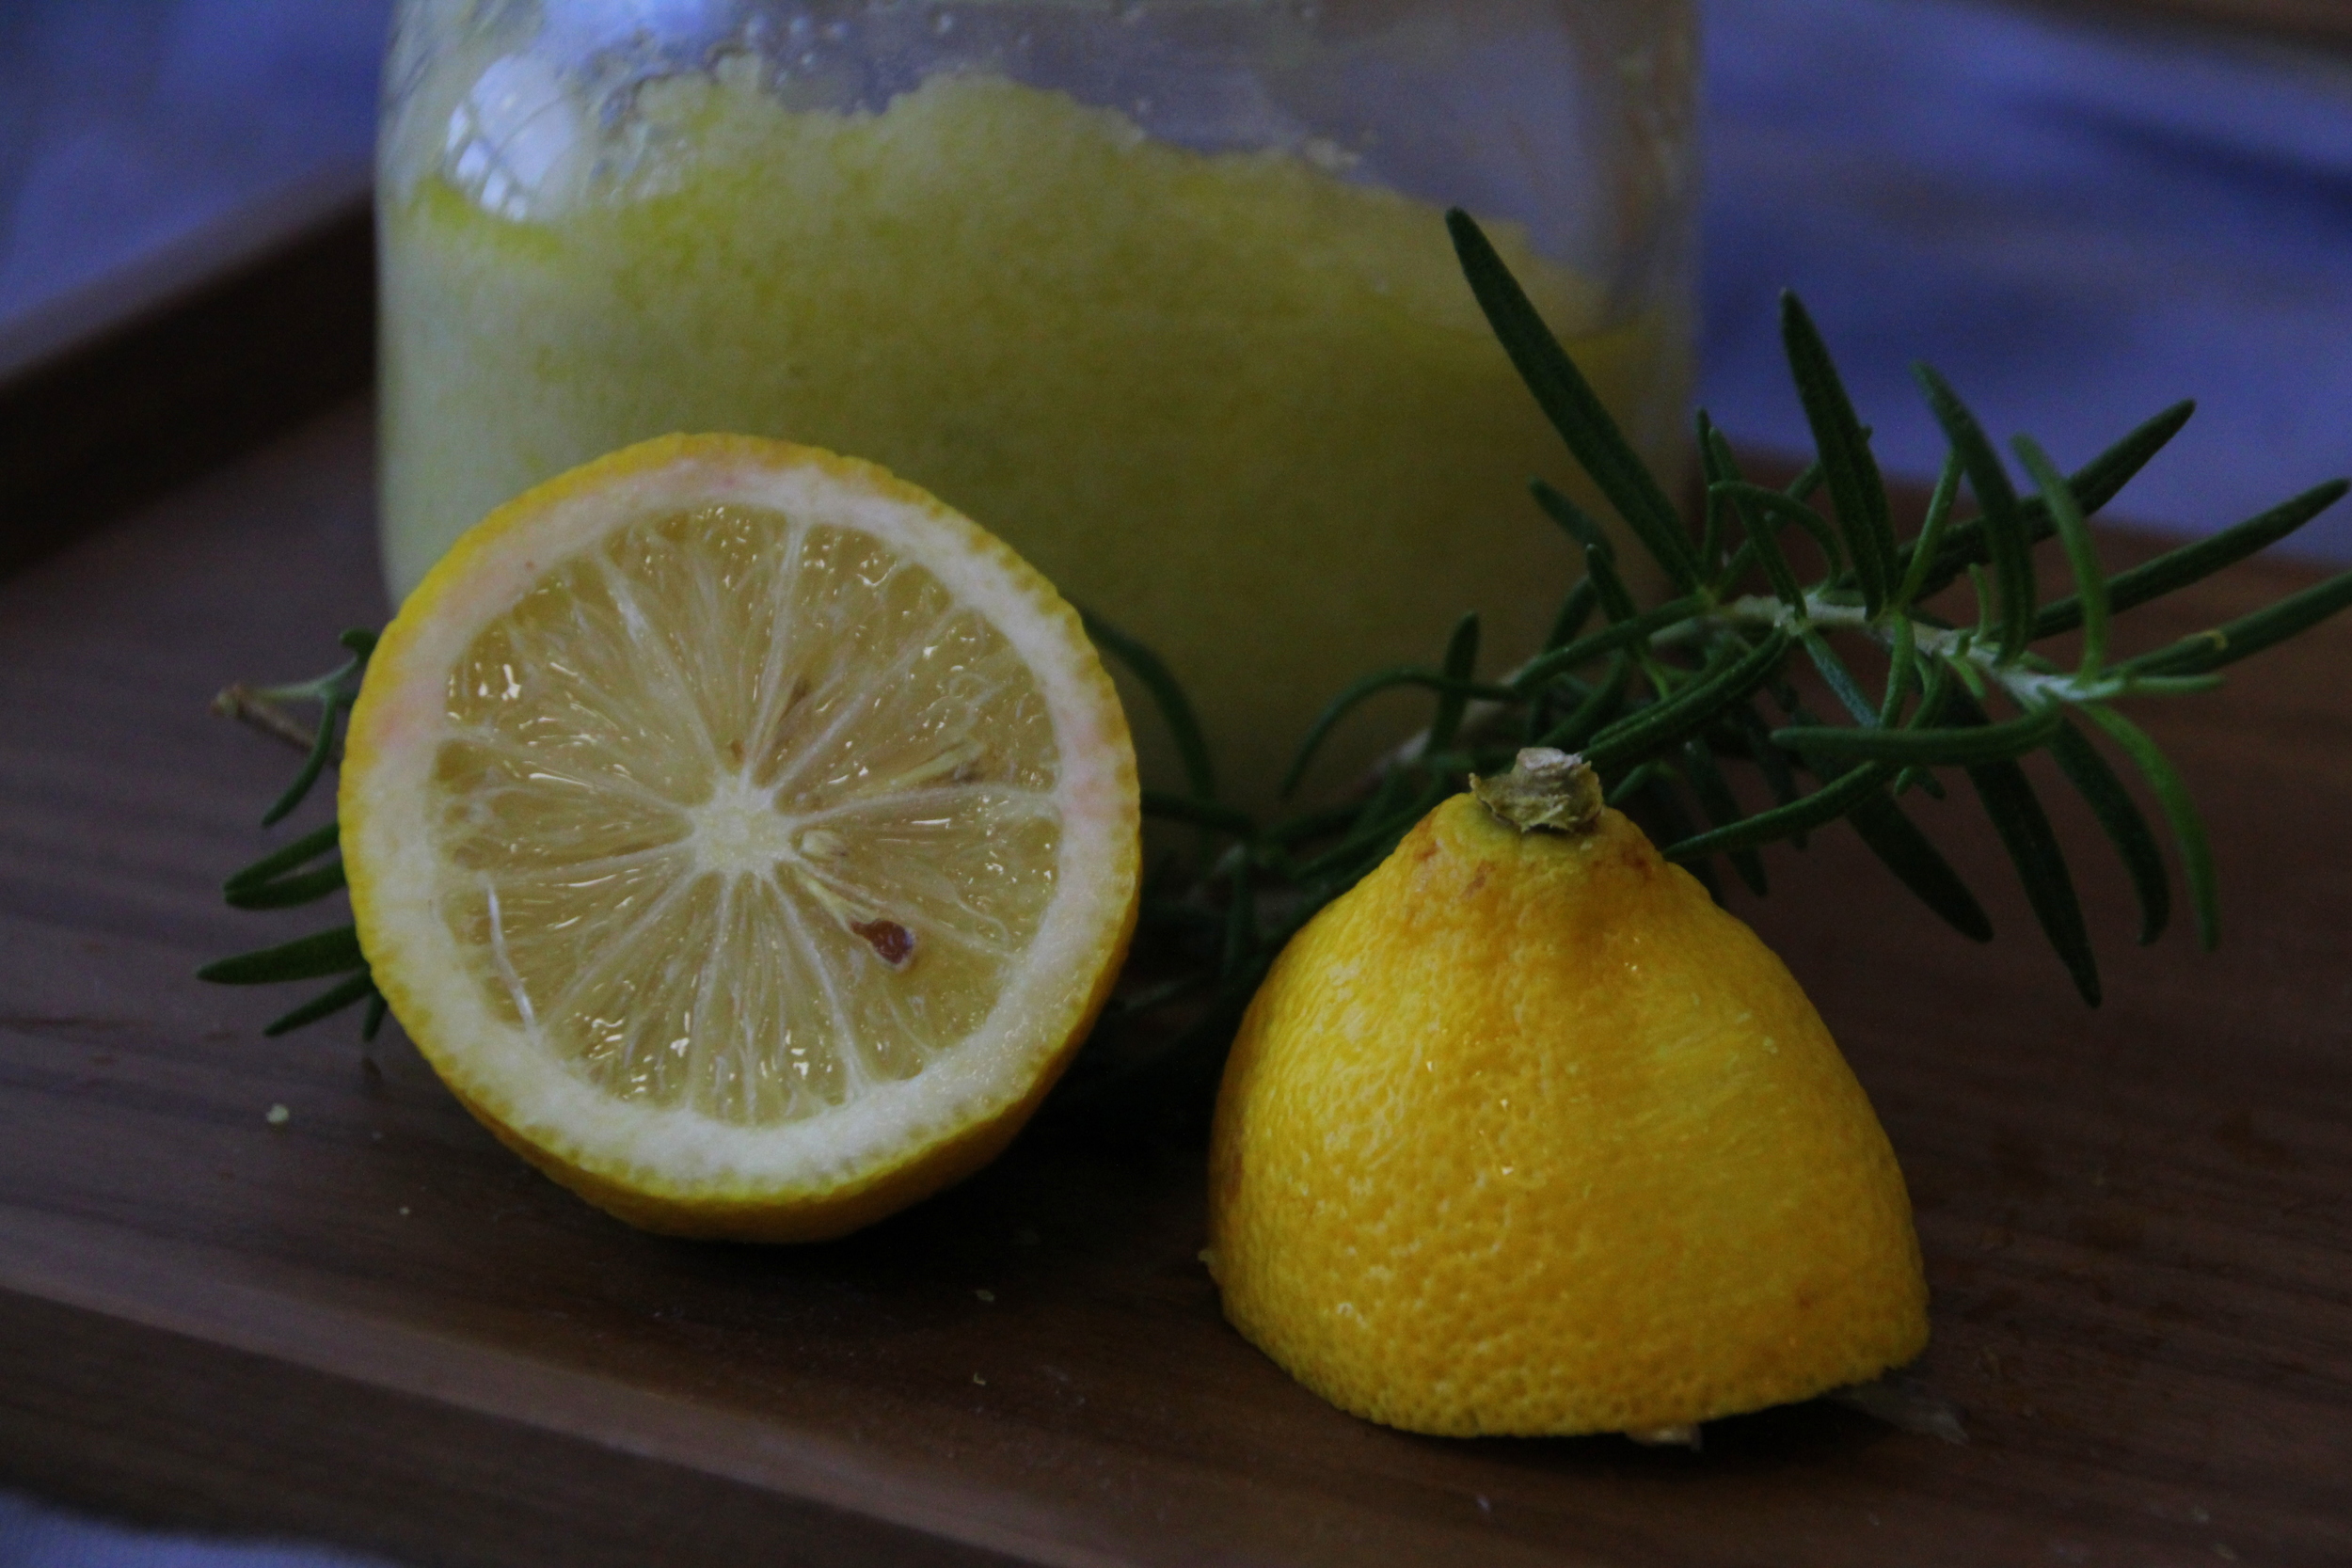
Purifying Rosemary-Lemon Scrub
Vanilla Cinnamon Whipped Body Butter

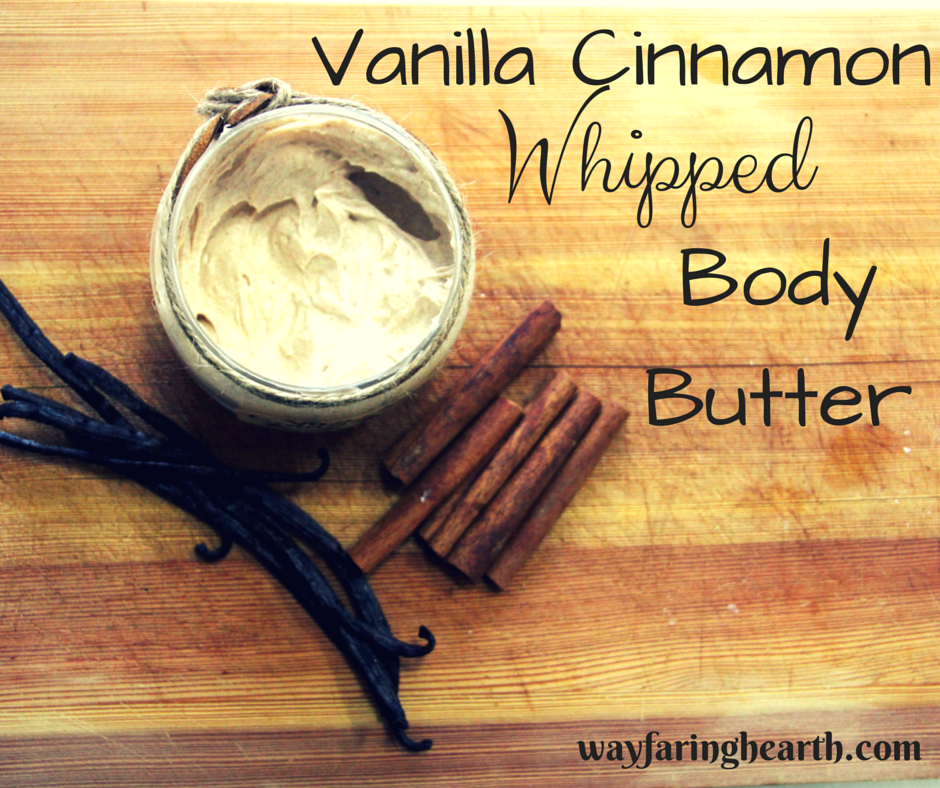 As the cold weather settles in, I change out my sandals for boots, my blouses for sweaters, and add more blankets to our bed. Fall invokes different sentiments than the vibrant summertime. It makes you want to cuddle up on the couch with hot chocolate and a good book, and suddenly there seems nothing wrong with staying in all day. I also tend to change out my usually light and fruity perfumes for warmer, more comforting scents. This Vanilla Cinnamon Whipped Body Butter is just what the doctor ordered.


A while ago I asked Facebook to vote on a scent, and Vanilla Cinnamon was among the most popular. I decided today was the day to finally whip it up (literally), and less than 10 minutes after starting the process, I was done. There are so many reasons to make your own body butter. It's much less expensive, you can choose your scents, and you don't have to worry about your skin soaking up any toxins or chemicals.

Here's what you'll need:
1/2 cup fair trade shea butter
1 Tablespoon vanilla extract
1/2 Tablespoon almond oil
1 teaspoon Vitamin E oil
1 teaspoon cinnamon
First, add all of your ingredients into a bowl.

Grab your hand-mixer and whip the ingredients at medium speed for 30 seconds, then increase the speed to high and whip until your body butter is light, beautiful, and fluffy (about 1-2 minutes).
It should look something like this:

Gorgeous, isn't it? Now, all you have to do is throw it in a jar and it's ready to use! Since this is a body butter, it's heavier than a regular lotion, and will make your skin oh-so-soft. I love to use this after shaving my legs. The light and fluffy texture makes this look like frosting! Enjoy!


DIY Citrus Cleaner
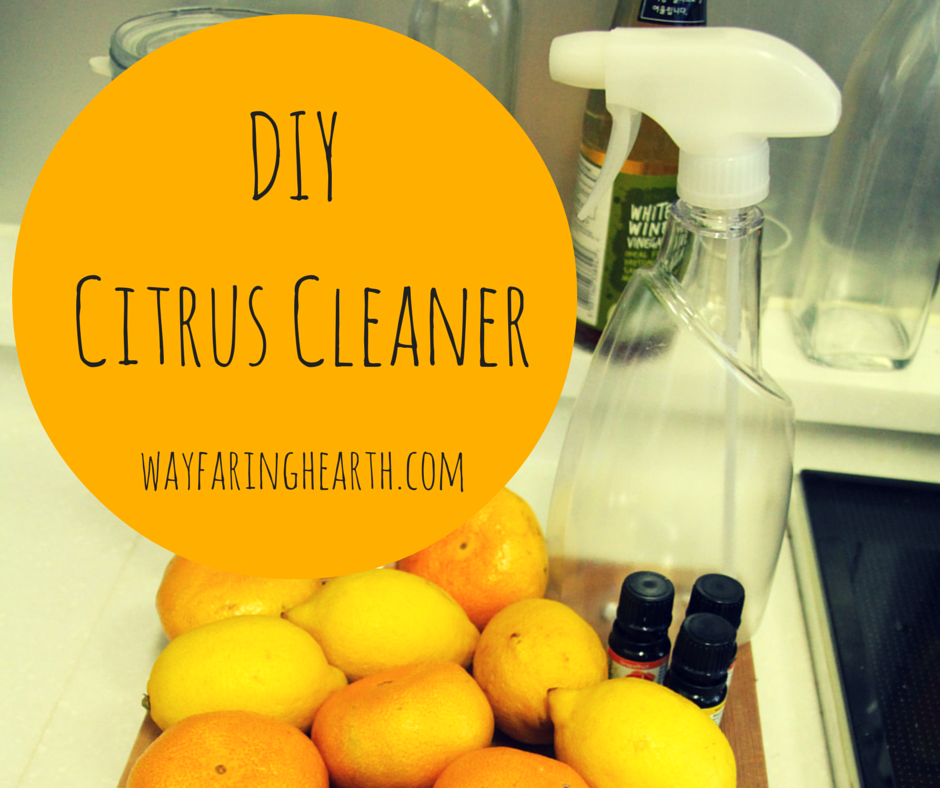
 I wish I could keep the counters clean when I cook. However, every time I step foot in the kitchen, it seems that I cause an explosion of some sort, whether it be flour, sauce, butter, or vegetable peels cluttering up our already sparse counter space.
Usually, I would just grab any old cleaner, spray the counters, and move on with my life. However, I finally made the connection that FOOD is prepared on my counters, and heaven forbid the store-bought cleaner should contaminate it. From this moment I set out to make my own cleaner, and after a good deal of Pinteresting I finally have a formula I am proud of. Not only is it safe, it actually works better than the store-bought cleaner I was using in the first place! Win.
Just grab these things:
1/2 cup white vinegar
Any citrus oil (I used lemon, grapefruit, orange, and tangerine)
2 cups warm water
1 Tablespoon Baking soda
You can mix everything right in the bottle, which makes this process super easy. First, using a funnel, pour in the 1 Tablespoon of baking soda. Next, add 2 cups of warm water and swish around to help the baking soda dissolve.
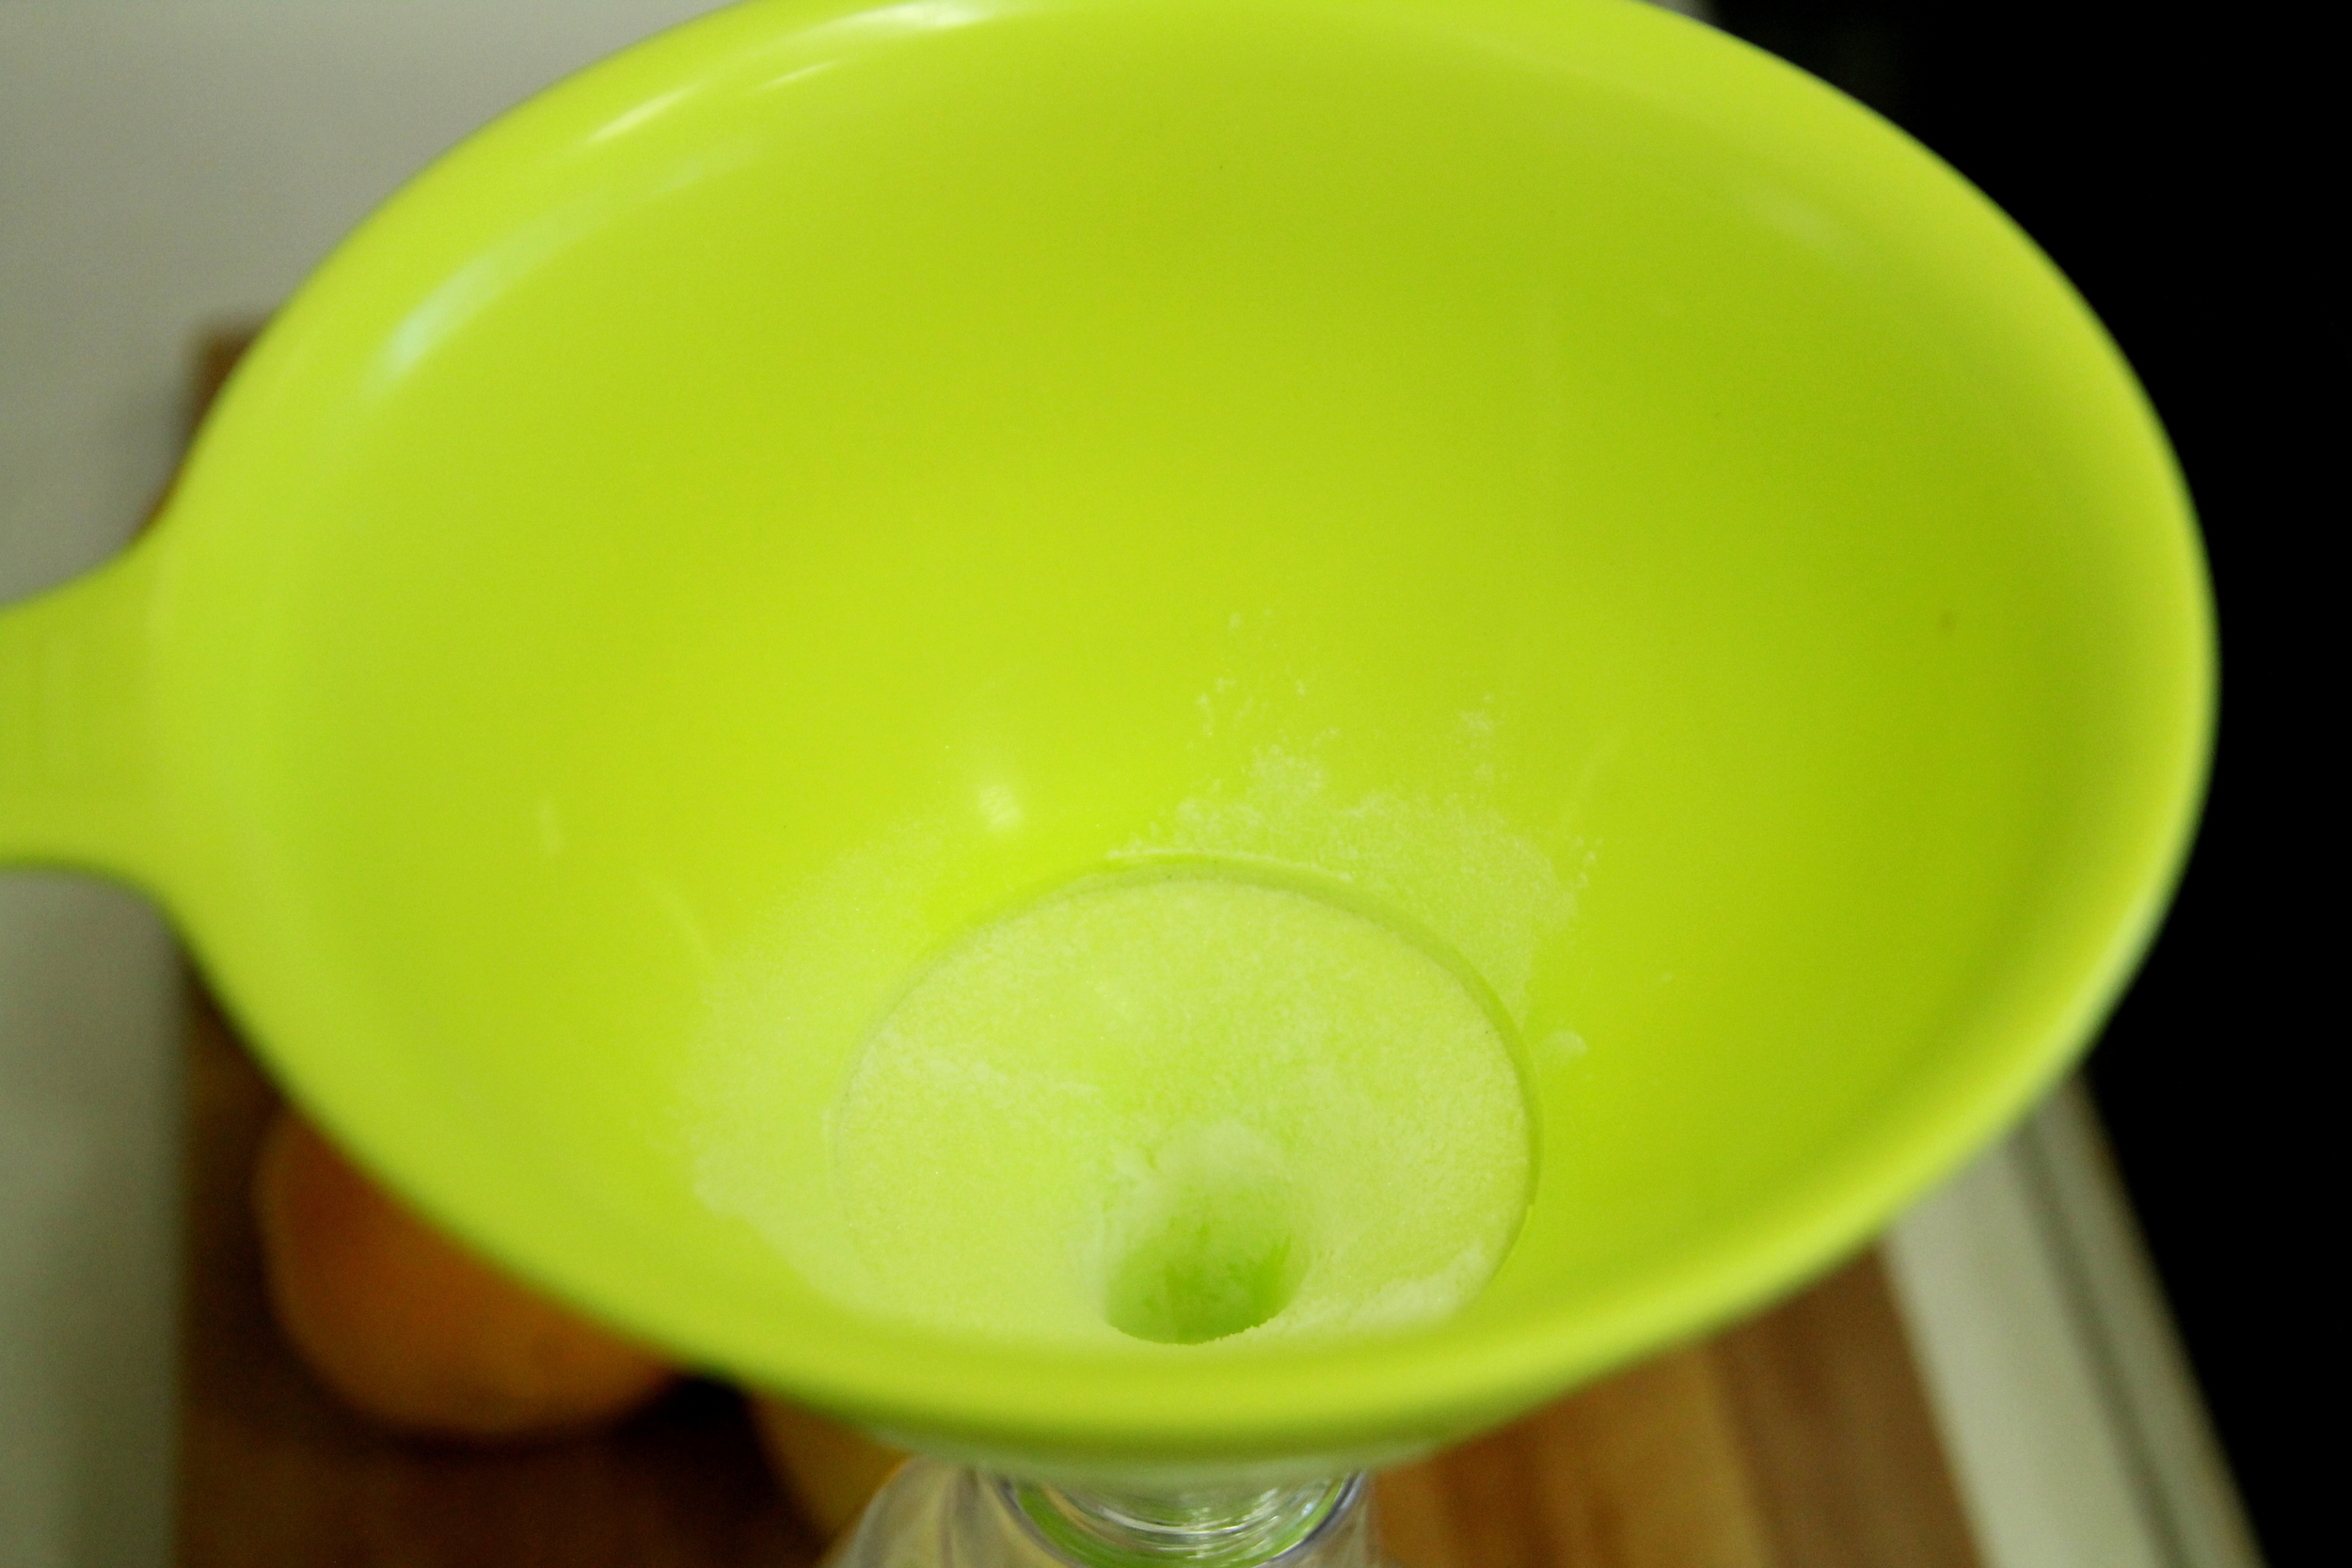
Now, for this next part, I have only one tip: Put the bottle in the sink before hand. I made the mistake of not only sealing the top with the funnel, but also doing this without the protection of the sink. The result was a vinegar explosion 10 minutes before we had to leave for school. Anyway, grab your vinegar and pour it into the bottle, but NOT to press down the funnel while you do this, or you will create a "seal" and the gasses created will have nowhere to go.

You can now add any scent you wish! I added lemon, orange, grapefruit, and tangerine (about 10 drops of each). Citrus has long been known for it's purifying abilities, and it smells great! Add the oils, swish it around again in the bottle, screw on the lid, and you're all set!

The thing I love most about this cleaner is that I could literally spray it on my food, and it wouldn't harm me (not that I would recommend that for flavor's sake. Plus, the oils I use aren't quite therapeutic grade). I use this spray for the kitchen, bathroom, and any other surface that needs some sanitizing and cleaning. Try this at home and let me know how it goes!
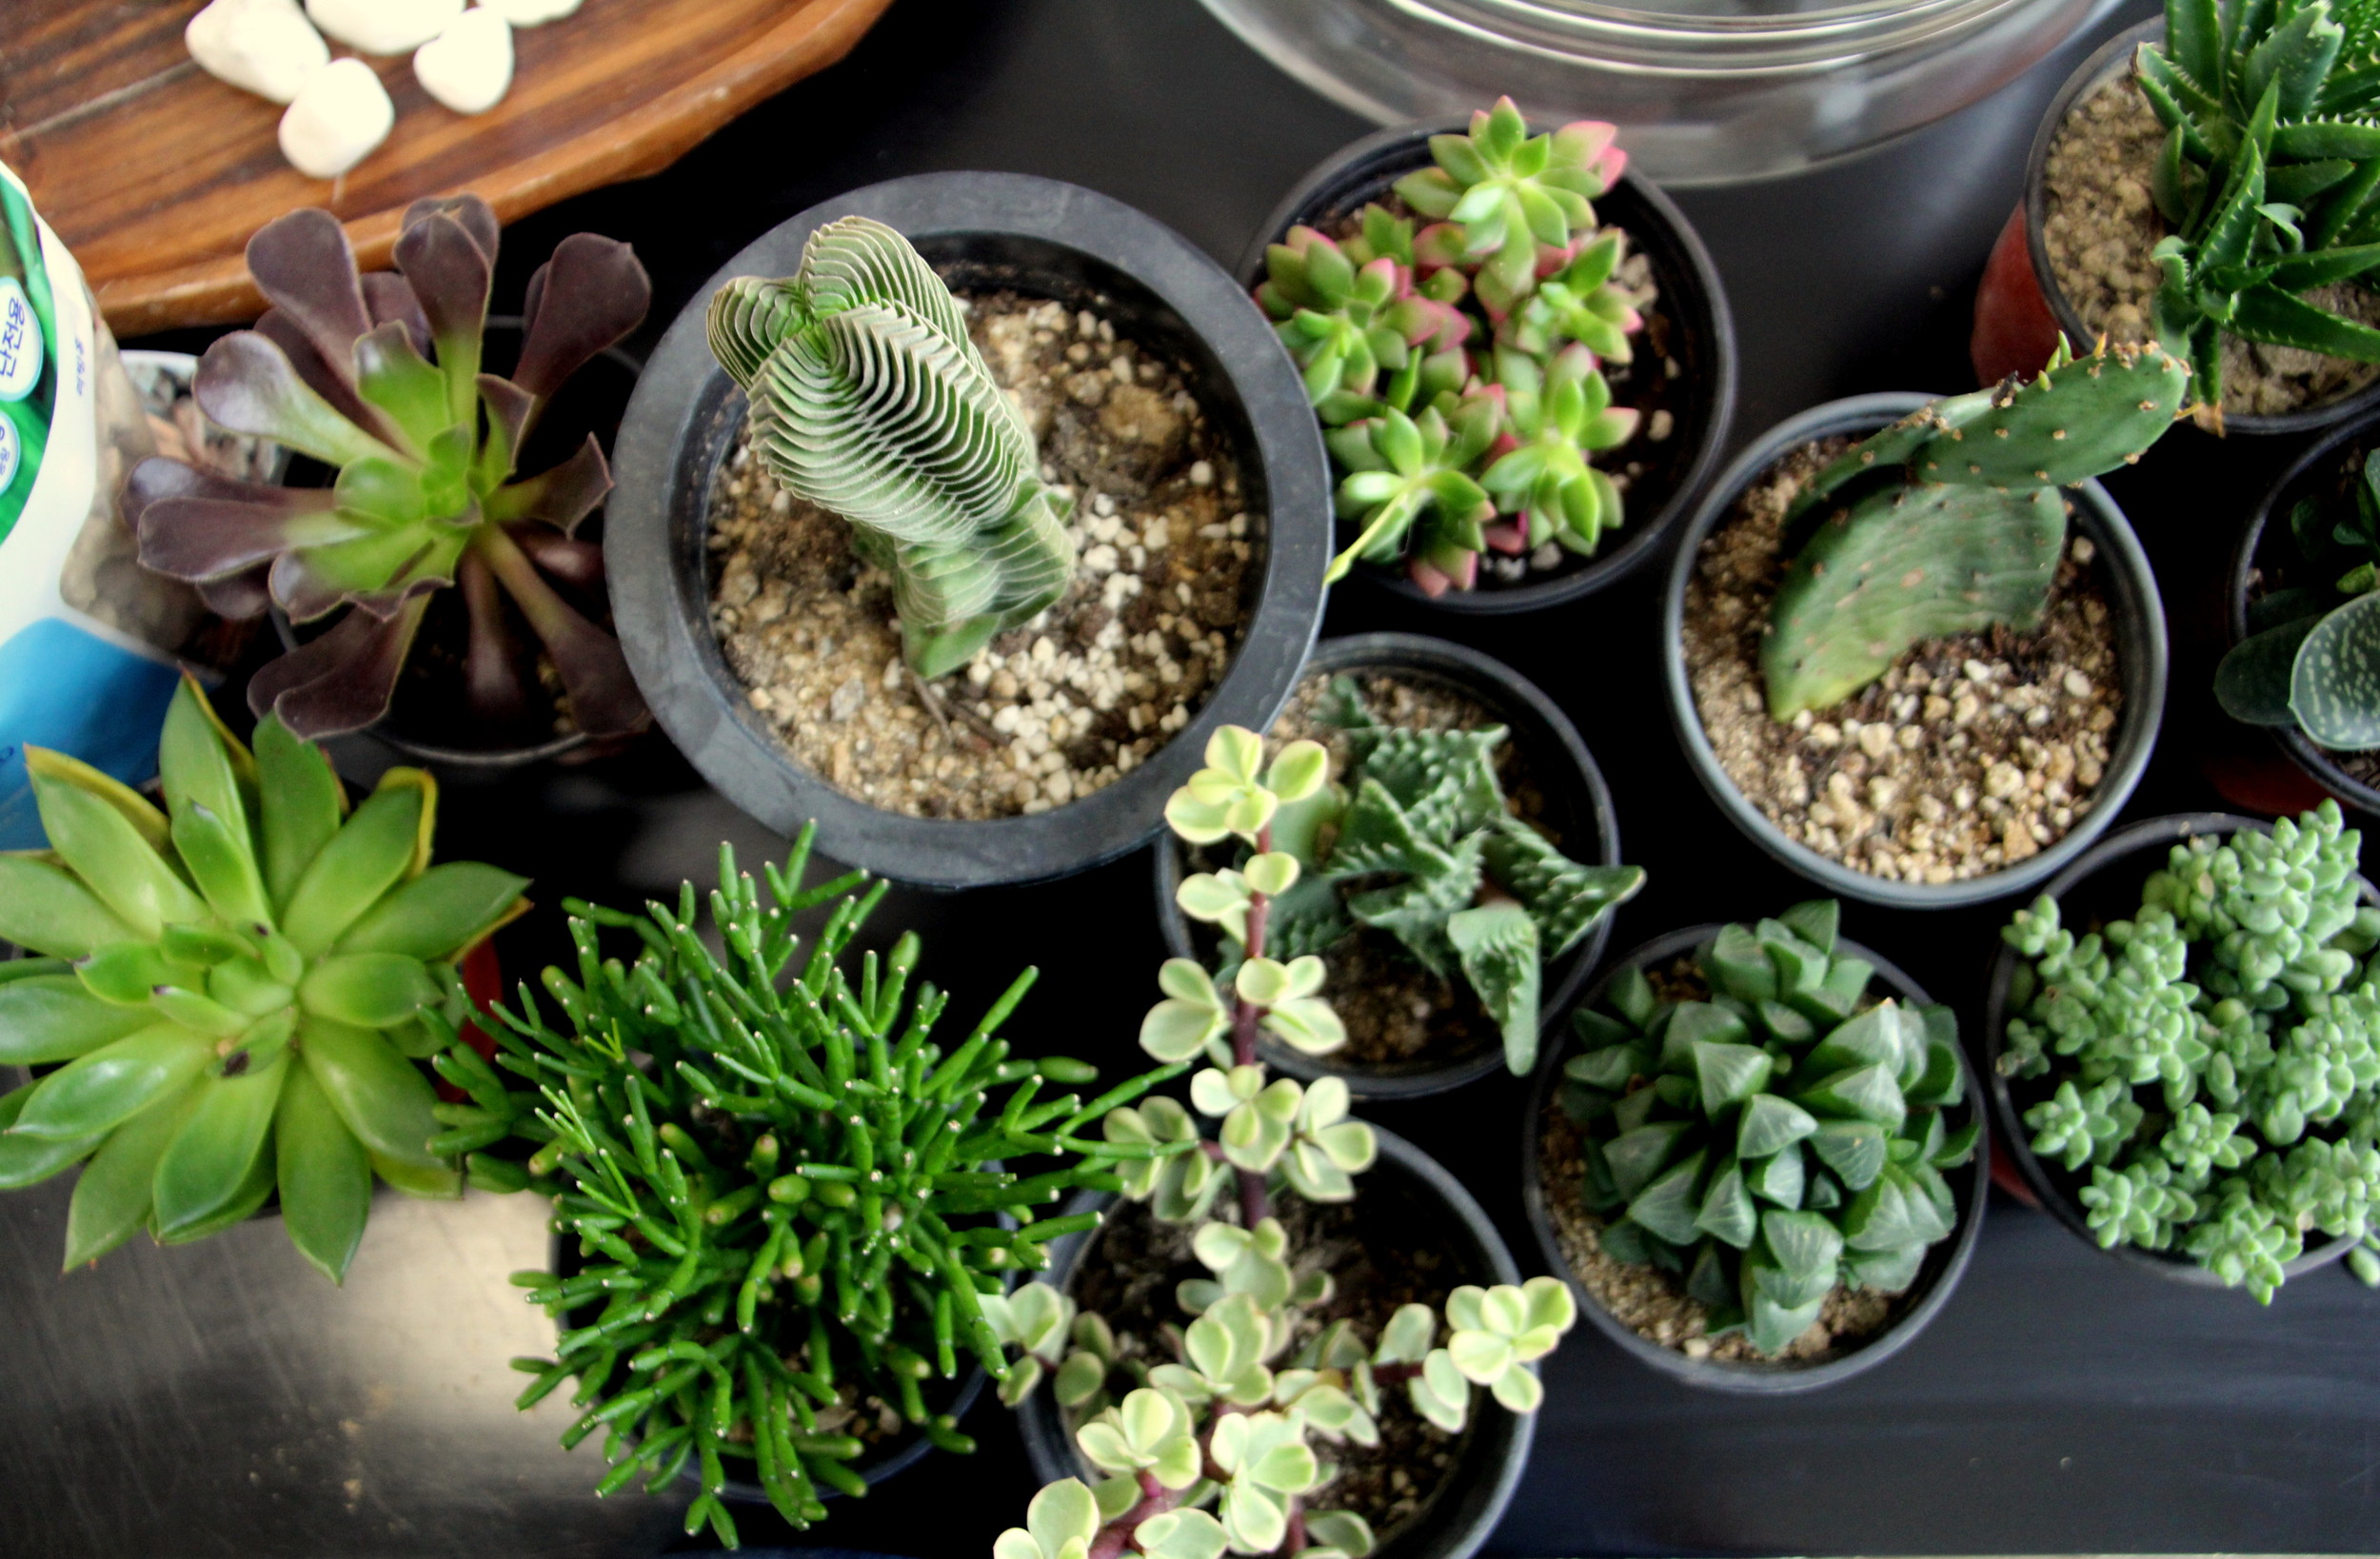
How to Plant Succulents
how to plant and grow succulents
I fell in love with these little guys a couple of years ago, and I've been obsessed ever since.

How to plant succulents
How to plant succulents
They are seriously THE easiest plant to take care of, and add a lot to a room.

how to plant succulents
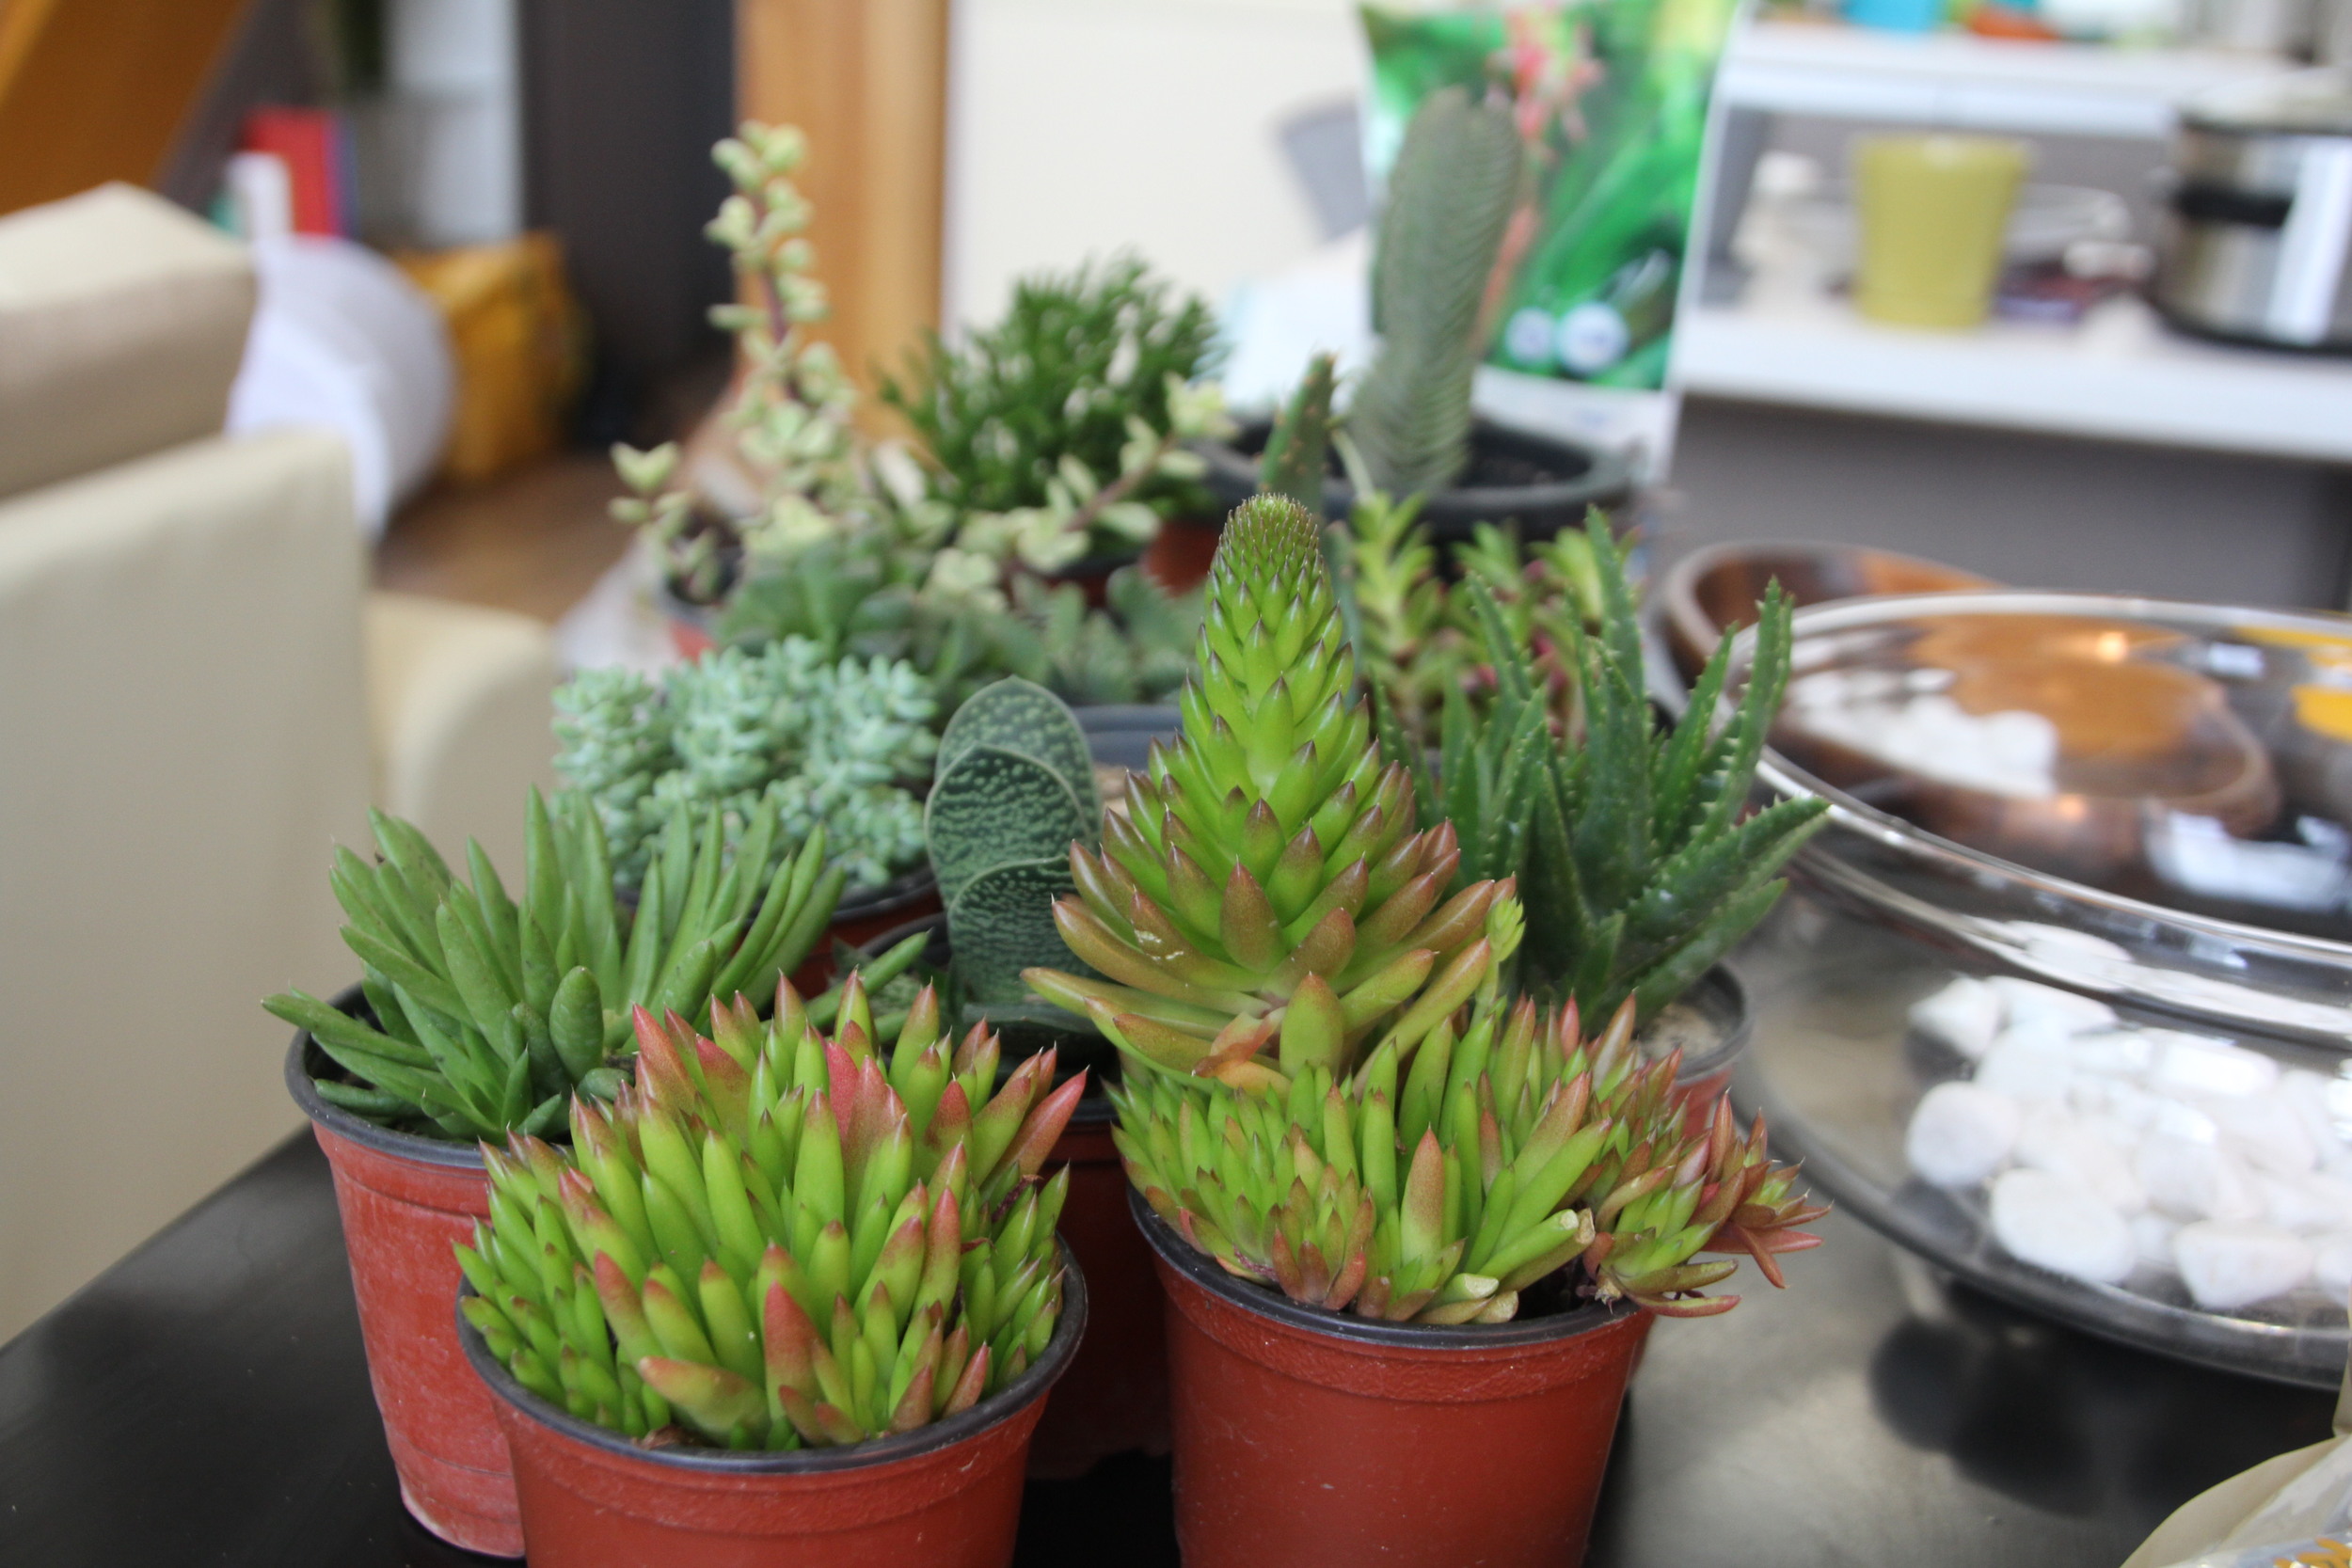
They don't needs tons of sun (in fact, they prefer not to be in direct sunlight), and only need to be watered every couple weeks. As a bonus, if they are healthy they will produce "chicks" which is like getting free plants! There are many types of succulents, which makes for a beautifully varied display. To plant them, grab these things:
Rocks (I like to get both big and small rocks to help filtration)
Soil made for cacti and succulents (here is a great soil)
Flower pot or bowl with a drainage hole on the bottom
Succulent plants
Decorative rocks (optional)
The ONLY thing succulents are picky about is filtration. It is absolutely necessary to get well filtered dirt made for these little guys, which is very different from regular soil. If you don't feel like buying special dirt just for these plants, you can mix regular potting soil with some sand and tiny pebbles. The result will be about the same. If you don't have a well-filtered area for them, their roots will rot and then bye bye birdie.
how to plant succulents
After you have all your supplies ready to go, put a layer of rocks on the bottom of your bowls or flower pots.

how to plant succulents
I like to also place some smaller rocks over this layer, but it's not absolutely necessary. I figure the more filtration the better!

how to plant succulents
After this, pour your soil over the rocks, leaving some room at the top. Remember that your plants will take up quite a bit of room, and you don't want to overfill to pot (wild guess as to how I know this). After you've added the dirt, you are ready to add the plants! I like to "roll" the roots in my hand a bit to loosen up the dirt from the starter pot it was in. Clear a space in the dirt, and place your plant where you'd like it!
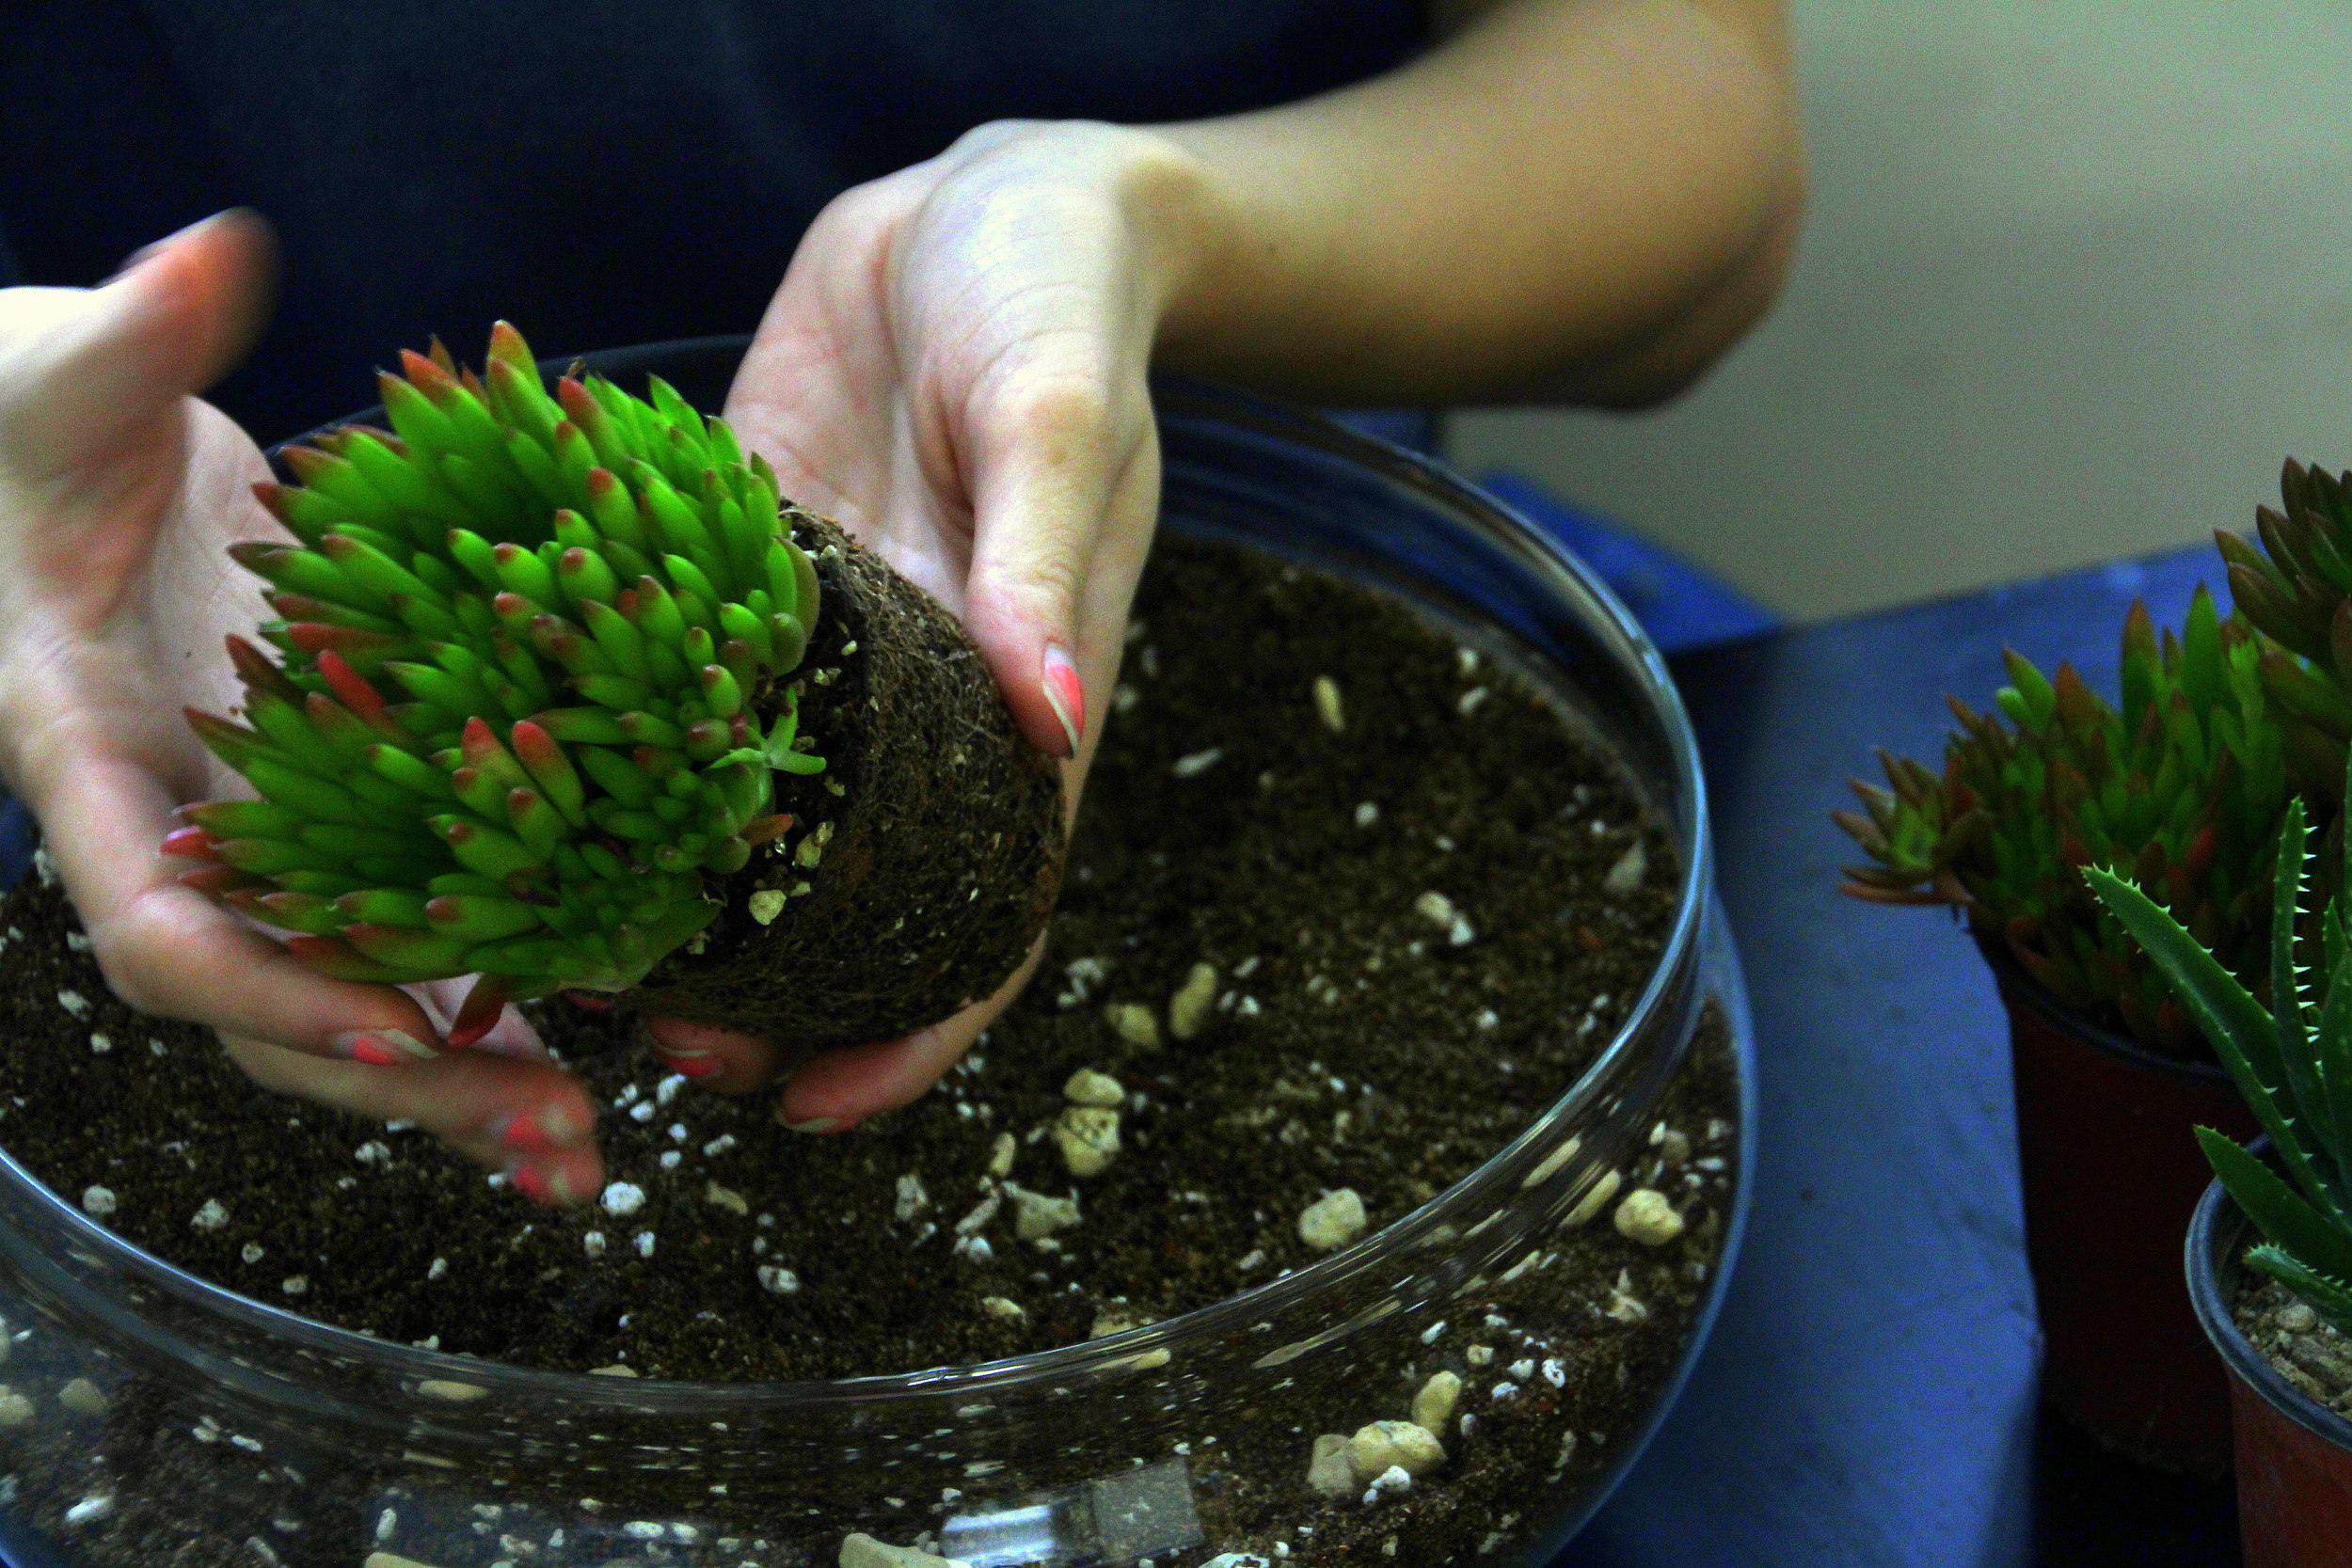
how to plant succulents

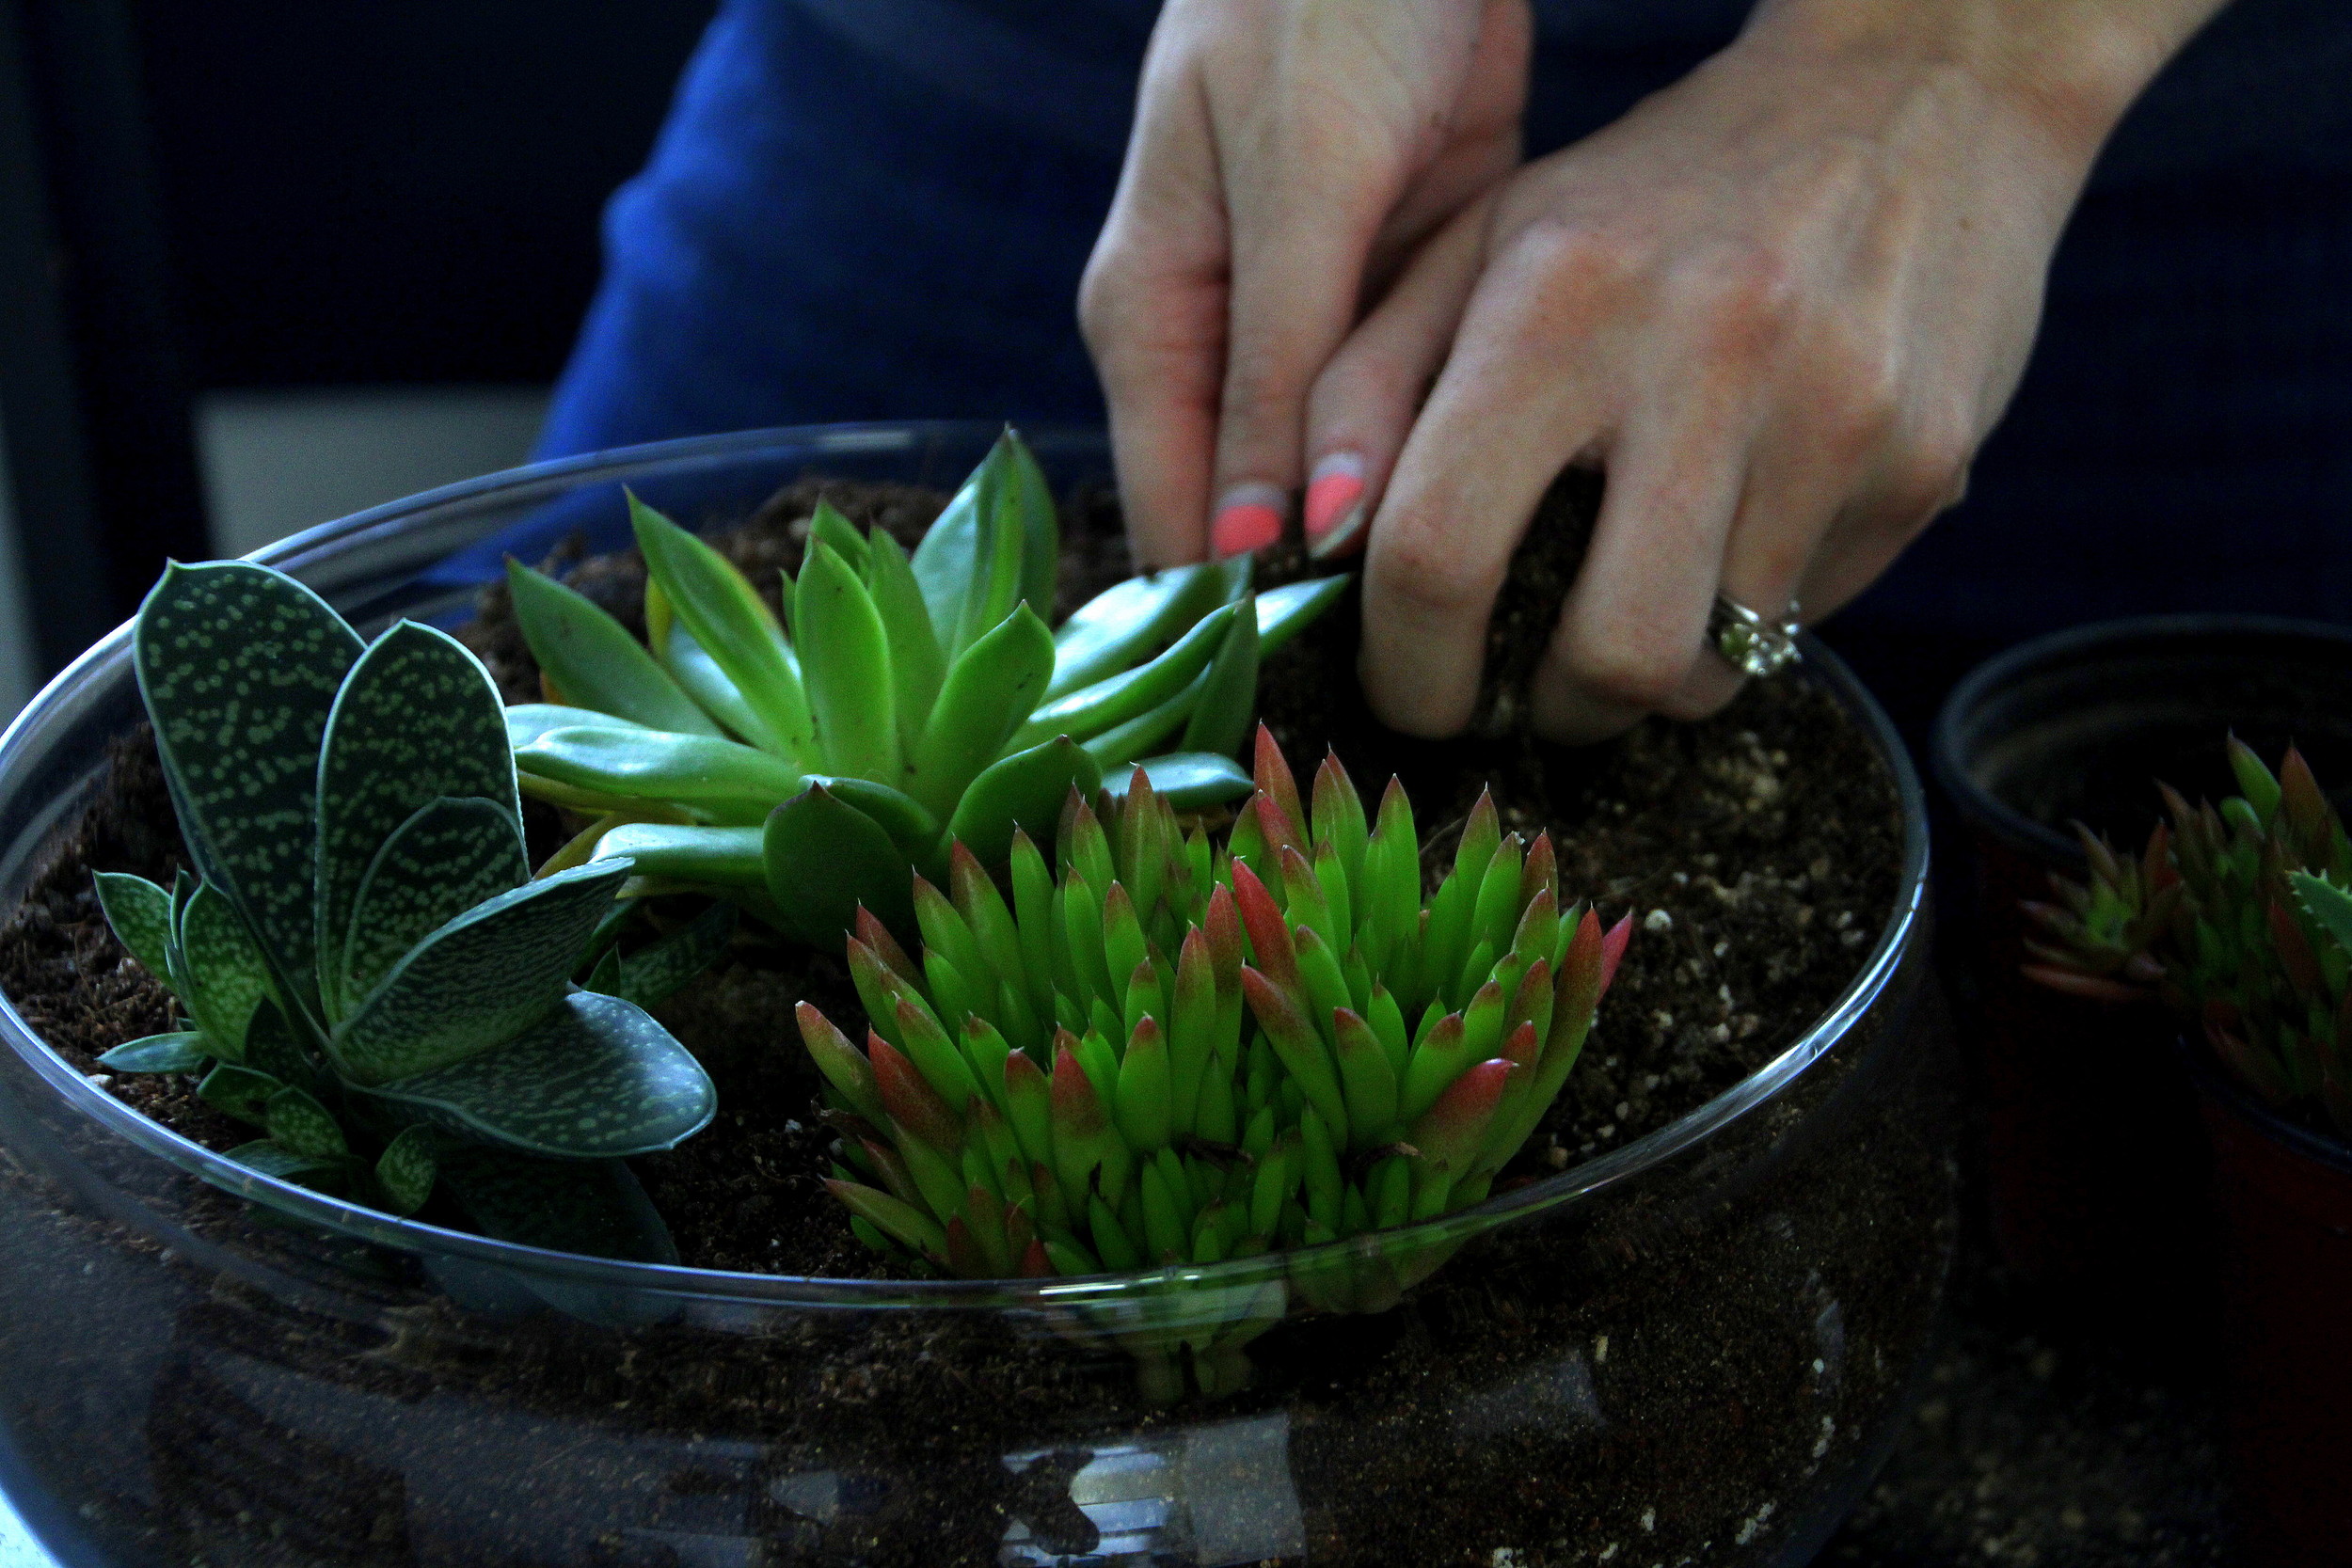
how to plant succulents
Repeat until your display is full of these beautiful things. Succulents don't need a lot of space, so don't worry about planting them close together. As you can see, mine are quite packed in there.
how to plant succulents
Look! It's one of my favorite things of all time! This Aloe Vera got its own little pot. Yep, I played favorites.

how to plant succulents
After I planted everything my bowl looked like this:

how to plant succulents
I added just a few white rocks for a decorative touch.

how to plant succulents

how to plant succulents
Here is the entire display:

how to plant succulents
The best way to care for succulents is to water them every two weeks. Some people do it more, but this watering schedule has always worked for me. When you do water them, really soak the soil. The extra water should drain out of the bottom.
Note: Sometimes these plants tend to fall prey to white little webby things (these are mealy bugs), and these pests damage them. To take care of the problem, mix 1 part isopropyl alcohol with 4 parts water. Dip a cotton swab into the solution and gently wipe the webby things off. I usually use peppermint oil in water for pest issues, however this did not work on the mealy bugs.
Succulents don't like to be in direct sunlight (my windows have a slight tint, keeping out powerful rays Korean style, so I still keep mine by the window).
Happy planting! What things do you grow indoors? I'd love to hear your thoughts and tips!

how to plant succulents

how to plant succulents
5 Minute Fix: Organizing Underneath the Sink

 I feel like if there's one area that doesn't get the organization-love it deserves, it's underneath the sink. Maybe it's just me, but this is the last place I organize since no one can see what it looks like in there, and I'm usually the only one that uses that cabinet. Here's proof:

I mean, I know it's not that bad, but we've only been here a month, and I'm already having trouble quickly accessing the things I keep under there. I also wanted to store more things in this space, but that was impossible in its current state. It turns out all I needed were a couple of drawers, and a basket. I already had the basket, so this project cost me $6. Can't beat that, right?
What I wanted was a no-frills system, that also allowed me to store more things under the sink. I wanted quick access to cleaning supplies, extra sponges, and laundry supplies (our washing machine happens to be in the kitchen, so we keep our detergent under the sink).
Like I said, I ran out and bought two plastic drawers. In it I store rubber gloves, extra sponges, cleaning rags, trash bags, and extra boxes of Ziplocs. My plan was to label them, but I think Korea has something against cute labels, as I can't find any.

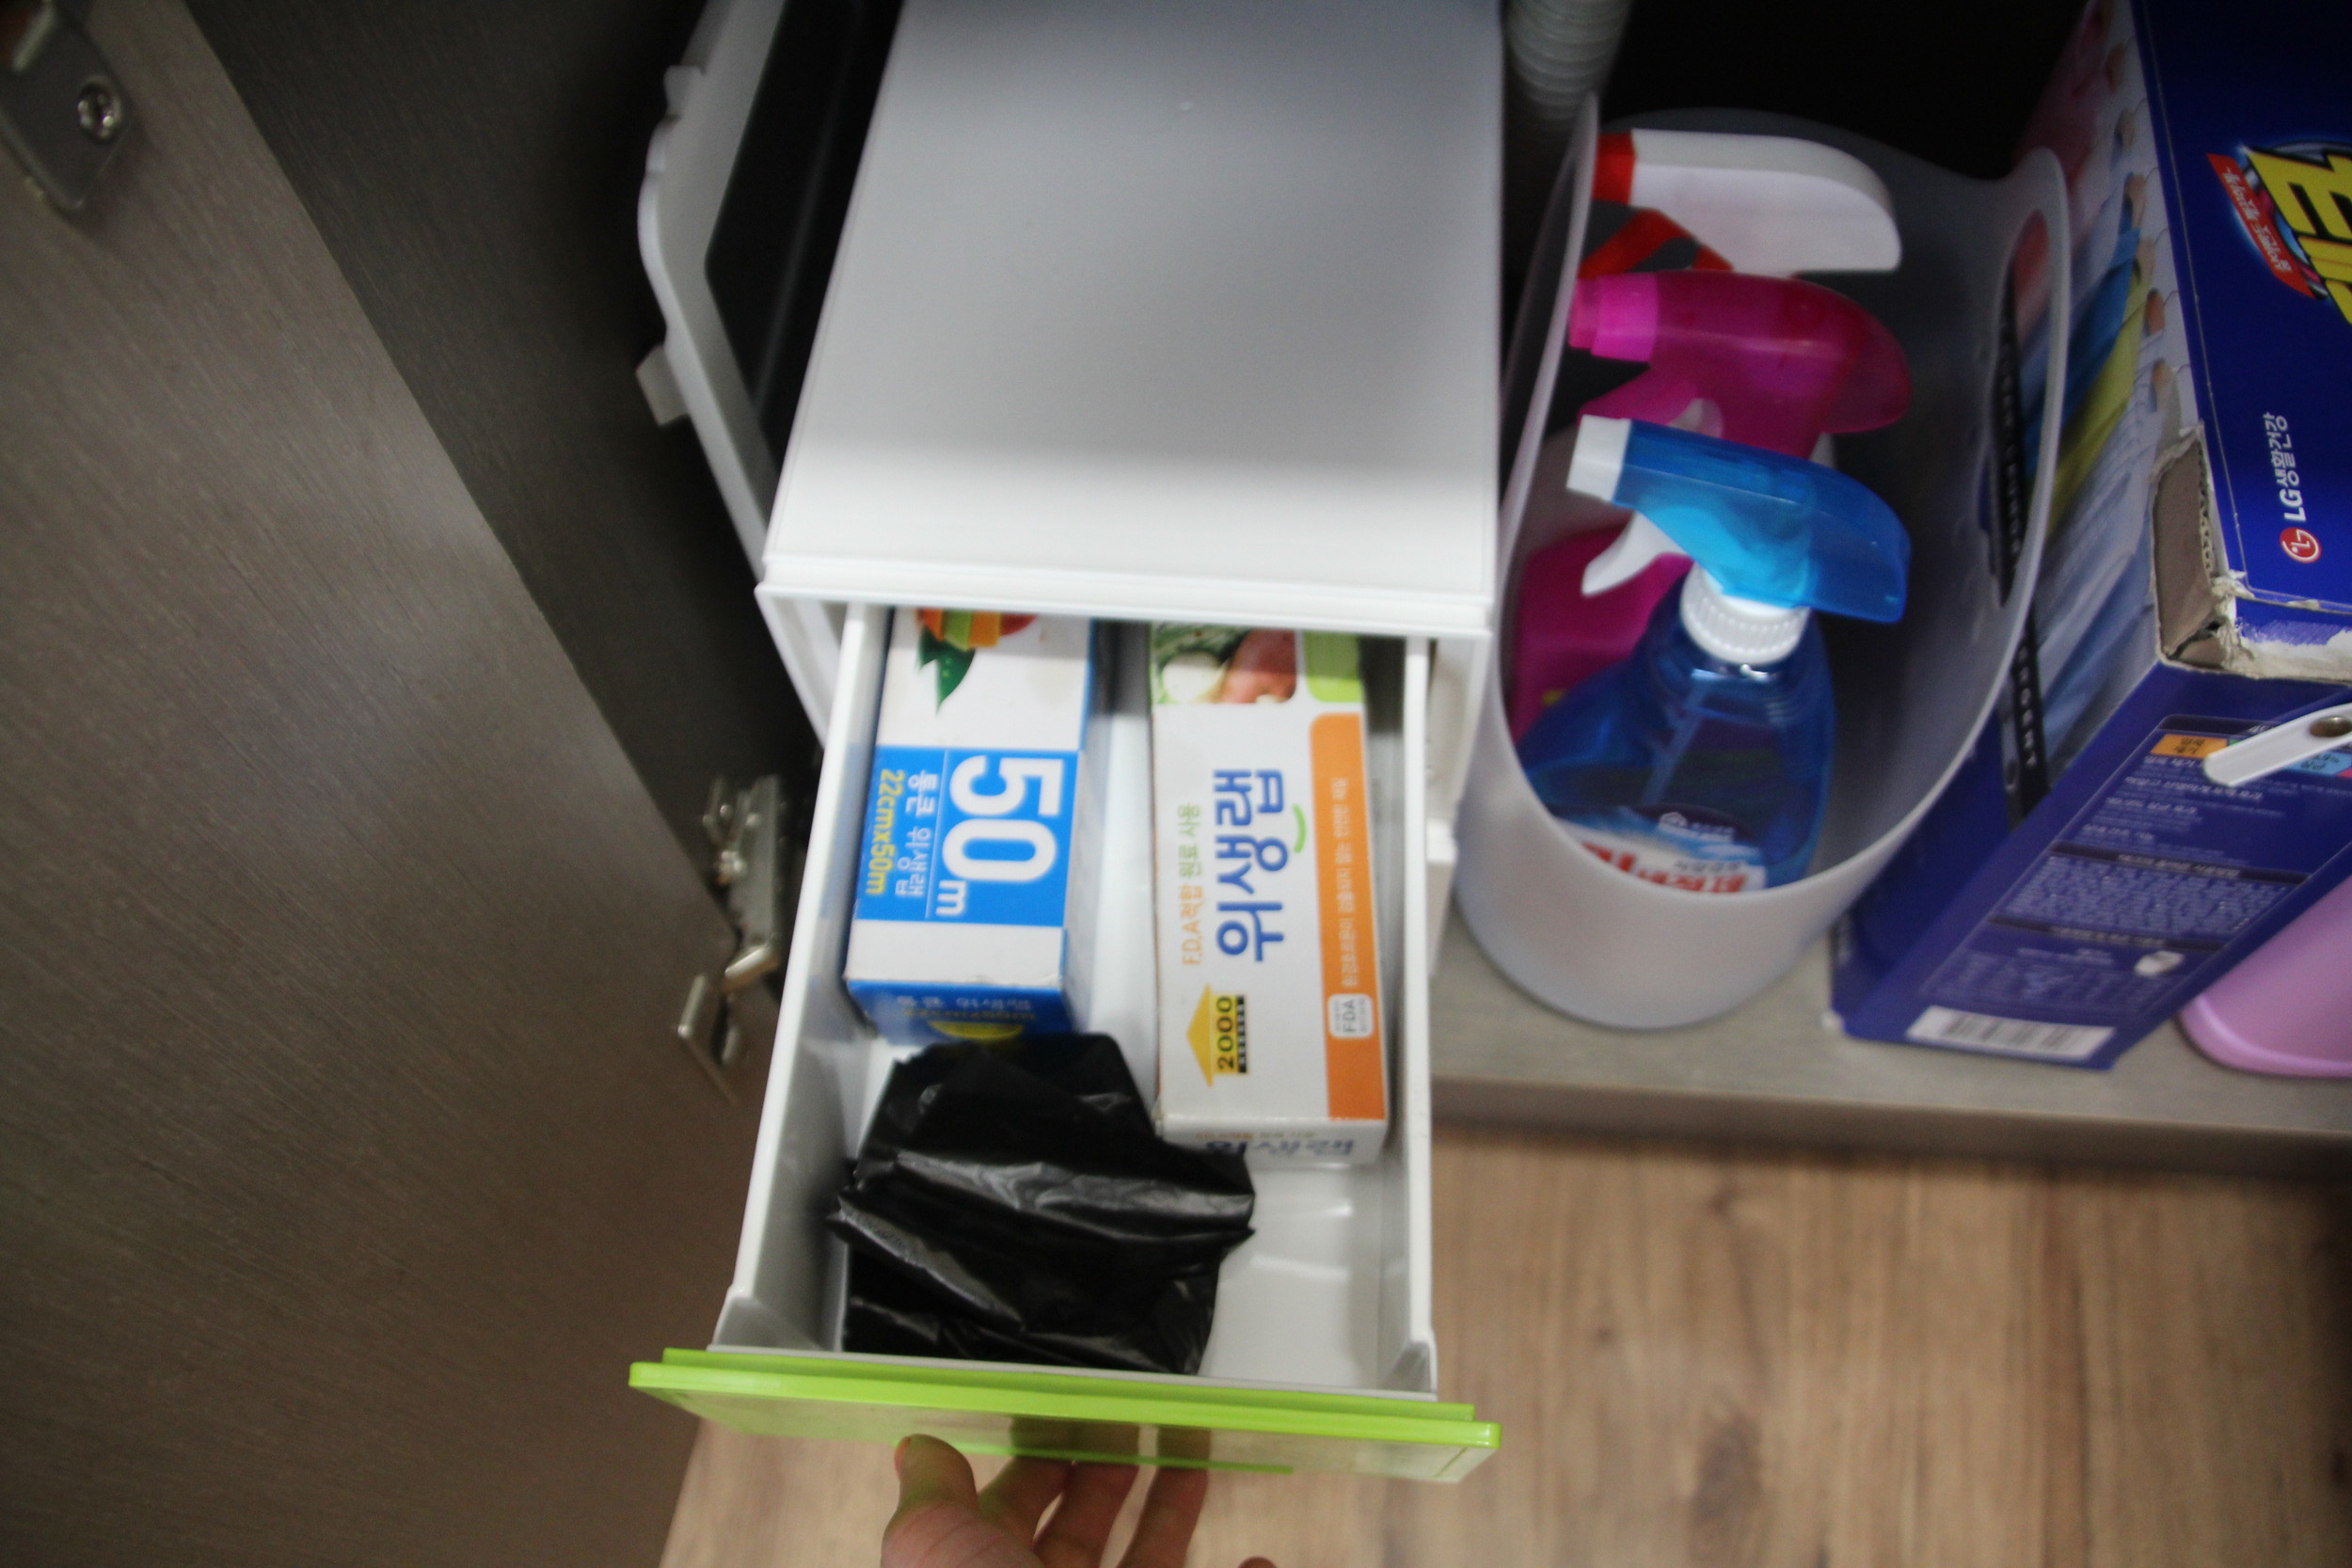
After this, I put our cleaning bottles in a basket, and set the laundry detergent next to it. I found a more functional spot for our recycling, and put the vinegar behind the detergent, since I only get it out when I make cleaning supplies. Here's the final result:

Yay! Like I said, it's nothing fancy, but it makes life a lot easier! Bonus: I even made a spot to hang paper towel rolls, which was previously just sitting on the counter.
What do you do to keep this space neat and organized? I'd love to hear your ideas!
Happy Friday!
Grapefruit Sugar Scrub
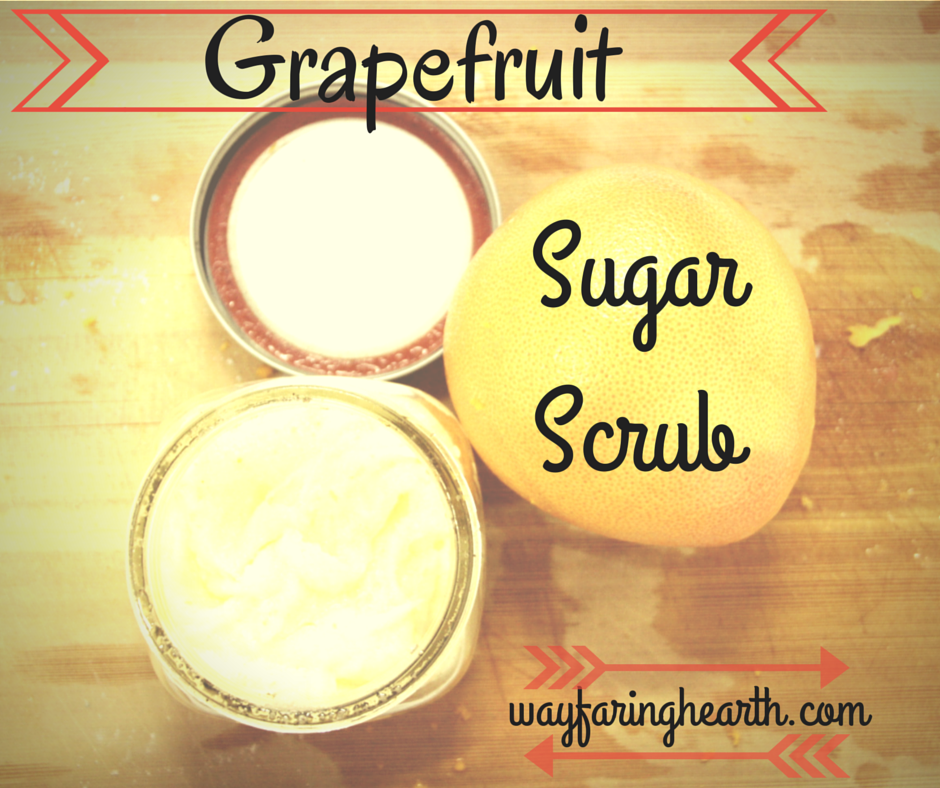
grapefruit sugar scrub
I'm kinda a sucker for all things that pamper.
We don't have a bathtub now, but when we did in Indiana I would make a whole event of taking a bath. Bubbles, lavender oil, the whole shebang.
However, this was limited to the times when I had an hour or two, which was usually on Saturdays. Folks, I finally found a way to have a minute or two of spa-like treatment, even on groggy Thursday mornings.
Introducing, my homemade grapefruit sugar scrub:

Grapefruit sugar scrub
This stuff will leave you feeling silky smooth, refreshed , and ready to start your day. With just four simple ingredients, it's a cinch to make, and yes, you could actually eat it if you wanted to.

Grapefruit sugar scrub
All you need is coconut oil, sugar, a grapefruit, grapefruit oil, and the supplies in this picture.

Grapefruit sugar scrub
First, measure out 1 cup of sugar. Plain old refined sugar will do. Pour it in the bowl, and mix in 1/2 cup of coconut oil.

Grapefruit sugar scrub
Don't worry if the mixture seems a little dry. This will be fixed when you mix in the zest and oil.
Next, zest the entire grapefruit, and mix into the bowl. Don't be afraid to squeeze a little juice in, too. It just adds to the grapefruit-y smell!
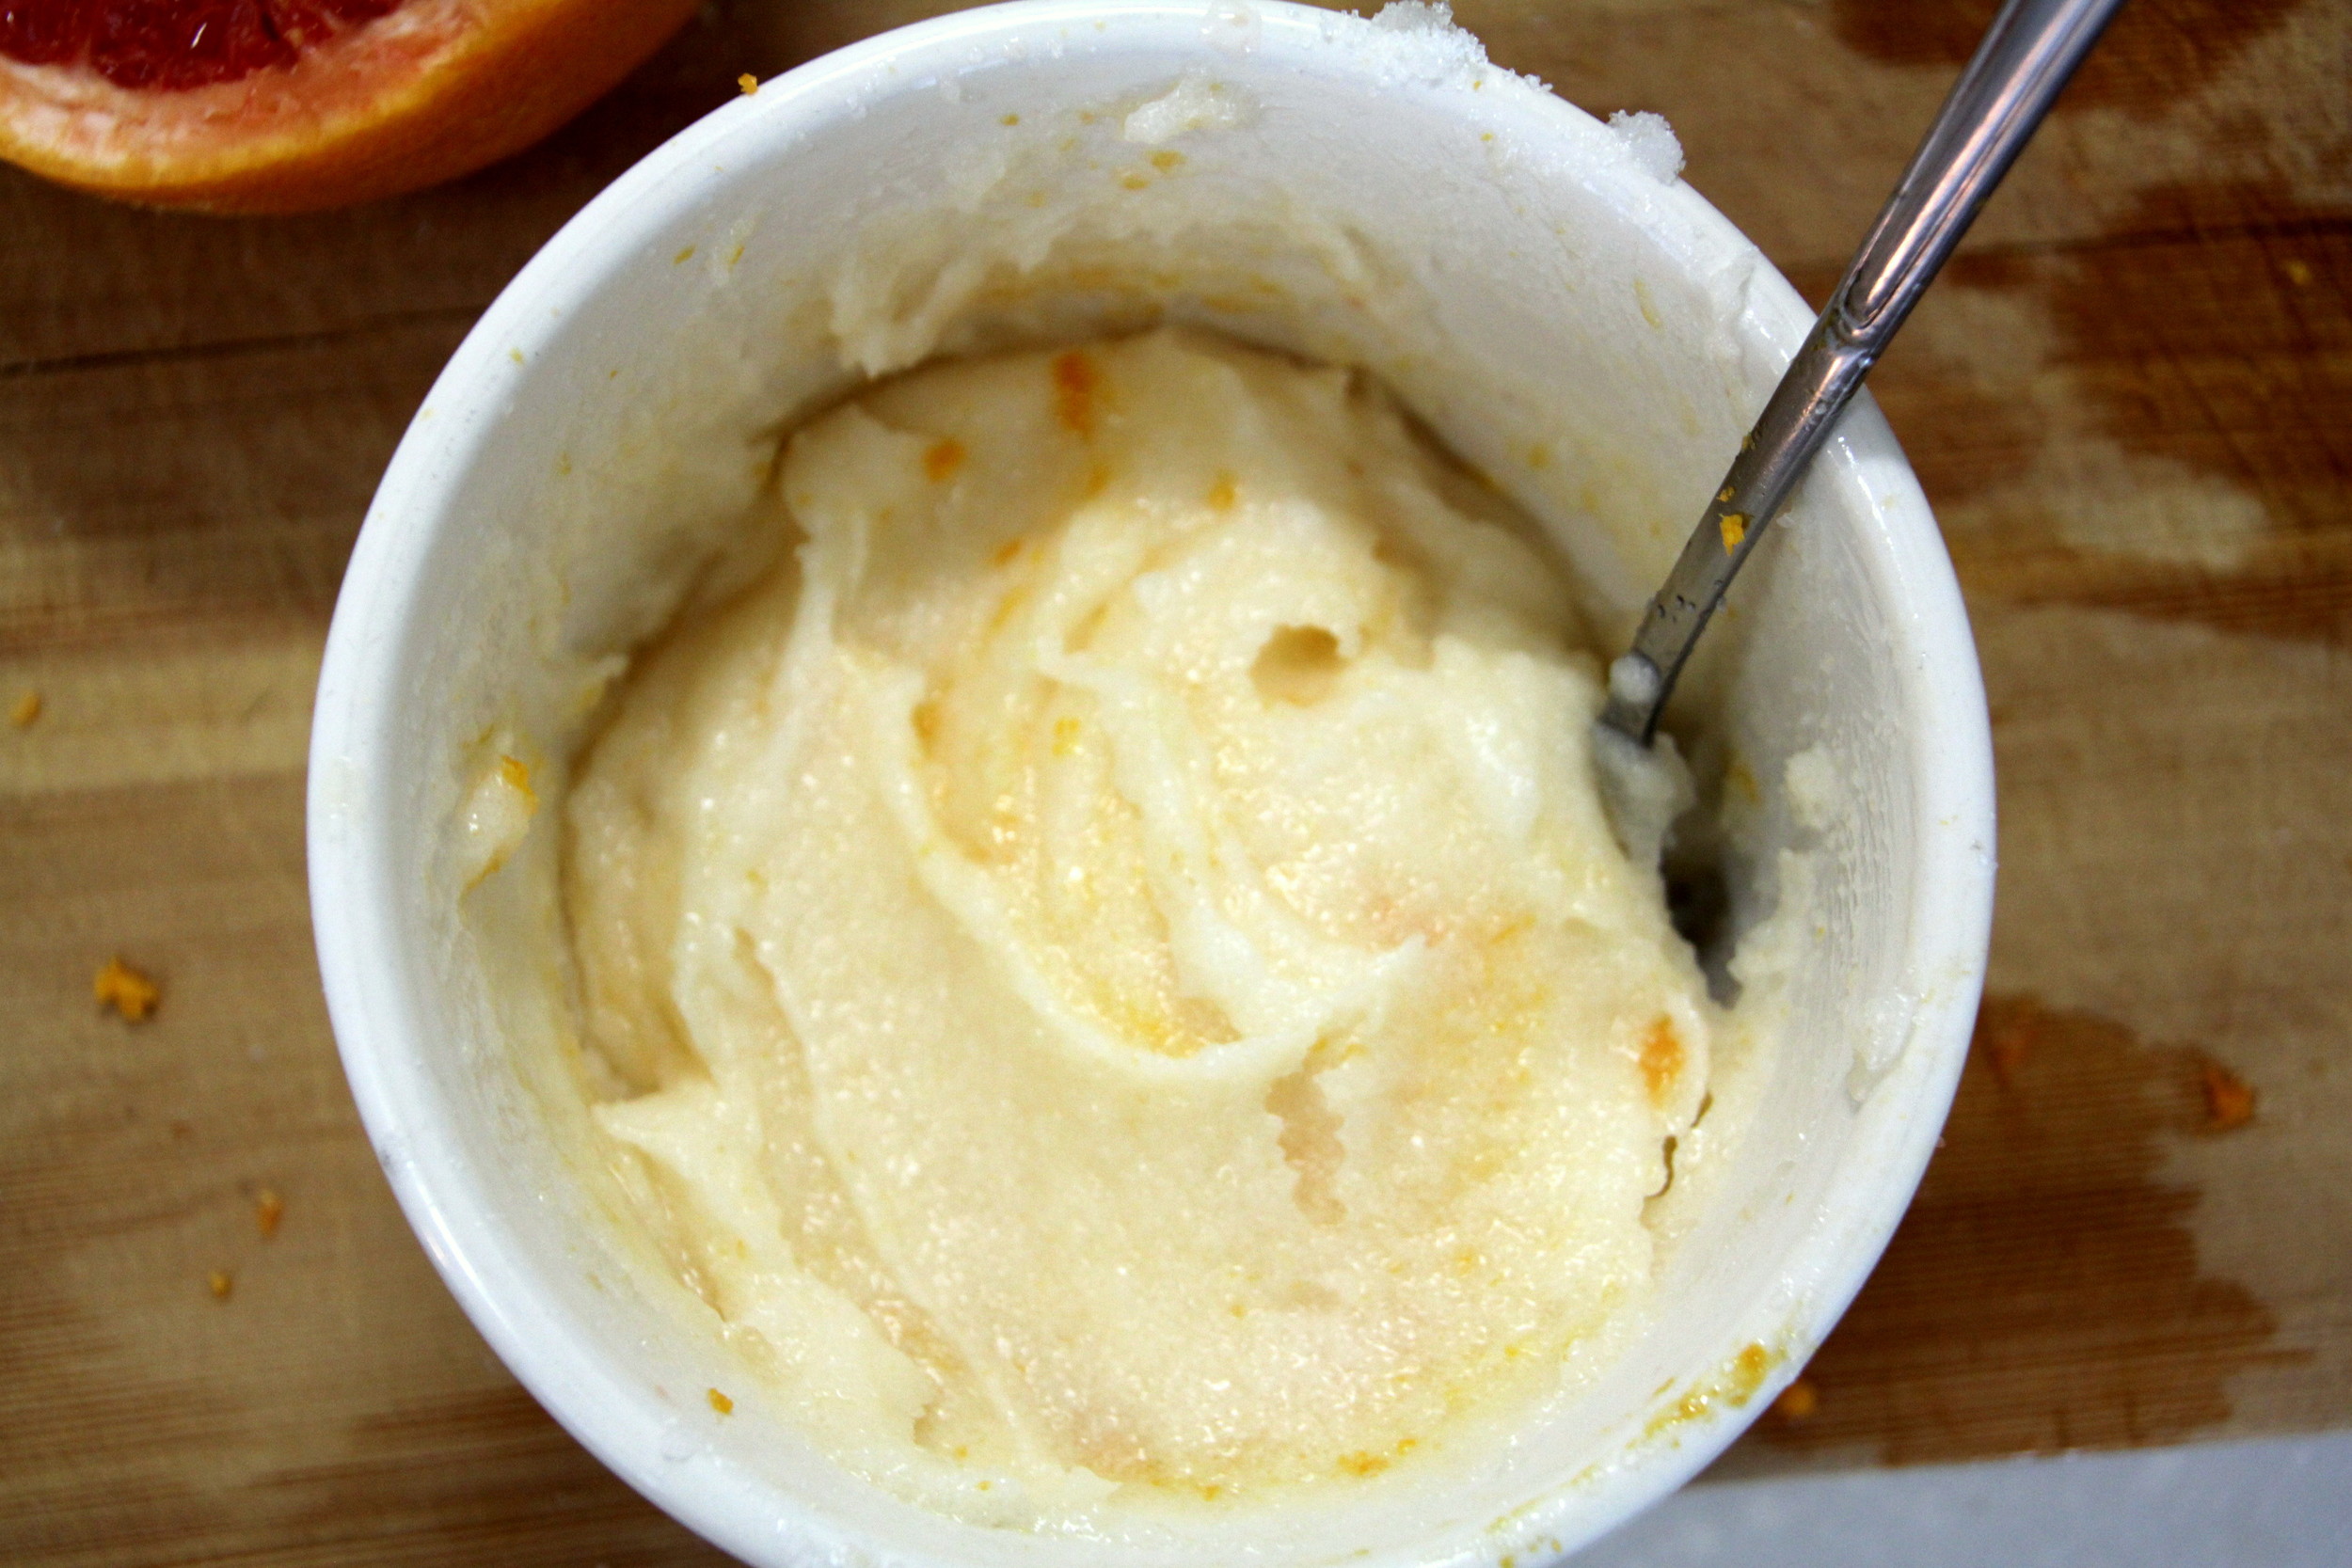
Grapefruit sugar scrub
Check out those little specs of grapefruit zest!
Add 15-20 drops of grapefruit oil, depending on your preference. For every oil that I don't ingest or use for medical purposes, I buy Puritan's Pride. I'm all for therapeutic grade oils, but, personally, I'm don't want to spend a couple hundred dollars on products I will use in scrubs or cleaners. Puritan's Pride has great products, but at a fraction of the price.

Grapefruit sugar scrub
Mix it all together, and throw in a cute jar.

Grapefruit sugar scrub
This scrub is great to give as gifts, or to pamper yourself. I especially love to use it after I shave my legs. It makes them so silky smooth!

Grapefruit sugar scrub
Recipe:
1 cup sugar
1/2 cup coconut oil
Zest from 1 grapefruit
15-20 drops grapefruit oil
Mix all ingredients together, and enjoy!
Happy Thursday!